
Raise shadows and decrease highlights. This is how many photographers start their post processing workflow. Sadly, this often leads to an unintentional mistake.
I will start out by defining “mistake” as this is the internet and anyone who can interpret a word differently always will. Therefore, a “mistake” is an unintentional effect, which decreases the overall value of the photo such as distracting from the intention behind the photo.
When I first started out with post processing, I learned that you more than often want to decrease the highlights and raise shadows to preserve the details in both. This is for the most part still true. Doing so in Lightroom or CameraRaw most often leads to an unwanted effect especially in high contrast areas. This unwanted effect is called haloing. You often create the base for this mistake in this initial phase of your editing and the effect will only worsen as you add local contrast and sharpen your photo later in the process.
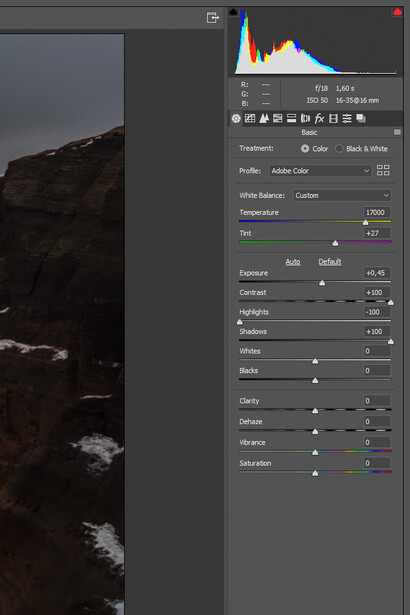
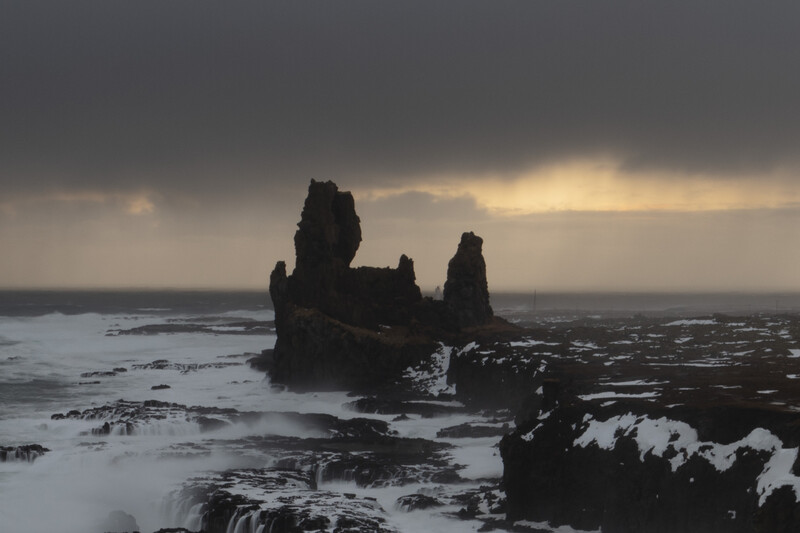
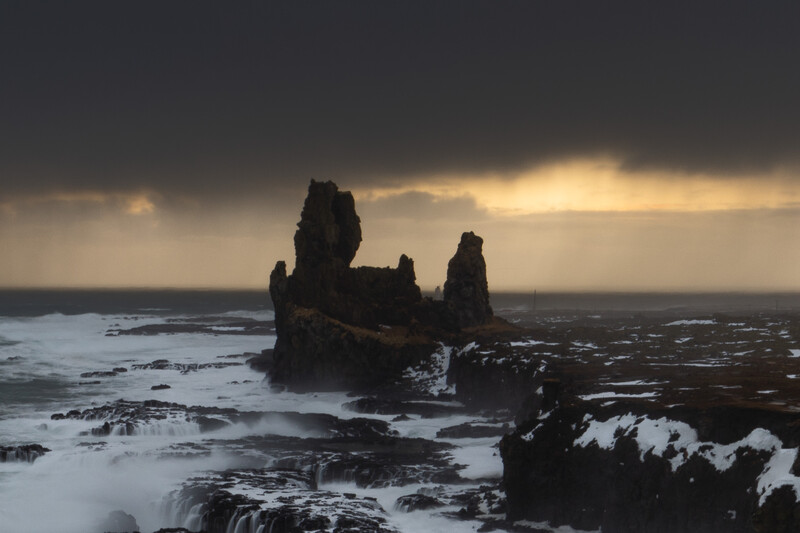
On the before/after photo below from Lóndrangar in Iceland you can see a typical example of this. Along the edges of the cliffs where you will go from a highlight area to a shadow area within a few pixels the halo becomes very visible. But first the settings:
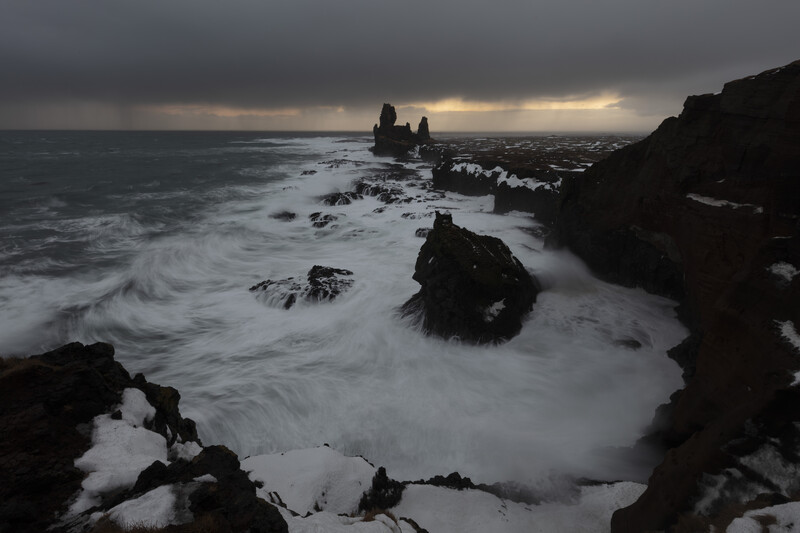
Zooming in to the photo the halo along the edge becomes very obvious. Personally, I absolutely hate this effect and despite there being many solutions to it, I still see it on a daily basis in all sorts of photography. As I am a landscape photographer, it is, of course, most pronounced for me in landscape photography.

Here is another example from the other corner.
If we zoom into the center for a look at the cliffs. We not only get the bright line around the edge we also get a dark halo around the cliffs as if the darkness/shadows from the cliff has been smudged out into the bright background of the sunset.
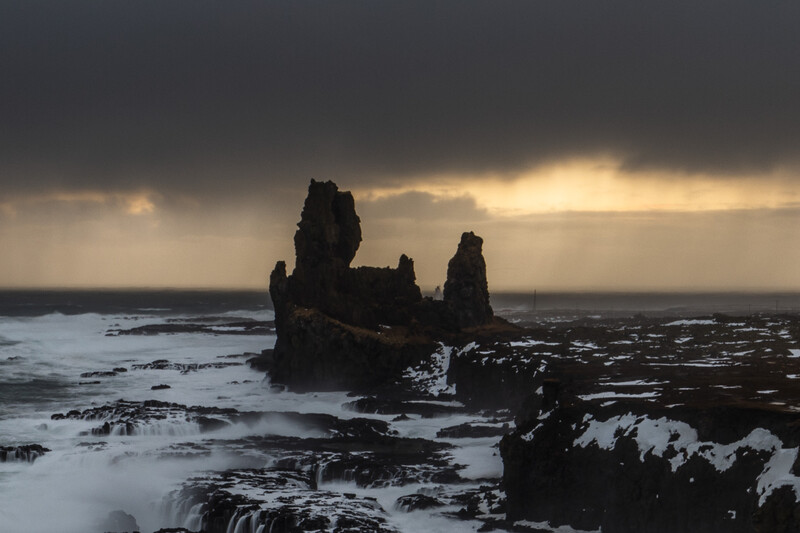
I do not want to use words like “unnatural” or “unprofessional” to describe the effect but it sure looks unintentional, as this effect is unwarranted. There is no reason to add it to the photo. And as already mentioned, adding clarity or sharpness will only worsen the effect.
How To Fix It
Luckily, there is a quick fix to this problem in Lightroom or CameraRaw. It is probably the simplest form for luminosity masking you can get. If you would want to raise the shadows and decrease the highlights without creating the weird halos this is one way to do it.
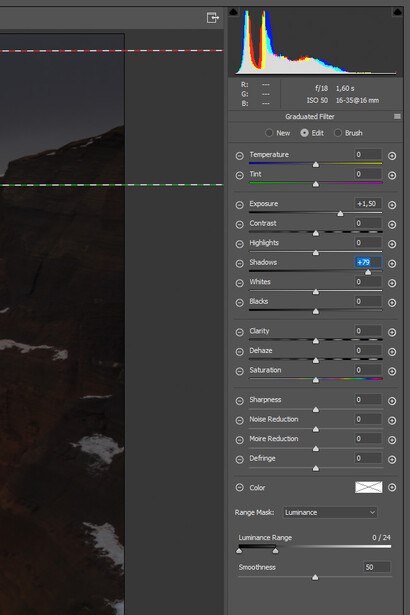
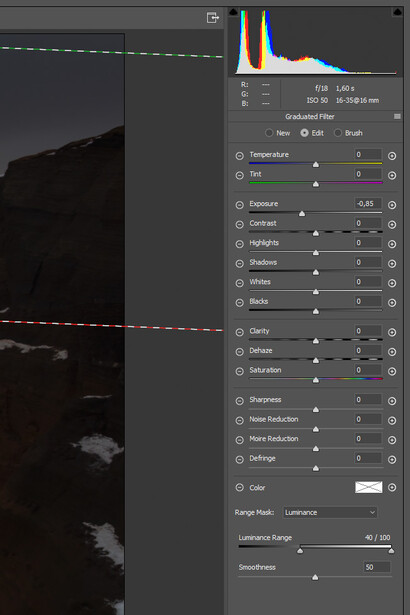
In this example, I create a graduated filter for the sky with the intention of decreasing the highlights in the clouds. I do this by decreasing the exposure. I also create a graduated filter for the bottom with the intention of raising the shadows in the cliffs. I do this by increasing the exposure and shadows.
The graduated filter for the sky/highlights will not only affect the sky but also the cliffs and the graduated filter for the cliffs/shadows will not only affect the cliffs but also the sky. To get around this you will have to choose the option of range masking for each graduated filter and select “Luminance.” That gives you a slider called “Luminance Range” (check out the bottom of the picture below). The slider ranges from 100% black on the left to 100% white on the right. By changing the range as in the example below you can choose what luminance values the graduated filter should affect. For the graduated filter, which is supposed to affect the cliffs, you simply exclude the luminance values for the sky pulling the right pointer towards left.
For the graduated filter, which is supposed to only affect the sky/highlights, you simply pull the left pointer towards the right thereby excluding the luminance values for the cliffs/shadows.
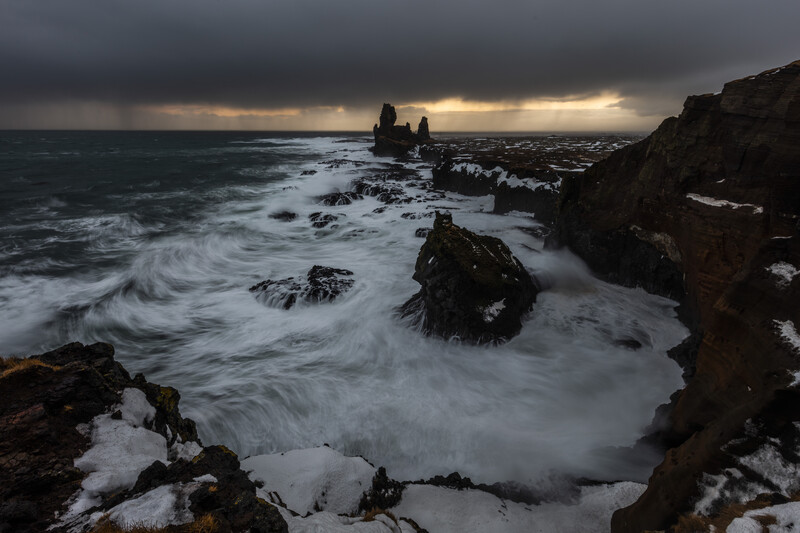
In this way, we have managed to raise the shadows and decrease the highlights based on luminance values, which does not create these unwarranted haloes. Check out the results underneath here with the difference between the “classic edit” and the “fixed edit.” From here you can continue and add both new graduated filters or brushes. Brushes also work with the Luminance Range.
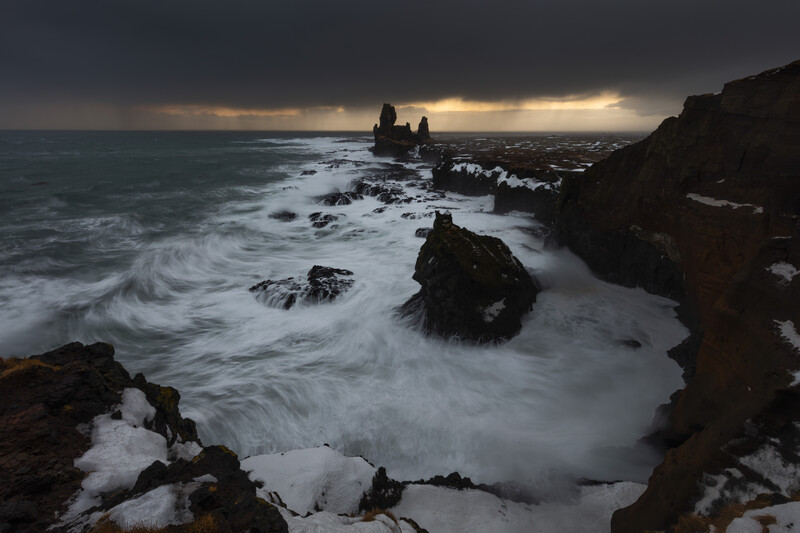

This gives an overall way cleaner edit without distracting elements. I hope this small tip will help you out in your editing.

Join the Fstoppers community for free
-
Post comments and join in the discussions
-
Browse the site ad-free
-
Share your work and get featured in the community
-
Compete in the photo contests for fun and prizes
54 Comments
As usual great Tip Mads. :)
Very useful concept. Thank you, Mads.
I am unclear about, and would like some clarity on, the difference between using the whites/blacks/shadows/highlights sliders as opposed to the tone curve as far as unwanted edge effects. My practice has been to use the whites/blacks for white point/black point and manipulate the intervening histogram with tone curve only.
Am I unnecessarily omitting use of shadows/highlights sliders or is using the tone curve truly equivalent?
Very nice! I've used colour and luminance masking before but didn't think of it for avoiding haloes. Just tried it with a suitable image and it worked great. The image didn't have haloes but these bright contrast edges without masking. Using the luminance mask I couldn't notice them anymore.
I have struggled with those halos! This will be a part of my workflow from now. Thanks!!