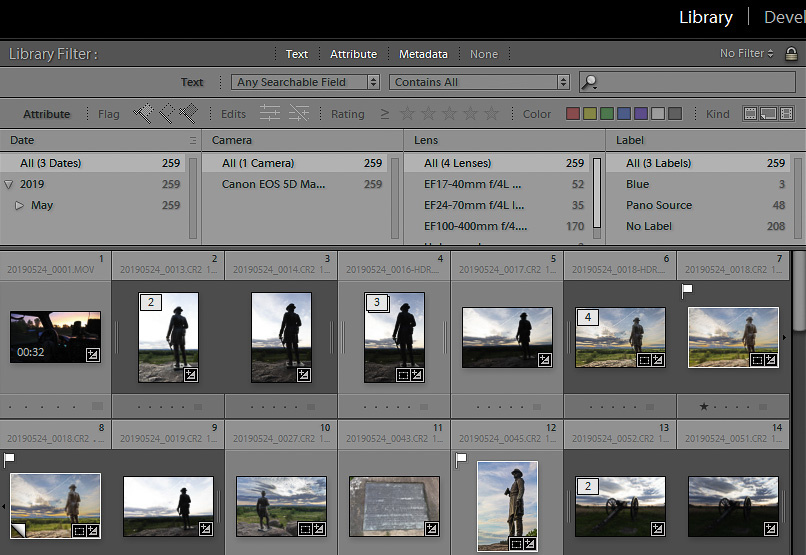
Lightroom has features that go unused by many users simply because they aren't out front in plain view. The filter bar is one of those features and is a great tool that you might be able to put to good use.
For many users, the Lightroom filter bar is used for merely selecting flagged or rated photos or searching for specific images. Many users don't use the full potential of the filter bar, probably because some of its best features are hidden in the menus and the filter dropdown on the far right of the bar.
Turning the Filter Bar On and Off
The filter bar in the Library Module can be turned on by pressing the "\" key or choosing Show Filter Bar from the View menu. Once shown, the filter bar appears at the top of the Library Module photos grid. The filter bar contains several sections: Text, Attribute, Metadata, and None, which can be used to customize which photos are shown.
A little secret about this area is that you can hold down the Ctrl key (Command on the Mac) to select multiple filtering sections. You can also grab the bottom edge of the metadata panel and resize it.
The Filter Preset Dropdown
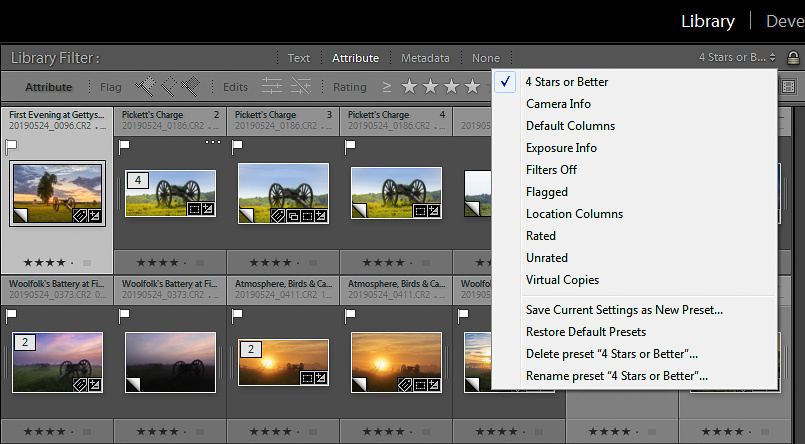
There's also a filter dropdown on the far right of the filter bar that shows filter presets. The filter presets include metadata presets (such as Camera Info, Default Columns, Exposure Info, and Location Columns) and attribute presets (such as Flagged, Rated, and Unrated), as well as a Filters Off preset. The dropdown also includes Save Current Settings as New Preset... and Restore Default Presets options. It's worthy to note that choosing Restore Default Presets will restore the default presets if you have modified or deleted them and won't remove any of the presets that you have created. Once a user preset is selected, Delete and Rename are added to the dropdown when that preset is selected.
Next to the filter dropdown is a lock icon that can be clicked to toggle the lock on and off. Turning the lock on will keep the selected filtering options (Metadata, Attribute, Text) filtering on when you switch to a different source folder.
The Enable Filters Menus
There's also the Library->Enable Filters menu, which turns on the Text, Attribute, and Metadata filters, depending on which ones you may have selected.
The Library->Filter By... menus also have preset functions for filtering by Preset, Flag, Rating, Color Label, Kind, and Metadata. You must have the applicable filter bar item turned on to enable these submenus. After selecting one of the submenu items, you can modify the settings if you desire and then save it as a preset. For example, I chose Library->Filter By Kind->4 Stars and the and higher option and then saved that as a "4 Stars or Better" preset, because I use that quite a bit. I also created a "4 stars and higher flagged as pick" preset.
Where They Are Stored
You may wish to copy these presets to another computer, share them, or back them up. The easiest way to get to the Lightroom folder containing these is to go to Preferences -> Presets Tab, Location Section, and then click the Show All Other Lightroom Presets button. Once the Lightroom folder opens in Explorer (Finder on the Mac), select the Filter Presets folder, and you'll find the preset files in there.
You may wish to also explore the other preset folders in that Lightroom folder and back those up as well.
Conclusion
If you find yourself often filtering or searching for images with specific attributes, the filter bar presets can save you time and increase your search accuracy by avoiding misspelled searches or incorrectly selected attributes.


Useful tip
Ha. I use the library filter every now and then and had no idea about some of these tips. Thanks!
So simple feature that gets overlooked often. Thanks.