Perhaps one of the most underutilized areas of Lightroom is the Detail panel. Nonetheless, it offers some very useful functions that can make a large difference in the final look of your photos, and it's well worth getting to know how all the features work. This helpful video will show you all you need to know.
Coming to you from Signature Edits, this great video will show you all you need to know about sharpening and noise reduction in Lightroom. Many photographers tend to leave these sliders at their default settings (I know I certainly did for a long time), but learning what they do and taking the time to adjust them for each photo can make a big difference in your images, especially if you're shooting at high ISOs or if you'd like to bring out a bit more detail in your photos (who doesn't want that?). I particularly recommend small tips like holding down the option key while moving the masking slider. Lightroom's built-in visualization tools will make it much easier to dial in the exact look you want instead of trying to eyeball everything without assistance. Check out the video above for the full rundown.


Or you could use DxO PhotoLab 2 Elite. That's what I do. It's PRIME noise reduction is unequaled, and detail extraction is among the best available. For output sharpening, Pixel Genius' PhotoKit Sharpener (now free) is hard to beat.
Photokit Sharpener is built into Lightroom as the sharpening algorithm behind Export or Print Sharpening.
I'll have to check that out. Does it include PKS' full range of capture, creative, and output sharpening options, or is this just a one-slider affair? Also, does the LR feature customize sharpening for specific output media and sizes? This is critical.
1) 20+ minutes of a supposed sharpening tutorial and no mention made of the Alt/Option + masking slider
2) The default sharpening amount that the author prefers is 150 (maximum)(!!!), and the images indeed look like (subjective opinion) I MUST SUBDUE REALITY
Haha good points Ken! #1 - NO idea how I this wasn't in the video! My bad there - It was in the original recording and I must have deleted that portion by accident while editing. Its a handy trick for sure, although I find although it can help get a general setting, zooming in to see what is happening in the actual image itself allows you to see more of whats actually going on. Its a great tool though, and I have a whole video dedicated to it!
#2 - 150 definitely isn't my preferred setting, just in this particular tutorial dedicated to sharpening, it makes seeing the changes a lot more simple to see, and both images happen to be pretty soft, so in this particular case 150 seemed to work pretty well. Granted totally subjective, and the tutorial is more about showing you WHAT the different sliders do than telling you the best settings :)
Here is the updated video where I put it back in there! https://www.youtube.com/watch?v=mSg_JYuULB8
Lol. Nope. Not even close to "everything".
I'm intrigued Tim - Other than the alt/option key, was there any other feature missed inside the tutorial?
As mentioned above, that should have been in there but was deleted by accident in the editing process - Thanks to Mike Dixon for pointing it out! https://www.youtube.com/watch?v=mSg_JYuULB8
I even commented on the video's lack of using masking several days ago, and they still titled the article "Everything You Need to Know...".
Thanks for the heads up Mike! FYI the masking was inside of the tutorial but for some reason during the editing process we deleted a clip and trimmed it out without realizing! Have gone through and put it back in there :) https://www.youtube.com/watch?v=mSg_JYuULB8
I'm very impressed with Topaz's ai sharpen. If not that then smart sharpen in Photoshop. The one in Lightroom is quite horrible.
Love that this video was shared on F Stoppers! There is a NEW updated version though which includes a breakdown of the alt/option masking feature - Make sure to watch it instead! https://www.youtube.com/watch?v=mSg_JYuULB8
The original vid was missing a section of the recording for some reason! UPDATED VIDEO LINK BELOW - Thanks to Mike Dixon for pointing it out! https://www.youtube.com/watch?v=mSg_JYuULB8
Thanks for the shout out! I think masking is the most important setting in the sharpening panel, without masking you're just making a mess of non-detail areas. Glad to see the updated video.
Absolutely you Mike - Appreciate you bringing it to my attention!
Sorry but this is surely not the best tutorial about sharpening in Lightroom…
I am an advanced amateur and I think that this tutorial is very helpful. I had previously watched many tutorials on the detail panel and they went too quickly and failed to zoom in on the image so I could never tell what effect the sliders we're having. Although some of the effects are pretty subtle, this does a nice job of showing what's happening
Thanks Peter - Very glad it was helpful for you and really appreciate your comment! I've had the same experience watching tutorials that are too quick for me in the past, so I tried to slow things down and really show what was happening. This won't be for everybody, but hopefully its helpful for some :) Take care!
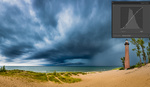
Is that image in focus? Or is this just for demonstrative purposes? Number one way to get sharp images is to have them in focus first.
Great point Del - Its not 100% tack sharp to begin with, as it was taken with an all manual lens and didn't quite nail the focus. Definitely easiest way and most effective way to sharpening is getting it sharp in camera and using sharp glass!