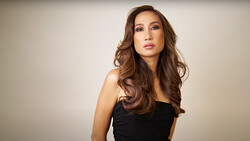
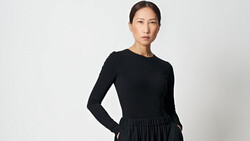
SLR Lounge founding partner, photographer, and retoucher, Pye Jirsa, walks us through a quick Lightroom tutorial on how to adjust a photo that has mixed light. How many times have you taken a group shot only to find one or two of your subjects were poorly lit because they were too far from the source light, hidden behind another subject, or from using multiple ambient light sources?
You don't always have the luxury of time, or the necessary gear, to balance the light while shooting. Fortunately most mixed light images can be corrected in post production and is often easier than doing so on location. Pye demonstrates an easy and effective way of doing this, in his sample image, by first balancing the Exposure, pulling down the Highlights and Whites before bringing up Shadows and Blacks. He then uses the Tone Curve to bring back any loss of contrast, as a result of these adjustments. What's next? Well, Color Balance and Split Toning the image of course; but you'll have to shoot over to the companion blog to this video to see the step-by-step walkthrough, and sample images. Enjoy the video and consider investing in a comprehensive education by signing up for their SLR Lounge Premium tutorial access.
[via SLR Lounge]


Join the Fstoppers community for free
-
Post comments and join in the discussions
-
Browse the site ad-free
-
Share your work and get featured in the community
-
Compete in the photo contests for fun and prizes
No comments yet