
Why fix it in post when you can do it right in camera? Learn how you can get a perfect exposure in camera every time!
Often when were out shooting in the field, we get carried away and catch ourselves saying we'll "just fix it in post." But what happens when you get to Photoshop later and you realize your blacks are crushed, or your highlights are blown out (this is especially evident in black-and-white photography)? In this quick article, learn in just five easy steps for how to get the perfect exposure in-camera every time.
STEP 1: Expose for the Scene
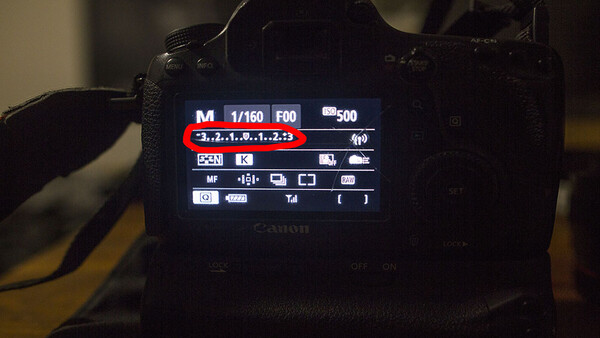
On every camera on the market, there is a way to read the exposure of the scene you're shooting. On your menu screen, you should see a bracket ranging from -3 (underexposed) to 0 (perfect exposure) to +3 (overexposed). This meter is reading the incident light in the scene and showing your relative exposure, which can be changed by adjusting your shutter speed, aperture, or ISO.
STEP 2: Read the Meter
When you're setting up your scene, keep in mind your incident exposure. To see what the incident exposure is, simply hold down your shutter half way (or however you set it on your camera), and the internal meter will pop up next to one of the numbers, usually -3 through +3.
STEP 3: Shoot a Neutral Exposure
To avoid having to reduce the highlights or lift the shadows in post, you want to make sure that your shadows, mid tones, and highlights are not blown out in-camera. Make sure that details can be seen in every area of the frame. The key thing to keep in mind is that whatever camera you're using, you want to be sure to underexpose your scene by at least one stop of light to ensure that no matter the scene, the details will remain intact. Adjust your shutter speed, aperture, or ISO to shift the number up or down.

STEP 4: Shoot Away!
Once you notice that the exposure line is in the right spot where all details are maintained, start shooting away! But keep in mind that when the light changes (if you're shooting in natural light), you need to adjust your exposure accordingly.
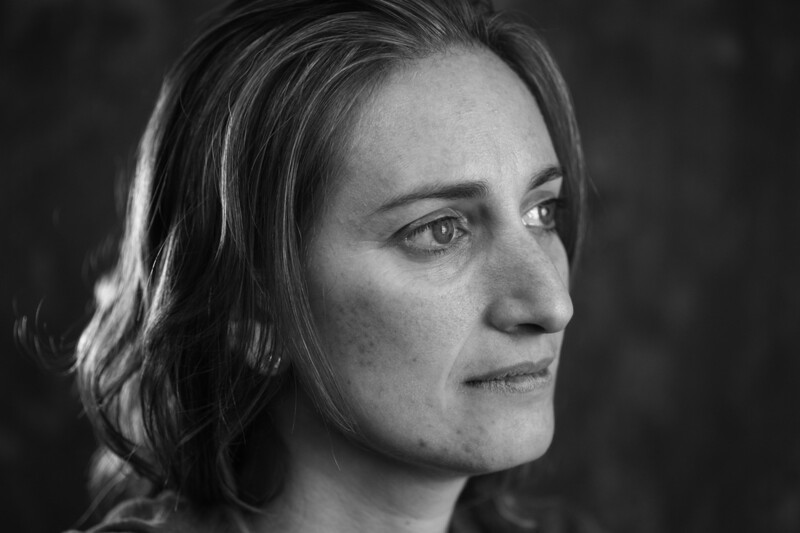
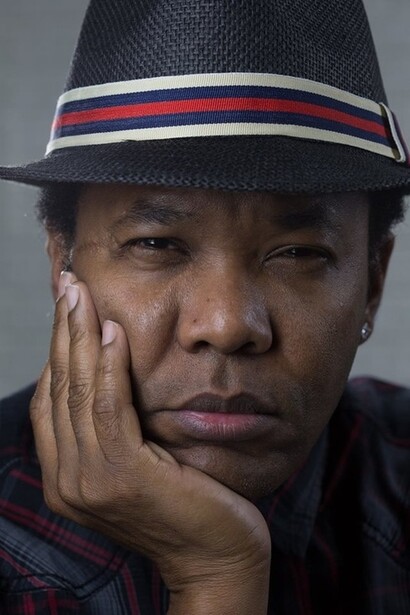
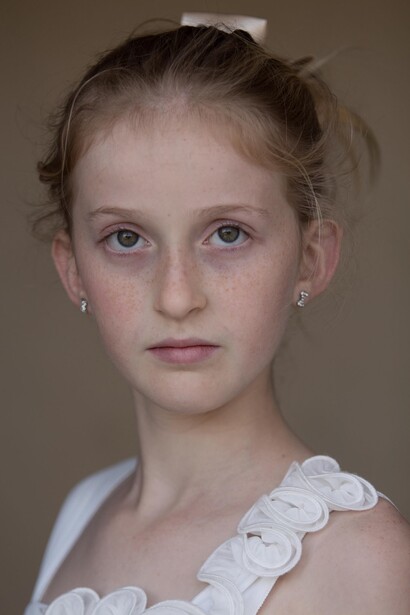
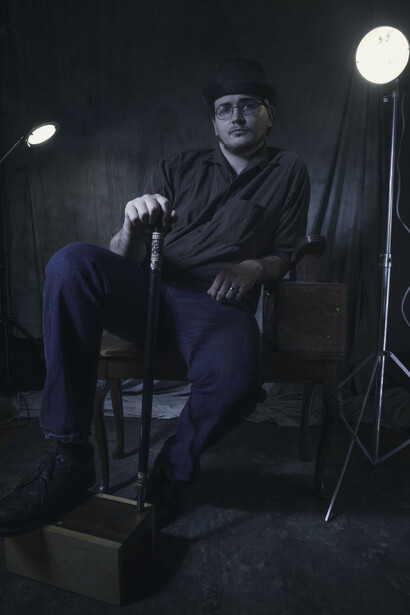
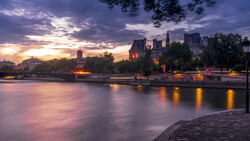
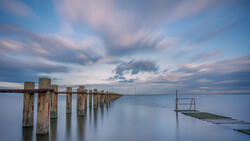
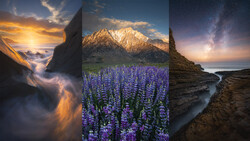
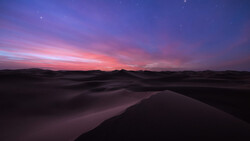
Below you can see images that are all straight out of the camera and have not been edited yet. The images below were also shot using both strobe and natural light.
The camera is the most powerful tool we have and should be taken advantage of. By taking just an extra few minutes on a shoot, you will save time later in Photoshop and are guaranteed to walk away with great photos in-camera. As the saying goes, "You can't fix a bad photo in Photoshop." So get it right in camera.
Have questions? Leave them in the comments below!
Join the Fstoppers community for free
-
Post comments and join in the discussions
-
Browse the site ad-free
-
Share your work and get featured in the community
-
Compete in the photo contests for fun and prizes
77 Comments
I shoot for a museum, the light is always yellow and in many cases low. I have custom white balance settings around 4000K and the ISO's are always high, which leads to lots of processing to get the noise out. Any suggestions to improve that? Thanks.
Can you shoot on a tripod? In a museum, I assume you can. If so, you can use a remote trigger and slow down your shutter speed. That allows you to lower your ISO.
Then shoot in RAW and you can adjust white balance in post (without losing any detail).
A tripod is your best friend in dark conditions. It will also let you get creative with subjects if you want to show the flow of people through a gallery.
If you're shooting events and need to have static people, a bounced flash can help give a soft boost the the lighting. Doesn't always work perfectly though.
Perhaps lowering your shutter speed? If you have a tripod of course. This will let in some light. Or even opening the aperture more. Not sure what you're shooting.
If you're shooting still objects, you can take several frames using high iso and stack them in photoshop using median or mean mode. The noise will be slightly different on each shot and you can cancel out a lot of noise this way (the more frames stacked the better the result). This is a technique used in astrophotography to clean up images of a starry sky.
Yes. For those shooting raw, there is such a thing as a perfect exposure: It's the exposure that captures as great a dynamic range as possible for the equipment. Back in the film days, St Ansel taught us to go flat with negatives to get in all the highs and lows, then handle the contrast in printing.
Audio engineers record sound as loud as possible just short of clipping. The reason they do that is to raise the signal as far above the noise floor as possible--so that all the signal is clear of noise--without clipping at the high ends.
For digital photographers, it means giving as generous an exposure as possible for the same reason--to raise as much of the shadow tones above the noise as possible...but not so much as to clip the highlights that must retain detail.
So, basically, watch the highlights and crank up the exposure until just before you lose them. Then you've automatically got as much of the shadow out of the noise as possible. Then, you've got the right raw data to set to your taste in post production.
Yes!!! Finally someone gets what I was trying to say! That's exactly my process!
With respect Eli, this isn't your process. :) " watch the highlights and crank up the exposure until just before you lose them" is not "you want to be sure to underexpose your scene by at least one stop of light to ensure that no matter the scene." Those are two completely different processes. When shooting with a camera like the old Canon 7D Kirk's process would ensure I got usable RAW files. But if I were to underexpose by a stop with the 7D I'd typically get noisy yucky mush.
The process that you use work really well for you and the camera and the lighting that you use. But it isn't a process to "capture the perfect exposure." Its a process in a controlled environment to capture the "exposure you prefer."
Good call. Thanks for the feedback
Not to be picky, but the Ansel comment is not quite accurate. He said expose normal for a “normal” scene with a full range of brightness. In low contrast scenes, he said under expose to bring out a black and then increase development to push the high values up to zone VIII. In a high contrast scene, he said over expose and then reduce development time bringing the high value down to Zone VIII. These procedures were referred to as N+ and N- development and can be found his book called “The Negative”. In digital we do the same thing by using the histogram.
+1. I often shoot indoor sports at 6400-8000 with a Canon 1Dx. For metering, I typically look for an exposure that leads to clipping of something white on a player's uniform, then "move left" 2/3 of a stop. The highlight warning on my LCD is a great exposure tool.
This is one of the articles I had been waiting for. Thanks for providing the exposure scale example (it really helped me understand how to estimate the underexposure level). This is still my weakness in photography.
Thanks for the great feedback ' I really appreciate! So glad you got something out of it! Check back in my profile every week for more educational content like this!!
Or you could get a mirrorless camera.
How would that help?
The electronic viewfinder shows you exactly what your image is going to look like before you even take it. It can also be set to show you a live histogram, highlight or shadow clipping and other aids. Changed the way I take photos forever.
Still works though with all mnaual film lenses? Even though there is no electronic sensor in the lens..
In the old days with film cameras, isn't that how they figured the proper exposure? The meter on the bottom?
With a mirrorless camera you can mount any lens from any manufacturer (via mount adapter) and depending on the mode you shoot in (I'm almost always in A mode) you will get accurate exposure without any hassle.
I have my front dial on the Olympus E-M1 set to adjust exposure compensation and with the EVF set to show what that compensation is doing I don't really need to think about anything other than composition.
Manual focus can be achieved using the focus peaking functions.
The simplicity and freedom mirrorless brings to the process of taking photos is truly liberating.
Great perspective. Look out for a new post on rokinon lenses and why i still shoot all fully manual in a few weeks!
Nitpicking, but it won't show you "exactly" what the sensor sees, but rather a JPEG preview of it. Depending on your scene, that can be important because the JPEG will clip the edges of your histogram that may still have detail in the RAW file. Also, I don't like to rely too much on exposure preview, because it can sometimes be difficult to tell the difference between, say, a zone 9 highlight that retains detail, and a zone 10 highlight that's clipped from the EVF alone.
That being said, most mirrorless cameras have a host of other features for helping with your exposure, such as clipping highlights and in-viewfinder histograms (my preferred method).
Live view isn't a JPG as far as I know. It might be compressed but it's a whole lot better than having to chimp after every shot just to see if you got the exposure right.
I don't know how other bands work but with Canon i've found the "perfect" exposure in the opposite way with the raw image: over expose by 2/3 to 1 full stop. It retains way more information.
Sometimes if I have a very dark scene and I have people in it, to keep the skin tones safe my exposure is perfectly in the center.
Try yourself: shoot the same image and watch how many megabytes is each photo.
When you process it you can keep much more information in the highlights, unlike what you get in the shadows. If you miss the exposure and is too dark your photos have much more noise, but, if you overexpose too much, you have to trash the photo and, is a risk that I can live with.
Interesting take on it. I always find that on canon -1/3 stop exposure works for my kind of portraits and editing style. Generally my ambient is pretty dark. But I guess it depends on what you're shooting. See more of my work here: www.elidreyfuss.com
really nice! your style is very moody and dark, i like it! :D
My work I think is the opposite (and my processing workflow too) because I always look for a lot of light and rich tones! If you have time take a look here: www.gabrielezanon.com
I tend to do the same with my Canon, I have a hard time trusting it at 0 ("perfect exposure") a lot of the times, I feel it is underexposed if I have it at 0.
Interesting. Yeah for my studio work where you can see above I still underexpose. because my workflow generally is underexpose the ambient, fill in with light/bring exposure and contrast in post just on the face or other areas using dodging and burn.
I've had the same experience and have noticed how noise will increase the file size. I expose to the right with high ISO then move left in post if needed. But, I still tend to do this for portraits with low ISO.
I don't always trust the meter alone since my backround can vary quite a bit -- very light or very dark. I often find that the highlight clipping warning in the LCD is a good indicator for exposure and try to pick an exposurte that's 2/3 stop below the clipping point. If I must rely on the meter alone and the sceen looks balanced to average out to 18% grey, then my first shot is typically 1/3-2/3 over exposed.
Still, there are times when I will experiment wildly. Underexposing a sunrise scene can really bring out color in the clouds. It's good thing that film is cheap these days.
Another setting to take into consideration is the metering area. A spot exposure centered on a dark subject can make the meter look way under exposed, and correcting would blow out the photo. Make sure your metering area is subject appropriate!
Where to even start with this…
First, measuring the incident light on a scene is something that is done with an incident light meter. These are the kind of light meters you see with little white domes. THEY measure incident light. The meter in your camera does NOT measure incident light — it measures reflected light. This is a very important difference. Since incident meters measure the light falling on the dome, they don't care if the subject is all white or all black because they aren't measuring light bouncing off the subject. Not so with your reflective meter in your camera. This is why camera meters can be fooled by light or dark subjects. It's also why there is no 'prefect exposure', which in turn is why the premise and conclusions of this article are absurd.
Here's a simple piece on the difference between incident and reflected exposure from Sekonic:
https://www.sekonic.com/l-478/incident-vs-reflected.html
thank you.
Thank you for the response :) I have now learned something new today. I was just sharing what simply has worked for me. You could see what i mean if you'd like by checking out my work here: www.elidreyfuss.com I should have been more specific and less general. Again appreciate the feedback. Hopefully next article will be better.
Thank you for your detailed response. Yes I should have clarified more in the article. Will do for next time.
Again I was simply writing about what works for me since thats all i know. I did forget to mention that I use only manual lenses. Film lenses. The exposure on my live view is not actually what the image looks like, so when I first started using them this is how i found out how to get it around the 0 line or -1/3 stop, the image would come out perfectly exposed. I would hold down my shutter half way every time i took the shot and measure my exposure for the scene. Thats how i learned. Look out for a new article soon on fully manual lenses.
Strange article. It's almost 100% wrong. Thankfully, as a seasoned old fool, I'm able to spot the errors in the rationale here. However, if I was a novice looking for a bit of sound exposure advice, this article is not only misleading (incident reading), but also offers poor advice (expose to the left in every shot).
Oh, and by the way, my car is the most powerful tool that I have. Not my camera.
This article is wrong on so many levels and should not be taken as a serious advice on how to assess and obtain optimum exposure. Fstoppers really should pay attention and edit out misleading content like this.
I just shoot RAW and bracket the exposure. That way I can focus all my attention on composition.
Exactly!! That's all I do too! It easier for post processing in my opinion. I guess it just didn't come accross clear in the article
Maybe the reason this didn't come across clear in the article is because the premise of the article is: 'Learn how you can get a perfect exposure in camera every time!' That's quite a different thing than 'shoot RAW and bracket the exposure'. In fact it's almost the opposite.
Thank you for clarifying: yes I probably mid worded the title. But glad it's all clarified in the comments section. :)
In outdoors photography when the range of light is too radical, there is no right exposure. When I bracket and I can't find the image with the right exposure, I can exposure blend or overlay images and correct in post processing.
I find that using the camera's 'spot' metering to place the most important area of the image in the right zone (adjusting exposure either through shutter speed and/or aperture or through exposure compensation when using a priority mode and auto ISO) will give me good exposures (not 'correct' exposures or 'perfect' exposures, which I think are wildly uninteresting).