
Why fix it in post when you can do it right in camera? Learn how you can get a perfect exposure in camera every time!
Often when were out shooting in the field, we get carried away and catch ourselves saying we'll "just fix it in post." But what happens when you get to Photoshop later and you realize your blacks are crushed, or your highlights are blown out (this is especially evident in black-and-white photography)? In this quick article, learn in just five easy steps for how to get the perfect exposure in-camera every time.
STEP 1: Expose for the Scene
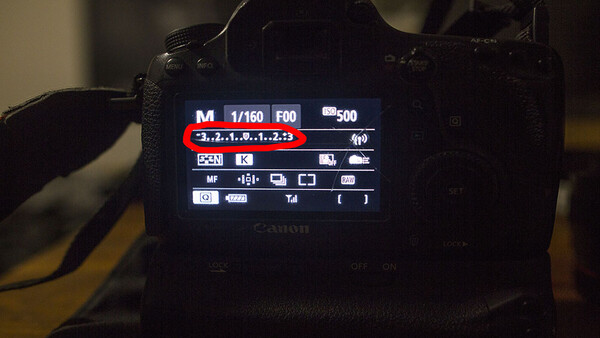
On every camera on the market, there is a way to read the exposure of the scene you're shooting. On your menu screen, you should see a bracket ranging from -3 (underexposed) to 0 (perfect exposure) to +3 (overexposed). This meter is reading the incident light in the scene and showing your relative exposure, which can be changed by adjusting your shutter speed, aperture, or ISO.
STEP 2: Read the Meter
When you're setting up your scene, keep in mind your incident exposure. To see what the incident exposure is, simply hold down your shutter half way (or however you set it on your camera), and the internal meter will pop up next to one of the numbers, usually -3 through +3.
STEP 3: Shoot a Neutral Exposure
To avoid having to reduce the highlights or lift the shadows in post, you want to make sure that your shadows, mid tones, and highlights are not blown out in-camera. Make sure that details can be seen in every area of the frame. The key thing to keep in mind is that whatever camera you're using, you want to be sure to underexpose your scene by at least one stop of light to ensure that no matter the scene, the details will remain intact. Adjust your shutter speed, aperture, or ISO to shift the number up or down.

STEP 4: Shoot Away!
Once you notice that the exposure line is in the right spot where all details are maintained, start shooting away! But keep in mind that when the light changes (if you're shooting in natural light), you need to adjust your exposure accordingly.
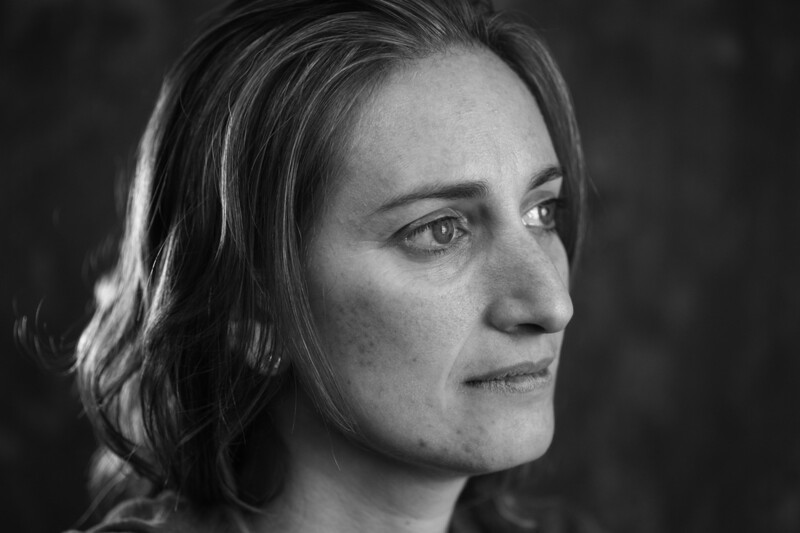
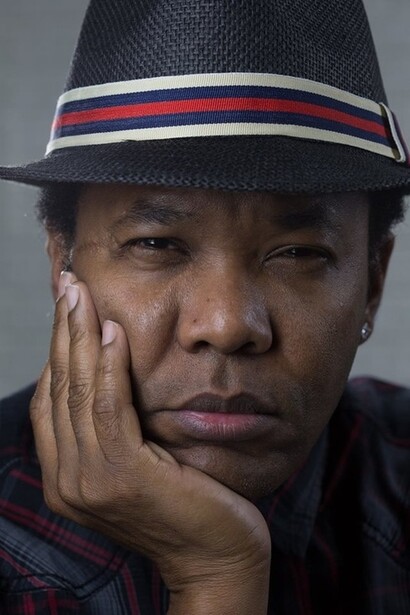
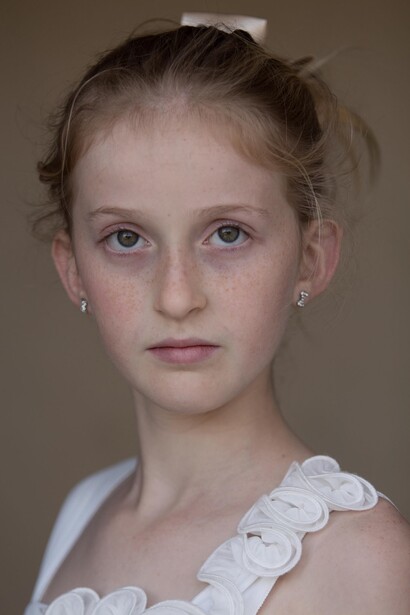
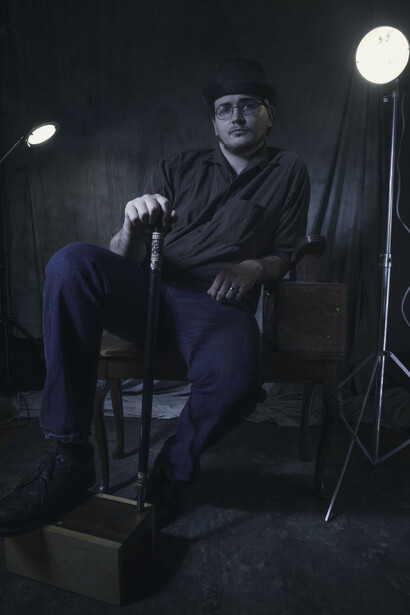
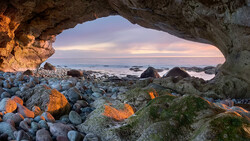
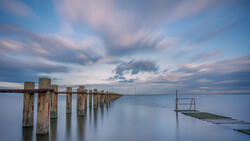
Below you can see images that are all straight out of the camera and have not been edited yet. The images below were also shot using both strobe and natural light.
The camera is the most powerful tool we have and should be taken advantage of. By taking just an extra few minutes on a shoot, you will save time later in Photoshop and are guaranteed to walk away with great photos in-camera. As the saying goes, "You can't fix a bad photo in Photoshop." So get it right in camera.
Have questions? Leave them in the comments below!

Join the Fstoppers community for free
-
Post comments and join in the discussions
-
Browse the site ad-free
-
Share your work and get featured in the community
-
Compete in the photo contests for fun and prizes
77 Comments
Yep!
This is confusing. I just use the histogram and expose to the right (until it touches the right side). This reduces the noise and captures the full range of tones
Great idea! You expose to the right to avoid noise in the shadows correct? What kind of work are you shooting?
Landscapes and nature. It avoids the noise, but it also nails the exposure. Even if I have plenty of room without going all the way right, the ETTR files provides a much better file (negative) because it provides the best dynamic range that my camera can handle thereby making Lightroom sessions pure pleasure. That is if I am fortunate to have photographed something worthwhile.
Oh ok. very different then studio portraits :)
True.... in the old film days, we used a flash meter and took an incident reading on the main flash. Then used a fill light with one or two stops less depending on the desired ratio. Of course we added hair and background lighting as required. However, the f stop would be based on the main. In a studio setup, the exposure would be nailed every time with Kodak vericolor film. Why is digital any different. I am just seeking to learn.
It's not. Thats why I wrote this article :) With those tips when in studio setting thats how i figure out light power and settings.
"Why is digital any different"
"It's not."
But it is, in some very important ways. A digital sensor has a linear response to light. Film doesn't. This is why we talk about film's shoulder and response curve, but not digital's. It's also why we can expose to the right in digital without screwing up the relationship between values so long as we don't clip. (and it's why film doesn't clip in the same way digital does).
I understand the desire for content marketing and the constant need for new material. But you're really not doing yourself or anyone else any favors by writing about topics before you have earned any real expertise. I feel truly terrible for anyone that is reading this article and taking its advice.
Thanks for taking the time to reply to every thread. It've very admirable how much you know. I truly would love to see your expertise presented in your work. Put up some work on fstoppers and send me over the link. Again would love to see a face behind these words :)
When I'm shooting out in natural light or somewhere with consistent light, I still use the ol' human grey card technique my photography teacher taught years ago. Meter Asian skin tone (my hand) "needle in the middle", take the shot.
Meter white skin tone, needle in the middle, close down a stop.
Meter black skin town, needle in the middle, open up a stop.
My thoughts exactly. Thats how i got the shots in the article!
Whoa. "Incident" exposure? You're kidding, right?
Point a camera at any subject and you're getting a reflectance light reading _unless_ you stand at position of the subject and point the camera at the light source. And that won't be a good reading because in-camera light meters aren't set up to read incident light.
Perfect Exposure = Under-exposed ?
Really ?
Sorry mate, but you have to go back to photography school.
Will do! Fork over 40,000$ a year and I'll go back. Until then I'll just teach myself and try to help others. If something worked for me I was just sharing my advice so it could work for someone else.
I find this article troubling on at least to two issues. First, the minor one: the confusing use of "incident" in "incident exposure." Second, this: "The key thing to keep in mind is that whatever camera you're using, you want to be sure to underexpose your scene by at least one stop of light to ensure that no matter the scene, the details will remain intact." If things were as simple as this, you could set your camera to minus 1 stop and fire away. But there is a sound reason why many people "expose to the right" (ETTR). In other words, they OVERexpose as much as possible without blowing out the highlights. They take the trouble to make sure that the highlights touch the right margin of their histograms. Though today's sensors make this less of a necessity, the current advice is exactly the opposite of what many seasoned photographers consider good exposure.
If I'm doing everything wrong I'm not sure why my pictures always come out perfectly exposed. You could see that work here: www.elidreyfuss.com
'why my pictures always come out perfectly exposed'
By most standards images like this are not 'perfectly exposed':
https://static1.squarespace.com/static/593c5abcb8a79bc410182c52/593db20…
Look at the histogram — the entire image sits in the bottom half. It's your business if that's the look your going for, but it's not what anyone would call 'perfectly exposed.'
Starting with the amount of money you make makes no sense and is no valid point at all.
I know wedding photographers who make 100.000$+ per year and I've seen their work with burnt highlights, bad compositions, inconsistent white balance and shaky video...
Technically and theoretically you are entirely wrong.
The best exposure is exposing to the right ( over-exposing ) to the point where you are near to burning the highlights ( not burning them, just a tad before burning them ) and lowering the exposure in post, getting all the details in shadows & highlights as a result, and also benefiting from the lower noise in the shadowy areas.
It's called ETTR.
To be fair, I don't think the author was referring to his income. The statement (in the thread above this one) is about the cost of going to school.
Your pictures on this article are not "perfectly exposed." Most are gloomy, underexposed pictures but your viewers forgive you because they think you are creating a "moody" atmosphere. Your pictures are SALVAGEABLE because of your camera sensor's good dynamic range, that is all. The sad part of this story is that newcomers will mistake your advice as being good because you are a professional. Oh, well.
Is it because I'm shooting RAW? That they are unprocessed files. Using this same technique.Check out dani diamonds post about why he underexposes. Fascinating stuff.
You seem to have a style that works for you and that your clients like. That's quite an achievement so congratulations. But, your explanation on how to get "perfect" exposure every time is a bit off the mark. It apparently works for you on the types of scenes you shoot but beyond those scenes there is a problem with your technique, and with your explanation of how things work. The confusion over incident versus reflected meter readings has already been mentioned. Another problem is that you don't provide enough information on your camera settings such as metering mode, shooting mode (P, Tv, Av, M), etc. for anyone to easily replicate your recommendations Are you in "P" mode and using the exposure compensation to underexpose or something else? The next issue is that the -3 to +3 "meter" you show is not a meter at all. What it does is indicate the amount of manual exposure compensation that you have dialed in. Manual exposure compensation is just an offset from whatever the cameras exposure reading determines as the "correct" exposure. The camera does not set it at all and changing the scene luminosity will not cause it to move one bit. So, the bottom line is that based on this article you are a successful photographer who doesn't seem to know much about how your camera's exposure system works. That's fine since it works for you but maybe you should consider not spreading incorrect information to others as you do in this article.
Very respectful and valid comment. Thanks for your feedback. Will keep in mind next time I write an article.
This article reminded me of magazine articles I read back in the 1960s portending to present some magic instant formula guaranteed to achieve perfect exposure. The only thing "instant" in photography is disasterous results when you fail to calibrate your equipment before using it. In this case it is essential to evaluate the exposure meter in the camera you are using before attempting to get repeatable/accurate results.
I always shoot RAW and the first thing I do when I get a new camera is set it up on a tripod, aim it at a scene with decent contrast illuminated by a steady light source and shoot a series of exposures. A typical series would be -2, -1.5, -1, -.5, 0, +.5, +1.0, +1.5, +2.0. As you shoot this series keep a sharp eye on your camera's histogram and note at what point you start to get blinkies indicating blown highlights.
I then upload the images into my computer and using my processing software (LR) in develop mode I check the series to see at what point the highlights begin to blow. Almost always the histogram in your camera will indicate blown highlights earlier in the exposure series than the histogram in your processing software because the camera histogram is based upon a jpg preview with less dynamic range than is present in the actual RAW image.
Once you discover at what point the highlights begin to become blown in your processing program's histogram make a note of the exposure setting you used to make that image. Let's say that setting was +1.0, you now know that you need to back off about .5 stops from the camera's suggested exposure to avoid blown highlights.
You can then either dial in a -.5 setting in your exposure calibration option or just manually subtract the half stop before pressing the shutter button.
As an earlier poster already noted, in the days of color film underexposing an image by half a stop was the safest strategy. In digital photography, however, the accepted technique is to expose as close to the point where highlights are blown as possible as this maximizes the amount of digital data collected. Underexposing, on the other hand, robs you of valuable data and, worse yet, introduces troublesome noise.
New rules on photographing art work in a museum prohibits using a tripod