
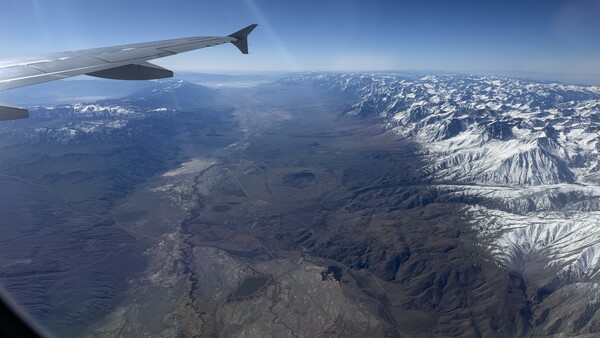
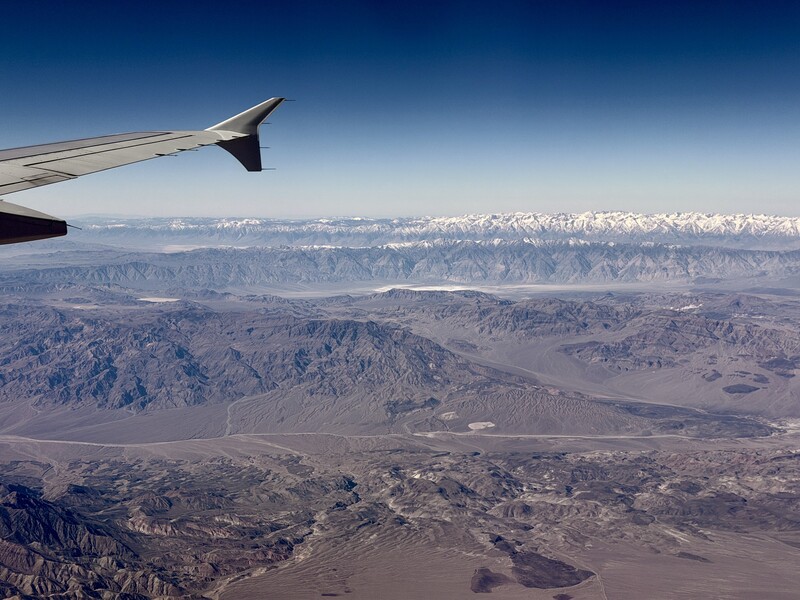
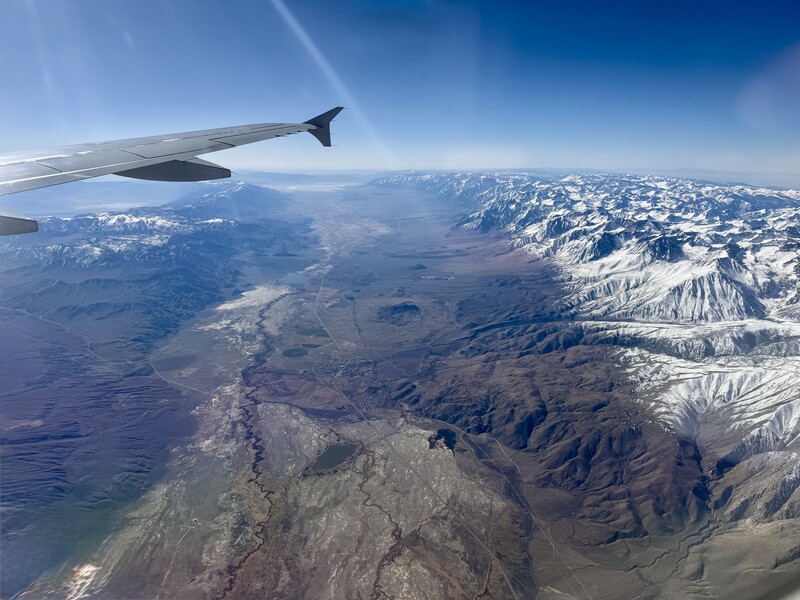
The view from a window seat at cruising altitude is one of the few genuinely unique perspectives available to anyone with a camera and a boarding pass. Mountain ranges, river deltas, coastlines, city grids, cloud formations, and weather systems reveal themselves at a scale and angle that no drone, helicopter charter, or hiking trail can replicate. The light at altitude behaves differently than it does on the ground: cleaner, less diffused by low-altitude haze, with color gradients at the horizon that shift from warm gold to deep indigo across a span of sky you cannot see from the surface. And the compositions are constantly changing, because you are moving at several hundred miles per hour through a landscape that rearranges itself every few seconds.
And yet most airplane window photos come out hazy, oddly colored, soft, or ruined by reflections. The problems are specific and entirely solvable, but each one requires a deliberate adjustment that most photographers do not think about until the moment has already passed below them at 500 miles per hour.
Seat Selection Determines Everything
Your window is your lens filter, your frame, and your limiting factor all at once. A clean window on the right side of the aircraft produces dramatically different results from a scratched window on the wrong side, and the difference between a seat forward of the wing and a seat behind the engine is the difference between a clear view and a frame full of heat shimmer and exhaust distortion.
If you can, book a window seat forward of the wing by at least three or four rows. Seats directly over the wing are obstructed by the wing surface itself and by the engine nacelle, and the hot exhaust gases from jet engines create visible refraction that softens and warps anything you try to photograph through them. The exact row numbers vary by aircraft type, airline configuration, and premium cabin size, so check a seat map for your specific flight rather than relying on a generic rule. Exit row windows are often smaller, offset, or misaligned with the seat, and while the extra legroom is nice, the window is frequently a compromise. When you board, check the window before you settle in. Airplane windows get scratched over time by passengers, cleaning crews, and general wear, and a badly scratched pane will amplify glare from the sun and soften every image you shoot through it. If the window is damaged and the flight is not full, ask a flight attendant if you can move to a seat with a cleaner pane.
The side of the aircraft matters for light, though the specifics depend on hemisphere, latitude, season, and route. As a rough guide, in the Northern Hemisphere, if you are flying east, the left side of the plane tends to face away from the sun for much of the flight, which means the ground below you is front-lit and the window glass is not fighting direct glare. Flying west, the right side often gives the same advantage. In the Southern Hemisphere or on routes that cross the equator, the relationship can reverse. The underlying principle is simpler than the geography: sit on whichever side keeps the sun behind you rather than shining into your lens, and check the route on a flight tracking app beforehand if you want to plan it precisely.
Eliminating Reflections
The biggest technical problem with airplane window photography is not the glass quality or the aircraft vibration. It is reflections from inside the cabin. Overhead reading lights, seat-back entertainment screens, bright clothing, the white pages of someone's book three rows up, and any other light source behind you will bounce off the interior surface of the window and appear as ghosting, flare, or washed-out haze in your images. The multi-layered construction of airplane windows (an inner cabin pane, an air gap, and an outer structural pane) makes this worse than shooting through a single pane of glass, because each surface creates its own set of partial reflections.
The most effective solution is to eliminate the air gap between your lens and the glass. Press the lens hood (or the front barrel of the lens if you do not have a hood) directly against the window, creating a seal that blocks cabin light from reaching the glass in front of the optic. If you are using a phone, press the phone flat against the window. If you do not have a lens hood and are using a camera, cup your free hand around the front of the lens barrel and press your hand against the glass. The goal is the same in every case: create a light-tight barrier between the cabin and the window so that nothing behind you can reflect into the frame. Wearing dark clothing on your chest and arms helps further, because your torso is the largest reflective surface near the window. Some photographers drape a dark jacket or blanket over their head and the camera to create a makeshift dark cloth, which looks conspicuous but produces the cleanest results on bright daytime flights.
One common recommendation that does not work here is a circular polarizing filter. A CPL is effective at reducing reflections from single-pane glass, but airplane windows are multi-layered, and the interaction between the polarizer and the multiple plastic and glass surfaces creates interference patterns, rainbow banding, and uneven color shifts across the frame. The physics of polarization through laminated and sandwiched panes is different from polarization through a single surface, and the result is worse than shooting without the filter. Leave the polarizer at home for this one.
Camera Settings
Focus is the first thing to get right and the easiest to get wrong. Autofocus systems are designed to lock onto subjects at varying distances, and when they encounter a window surface with scratches, smudges, water droplets, or frost, they will frequently hunt on the glass rather than focusing on the distant landscape beyond it. Switch to manual focus and set the lens to infinity. On a mirrorless camera with focus peaking or magnified manual focus assist, you can confirm the infinity setting visually. On older lenses with a hard infinity stop, set the focus ring to the stop and leave it there. You should not need to refocus for the entire flight unless you switch to photographing something inside the cabin.
Keep the shutter speed fast. The aircraft is moving at 400 to 550 miles per hour, and at lower altitudes during takeoff and descent, ground features pass through the frame quickly enough that a slow shutter speed will produce motion softness that looks like a focusing error but is actually the landscape sliding sideways during the exposure. Use 1/250 or faster as a default. At cruising altitude, where the ground is 35,000 feet below and relative angular motion is slower, you can sometimes drop to 1/125 and still get clean results, but the vibration of the aircraft adds another variable that faster shutter speeds eliminate. If your camera has in-body stabilization, it will help with vibration but not with the translational motion of the ground moving through the frame.
Shoot raw. Airplane window glass has a tint that shifts the color of everything you photograph through it, usually toward blue or green depending on the aircraft type and the age of the window. Auto white balance will attempt to correct this but often overcorrects or produces inconsistent results from frame to frame as the light changes. Shooting raw gives you the latitude to correct the color shift precisely in post-processing rather than fighting a JPEG that baked the wrong correction into the file. The window tint is consistent across a given window, so once you find the right white balance adjustment for one image, you can sync it across the entire set.
Expose for the ground, not the sky. The camera's meter sees a frame that is typically half bright sky and half darker ground, and it splits the difference, which means the sky is fine and the ground is underexposed. Spot-meter on the terrain if your camera supports it, or add +1 to +1.5 stops of exposure compensation to push the ground exposure up. If you are shooting raw, you have headroom to recover bright highlights in post, so it is safer to overexpose slightly and save the ground detail than to underexpose and try to pull shadow detail from a muddy landscape.
Focal Length
The useful range for airplane window photography runs from about 35mm to 200mm in full frame equivalent terms, and the best choice depends on altitude and subject. At cruising altitude, something in the 50mm to 100mm range is the sweet spot: wide enough to capture a sweep of terrain or a cloud formation without including the window frame or wing in the edges, and tight enough to give the landscape a sense of depth and scale. A standard zoom like a Tamron 28-75mm f/2.8 Di III VXD G2 or a Sony FE 24-105mm f/4 G OSS covers this range without a lens change. It might sound strange to call 50mm wide, but remember you're six miles in the air and things are farther away than usual.
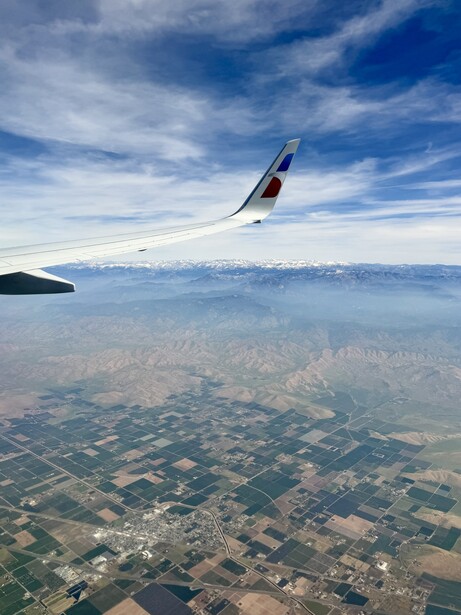
Wider than 35mm, you start picking up the window frame, wing, and cabin interior at the edges. That can be a deliberate compositional choice that works in two directions. The wing provides context, scale, and a visual anchor that tells the viewer this was taken from a plane, grounding what might otherwise be an abstract aerial image. The window itself, with its rounded corners and the slight vignetting of the cabin interior, can serve as a natural frame-within-a-frame that draws the eye toward the landscape beyond, the same way a doorway or archway frames a subject in street photography. Some of the most compelling airplane photographs lean into these elements rather than trying to eliminate them: the curve of the window, the hard line of the wing, the rivets on the fuselage, all providing a foreground layer that gives the image depth and a sense of place that a clean aerial shot does not have. If you want that look, shoot at 24-35mm, include the window edge intentionally rather than accidentally, and make sure the interior elements are dark and silhouetted rather than lit and distracting. If you want clean aerial compositions without the airplane context, stay at 50mm or longer.
For isolating specific ground features during takeoff and landing, when buildings, rivers, and infrastructure are close enough to show texture, a telephoto zoom in the 70-200mm range is useful. A Tamron 70-300mm f/4.5-6.3 Di III RXD adds reach without excessive weight. Beyond 200mm, atmospheric haze and window glass distortion become the primary limiting factors rather than the lens, so pushing to 300mm or longer produces diminishing returns for most flights.
When to Shoot
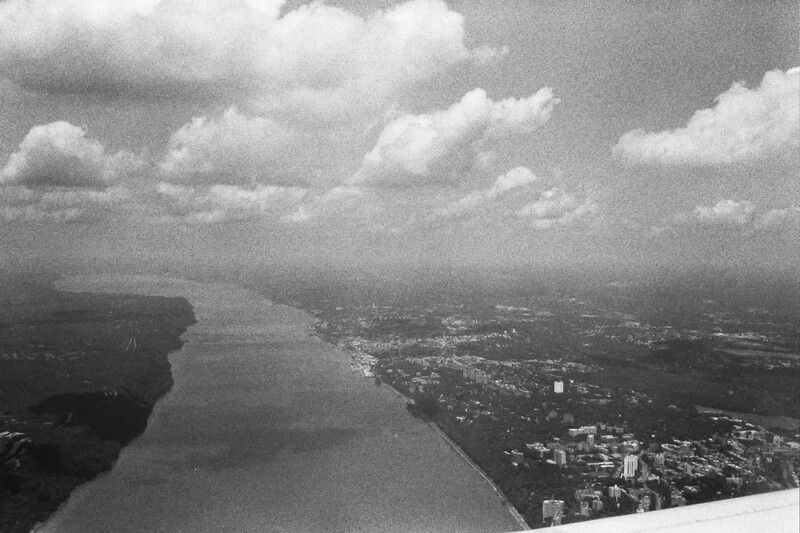
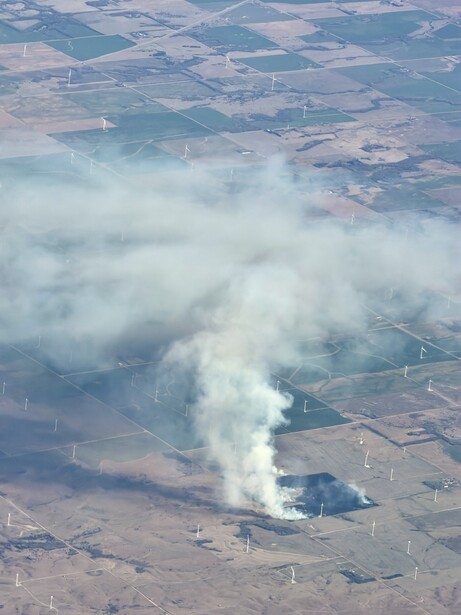
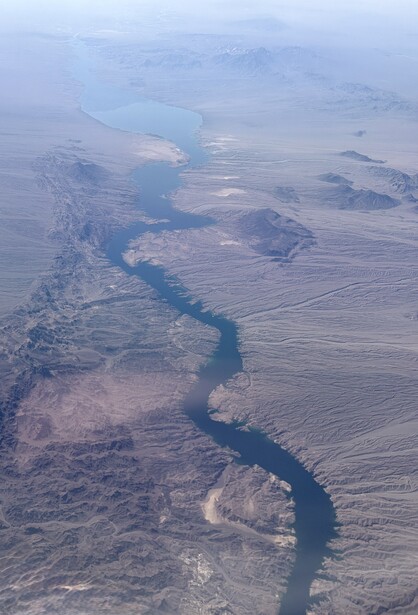
The 15 to 20 minutes after takeoff and the 15 to 20 minutes before landing are the highest-value windows for airplane photography. The aircraft is low enough that ground detail is visible and textured (individual buildings, road patterns, field geometries, coastline details), and the changing altitude means the perspective shifts continuously, giving you a moving composition that evolves second by second. Once the plane reaches cruising altitude, the ground flattens into abstraction: river patterns become thin lines, cities become gray smudges, and the visual interest shifts from terrain to clouds, weather formations, and the horizon.
The best light follows the same principles as ground-level photography. An early morning departure or late afternoon arrival puts warm, directional light on the landscape below, creating shadows that reveal topography and texture. Midday flights produce flatter, higher-contrast light that is less dramatic but still workable for abstract compositions, cloud studies, and high-altitude panoramas. Night flights are extremely difficult; the combination of aircraft vibration, low light, and the high ISO required makes sharp handheld images through the window nearly impossible, though polar routes sometimes offer aurora borealis opportunities for photographers willing to push ISO to 3,200 or higher and accept noise as part of the result.
Why Your Phone Is Actually a Good Choice Here
This is one of the few photographic situations where a phone may be the better tool than a dedicated camera, and the reasons are worth understanding rather than dismissing.
An airplane seat is a terrible place to operate a dedicated camera. The space is cramped, your elbows are pinned by armrests and neighboring passengers, and any lens longer than a compact prime turns the simple act of raising the camera to the window into a negotiation with the person next to you. Changing lenses in a middle-armrest-width workspace is impractical at best and risks dropping a rear lens cap into the seat gap at worst. A camera bag under the seat or in the overhead bin means unpacking and repacking every time the light changes, and by the time the camera is out, powered on, and configured, the scene that prompted you to reach for it may already be behind the aircraft. The physical logistics of dedicated camera operation in economy seating work against you at every step.
A phone eliminates all of that. It is already in your pocket or seat-back pocket. It requires no unpacking, no lens selection, no configuration. When the cloud layer parts to reveal a mountain range or the light hits a river delta at exactly the right angle, the photographer with a phone captures the moment in the time it takes to unlock the screen. The photographer with a camera in the overhead bin does not.
A phone pressed flat against the window creates an excellent light seal with no additional effort. The flat rear surface of a phone sits flush against the glass, eliminating the cabin reflections that are the biggest technical problem in airplane window photography. No lens hood, no cupped hand, no dark jacket over your head. The phone's form factor is the solution to the reflection problem.
A phone's computational HDR handles the high-contrast exposure challenge automatically. The bright sky and darker ground that fool a dedicated camera's meter into underexposing the landscape are exactly the kind of high-dynamic-range scene that phone HDR was designed for. The phone captures multiple exposures, merges them, and delivers a balanced image that preserves both the cloud detail and the ground texture without any exposure compensation input from the photographer.
A phone's wide angle lens (typically 24-26mm equivalent) is slightly wider than ideal for pure aerial landscapes, but the resolution on modern phones is high enough to crop significantly and still retain a usable image. Shooting wide and cropping to a 50mm equivalent field of view from a 48 or 50 megapixel phone sensor produces a file that is perfectly adequate for social media, web use, and moderate-sized prints.
The phone's limitations here are the same as its limitations everywhere: no optical telephoto reach beyond 3-5x (and digital zoom degrades quickly beyond that) and less raw editing latitude than a dedicated camera. If the phone's autofocus hunts on the glass, tapping to focus on a distant point usually resolves it, and third-party camera apps with manual focus controls (such as Halide on iOS or ProShot on Android) give you the option to lock focus at infinity the same way you would on a dedicated camera. For a traveler who wants to capture the view without dedicating a bag to camera gear, the phone is not a compromise. It is a genuinely effective tool for this specific situation.
Post-Processing
Every airplane window photograph benefits from post-processing because the window glass degrades the image in ways the camera cannot fully compensate for in the moment. The first adjustment is white balance: correct the blue or green color cast from the window tint by using the white balance eyedropper on something neutral in the frame (pavement, concrete, a white building roof, or a gray cloud). The second is dehaze: the Dehaze slider in Lightroom or an equivalent tool in your editor of choice recovers contrast and color saturation lost to atmospheric haze between the aircraft and the ground. Start around +20 to +30 and adjust to taste. The third is a modest boost to contrast and clarity (+10 to +20) to counteract the micro-contrast softening caused by shooting through multiple layers of glass and plastic. Finally, crop and straighten: the horizon is easy to misjudge at altitude through curved glass, and the edges of the frame often catch window frame, wing tip, or reflection artifacts that are better removed.
The goal in post is not to make the image look like it was taken from a helicopter at low altitude. It is to remove the artifacts the window introduced (color cast, haze, softening, reflections) and let the inherent quality of the aerial perspective speak for itself. The view from 35,000 feet has a quality that ground-level photography cannot replicate: the scale, the geometry, the abstraction of familiar landscapes into patterns. The photographer's job is to capture it cleanly enough that the window does not get in the way.
Keep Your Expectations Reasonable
Even with perfect technique, airplane window photographs are never going to match the quality of images taken from an open helicopter door with a stabilized medium format camera. You are shooting through multiple layers of scratched, tinted plastic at a subject that is miles away through an atmosphere full of haze, moisture, and particulate. The images will be softer than what your lens produces in normal conditions. The colors will need correction. The contrast will need help. Some flights will produce stunning results and others will give you nothing usable because the window was too damaged, the haze was too thick, or the clouds never broke.
That is fine. Airplane window photography is opportunistic, not planned. It's fun, not business. The value is in capturing perspectives that are otherwise inaccessible, not in producing technically perfect files. A slightly soft, slightly hazy photograph of a volcanic island from 35,000 feet is more interesting than a tack-sharp photograph of your hotel room, and the imperfections are part of what gives aerial images their character. Approach it as a bonus of the travel rather than the purpose of it, and the results will consistently exceed your expectations rather than falling short of them.
If you are building foundational skills in exposure, composition, and camera operation that will serve you on the ground and at altitude, the Fstoppers Photography 101 tutorial covers those fundamentals in depth. And if landscape and travel photography is where you want to take these skills next, the Photographing the World series covers the complete workflow from finding the shot through post-processing the final image.


Join the Fstoppers community for free
-
Post comments and join in the discussions
-
Browse the site ad-free
-
Share your work and get featured in the community
-
Compete in the photo contests for fun and prizes
2 Comments
I flew to Paris earlier this year and I asked my partner if I could have the window seat (she got it on the flight home). We were lucky to see this breathtaking sunrise as we approached Charles De Gaulle, I snapped a ton of images out the window but this is the one I love the most. This is straight out of camera on the OM System OM-3 with 17mm f/1.8 II
Adding:
Make sure to look up any legal hurdles before publishing images taken from airplanes. While there's generally little or no restrictions for taking photographs from the sky, there are several countries where law require photos to be screened prior to distribution. Or, where snapping from commercial routes and recognized tour operators is fine, but anything else require a permit. It may seem innocent to play the dumb tourist, or simply wait to put a pic up until you get home, but since 2022, there have been increased crackdowns globally. So it's worth being a little cautious, and plan ahead.