
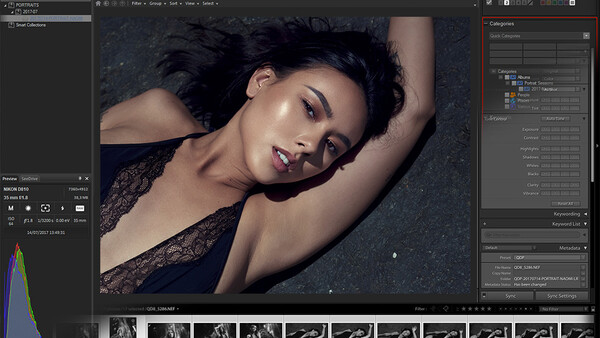
In a previous article, we discovered how we could transition from Lightroom to ACDSee Photo Studio Ultimate 2018 by importing old catalogs. We also discovered the different files management options and tools ACDSee Ultimate 2018 has to offer. With this second and last part, we are going to go through the main photo editing tools you’d use in Lightroom and see their counterpart in ACDSee. If you are making the switch from the Adobe solution to ACDSee Ultimate 2018, be sure to read this article.
Just like in Lightroom, the editing process takes place in a specific module called Develop. Further retouching can also be done using the Edit module. For today we are going to focus on raw processing and thus stay in the Develop module. You can access it from the top right of the ACDSee window.
With a photo selected and the Develop module opened, let’s see how we can find alternatives to what we were used in Lightroom.
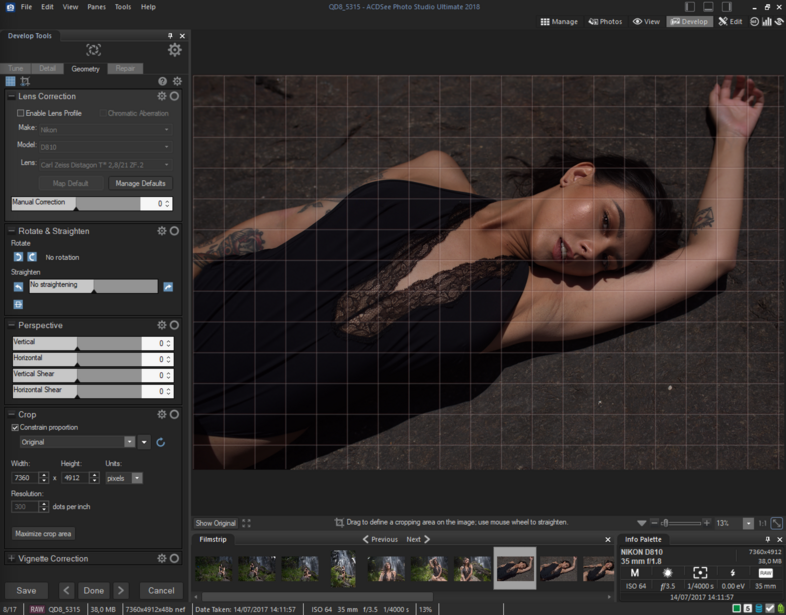
Crop Tool
In the sample image, I’m going to start by cropping the image. Everything related to crop, perspective, and lens correction will be found in the Geometry tab. The crop tool is not very different from what you’d see in any other photo editing software. Set the proportion if needed or the width and height as well as the resolution, and then drag the cursor to change your framing. To apply the change, double-click on the image and you are done.
Exposure and Luminosity Sliders
After double clicking on my photo to validate the crop, I’m back to the Tune tab which contains pretty much everything we are going to talk about today. The first tools we need to find when switching from Lightroom are the luminosity and exposure sliders. These are located in the General box, and you can adjust the exposure in EV values.
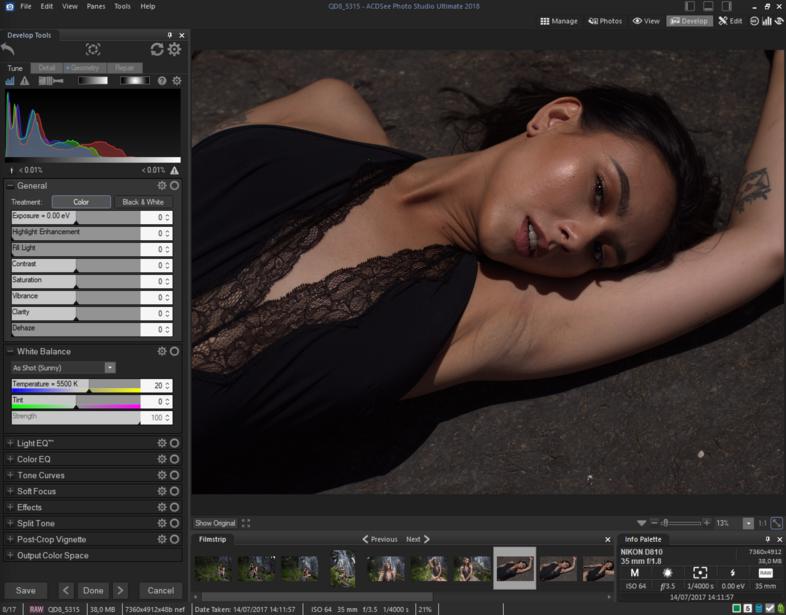
One significant difference when compared to Lightrrom is we do not have four sliders to change the luminosity but only two: highlight enhancement and fill light. These two also just go up and not down. Meaning you can bring back highlights and boost your shadows, but you cannot make them stronger. To set the black, shadows, highlights, and white, you’ll have to rely on either the tone curve or the Light EQ.
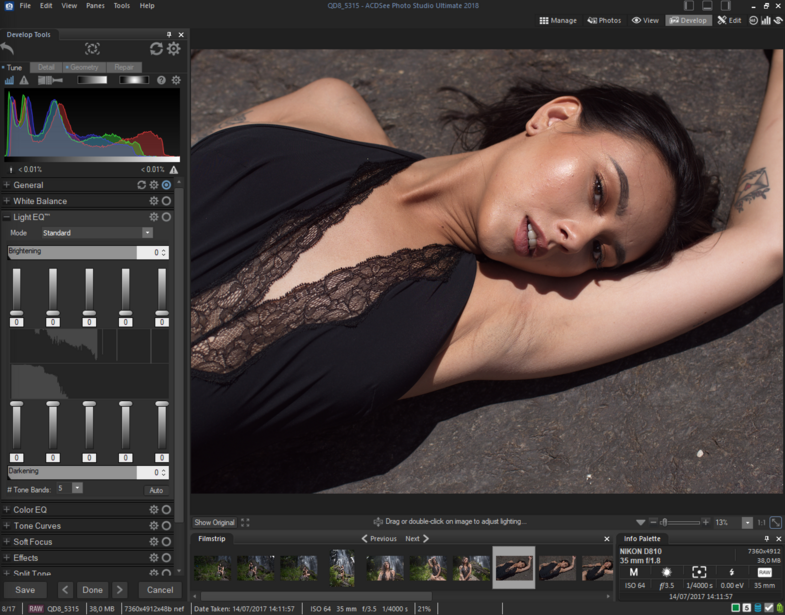
The Light EQ tool can be set in different modes. The first one is Basic which looks very much like using the sliders in Lightroom only with one difference: you will be adjusting shadows, midtones, and highlights. Otherwise, for more refined adjustments, change the mode to Standard. In this mode, everything above the graph will brighten, anything below will darken. On the left, you have the sliders for black and shadows, on the right highlights and white, finally in the middle the midtones.

Keep in mind that the Light EQ gives a result close to moving around the RGB curve. Meaning that you’ll see a shift in saturation depending on the adjustment applied.
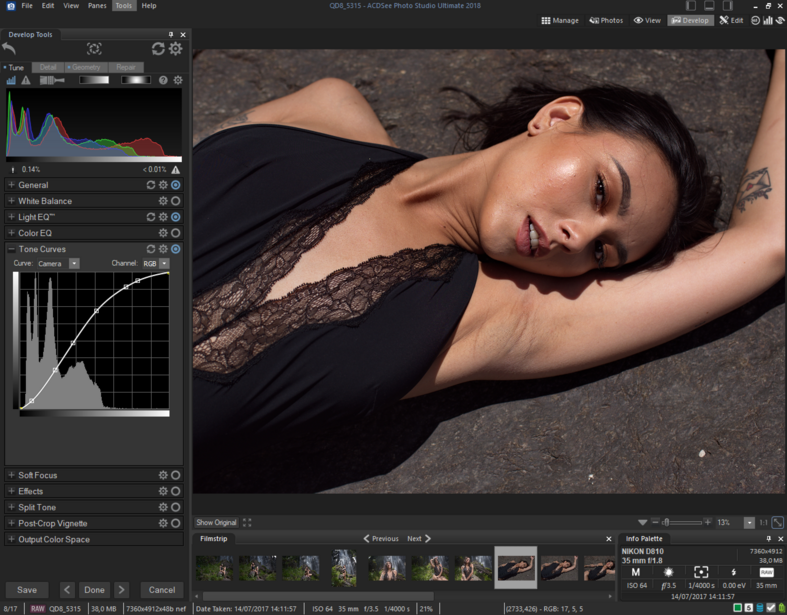
Curves
The curve is called Tone Curves in ACDSee Photo Studio Ultimate 2018. It doesn’t change much compared to Lightroom or even Capture One in the sense that the fundamentals stay the same. The difference is found in the curve drop-down menu where you can adjust the curve of your camera. By default, each raw processor applies some basic processing to your images depending on your camera. With some tools you can change the ICC profile, while others adjust the hue, here you can modify the raw processing rendering with curves. Other than that, if you know your way around the curves in Lightroom, there’s nothing more to tell.
Hue and Saturation
The HSL tool doesn’t exist in ACDSee Ultimate 2018. But before you scream and cry, there’s a tool to replace it. It’s called Color EQ, and it’s actually much more intuitive and powerful than the HSL found in Lightroom. In its default High-Quality mode, it works very much like your Adobe HSL tool. But change it to Standard and a whole new world opens up. You can shift all hues, brightness, and saturation values at once to change the tone for example of all channels before adjusting just one. For more advanced or artistic color grading work, it’s quite exceptional. So if you are used to the HSL, don’t worry, it’s there, but if you want to go further and see what you missed with Lightroom, play around with the Standard mode.
Sharpening and Noise Reduction
In the Detail tab, you’ll find every tool you need to sharpen your image or remove noise. There’s even one bonus, called Skin Tune, if you don’t like losing time with refined skin retouching techniques. With all these tools you’ll be able to get the most out of the texture of your raw files.
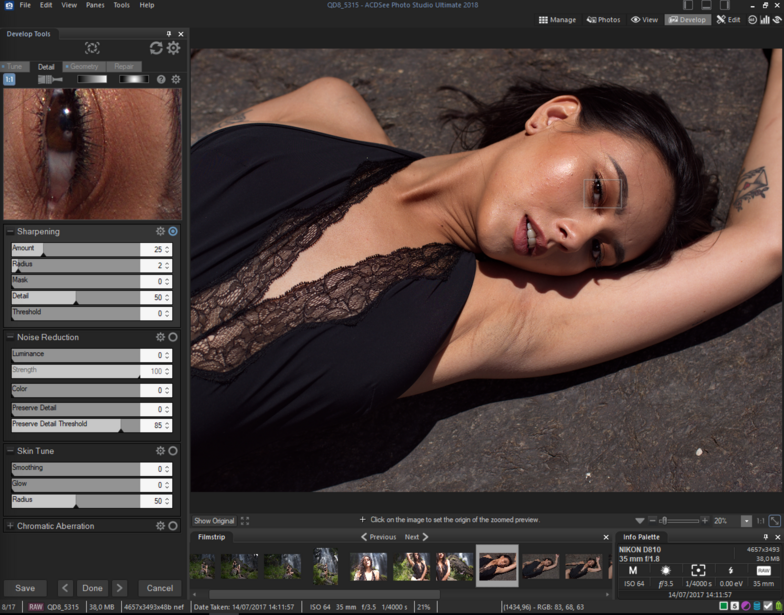
The only difference compared to Lightroom with the Sharpening and Noise Reduction tools is knowing that they are in a separate tab.
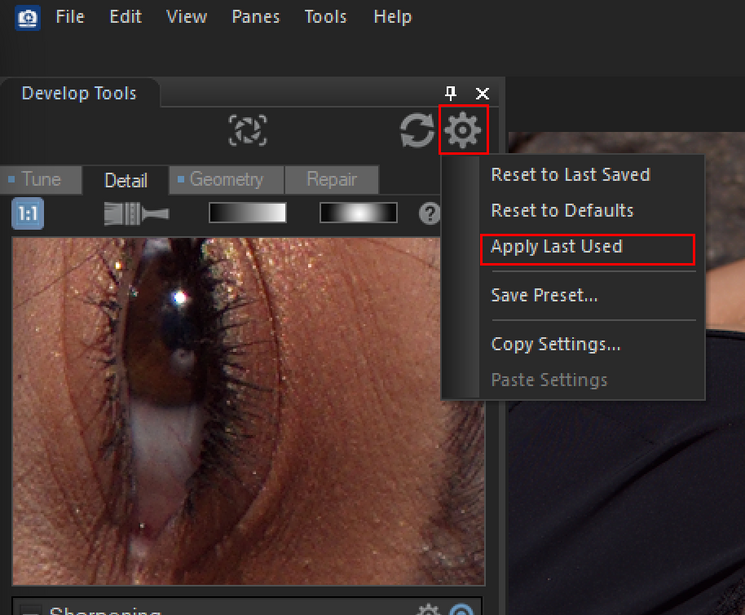
Settings Synchronization and Presets
If you need to apply the settings of a processed image to other pictures, you can either open the Develop module with the image on which you wish to apply the settings, then click the gearwheel and choose Apply Last Used.
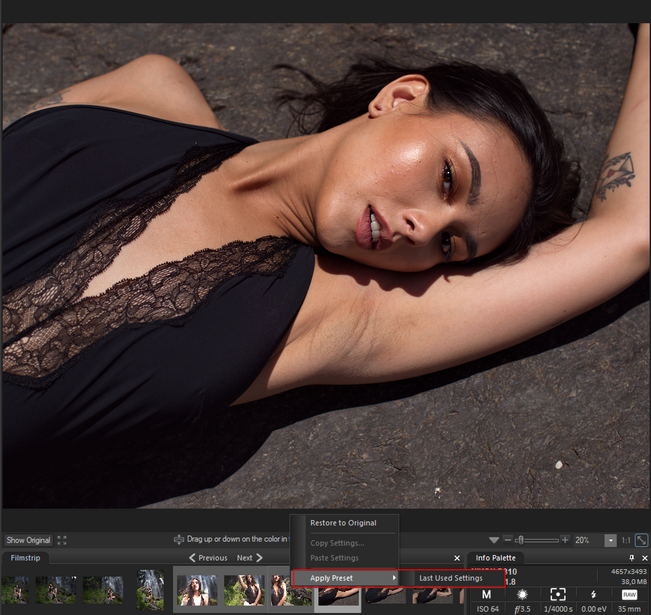
Another way would be selected the pictures in the thumbnail strip, then right clicking on them and in Apply Presets pick Last Used.
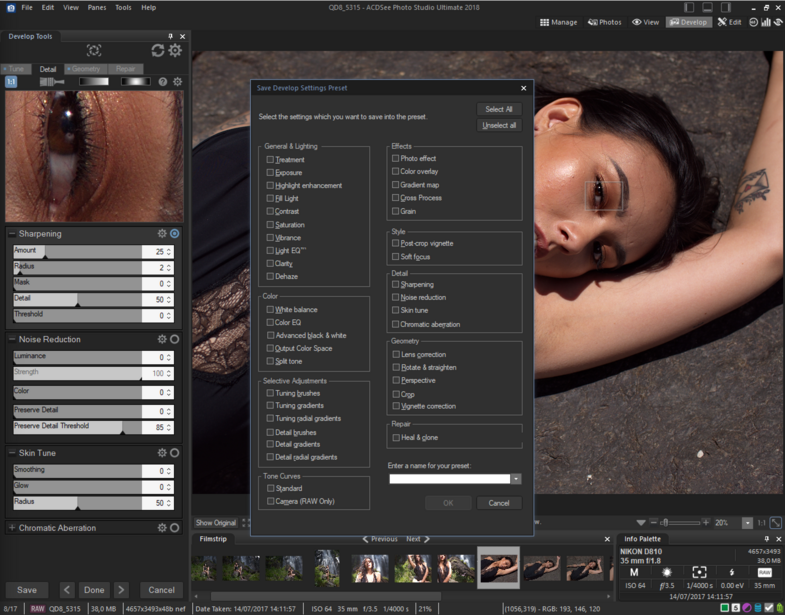
Obviously, if you know you are going to reuse these settings for future sessions, you can save them as a preset. Presets are created by using the same gearwheel as above and then selecting Save Preset. In the new window, pick the settings you want to save in your preset, give it a name, and once you click OK, your preset will become available.
With these different tools, you should be up and running with the fundamentals needed to process your raw files. Be sure to visit the rest of the tabs and module to take full advantage of all the numerous and powerful features ACDSee Photo Studio Ultimate 2018 has to offer. To learn all about them, feel free to visit the ACDSee tutorials database.


5 Comments
Aside from learning how to import your work from a previous workflow tool to a new tool, (which you covered in your previous article), the best way to learn a new tool is to forget everything you used to do, read the manual/user's guide/tutorials, and learn the new way.
so many things are merely digital implementations of analog techniques, and are as basic as the analog techniques, and do not change, but other things, although still based on the analog workflow, are implemented so differently, that if one tries to adapt the old way to the new tool, one may never master the new tool. Learn the new tool.
For me, my first move was from Digikam to DarkTable. (Digikam is still 8/16-bit integer). I then tried to move from DarkTable to RawTherapee. (DarkTable does not suport PixelShift, as of yet). The three apps are all good, but they all take such different approaches, none of them really wrong. I ended up not moving to RawTherapee at this time, but I may do so later IF I ever get a PixelShift camera, (unless DarkTable start supporting PixelShift).
Lightroom has been so incredibly frustratingly slow to me, testing acdsee out right now for yesterdays shoot.
Superficial impressions after 30 minutes:
The default Lightroom UI is cleaner and more intuitive. ACDSEE starts out as a barren wasteland, but can actually be customized to make more sense on my 21:9 screen.
Workflow looks fine, there are sliders for most stuff I need.
BUT! I want to do the "heavy lifting" in Photoshop. There doesn't seem to be an easy way to export & edit it in PS?
On that note, it would be nice if you mentioned shortcuts for the tools you used.
I'm not sure if this is what you are looking for but ACDSee allows you to set up external editors. Under Tools/External Editors/Configure Editors. A popup will allow you to add the .exe file for another program, in my case I navigate to C:\Program Files\Adobe\Adobe Photoshop CS5 (64 Bit) and select the Photoshop executable. You can have multiples external editors. In Manage, right click on an image or thumbnail and select external editors to launch the image in Photoshop or other editor you may have set up. If you have set Photoshop as your default external editor you can launch it by selecting an image and use the Ctrl-Alt-X shortcut.
Hope this is what you are looking for.
I think it is, thanks!
Does ACDsee support the D850 yet?