
A couple weeks ago, I did a quick photo session with my Jiu Jitsu coach, Rafael Moreno, and I filmed the process from start to finish.
The goal for this shoot was to shoot environmental portraits of Moreno in his Gym in Humacao, Puerto Rico. There is a joke within the martial arts world that every portrait looks exactly the same, with the subject's arms crossed or holding their belt. I wanted to try to do something different.
The gym has a fantastic vibe, but it also posed some difficult challenges. The gym was extremely deep and has natural light coming from only one side. This created a dark "cave" that was bright at the entrance and completely black in the back. To learn about my thought process and how I lit each shot, you can watch the video above, but my final images are below.
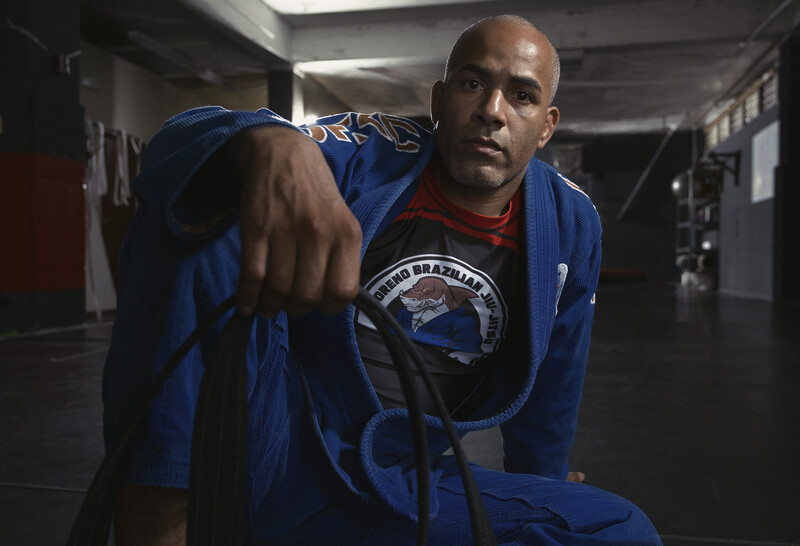
For the first shot, I wanted to capture a true portrait of Moreno. I got close and shot wide, and I made this image more about the subject than the environment. I purposely left in the perspective distortion, as I feel like it adds to this image.
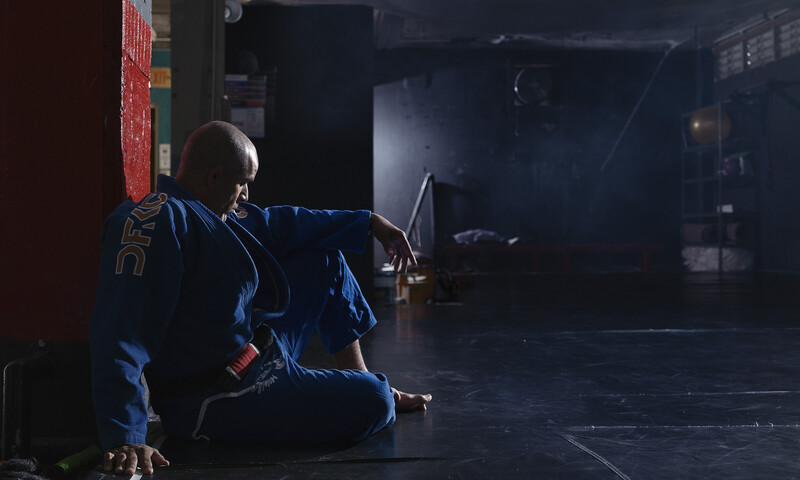
For the second shot, I wanted the image to be just as much about the gym as it was about Moreno. I placed Moreno on the left side of the frame and had him look away from the camera. To add a little bit of ambience to the room, we added a little smoke to add a slight haze. After the video was released, Patrick noticed that I had a retouching error above Moreno's hand. I would have fixed it for this post, but since it made the video, I decided to leave it.
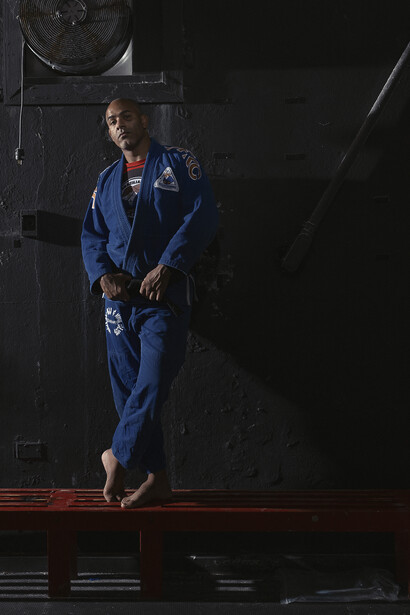
For the final shot, I decided to take a more stereotypical martial artist portrait by shooting Moreno standing, straight on. I made what felt like a strange decision to get Moreno to stand on top of a red bench in the back of the gym, but I think it worked out. Surprisingly, this ended up being Moreno's favorite shot.
This shoot and the tutorial video was made possible by five different sponsors. Instead of a standard ad read, we thought we'd try using the products and software that advertisers want to promote to actually create the photography in these tutorials.
Profoto B10
Yes, Profoto did sponsor this video, but regardless of that, this is by far my favorite light of all time. It's not cheap, but if you're willing to pay a premium, you're going to get one of the most convenient and powerful lights on the market today. The light is small enough to fit in a backpack, can be used with a battery or AC power, has a dimmable and color-shiftable LED light that can be used for video as well, and one of the most reliable remote systems I've ever used.
Fujifilm X-T3
The Fujifilm X-T3 is one of the best APS-C style cameras currently on the market. FUJIFILM has been known for their color science, but the X-T3 has put them on the map for incredible camera features. The autofocus on this camera is incredible, competing with many of the best sports cameras on the market. The video features have also been upgraded, and the X-T3 is now a formidable competitor to our favorite video camera, the Panasonic GH5.
Lens: Fujinon XF 16-55mm f/2.8 R LM WR
For this shoot, I used the 16-55mm f/2.8 lens, which is a 24-70mm 35mm equivalent. Fujifilm lens build quality is superb, and combined with the incredible face detection of the X-T3, every image I took was extremely sharp.
Manfrotto Befree GT Carbon
I've never been a huge fan of "travel" tripods. I've always felt like they were too small and cheap feeling. The Manfrotto Befree GT is the best travel tripod I've ever used. It's extremely small when it's packed down, but when the legs are extended, it feels shockingly rigid. It's not cheap, but if you're looking for a small tripod and you're willing to pay for extra quality, this one is certainly worth checking out.
LowePro Photo Active 300AW
We carried most of the gear for this shoot in the LowePro 300AW backpack. 15 years ago, my parents bought me a LowePro backpack for my first DSLR, and I still own it and use it today. LowePro makes high quality gear that will last for years. If you're looking for a backpack with side access, check out the 300AW.
Alienskin Exposure X4
I've been using Exposure for a very long time now, and it's by far the best software I have ever used to "finish" an image, but it's much more than that. Exposure X4 is now standalone software, and many photographers are using it as their raw processor. Depending on the type of editing you do, you may not ever need to open Lightroom or Photoshop again.
Exposure X4 is most known for its incredible film-replicating presets. Simply mouse-over hundreds of options, and your image will instantly change. Before I send an image to print or to the web, I always run it through Exposure first.
The software is 100% free to try, and if you decide to buy it, you can save 10% with the code "FSTOPPERS."
If you'd like to go even deeper into photography, lighting, and retouching, check out our full length photography tutorials in the Fstoppers store.
Join the Fstoppers community for free
-
Post comments and join in the discussions
-
Browse the site ad-free
-
Share your work and get featured in the community
-
Compete in the photo contests for fun and prizes
3 Comments
Nicely done. Very nice images & good video overview as well.
n/m
Boa Lee Morris , Oss! ha