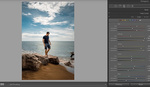
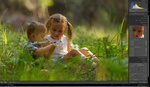
Some Lightroom panels and sliders can make drastic shifts in the look of your images, while others provide more subtle nudges that can give your photo that final touch. This great tutorial will take you through the ins and outs of the Details panel in Lightroom.
Coming to you from Lucy Martin, this helpful tutorial will take you through the basics of the Details panel in Lightroom. It's a part of the app that can be easy to ignore; many people tend to leave its sliders at the default settings, and the vast majority of the time, that'll work just fine when you're starting out. Nonetheless, like most things in photography, bits and details add up to the overall impression an image makes, and as you continue to grow, you'll want to start taking control of that panel. In particular, pay attention to how Martin uses the Masking slider to only apply the sharpening effect to prominent edges, leaving vast swaths of alike pixels untouched. This is important, as sharpening increases the appearance of noise, and we tend to notice noise most in more uniform areas of a photo, areas that don't need to be sharpened anyway (and in fact, detract from the subject's ability to stand out if they are).


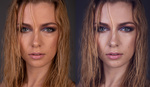

Oh boy, sharpening an unsharp image doesn't make it any better. Even more worse.