
In photography - and in anything else, really - it seems as though when we first discover something new, whether it be a new camera, a new technique, and/or a new system of doing things, it’s fairly natural I think to want to use it all the time. When I first “discovered” photography, I immediately gravitated toward those photographers like Emily Soto, Zach Arias, Joey L, and Syl Arena. I was smitten by their strobe work and their use of off-camera flash. To me, it was fresh and new and their ability to bend and shape light, combined with their technical and artist prowess, pushed me in every attempt to emulate their respective bodies of work.
So smitten in fact, that I bought the strobes they used, I bought the flashes they recommended, I watch BTS videos and tried my best to reverse engineer their shots. I lived and died by their blog and Facebook posts. In some cases, I even went and sought out the same models they used in the hopes of capturing some of that magic. While I believe that in some cases I came close, the truth is that I was nowhere close to where I wanted to be in relation to their work. In addition to lacking the ability to shape and twist the light as they did, I lacked the desire (and the assistants) to lug gear around from shoot to shoot as well as the technical prowess for the vast amount of post processing needed (in some cases).
After a late night conversation with a friend of mine who informed me that my work looked like a poor man's version of the artists I was trying to emulate, I forced myself to take a more natural and minimalist approach. I ditched my outdoor lighting gear, sold off my second 580EXII, and began experimenting with using only natural light in my photo shoots.

To be honest, it was a difficult conversation - although I ditched my lighting gear, I still held on to my studio gear and my reflectors because if nothing else, I wanted a fall back in case I failed miserably. Also, while the relative ease of moving into an area, shooting and moving on to the next is obviously much greater without gear, there are a lot of other factors to consider, which I later discovered.
As I said, it wasn't an easy journey from strobed work to an all natural light approach. I shot a lot. A LOT. And so several hundred shoots and two years later, I believed I developed a natural light technique which I think works fairly well and has become part of what I consider to be my “look” or style as a photographer. I’ve had several requests over the last few months to talk about what I do and how I go about it, so I’ve broken it down into several steps so that you can try out on your own. As with anything else, this is my technique and it works for me - your mileage may vary, attempt at your own risk, etc.
My natural lighting technique. Preface.
I have to say that of all the things to take into account when shooting natural light, one of the most important things is the fact that you have to let a little bit of what you know about proper exposure go. In my opinion, the beauty of shooting in natural light is that there are so many variables that often, shooting the same model on two consecutive days (or two consecutive hours!) has the possibility to yield entirely different results. In addition, to me, there beauty also lies in the light and dark and how they play off one another - that a photo can be at once underexposed and overexposed blown out and too dark is what makes the photo. Sure, sure, understanding how to expose properly is great (and recommended), but understanding that a good photo is not always properly exposed is also key to breaking away from conventional rules and finding a style all your own.

That said, there are some basics things I do when shooting natural light that I think will be helpful in getting started.
Ditch The Strobes. Seriously. I know it's a difficult idea to wrap our heads around, but to be honest, we'll never learn any new techniques if we keep falling back on what we're comfortable with. Try it once and it'll suck. Try it a few times and it'll get better. Give yourself a month or two worth of shoots, and I promise you'll be wondering why/how you ever lugged all that extra gear around.
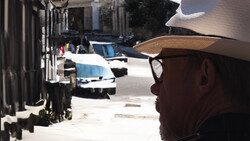
Look for an area of open shade: Obviously the easiest way to go about shooting natural light. If the light surrounding the area is bright enough, then what you’ll have is a pretty sweet natural light studio. Combine this with a natural reflector like a building with light colored walls and/or a city street made from cement, and you’ve got all you need. This is a concept which, I believe, warrants it's own article, I'll cover this fully in the next coming weeks.
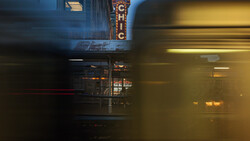
Embrace Overexposed and/or Blown Highlights: It’s a taste thing, really. To me, it sets a mood because when you look at a photograph which mimics how we see in bright sunlight, it pulls you in (at least, it pulls me in). As a lifestyle photographer, this is important because you want to capture not only the moment, but the mood so that your views feel as though they’re right there in the photo. If you’re doing anything in the sun, blown highlights are a fact of life. Embrace them.
Shoot Whenever You Want (except between 10-2). Nothing makes me question my life choices more than getting home and seeing photos that I took where everyone has a serious case of raccoon eyes caused by the direct overhead lighting. It’s totally avoidable, of course - if the sun is too high in the sky, don’t shoot. Or, if you absolutely must shoot at high noon, find an area of open shade that will completely shade your subjects.
Shoot Wide Open. Pretty much that. I have a comfort zone which I like to stay in, but I'm going to cover that in a full article in the coming weeks.
Overexpose. Shoot to the right. I generally like to stay 1/3 - 2/3 above proper exposure. Mess around with it a bit, see what looks good to your eye.
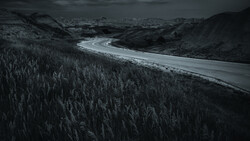
Underexpose. Shoot to the left. I generally like to stay 1/3 - 2/3 below proper exposure. Once you bring the files into Lightroom/Photoshop, you can dodge and burn your way to some great looks.

Learn How to Post Process. Lightroom, Adobe Camera Raw and to a much lesser extent, Aperture, etc. They are your friends. I failed miserably in the beginning because, quite simply, I didn't know what I was doing and relied too heavily on plug-ins, presets, and actions to get the look I "wanted.."
Don’t Listen to Others. Despite that’ I’m writing this here now, what I’m giving you isn’t a how-to, nor is it a formula for getting good results. These are steps for getting my results and someone may try this and decide that it looks terrible and immediately default back to their own thing. That’s fine. My point is, you have to explore. Break away from the conventional, traditional way of shooting and step away from what “everyone” considers good photos. Learn the basics and then close your ears to what everyone says about what you’re doing.
Listen to Others. Sometimes the best advice comes from the place you least expect it. My approach toward photography was forever changed due to a conservation I had with a friend at 2am via Facebook messenger. He told me my work looked like a “poor man’s version of…” one of the photographers I was emulating. It hurt to hear that, but in hearing that and looking upon my work with a critical eye and a new perspective, I realized he was right. Had I not had the conversation? Who knows. I don’t like to think about that.
That’s pretty much it. I’m sorry if this is a bit disappointing because I don’t break down my shots down to their technical details, but to be honest, I’ve never really been good at that and if you've been following, you already know that the last thing I am is a technical shooter. I do hope, however, that this does help answer some of the questions that I’ve been getting lately in regard to my natural light shoots. If you have any questions, feel free to post them in the comment section. I’ll do my best to answer as best I can.
Thanks for reading!
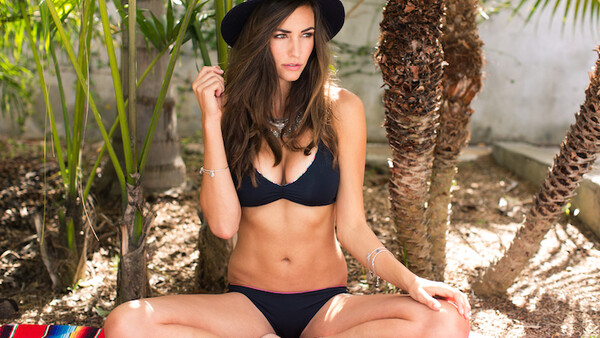
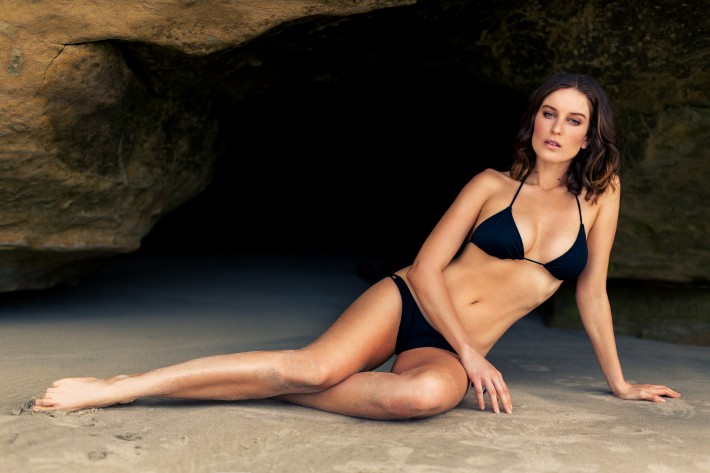
Models: Amy Scott and Holly Parker
John Schell | Instagram | Vimeo | Facebook

54 Comments
You make a very good point. Here's the before and after and the Develop Panel from Lightroom. Hope this helps.
.
I say "shoot what you like, in the way you like", and try not to come off as telling the next guy how to do it. It's like saying I shouldn't eat meat because you're a vegetarian. So I like that you wrote this as about your own personal journey instead of as advice or instruction.
Personally, I shot in natural light for most of my photography life and am only now learning the real ins and outs of using flash, but I don't have a preference, and probably never will. I like being free to use whichever method strikes my fancy. :-)
I like strobes, but I always prefer the natural light myself. Most people don't want natural light, but I love it. If the camera has a great dynamic range then there is nothing else really needed, just get your exposure right and expose for the shadows and highlights and there is nothing else needed. Don't need strobes or reflectors for stuff like this, just a good position and awareness of light and shadows and knowing what your camera is capable of.
Most of my work uses strobes, but that doesn't mean I like it the best. But then I knew the style I wanted from the get go, and bought the lights I knew would work with my style. I can see being mislead, but it doesn't mean I have to go without it. There are photos I like with natural light and photos that I want with strobes. Like dramatic, movie style lighting is something I'll do with flash, but if it's wedding boudoir, I rely on natural lighting, it really sets the mood.