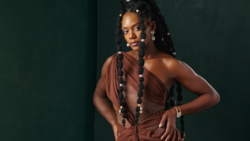
Shooting model portraits well has less to do with gear than most people assume, and everything to do with understanding light and how to pose a subject. Whether you're working with a phone by a window or a pair of strobes in a studio, the gap between a flat, forgettable shot and one that actually stops someone mid-scroll comes down to a handful of decisions you make before you ever press the shutter.
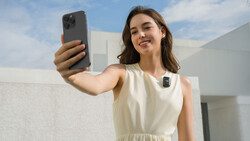
Coming to you from B&H Photo Video Pro Audio, this practical video from Juan Pablo walks through model photography at three distinct levels: beginner, intermediate, and professional. At the beginner stage, Pablo shoots with a phone and natural window light, and the advice here is more useful than it might sound. Placing your subject at a 45-degree angle to the window instead of facing flat into it changes everything about how shadows fall across the face. He also covers using a simple white bounce card to fill shadows, the importance of catchlights in the eyes, and why you should avoid the 0.5x ultra-wide lens on your phone if you want your subject's face to look natural. The beginner section alone reframes what "not having gear" actually means in practice.
The intermediate section introduces a dedicated camera body and a lens in the 35mm to 50mm range, along with a C-stand to hold your bounce card so you can work solo. Pablo talks about how he directs models without being overly prescriptive, letting them move naturally and then locking in the poses that work rather than choreographing every moment. He also makes a point that most people overlook: showing a little bit of what's outside your backdrop can actually make an image feel more editorial and less like a catalog shot. He brings in an LED light toward the end of this section to demonstrate how a color-adjustable light source can replace a bounce card and add creative flexibility.
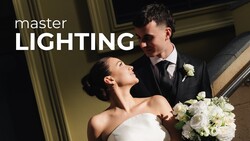
The professional section is where things get interesting in ways that are harder to summarize quickly. Pablo works with two Profoto strobes, V-flats, and a backdrop, and the focus shifts from "getting a good exposure" to making deliberate choices about mood, contrast, and storytelling. One setup uses a V-flat not to bounce light onto the subject but to subtract it, pulling detail from one side of the face to create a contrasty, half-lit look that reads as cinematic rather than polished. He also experiments with backlighting and hair lights, treating the session less like a formula and more like a test. The point he keeps returning to is that the techniques from the beginner section still apply at the pro level. Catchlights still matter. Angles still matter. Posing still matters. The strobes just give you more control over how all of it comes together. Check out the video above for the full pro-level breakdown and lighting setups from Pablo.


Join the Fstoppers community for free
-
Post comments and join in the discussions
-
Browse the site ad-free
-
Share your work and get featured in the community
-
Compete in the photo contests for fun and prizes
No comments yet