
The season of red, orange, and yellow leaves is just about here. Whether you’ve already gone out and taken some photos or are just about to, it can be really helpful to keep a few key concepts in mind. In this guide, we'll be taking a look at what to do when you’re behind the camera, as well as in front of the monitor editing those shots.
Think About Different Angles
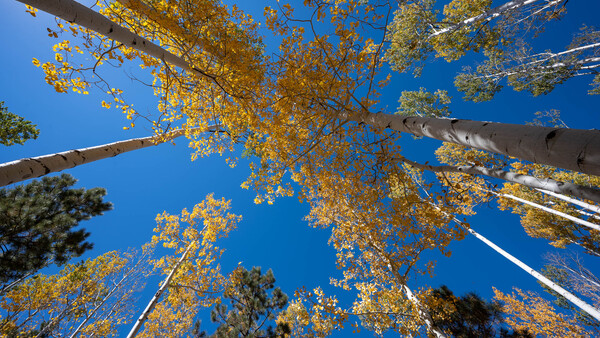
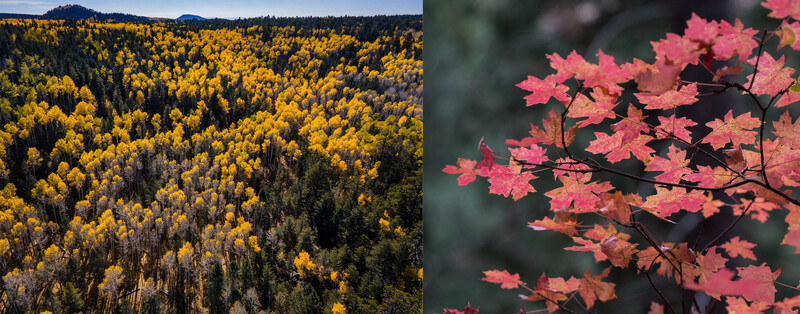
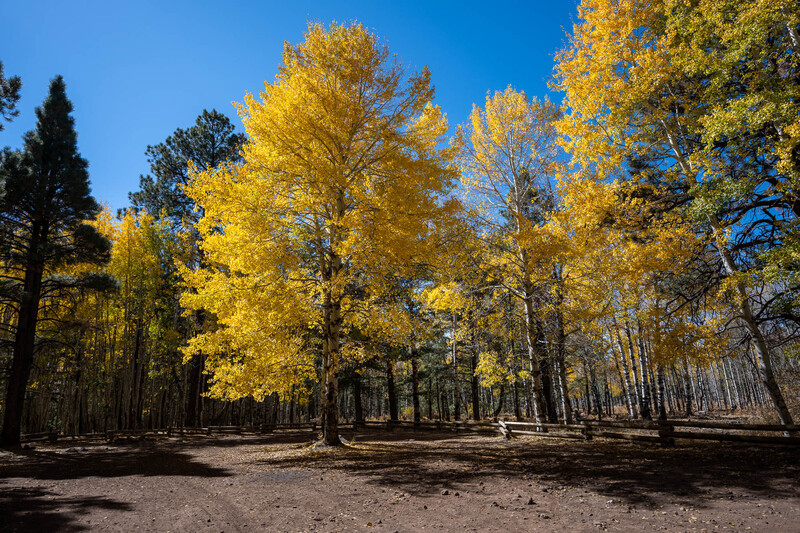
While this applies to almost any photographic subject, I find that I have to be conscientious about approaching the subject in a variety of ways when shooting fall photos. It can be tempting to try to cram every colorful tree into a straight-on, wide angle shot (not that you need to skip this shot). Once you’ve gotten that shot, however, take some time to try to mix it up. Individual leaves can make great macro subjects, telephoto lenses can let you isolate a particularly interesting tree against a more sparse background, and some creative angles, like looking up or down into the woods, can round out your shot list.
On the topic of interesting angles, remember to watch your vertical lines. While typically a concern of real estate and architectural photographers, photographing a tree from the base, while tilted back, can also tilt your vertical lines. At the extreme, this can be a dramatic effect, but in more minor cases, it can just leave the tree looking like it’s messed up. Fortunately, you no longer need a tilt-shift lens to fix this — minor cases of messed-up verticals can be adjusted with the transform tool in Lightroom or Photoshop. If you’re planning to fix it in the post, just remember to frame it a bit more loosely around your subject, as the correction results in cropping the image compared to what you see in the viewfinder.
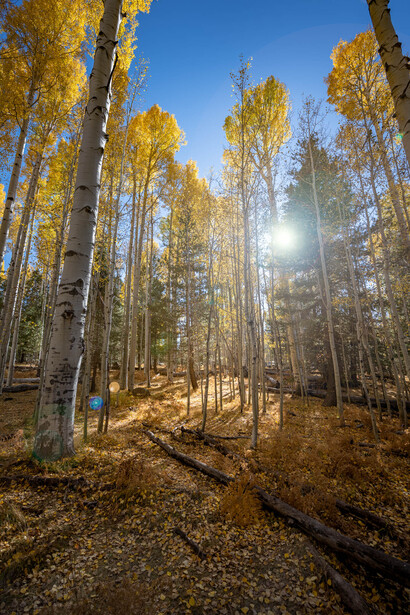
Another angle to keep in mind is that of the sun. The way the light is hitting the trees can create several interesting situations. A strong backlight on the leaves can bring out their color, as well as allow you to play with some artistic lens flare; just make sure not to stare at the sun itself or leave the sun focused through your lens onto either your shutter or sensor! Dense forests can also lead to some challenging dynamic range situations with the forest floor being significantly darker than the sunlit treetops. While this might present an exposure challenge, it’s also an opportunity to get creative with the contrast.
Field Techniques
If you’re planning any nature or landscape shoot, you should consider grabbing a circular polarizing filter. The polarizing filter can reduce reflections off water, as well as naturally amplify the color of the foliage and the sky. I’ve had good experiences with Tiffen, B+W, and Haida. When shopping, consider the size of the largest filter ring in your commonly used lenses. Buying bigger and adapting “down” can cost a little more upfront, but save money over purchasing the same style of filter multiple times. Additionally, you’ll want to look for coated glass to reduce flares and a thin ring to reduce the risk of vignetting on wider lenses.
Using that polarizing filter is easy: with it mounted, just look through your lens or live view and rotate the outer ring of the filter. You should be able to see a subtle difference as you rotate the filter around. You’re adjusting the degree of polarization and should be able to spot a point where it’s strongest and weakest. That aspect, despite sounding technical, doesn’t have to be scientific. Instead, just pick what looks good. One last thing to keep in mind is that a polarizer doesn’t always play well with a very wide lens. The sky isn’t evenly polarized, and using that filter on a wide sky shot can leave it looking blotchy or weird.
One last thing to keep in mind, which has been an unpleasant surprise for me in past shoots, is just how much wind can be occurring at the height of treetops. Even if you aren’t feeling it on the ground, those treetops can be swaying, and longer exposure can lead to blurred branches and leaves. Don’t rely on an exposure time that you can handhold, but instead spot-check that you are getting crisp branches when desired. On the other end of the spectrum, going with a long shutter speed can allow you to create interesting abstractions of the trees and focus on the dynamics of the fall colors. Whatever your conditions and desired results, just remember, you may have to pay more attention to that shutter speed than normal.
Back at Home
After a successful shoot, there’s still some editing to be done. When it comes to fall foliage photos, you’re probably looking to emphasize the beautiful colors you captured. If that’s the case, resist the temptation to just crank up the saturation. Most editing tools will give you a variety of ways to more granularly control your colors, and you should make use of them.
In Lightroom and Photoshop, you have a choice between saturation and vibrance. In almost all cases, vibrance is a safer choice. Vibrance focuses on increasing the saturation of less saturated colors while raising the saturation boosts all colors uniformly. This means that saturation can end up clipping colors much sooner than vibrance, and a clipped color can look unpleasant and unnatural.

Beyond the basic saturation sliders, the HSL sliders, which control the hue, saturation, and luminance (brightness) of individual colors, can offer even more options. By being able to adjust each color range, you can selectively amplify the red of some leaves and darken the blue of the sky, all without messing with the other colors. When using the sliders, make sure to watch for artifacts around areas of different colors, like in leaves against the gradation of the sky. The colors that fall under the “blue” slider, for instance, can cut off sharply, leaving a significant contrast between the adjusted and unadjusted regions.
Conclusion
Fall foliage can turn ordinary woods into extraordinary areas. If your area hasn’t hit the peak colors yet, keep an eye on foliage maps and local news. Going out and shooting in those conditions can be an immensely rewarding experience!


Join the Fstoppers community for free
-
Post comments and join in the discussions
-
Browse the site ad-free
-
Share your work and get featured in the community
-
Compete in the photo contests for fun and prizes
2 Comments
Hum, I didn't use any of your advice and ended up with this. Seems to have been a hit in certain circles. Oh and zero post processing.
Good advice. I tend to post like Heisenberg makes blue meth so having a bit of restraint is a great idea