
Lightroom is full of powerful tools for all types of photography. None of them are as effective as radial filters to create dramatic results like these.
Whether you just picked up photography or you've been editing for years, radial filters are a tool you should have in your editing toolbox. There isn't a quicker way for me to take an image from dull to exciting than this trick using radial filters within Lightroom. If you're unfamiliar with masking be sure to catch yourself up by reading my masking article from last year.
Light is everything in photography yet many times our photos simply don't resemble the light we witnessed in person, or perhaps you want to enhance and push a photo creatively. This method is one of the easiest and most effective ways I've found to do this with very little invested time.
Light Up The Stage
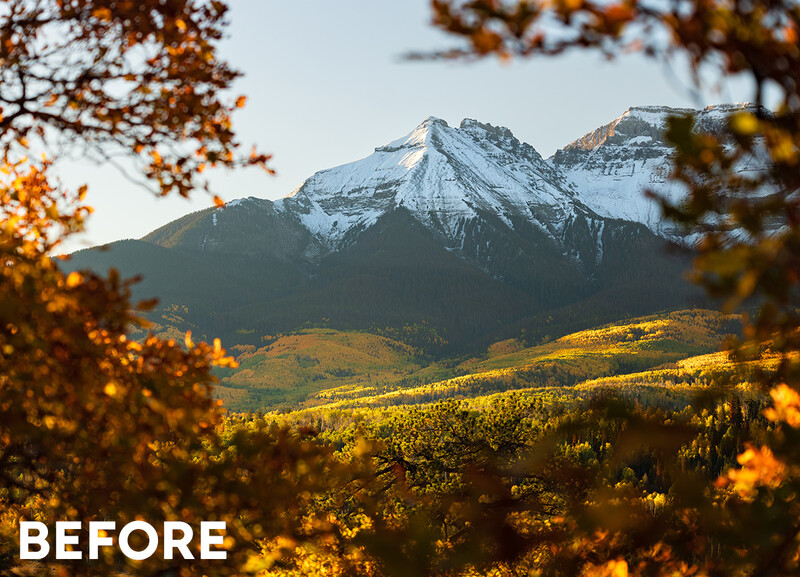
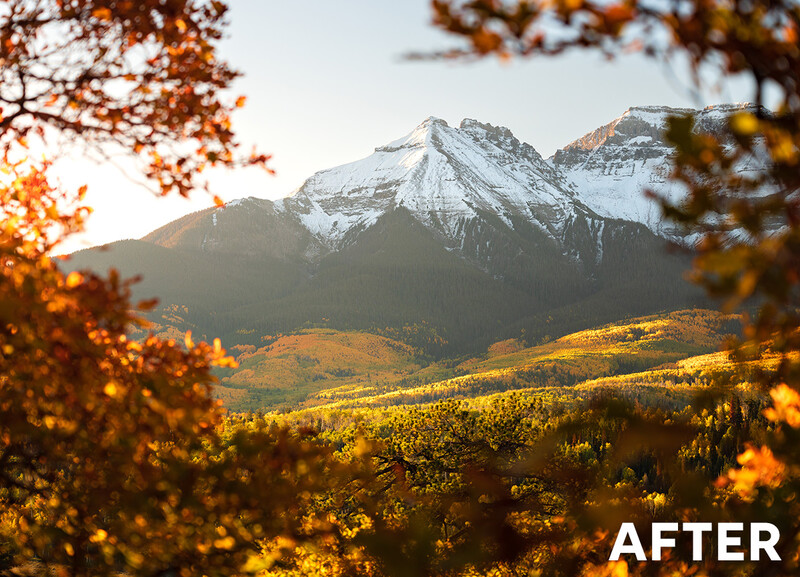
Throughout this guide, we'll be using radial filters to create pseudo sources of light within our images. The key is to do it in a natural way using a few techniques that make it quick and easy. We'll start with this image:

The before and after above is using only a radial filter. If you're interested to see the full edit of this image be sure to watch the video at the top of the article.

The first thing you want to do using this method is to start off by creating a very large radial filter, typically with the center of the filter located off-screen. The key thing to remember in choosing where to do this is to look at where the light is naturally occurring in your image. In my case, the light source is coming from the left of the frame during sunrise. To do this you'll have to zoom out to about 12%. You can do this by holding shift and dragging your mouse left (while in the develop module), or using the navigation panel located in the top left of Lightroom's interface.

Next you want to go to your masking panel and create a new radial filter (shortcut shift+m). Put the center of the mask outside of the frame of the image and drag it all the way across the image, then make it quite narrow. Think of it like a beam of light. Make sure your filter is set to 100 Feather.

Next, we'll apply our edit to the mask. This will obviously vary based on the image but there are a few tricks here that will help your image look as natural as possible. The first thing you should always adjust is the whites within the image. This will naturally affect the areas that are already getting hit by light within your image. Then you'll adjust your exposure by increasing it slightly, don't overdo it though otherwise, it will become obvious. Next, you'll decrease your Dehaze by about -5 to -15. This will create a small glow to your light. Lastly, I like to add a bit of warmth to the light by increasing the color temperature by +5 to +15 and tint by +5 to +10. These values will vary based on your image.
You aren't done although it might look like it. The next step is to balance your entire image with the light you just created. The first thing you'll want to do is decrease the exposure of your entire image by a little less than your chosen exposure for your radial filter. Many times I actually do this before creating the radial filter, essentially darkening the entire image and adding light back into it but for this tutorial, it is easier this way.

The last step is to go back into the mask you just created. Zoom out again and create a "subtract" linear gradient mask. Drag the linear gradient from outside your image to inside your image, making sure it is also quite large. The trick here is to only use the section of the mask from the center to the outer line. The purpose of this is to control the light that's closest to the edge of your image. Many times using this trick, it'll get too bright on the edge of the frame and this subtracted linear gradient can be used to control a bit of the light.
That's it! While that was a decent amount of text to explain the concept behind this tool, in practice it only takes a few minutes with practice. Let's take a look at a few more examples.
Examples
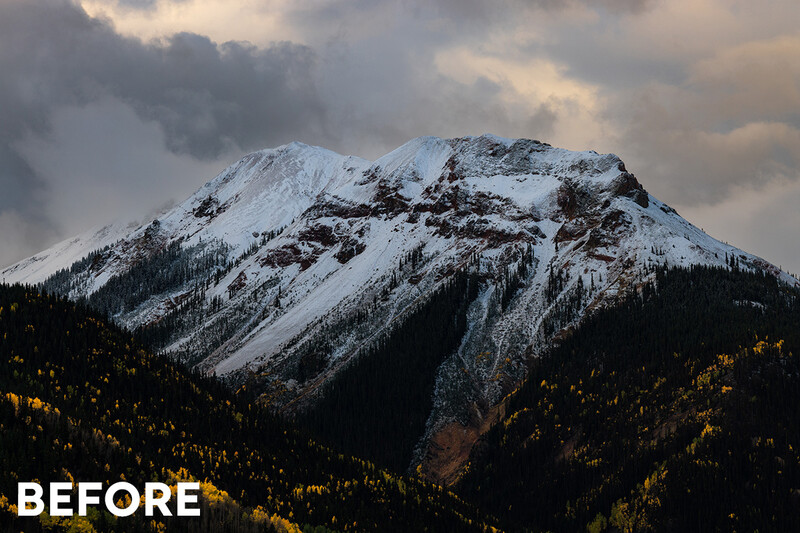
You likely noticed how much we changed the first image using this technique which doesn't always have to be the case. Many times I use this trick in images that already have naturally occurring light but it creates even more dynamics within the image.
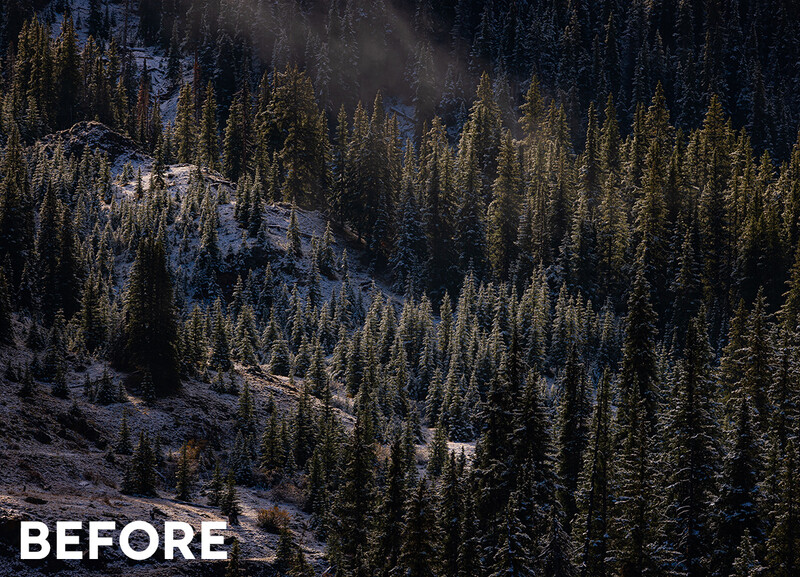
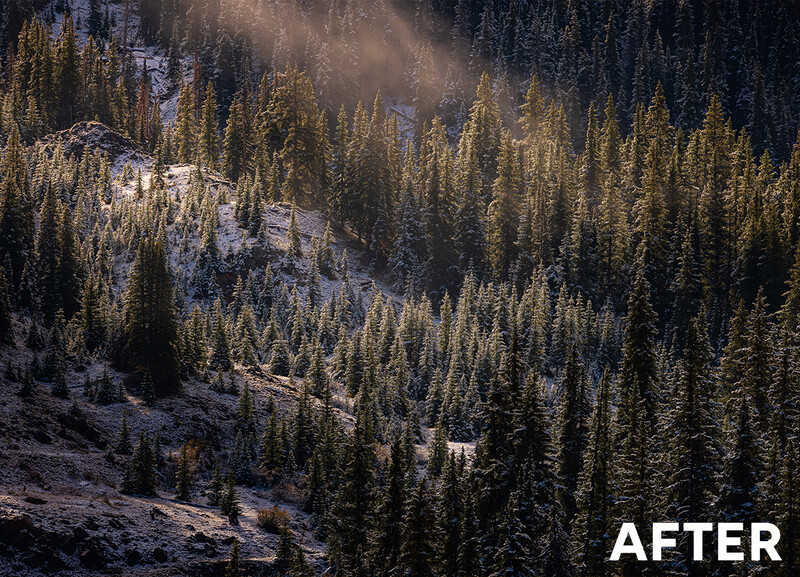
In the above before and after you'll see that even before adding the radial filters there was light peering from the top of the image. I actually created two very narrow radial filters for this image.

These were intended to replicate beams of light rather than a large source of light. I used more extreme settings for these as well. Notice how small the sources of light are and exactly how I used the subtracted linear gradient to manage light at the corner of the frame.

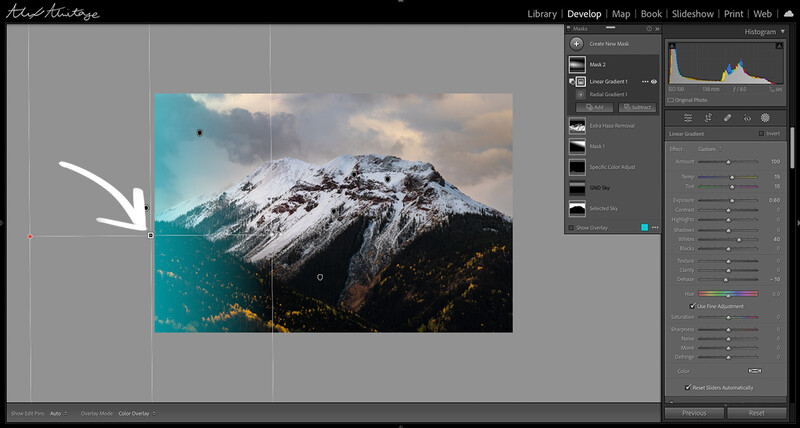
This next example uses these tools more subtlety but a combination of two different radial filters to help balance the light within the image.

The first radial filter was used to lighten up the mountain range in the background but only on the side where light should be hitting. You'll also notice I used a subtract linear gradient again to remove some of it from the area in the sky. I did this instead of a sky selection because the sky selection looked too unnatural.

The next radial mask I added came from the bottom of the frame creating a huge source of light but only lightly increasing the brightness in the overall image. Most of the time less is more.
Sometimes you do want a lot of added drama though. Notice that even before the radial filter there is a lot of dramatic and contrasting light. You might find yourself not needing any extra light but in this case, I decreased the exposure for the whole image and added the light back in to further that high-key look of the light coming in from the left of the frame. Just another type of example when using this technique.
The biggest thing to remember here is to be light-handed. Something you can do once you're done with your edit is zoom out really far and see if you can notice any haloing within your image. Just be careful because if you push this too far it'll be obvious and not natural. I hope you enjoyed and I'd love to see your own results in the comments below!


Join the Fstoppers community for free
-
Post comments and join in the discussions
-
Browse the site ad-free
-
Share your work and get featured in the community
-
Compete in the photo contests for fun and prizes
No comments yet