
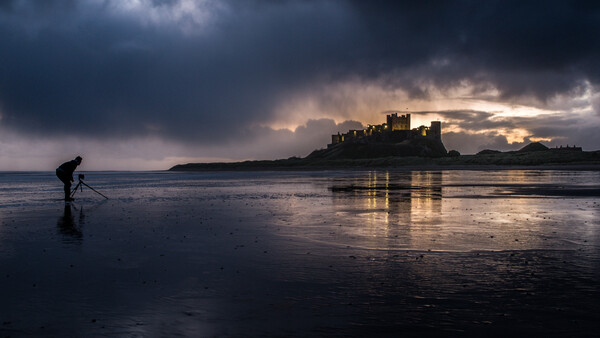
I shoot solely raw. However, I know some tremendous photographers whose cameras are set to record just JPEGs, and they will never change. I am envious because they spend less time in front of the computer. Shooting raw is worth learning, but maybe there's also a good reason to shun it.
It's analogous to the difference between using your own darkroom or sending your roll of film off to Kwiky-Printz-R-Uz to be developed in a batch with hundreds of others. KwickyPrintz will do an OK job, but there is no option to assert your own creativity on the development and printing processes. In the darkroom you can. Similarly, the big advantage of raw is the ability to adjust images to look the way you want, rather than how they were programmed to look by a clever technician somewhere in a laboratory on the other side of the world.
RAW or Raw?
Raw is not an acronym. Although people sometimes use "RAW" as if it is an abbreviation, it actually refers to it being the raw data sent from the camera's sensor. That data is developed digitally and, like printing from a negative onto paper, versions (usually JPEGs) are exported from the raw file.
Switching To Raw
In your camera's menu, there will be the option to change the file type. It's easy to find and often accessible from the control panel or quick menu. If you can't find it immediately, then ask your favorite search engine and it will tell you how.
If you've not used raw before, you may want to select the raw + JPEG option, so you still have the shareable JPEGs immediately available. It takes time learning to develop raw files and at the beginning, you may want to still use your camera's excellent JPEG results while you learn to adjust the raw files to get the results you envisage.
In Praise of Raw
Now your camera is set to take raw images, you have a greater ability to adjust the look of the image than if you have it set to take JPEGs.
Raw files save all the data collected by the sensor and allow for non-destructive development of the photo. This is unlike shooting to produce JPEG files. JPEGs are processed in-camera, compressed, and consequently, have a lot of the unused data discarded during that automated processing. The discarded data is unrecoverable, lost forever.
For example, if you set your camera to shoot in black and white, all the color data is lost with the JPEG. However, with a raw file, all that data still there. With raw, you can produce any number of different versions of the image from that raw file. Think of using a film negative over and over again in the darkroom.
Knocking Raw
They have their disadvantages. Raw files are larger than JPEGs and they require developing and converting into usable images before being shared or published; you cannot upload a raw file for your friends to see on Facebook, Twitter, or Flickr. Furthermore, you may not be able to view a raw file on a phone or tablet. Additionally, your computer might need a specific plug-in to view a raw file.
The file extensions vary between manufacturers, .CR2 for Canon, .NEF for Nikon, .ORF for Olympus, and so on. Raw file formats are not only unique to each brand but also to each camera. Therefore, they require software updates to access them. As the raw files from each model vary, a new codec for your operating system and updating your developing software may be required if you buy a new camera. New camera releases are often incompatible with existing software until updates are released.
Standardization
It's a pipe dream of many photographers that there is more compatibility across brands. Adobe tried to standardize raw by bringing out DNG (Digital Negative) raw format, offering this to be used by the camera manufacturers. However, this was not taken up by any of the major players, possibly because they thought it would weaken their hold on the market if they didn't maintain incompatibilities between their products and those of their competitors. However, Adobe produces a free raw converter that will allow you to convert any raw file into a DNG file. That's especially useful if you have outdated development applications and a new camera, but don't want to upgrade your app.
Development Software
There is a huge array of different programs for developing raw files. Some come with additional functions and editing tools, some have the ability to catalog the images, making it easy to find particular images. Meanwhile, others solely develop images. The results from these programs vary and some are more intuitive to use than others. They also differ in price and in smoothness of operation.
Just like cameras, people will always recommend what they own and use. Don't listen to them. What suits them might not suit you. One of the many programs I have installed I find clunky, illogically ordered and lacking in both functionality and compatibility with other editing programs. But lots of others swear by it, so I won't tell you which at the risk of upsetting them.
Most pay-for programs come with free trials and it is worth trying these to see which suits you. There are also free programs to use.
Free
Every camera manufacturer produces its own raw development software. This is usually bundled with the camera and is downloadable for free from their websites. Most of these programs mirror the settings that are available in-camera.
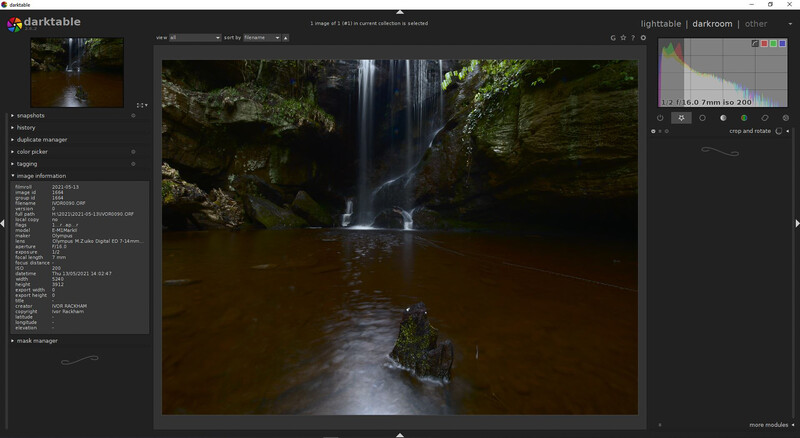
Many professionals cut their raw development teeth on the free and open-source UFRaw. There are plenty of other free tools available such as RawTherapee and Darktable and the early versions of Lightzone.
Paid For
Although it is not my intention to use this article to review the different apps available for developing raw files, the old adage that you get what you pay for holds true. The free programs are clunky and slow compared with those you buy. But hey, they are free!
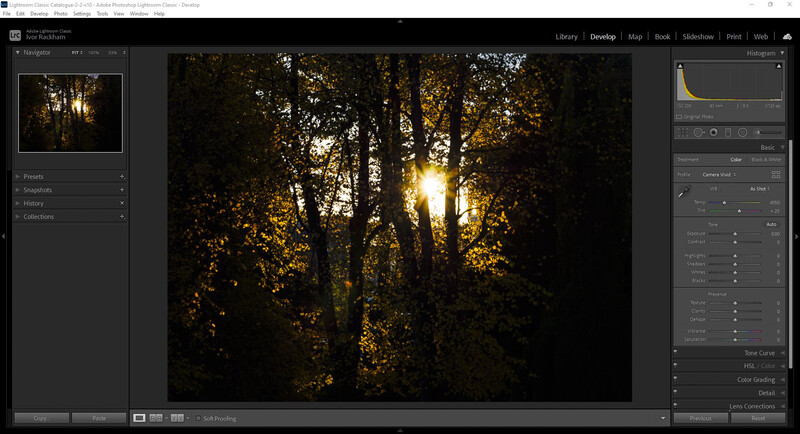
Adobe produces, arguably, the best-known raw converter that is used as a plugin for Photoshop and Photoshop Elements (a cut-down version), which has the same developing tools as found in Photoshop Lightroom. The Adobe Camera Raw (ACR) process is seen as the industry standard for raw conversions. There is no arguing that it is good software and outsells all other brands. But, their dominance is being eaten away, and other converters can give a very different and unique look to your photos. I've argued before that there are good reasons for avoiding the popular choices of camera manufacturer, and the same reasons apply to software; don't be scared to be different!
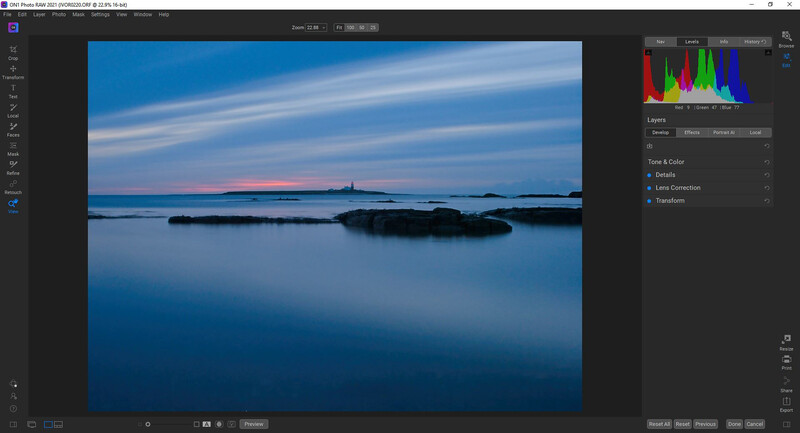
On1 Photo Raw, DxO Optics Pro, Serif Affinity, Coral Aftershock Pro, and Phase One Capture One all have raw converters. Most of these have similar basic adjustments and then a variety of additional tools, some that work better than others. Most have free trials and it is worth trying the different software before purchase to see if you like the results and if you find them intuitive. There are plenty more on the market that I haven't mentioned, and it would be great to hear what you like and why in the comments.
Adjusting JPEGs With Raw Developers
Raw development is not limited to being used just on raw files. Other image files such as JPEGs can be manipulated with these tools too. However, raw files are more adjustable.
Basic Adjustments
There are variations in how different adjustments work in different apps. For example, adjusting the exposure slider in Lightroom may give different results from the same slider in Affinity, which in turn may vary in results from On1. A good way to discover how the adjustments work is to push them to their limits and see what happens to the image. However, to produce the best results, most sliders are best used gently.
Color Temperature
Temperature adjustment is used to change the white balance. Often, an eyedropper tool can be used on a neutral white or gray in the image and the image will be automatically adjusted to remove any color cast. The sliders can then be adjusted to warm up or cool down the image. Many landscape photographers like to warm their images slightly.
I rarely find that I need to adjust the Tint slider, although it is sometimes necessary under artificial light.
Exposure
Exposure adjusts the brightness of the entire image, but often with an emphasis on the mid-tones. If you increase exposure in-camera by one stop, the result is unlikely to be identical the increasing the raw slider by one stop.
Contrast
This makes the darks darker and the lights lighter. Again, the different programs make this adjustment work in different ways.
Other Tonal Adjustments
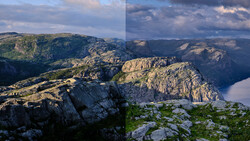
Blacks, Shadows, Mid-tones, Highlights, and Whites sliders adjust the brightness of those are areas of the photo. Pulling the whites and highlight sliders to the left may recover detail in the brightest areas of your photo and pushing the blacks and shadows to the right may reveal shadow detail previously hidden. If you have blown out highlights (pure whites) these sliders won't recover the details in those areas. Similarly, pure blacks will have lost their details too.
Clarity
Clarity or structure works a bit like contrast but solely on the mid-tones. Adding clarity can make your images really pop and stand out, but can also be easily over-adjusted. Be gentle with this slider.
Saturation
Vibrance and Saturation are very similar, making colors bolder. However, Vibrance only works on the more muted colors whereas Saturation works across all colors. Try turning Vibrance down to -50, and you will see the most saturated colors remain while the weakest ones become differing shades of gray. Turn the Saturation slider all the way down and the image becomes monochrome.
Other Adjustments
The raw converters have a host of other adjustments available too. These may include noise reduction, sharpening, tone curves, black and white, split toning, spot and red eye removal, as well as camera and lens profiles. All will include cropping tools and the ability to straighten the horizon. The better ones will also have the ability to apply local adjustments — changes to parts of the image — and not just global adjustments that affect the entire image.
The better programs will have tutorials on their websites that demonstrate how to use the software, and YouTube is full of independent photographers willing to share their experiences with you. Of course, these tutorials all give results that are subjective. Just because a famous YouTuber says an image should be developed in a certain way doesn't mean they are right.
So, What's the Good Reason Not to Shoot Raw?
As I said at the start, I know super photographers who produce fabulous images straight out of the camera, so they record JPEGs. They don't have to mess around with changing the look of the image. That approach encourages one significant trait for photographers: they must make the effort to get the image right in the first place.
When holding the viewfinder to their eye, they look around the edge of the frame for unwanted distractions and make sure the composition is correct. They need to be precise with their exposure and know how the three main exposure settings will affect the final image. It teaches them to be better photographers.
Perhaps, we could learn from that and take the risk when going on a photoshoot of setting the camera to shoot JPEGs. Dare you do it?

Join the Fstoppers community for free
-
Post comments and join in the discussions
-
Browse the site ad-free
-
Share your work and get featured in the community
-
Compete in the photo contests for fun and prizes
64 Comments
TIFF IS THE GREATEST MUAHAHAHAHAHAHA!!!!
I read the headline and was "if the only reason i should not shoot raw, is to safe storage space, then this is click bait", i wasnt wrong
"Yeah let's lose quality and archive our memories on an inferior format" said no one ever. What a ridiculous article. Are you really that hard-pressed for content? Definition of clickbait.
Mr.Rackham, nobody gives a damn about your (pro) opinion about these two-decade-old bs. Write some meaningful articles that are worth reading! Who are those (super photographers) you mention in your article, who only shoot only JPEGs?
He is talking about live sports mainly where the photographers have their images uploaded within minutes or an hour for main agencies and time is important. That's totally real.
Agreed.
It is well known that professional sports action photographers who work for agencies have only shot jpeg for decades. The reason is as you say, Benoit - that they need to upload all of their thousands of image files to their agency's servers within minutes after the competition is over. Also, they need to shoot jpeg in order to realize the highest frame rates and the fastest buffer clearing that their cameras are capable of.
If there are people out there commenting who do not realize this, it makes me question how in touch they are with the highest level of sports action photography.
isn't this the same reason journalist shoot jpegs as well as for "journalistic integrity"?
If you're going to publish an article titled: "Are You Shooting JPG? There May Be a Good Reason Not To," don't bother; we already get it.
An emotion filled subject for sure and many strong opinions about it. I will offer mine. Articles that start with “I always” are suspect to me right off the bat, because very free things in life ALWAYS require the same solution. There are reasons to shoot raw and reasons to shoot jpeg. Shoot whichever you like and whichever makes the most sense for that shoot. That’s my opinion.
I commend the author, Ivor, for giving this article a very appropriate title.
His use of "may be" is wonderful, because it allows for the possibilities of there being good reasons to shoot RAW and also for the possibility of reasons not to shoot RAW.
It's pretty hard to argue with a title when it is so carefully written.
:-)
I shoot sports for an agency, speed is critical. They want 5 photos before the game starts 20 at half time and 20 more within 10 minutes of the game ending. All athletes identified and the photos captioned. I shoot those as jpeg.
The article makes some interesting points, but it's like a French chef saying his Italian friend makes some good food, kind of... it seems like. Maybe you should try that maybe. Wouldn't the article benefit from the input of someone who shoots jpeg?
BTW I shoot my landscapes and street photography as RAW. I shoot my kids birthday parties as jpeg. There is no law against using the right tool for the right job.
I agree with the last part of the article.
Thanks. Carl.