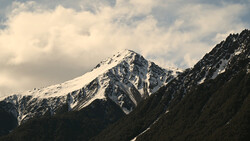
Understanding the raw editing process is fundamental for any new photographer, both to produce polished images and to establish a consistent and repeatable workflow. This helpful video tutorial will show you a four-step process for editing your photos in Lightroom.
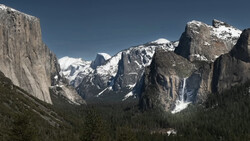
Coming to you from Christian Möhrle - The Phlog Photography, this awesome tutorial breaks down the raw editing process in Lightroom into four distinct steps: basic adjustments, local adjustments, color grading, and sharpening. The first step involves lens corrections, cropping, and global exposure adjustments. This is crucial because it lays the groundwork for the entire editing process by establishing the exact geometric proportions you'll be working with. The second step, local adjustments, allows for targeted editing. This step is vital for emphasizing or downplaying specific areas of the image, enhancing the overall composition and storytelling aspect of the photograph.
Color grading, the third step, is where creativity truly comes into play. This step allows photographers to set the mood and atmosphere of the image, playing with hues, saturation, and luminance to achieve the desired effect. The final step, sharpening, is essential for bringing out the details and ensuring the image looks crisp and clear. This tutorial demonstrates how each step builds upon the previous one, creating a cohesive and well-thought-out final image. Understanding this process is key to developing a consistent and effective editing style. Check out the video above for the full rundown from Möhrle.


Join the Fstoppers community for free
-
Post comments and join in the discussions
-
Browse the site ad-free
-
Share your work and get featured in the community
-
Compete in the photo contests for fun and prizes
1 Comment
Great video! Even an old photographer learned something, the last part in Photoshop (I never use) and content aware. I would have brought the sides in! The last thing would be to get the size back by using Topaz Gigapixel AI or any other program that has that ability. If just for web showing no real need. Today we have high pixel count cameras mainly for cropping and other things.
One thing few are aware of is once you finish in lightroom and click on the "Has Changed" part to get up to date part you then can open it again and select edit in another program, like Topaz Denoise and run it and go to Develop, then again you have all sliders zeroed to further to more! How it works now is you can increase exposure to get a brighter say night shot or even increase Texture or Clarity to bring out more stars but you now have noise again edit noise and again click "Has Changed".
The two images are the result of this. The original was even darker than the first. I was playing in the dark and put a Voigtlander 10mm f/5.6 on my A7s but in post I had noise got rid of but with the Denoise I went back to Develope and saw everything zeroed so increased Exposure and did some Texture and Clarity again. Now it was looking like a f/1.8 shot and the Milky Way I edited it more as well as the clouds but the brighter fort had more texture and color. The point is you can go over an image again and again for whatever reason.
This was like 2016 noise control was somewhat in the beginning. Lightroom did not have the option of sky, foreground or even subject. Half of working an image is playing which brings out discovery, Almost like a video game but better. Play some then walk away come back and play. Also different programs you get different results difference between PS and Lr.
My first step is to get rid of sensor dust for it gets worse as you go but also check for lens dust that is on the back of the lens it looks like a big blob and yes it is removable.