
It’s the middle of winter; everyone is looking a little pasty and pale, and you wish the subjects you are photographing had that healthy summer glow. So what do you do? Should you send them to a solarium or get a chemical spray? If you are a fan of black and white photography, this is a fantastic Lightroom technique that will give your subject a natural looking suntan.
Black and white photography offers a range of flexibility that color sometimes doesn’t allow. In the past, photographers shooting with black and white film used colored filters to alter the look and luminosity of their images. If they wanted darker skies, they would use an orange filter, and if they wanted darker skin, they would use a green filter. This Lightroom technique works in a very similar manner but with much more control.
This technique will vary in results depending on what other elements are in the image and the pigmentation of the person’s skin. Because you are shifting the tonal values of different colours, different areas will be affected, so it’s a good idea to pay attention to the entire image.
OK, here we go:
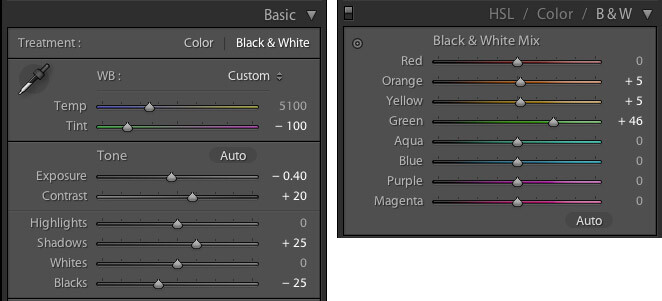
- Switch your image to Black and White mode (hit the "V" key).
- Drag your White Balance Tint slider towards the green spectrum. Set it to somewhere between -70 to -100.
- Go to the Black and White Mix panel and drag the Green slider up towards somewhere between +40 and +70. At this stage your image might look a little light.
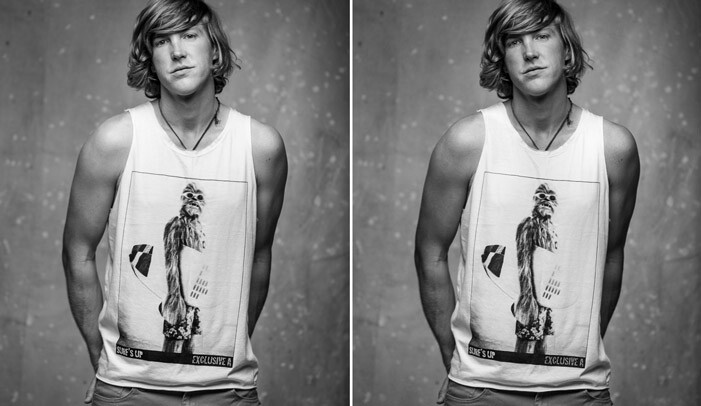
- Drag your Exposure slider down to darken the image. You should adjust this so the background looks like it did originally. Now the skin has its tan, but you may notice that the lips have gone a little too dark.
- To fix this, go back to the Black and White Mix and drag up the Yellow, Orange, and Red sliders to lighten these darker tones until the subject looks more natural.
Once this is done, you can apply what other contrast, curve, or toning adjustments you want. You can even apply this technique to black and white images you have already edited. Feel free to push the numbers beyond what I’ve suggested if it works for you. If you end up using this technique frequently, it’s a good idea to make a preset so you can preview the effect while editing.
Because everyone’s skin tones are different, it is important to adjust these settings according to each individual. It is possible to just drag the Orange slider down in the Black and White Mix to achieve a similar effect, however I find that it doesn’t leave you much control over the other areas like the lips and background.
Some other things to watch out for are strange artifacts and blotchy noise that can occur if you push some of the tones too far. Also, this technique can accentuate skin blemishes because you are darkening the skin, so a little more retouching and smoothing may be required. One positive is that blue-toned eyes tend to lighten with this effect which may be pleasing in contrast to the darker skin.
Like all forms of skin tans, it looks tacky if you overdo it. I mostly apply these adjustments to suit what the person is wearing or to compliment their surroundings. Use this new found power wisely.
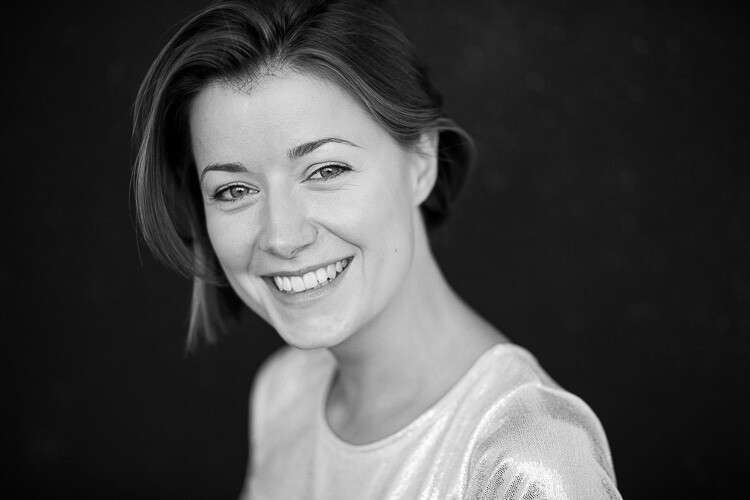
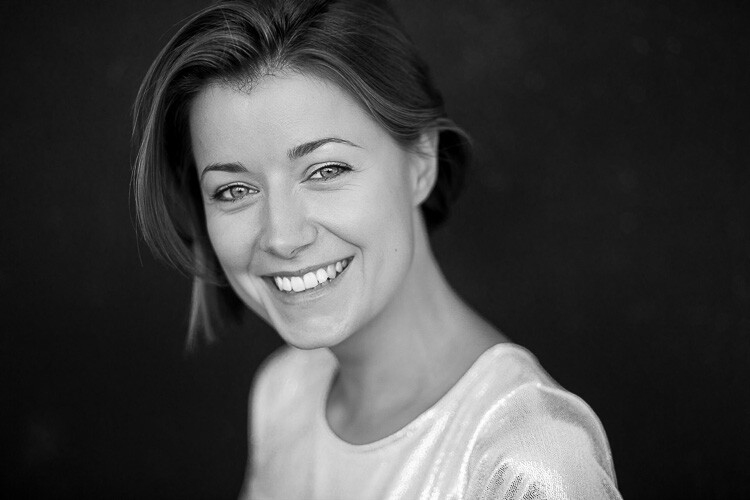
Another before and example of this technique. Note the eyes are lighter in the second image.
All photographs by Jason Lau.


Join the Fstoppers community for free
-
Post comments and join in the discussions
-
Browse the site ad-free
-
Share your work and get featured in the community
-
Compete in the photo contests for fun and prizes
12 Comments
Ooooo man, can't wait to add a digital sun tan to my Tinder default pic!
But seriously, good tip. Another good way in Photoshop is to add a Channel Mixer adjustment layer and choose the Blue Filter preset, then season to taste.
Good tip, but "healthy summer glow" it is not. Tanning is the worst thing you can do for your skin.
All the more reason to use photoshop or lightroom to do it instead.
Or better yet, get rid of the idea that burnt skin looks better.
Burnt skin doesn't look good. Tanned skin looks great to me though.
What looks great to me is clear, wrinkle free, and undamaged skin that keeps a person looking healthy and young. Do a Google search for UV photography and freckles so you'll see what those tans really look like, and lead to.
I don't care to look anything up; I have my preferences and that's that.
Tanning skin is damaging and dangerous to one's health. It would be wise to look beyond what is skin deep.
Dunno about you, but it looks deliscious on chicken!
I've used similar techniques to bring out freckles as well.
I'd like to see how to get rid of sunburned skin in photos. Plenty of weddings here in Florida and the clients with fair skin that come down here (sorry Northerners) get excited about warm weather tend to soak up the rays a bit too much before the big photo day and then are fried red.
Ought to re-name this the 'Boehner effect'. nuff said