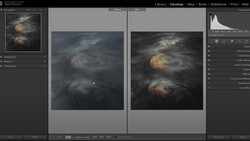
The histogram is one of the most useful tools available to any photographer, no matter the genre in which they shoot. You can do a lot more with it than simply reading the tonal content of your images, though. This excellent video tutorial will show you three lesser-known aspects of the histogram and how to use them in Lightroom or Camera Raw to get more out of your image edits.
Coming to you from Blake Rudis from f64 Academy, this great video tutorial will show you some of the deeper aspects of working with the histogram in Lightroom and Camera Raw. If you have not started using the histogram in your work, it is definitely worth at least learning the basics of it. The clipping indicators are particularly useful, and I use them on almost every image I edit. They make it extremely easy to ensure that you are not clipping the highlights or shadows anywhere in your photo and to adjust them to just barely bring them back if you want maximum range, as it can be a bit tricky to tell the difference between values that are almost clipped and those that actually are just by sight. Check out the video above for the full rundown from Rudis.


Join the Fstoppers community for free
-
Post comments and join in the discussions
-
Browse the site ad-free
-
Share your work and get featured in the community
-
Compete in the photo contests for fun and prizes
No comments yet