Lightroom Classic landscape masking can save you from tedious brush work, but it can also make confident mistakes that you have to catch fast. If you edit outdoor scenes, it changes how quickly you can isolate problem areas like sky bleed, muddy snow, or uneven water tones.
Coming to you from Mickey Pullen with Eastern Shore Photo Instruction, this hands-on video walks through the Select Landscape mask in Adobe Lightroom Classic and shows what it really selects. Pullen breaks down the eight elements Lightroom Classic can detect: Sky, Mountains, Architecture, Vegetation, Water, Snow, Natural Ground, and Artificial Ground. The key constraint is blunt: you do not get to “tell” the AI what something is, so you have to judge whether the result is usable before you touch any sliders. You also get a choice that matters more than it sounds, creating one combined mask or creating separate masks for each detected element. If you often build masks in layers, that separate-mask option can keep you from painting yourself into a corner later.
The most useful part is how Pullen treats landscape masks as cleanup tools, not just “mask the sky, darken it, done.” You see a practical routine for checking a mask in “white on black” so you can spot stray gray edges before they turn into halos. You also get a clear example of subtracting one landscape element from another, like subtracting Mountains from a Sky mask to tighten the ridge line without spending five minutes brushing. The video also shows why subtraction choices matter: if Mountains includes Snow in your file, subtracting Mountains from Snow can wipe out the very area you meant to adjust. When you start thinking in overlaps instead of labels, you stop trusting the name of the mask and start trusting what it actually covered.
One of the smarter moves comes when the landscape mask gives you only Sky, Vegetation, and Water, but the real target is the people sitting in kayaks. Pullen uses the Water mask, duplicates it, inverts it, and suddenly you have a rough “people” mask without trying to select each subject one by one. Then the cleanup stays simple: a quick linear gradient subtraction to drop the sky and banks, and a fast brush pass to remove any leftover junk along edges. That approach is a reminder that you do not have to accept the obvious use of a tool when the faster path is hiding in an invert button.
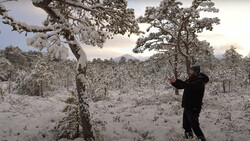
Later, the video gets into the kind of problems that usually show up after you think you are finished. You see how a sky adjustment can create glow around buildings, and how brushing with Auto Mask can patch the selection without smearing onto Architecture, as long as the crosshair stays where you want the sampling to come from. There is also a sequence where snow appears in two separate places, which forces a more careful split so one adjustment does not contaminate another. Pullen brings in color range subtraction to carve snow away from mountains, then uses a different mask to work the mountain tone without dragging the snow along with it. He also shows what happens when you remove spots and your AI masks fall out of sync, and why “Update” is not optional if you want the selections to match the file you are actually editing. Check out the video above for the full rundown from Pullen.




Join the Fstoppers community for free
-
Post comments and join in the discussions
-
Browse the site ad-free
-
Share your work and get featured in the community
-
Compete in the photo contests for fun and prizes
No comments yet