
RadioPopper just released their new mid-range set of triggers – the Jr2 system. It’s a complete overhaul of their much successful JrX system with some additional new features like 4 groups, stop-accurate remote power adjustments and 4 memory locations. The transmitter is completely backwards compatible with all previous RadioPopper products and can remotely power all Canon and Nikon flashes as well as Paul C. Buff and Photogenic monolights. Like me, you probably already have an off-camera flash triggering system you’re used to and using regularly… but the Jr2 may very well have you switching triggers!
As a wedding and portrait photographer, I tend to have a lot of lights, triggers, stands and modifiers. That’s just the way I roll. Some people love the natural light, and hey, sometimes I go au naturel as well. But usually for me, there’s a very satisfying feeling of having complete control of the light within my images. So in order to successfully take advantage of that much creative control, I need a reliable system of radio transmitters & receivers.
I’ve tried the Joe McNally way of letting your camera figure out what you need through the lens, but not knowing exact numbers and bouncing infrared signals by direct line-of-sight always felt clunky to me. The only time I work TTL with my light, and the only time I’m firing a flash from off the top of my camera, is during dynamic wedding environments like a ceremony or reception. Even then I’m usually utilizing off-camera, non-TTL lights as well… but I mostly go manual. I figure out the ambient light, I figure out the key light, and then I build everything else from there. This doesn’t require much more than a system that sends a signal from my camera to my light. I snap, it fires, simple! It's only been over the past year I've been craving more – more like groupings of lights, remote power control, and custom memory recall. The RadioPopper Jr2 has it all!
What It's All About
What Comes In the Box
The transmitter unpacks pretty simply with 2 AAA batteries and a USB cord for firmware updates.
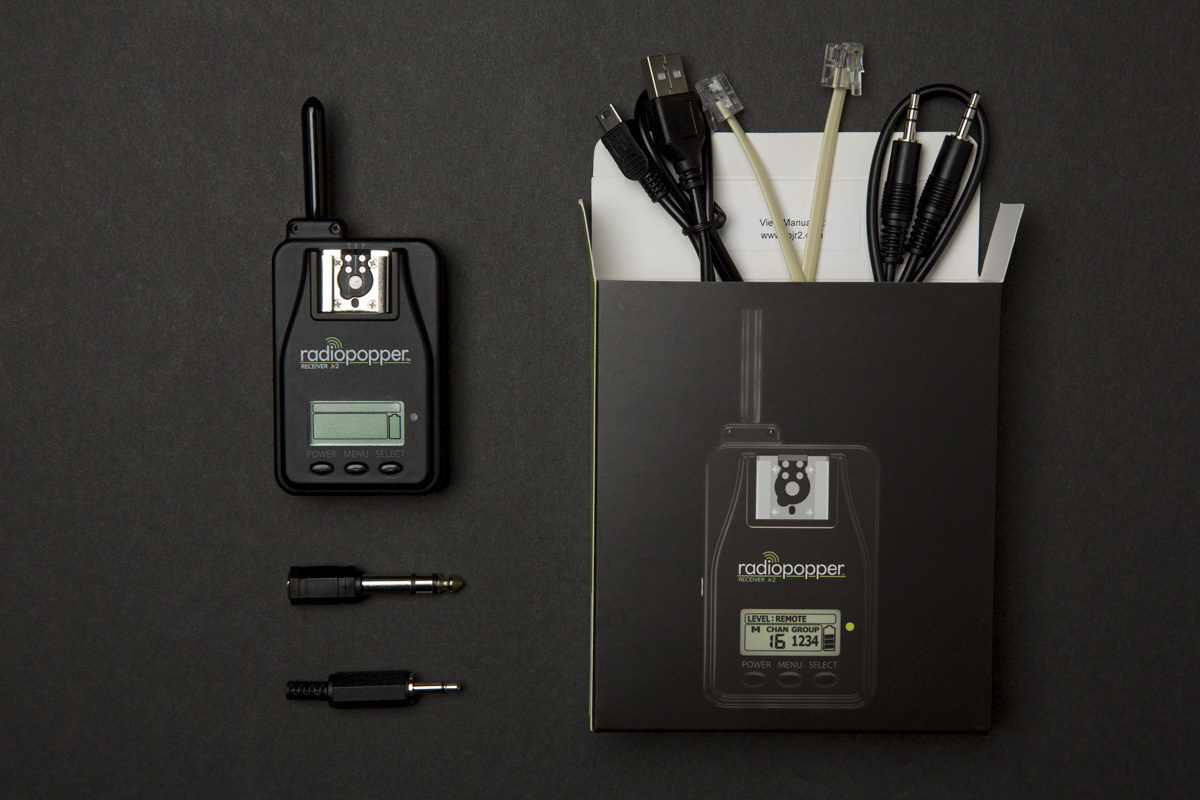
The receiver comes with more. It's packaged with the same 2 AAA batteries and USB cord for firmware updates, a standard 3.5mm sync cord, a phono plug adaptor, a 3.5mm mono solder type head and an RJ12 4 conductor phone cord (as well as a warning paper - not pictured).
How Receivers Connect

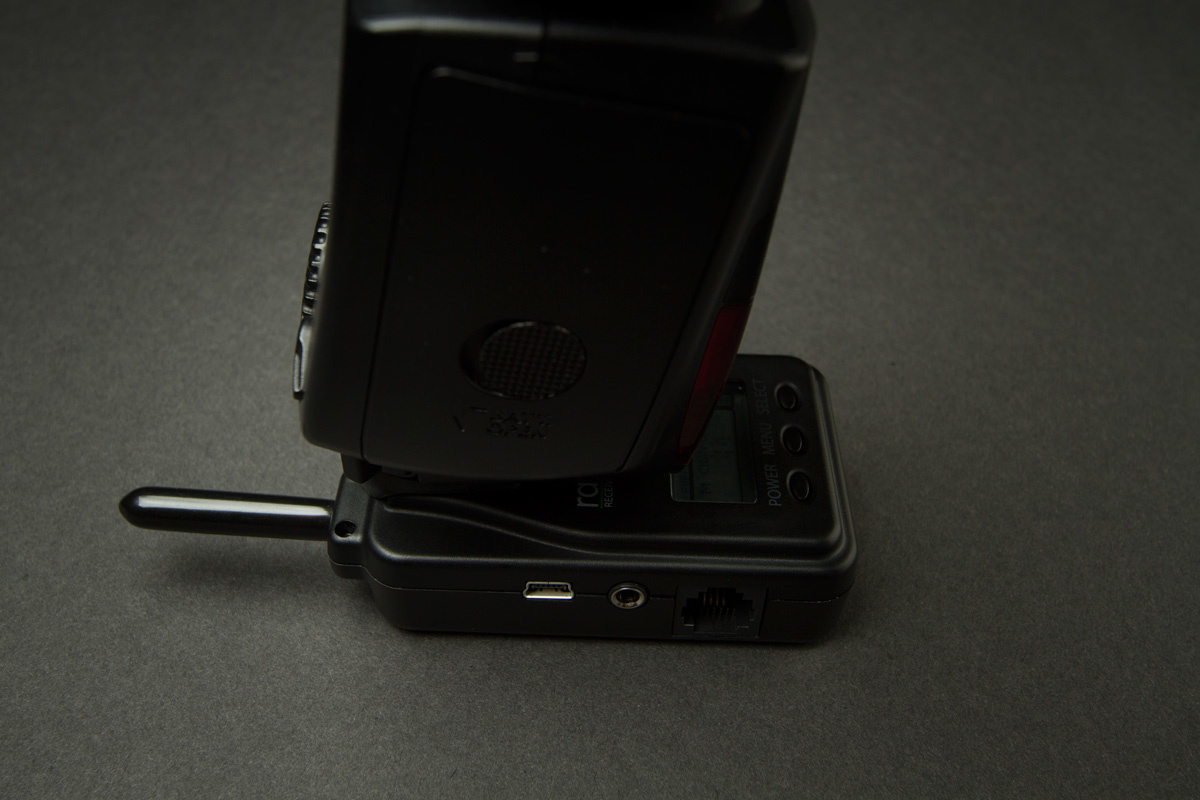
You simply just slide your speedlight right on to the hotshoe connector of the receiver, turn on the receiver, hold the Select button to change from Local to Remote (which allows you to remotely control the flash) and you should see a low power flash emit notifying you that your flash is now being controlled. You can always hold the Select button to change back to Local mode if you don't want to use the remote-control feature on the transmitter. This is the same as connecting the flash to the trigger via a PC to 3.5mm cord as well. Now you can set which channel and group number you want to use before you connect your speedlight or even once it's on - there's enough room for most fingers.
I have Einstein monolights but once really enjoyed AlienBees. You can see above in picture two the phone cord connects on the left side of the receiver. Plug one side there and the other right into your AlienBee for remote control access. The same low-powered flash will emit once you hold the Select button to change from Local to Remote and then you'll be in business.
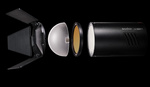
RadioPopper recently released the Einstein E640 module too!


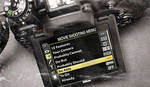
It's really easy to use: just plug the module directly into your Einstein monolight up top and then select the channel and group number (noted as "zones") within the Einstein's menu to correspond to your transmitter's channel and group number. This is a quick setup if you're only using 3 groups. If you need 4, it just takes a little more to set, but it's still pretty easy to understand. These are the directions included with the Einstein module.
If you only need 3 groups:
If you will be using between one and three lighting groups, on the display of your E640 light, use the "C-TL" channels 1 through 16 to set the radio channel. Zones A, B, C on the E640 correspond to the RadioPopper groups 1, 2, 3 on your Jr2 transmitter. Easy. :-)
If you need 4 groups:
If you'd like to use 4 groups in your setup, it's a bit more complicated. You'll need to set the radio channel on your E640 between 16 and 32 to cause the "D" zone to become enabled on the E640 light. These channels 16 to 32 actually map to the RadioPopper channels 1 to 16. (E640 channel 16 is actually RadioPopper channel 1, E640 channel 17 is actually RadioPopper channel 2, etc.)
How the Transmitter Connects
Attach it to the hotshoe connector at the top of your camera. Easy peasy... unless you're a wedding photographer. I always have a speedlight on my camera for those moments I'm running and gunning around indoor ceremony and reception locations. Sometimes you have to pop off some on-camera flash. Hey, don't judge me! It happens. I'm usually bouncing it off a wall to make it more dramatic, but still... I need that option. So where do you connect the transmitter if you've connected a flash on your hotshoe already?
You need a camera with a PC sync terminal.
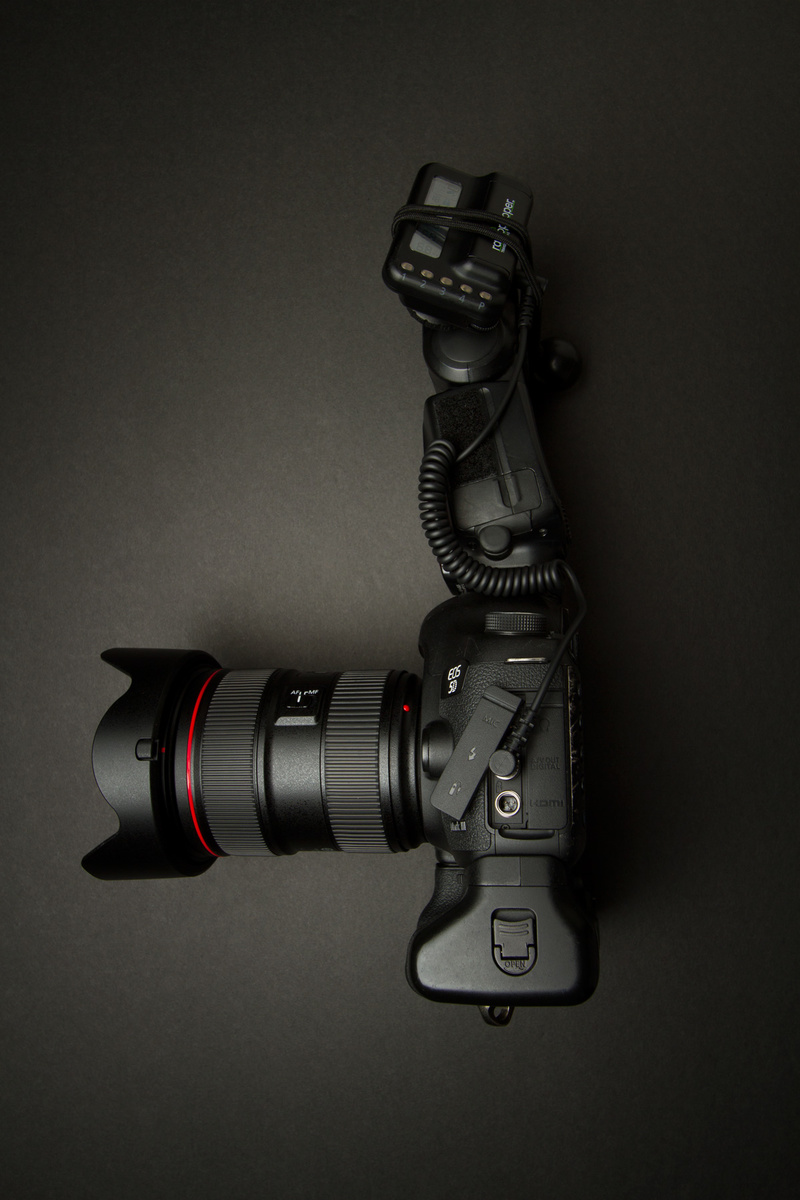
The PC terminal is on the left side of the camera when looking from the back towards the viewfinder. It's between the microphone and shutter release on the Canon 5D Mark III. You'll need a PC to 3.5mm cord to connect your camera body to your RadioPopper Jr2 transmitter. This allows you to have your on-camera flash enabled in TTL mode along with your transmitter connected to your off-camera manual flashes - both firing off together in sync!
I just attached the transmitter to my flash with a ball bungee cord, but you could use any number of methods including Velcro or a flash bracket.
Groups
So now you're all set. You've attached your transmitter. You've attached your receivers. Go ahead and select a channel for everything to run on. Go ahead and group your lights. Maybe you want to separate your dance floor lights from the lights you're using outside at a wedding. Maybe you want to separate every light you're using on a portrait shoot: key, fill, hair, background. Go ahead. You have four groups to separate everything into! Now you'll be able to selectively turn them on or off whenever you need to with the simple push of a button on the transmitter.

Here's group one (light on the left) and group two (light on the right) at one of my wedding receptions. Note that the entire foreground is being lit with my on-camera flash bouncing up and out with a bounce card via the setup I've previously shown above.

Now I shut off group one (light on the left) with a simple touch of the button. Why would you want to do this? Maybe you're on the dance floor and have a flash on-camera that you're using as your key light. If you get in front of people within the direct line of group one, you'd either want to turn it off or turn your on-camera flash off as both together will probably over-expose your image. I prefer to turn off the grouped light, as it tends to be a harder light, and I prefer to bounce a larger, softer, light on to my subjects. It's really up to you. Canon speedlights have a simple switch to turn them on and off without even having to look if you need to. I do this for a silhouette effect sometimes. You have a great number of options right at your fingertips with this system!
Remote Power Adjustment
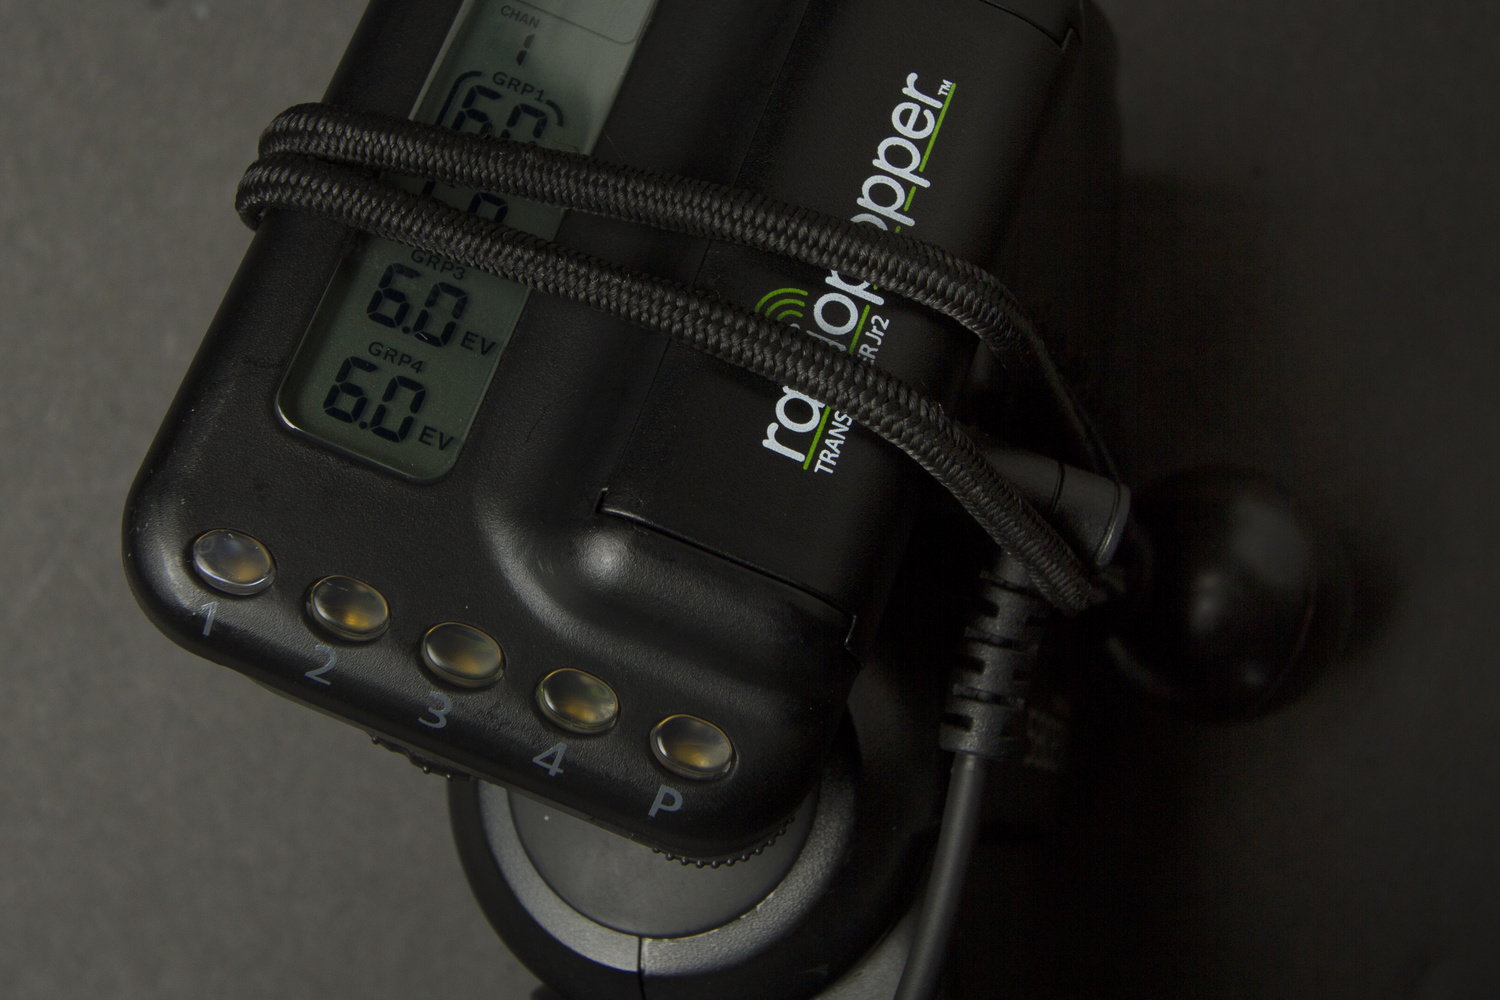
What if you want to adjust the power of your light remotely? It's super simple. Once your receiver is controlling your light, all you have to do is target that light with a simple double-push of the group button and the led on the transmitter's group button turns white. Or you can scroll through each group by pressing the corner scroll wheel in. This allows rotation through each group as well as total group selection. Selecting all groups at once is perfect for after you've adjusted your ISO or aperture. What a quick way to make a global change! Simply scroll the corner exposure wheel and you're adjusting the light output! 9.0 represents 1/1 full power and you can set the transmitter to adjust in 1/10 or 1/3 stop increments. Look at the example below.
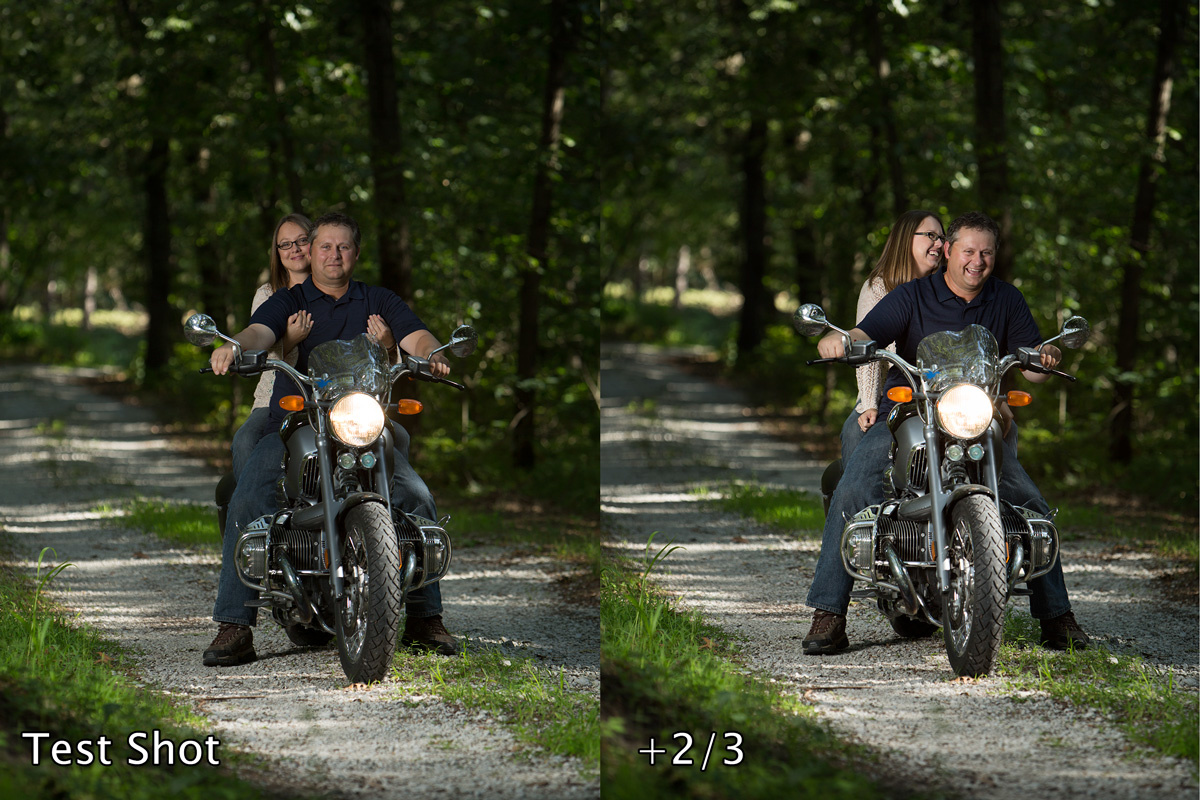
I was about 100 feet away shooting at around 150mm with an assistant holding my light in a softbox just outside of frame, camera left. I started with my power settings on my transmitter at 6.0 or three stops down from full power (9.0) at 1/8 on my Einstein inside of a 60" Photek Softlighter II. With an assistant, I could easily yell out what to change the power setting to. Without an assistant, I could easily walk over and change the setting myself. But, with the ability to change the power setting directly from my position, I was able to look at my test shot, keep talking with my subjects, engage them in a meaningful way, adjust the exposure by 2/3 of a stop brighter, and capture the moment all within a matter of seconds. Sure, I could have adjusted the exposure in post. I was pretty close in my test shot, but that's just a lazy way of thinking... and I would have brightened the entire scene or I would have had to spend a lot of time masking in an exposure adjustment. Remote power control allowed me to be in the moment with my clients, keeping them interested, and adjusting the power output on my light without missing a beat. Sweet deal!
The Specs and Pricing
Jr2 Transmitter
- Dimensions: 1.75” x 2.25” x 1.25” (45mm x 57mm x 30mm)
- Weight: 1.7 ounces / 48 grams (Including battery)
- Battery: Two "AAA" Size Batteries
- Battery Life: Approx 20 Hours total power-on time. We suggest use of Lithium or NiMH rechargeable batteries.
- Radio Frequency: 902-928 Mhz, ISM Band (CE version: 868-868.6 Mhz)
- Radio Range: 300 ft to 1750 ft depending on conditions and environment.
- Maximum Sync Speed: 1/250 Shutter Speed for cameras having leaf shutters
Jr2 Receiver
- Dimensions: 4.0” x 1.75” x 1.2” (100mm x 45mm x 30mm)
- Weight: 1.9 ounces / 53 grams (Including battery)
- Battery: Two "AAA" Size Batteries
- Battery Life: Approx 8-10 Hours total power-on time. We suggest use of Lithium or NiMH rechargeable batteries.
- Radio Frequency: 902-928 Mhz, ISM Band (CE version: 868-868.6 Mhz)
- Radio Range: 300 ft to 1750 ft depending on conditions and environment
Sekonic Module
- Sekonic Compatibility: L-358, L-758D, L-758DR, L-758Cine, and C-500R light meters
- Allows the Sekonic meter to wirelessly trigger Nano and JrX Receivers on any RadioPopper radio channel.
RadioPopper Einstein Receiver
The Einstein Receiver allows remote triggering and remote power control of the Einstein E640 light. Simply attach the RP Einstein Receiver to the port on the top of the E640 light and you're all set. The Einstein Receiver is powered directly from the E640 and is configured using the display on the E640. A Jr2 Transmitter is required to control power levels of the attached E640 light, though it may be triggered by any RadioPopper transmitter (Jr2, PX, JrX, Nano).
- No batteries required
- Stop accurate power control of the E640 light
- Assigned to one of 4 groups/zones.
- Supports all 16 RadioPopper channels
RadioPopper Photogenic Receiver
Coming soon...
The Wrap Up
I'm really impressed with this system of wireless flash triggers. Here's a breakdown of what I love and what could be improved.
What I Loved
- Groups: I own Pocket Wizard Plus III transceivers and the addition of zones (or groups) is something I couldn't think about being without again. The RadioPopper Jr2 groups allow you to separate your lights in a very intuitive way. The easy to see / push buttons on the transmitter blows the Pocket Wizards away. I'm always fumbling to find the correct button in dark locations with my PWs. RadioPopper did a great job of lighting the groups you have activated. Kudos to them!
- Remote Power Control: Although the JrX already had this feature, I feel like pointing it out again because the Pocket Wizard Plus III does not. You can find remote power in many of the cheaper made triggers out there, so again, I think RadioPopper wins against the triggers I'm already using. I love the idea of being able to stay engaged with my clients instead of yelling commands to my assistant or fidgeting with gear. If RadioPopper can start controlling the Lumopro LP180 or Yongnuo Canon / Nikon clones (cheaper off-camera speedlight alternatives many people use), these triggers would be unstoppable!
- Programmable Memory: Just like my camera, I'm able to save settings with the RadioPopper Jr2. I love the idea of locking in my settings for, let's say, a reception hall and then another set for the ceremony site (which is often near by), and even another set for whatever else I'm doing at a wedding (on-location portraits, getting ready shots, etc.). That's exactly the way I program my camera, so having the same ability with my triggers is an awesome feature - especially for wedding shooters!
What Could Be Improved
- Build: Don't get me wrong... these badboys are a huge step up from the JrX build. Still, I'm not a fan of the floppy antenna and no easy way to hang them from monolights. My Pocket Wizard Plus IIIs have the antenna within the hard shell plastic now, plus they have a lanyard that is great to hang from my light stands. I'm sure some Velcro would solve this dilemma, but it's an easy addition RadioPopper missed. Also, The Jr2 has a slide off battery compartment and I love the swing door on the PW IIIs. If there's a plastic part to lose, I'll lose it. Although the transmitter has a nice backlit screen, the receivers do not and are very hard to see and operate in dark environments. Also I love a blinking "on" signifier with my triggers. The Pocket Wizards have a very visible blinking LED that allows you to know when it's on, where it's at by sight, and when it's being accessed, it blinks brighter. This might be something RadioPopper can add via the firmware, but I work in darker locations so being able to have these visual clues is highly appreciated. An included PC to 3.5mm cord would be nice too for those who want to have a speedlight on-camera. The plastic itself seems well built and solid, but only time will tell how rough and rugged these really are.
- AAA Batteries: This isn't a huge deal breaker or anything, but I wanted to at least mention it because it's a personal annoyance of mine for sure. I have tons of Eneloop rechargable AA batteries for my speedlights and I don't want to have to buy a completely different battery for my triggers. I want to be able to grab a pack or three on the go and be able to swap batteries between lights and triggers in a pinch. Plus the AA batteries add some heft and make my Pocket Wizard Plus IIIs just seem more solid when installed.
RadioPopper really put together a great set of triggers with the Jr2 system. Priced $20 cheaper than Pocket Wizard Plus IIIs, they're big competition - especially with the ability of remote power control. Both brands have pros and cons, but I was honestly impressed working with these. They're not perfect. If the improvements I mentioned are addressed in the next iteration, then I really think we'll have a new heavy weight world champion in the radio trigger world! They do, however, totally kill the cheap triggers touting similar features out there. So if that's your comparison, don't even hesitate. Buy these now!
If you're a wedding and portrait photographer like me, you might want to take a good look into these as an alternative to Pocket Wizards. After a week with these, I'm weighing options between them both right now and I'm really still not sure which way I'm headed... let that speak to the quality that RadioPopper put into these. If you're just starting out with off-camera lighting, you're going to fall in love with the Jr2 and won't be disappointed in the least.
You can find out more information on the Jr2 system directly at the RadioPopper website and purchase them right through B&H Camera Shop.


I have been using the JRX studio unit every day in the studio for over a year.
I got this new unit, I'll reserve my judgement until they replace my trigger that has a tendency to...not turn on.
When it did work, it was cool.
Double tap to adjust power is BS, I want to double tap to turn off a light and single tap to adjust. I'm very hopeful thanx to the software upgrade capability!
Just need to get Laurent on the phone, best customer service dude in the world!
Glad to hear customer service is taking good care of you!
Laurent is awesome! I hope he's reading this article. I love the customer service I get from radio popper.
Same!
Laurent, expect a call from me as soon as I have time :)
Totally agree on double tap! It's so anoing!
These 3M fasteners come in handy for attaching receivers to lights:
http://www.amazon.com/dp/B004MEDFCA/ref=sr_ph?ie=UTF8&qid=1410541354&sr=...
I glued one end permanently to each of my lights, and glued the other on a Frio cold shoe. The receiver goes securely in the cold shoe, wire connects to the light. I use glue because the fasteners are very strong and it's easy for one to pull the other off an object.
This way, the receivers always have a secure home with no flopping around.
Great tip, man! Thanks for sharing!!
If I secure the transmitter to my on camera flash (Fuji X-T1 - Fuji flash) could this operate my 2 off camera Canon 600's on light stands without having to buy each one a receiver considering they have radio triggers built in already ?
Set one flash to master and the other to slave, and see if you can trigger the slaved flash by popping the master flash manually (both off camera).
I always thought the radio triggering (and IR in the past) depended on one flash being a master on the camera and the other flash off camera being commanded by the master on camera flash (or an ST-E2). So I'm thinking if one flash can trigger the other independent of it being on a canon camera, you could in theory just use one trigger/receiver setup to work those two flashes.
No. Not that I'm aware of.
I assume since these are universal there is no "auto" adjustment capability of them? I know one of their competitors actually connects to the camera via TTL type information and will adjust the power up and down based on changes to ISO it reads from the camera. Is there a way to adjust the output of all of the flashes together (for example when you change ISO significantly?)
No auto adjustment, but there is a nice "select all" feature that will allow you to adjust all groups at once for global instances like ISO or aperture change. You'll definitely like that - I know I do!
I've affixed industrial velcro to all my speedlights, strobes, and receivers. Securing the receivers hasn't proven to be a major knock and I wasn't a huge fan of the lanyards on my pocket wizards anyway, as I velcro'd those as well.
I like the lanyards as a fail-safe to velcro or bungee cords. It's nice to know it won't fall to the ground if it gets loose for some reason.
These look great. If they had high speed sync, I'd buy four.
Great! I was looking for a new Trigger
Did I read "Alienbees remote control access?" Does this mean that you can control the output remotely when using the phone cord with these triggers? Or, is this just an alternative to firing the flash than using the mini 3.5mm jack?
Yep, you sure did! Plug the phone cord in your Alienbee and in a receiver and you're good to go!
I agree with the comments above. I would like to see RadioPopper build in a hyper-sync function like PW's so I can exceed my sync speed up to 1/800th or greater to control that ambient and fire off my Einstein's for those overpowering shots (and not use an ND filter). Having the ability to shoot at 1000th of a second, with an Einstein as a key light and grouping other speedlights for other creative tasks would be top-notch!
Do you know if they can adjust the power through the whole power range of the Einsteins? The PW's need to be bias towards the higher output or lower with the ability to control only 6 stops out of the range, which is annoying, especially when going from outside to inside not having to use the higher watt seconds inside. I've switched from PWs to poppers back to PWs 3 times haha
Full 9 stop range, Stevie!
I have heard that the jr2 receivers had a problem with battery drain, leading to inconsistent performance.
Has anybody experienced this themselves?
Aaron, how about you?
thanks...
Haven't noticed that on my end at all...
Battary dies really fast on new JR2
Another question (sorry everybody, I'm new to this forum):
Has anybody had success with controlling a Phottex Mitros
(Nikon version) with the jr2?
Not sure about Mitros, but JR2 can't control Nikon Sb 24, Sb 28 and Sb 80DX, very disappointing.
Going back to JR 1st generation
I tried the new Radio Popper receiver for the Einstein and, so far, while I can trigger the strobe I cannot control the output using the RX transmitter. Does the Einstein require certain power settings to enable it to work?