Learn how to remove chromatic aberration (color fringing) manually in Lightroom Classic for the most accurate results.
It's incredibly difficult to create the perfect lens glass. Not only does it have to be capable of focusing light sharply to a fixed point (the image sensor or film), but it also needs to converge different wavelengths of light all to the same point. If the lens in question also has a zoom function, the complexity of keeping every wavelength of light sharp simultaneously is increasingly tricky. That's why on lower-budget lenses with inferior glass it's more common to see chromatic aberration — color fringing around contrasty edges in a photograph.
It's more obvious with cheaper lenses, but you may also see this issue on more expensive lenses, too. Camera manufacturers try to combat this with corrective glass inside the lens, superior grinding, and multiple layers of lens coatings that help to focus the light entering the lens without causing distortion.
Normally, when working to remove chromatic aberration in Lightroom Classic, we can just tick a single button and be done with it, but occasionally, this doesn't work. I'll go over why this is and walk through some manual options to help remove tricky color fringing from photos without the automatic help of Lightroom.
The Problem Areas

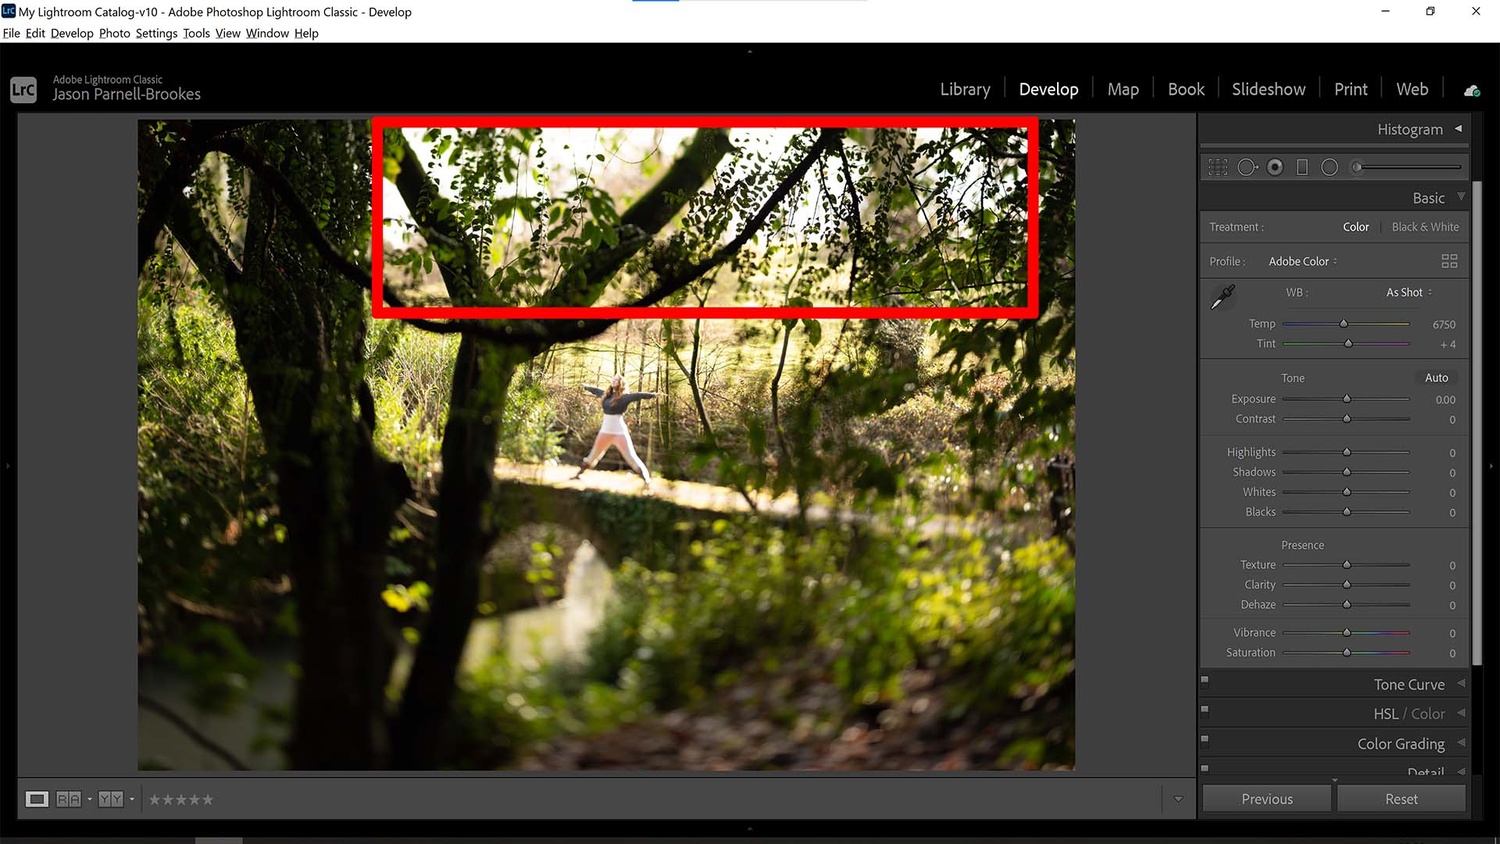
The areas of deep contrast (between bright highlights and dark shadows) in this photo cause the most issues when it comes to chromatic aberration.
In the example photograph I'll be using, we can see an area in the top-right of the frame, where dark, shadowy foliage is silhouetted up against a bright, overcast sky. This kind of extreme contrast between light and dark creates the perfect conditions for color fringing to rear its ugly head. Let's take a look at how we can remove it.
Lens Corrections Panel

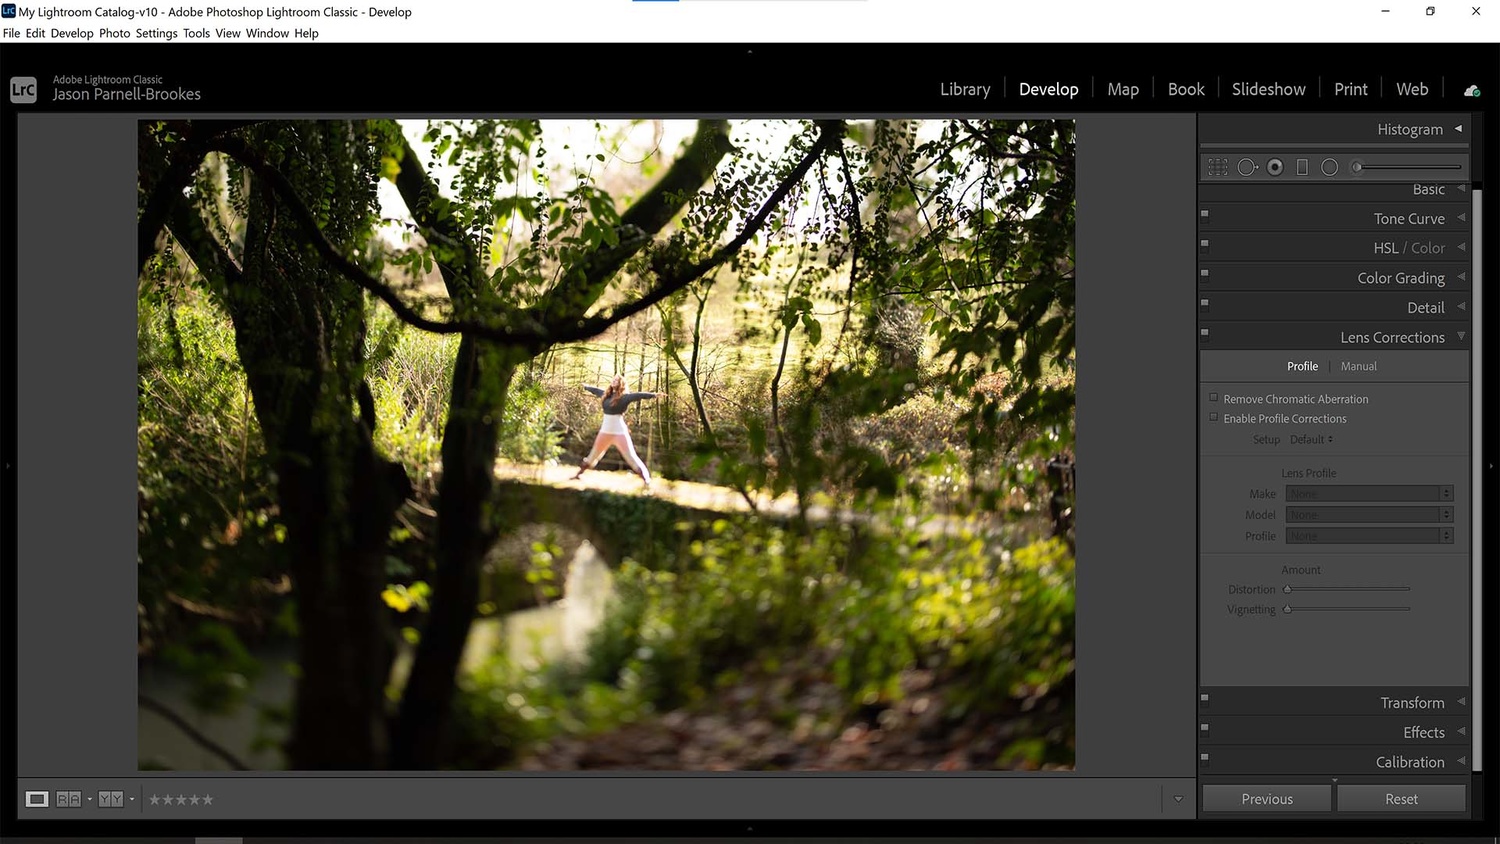
The Lens Corrections panel in the Develop module is where you'll find the options to remove chromatic aberration and make automatic optical changes to the photo based on metadata in the file.
In the Develop module, head down to the Lens Corrections panel. Under the Profile tab, there are two options for making corrections: Remove Chromatic Aberration (our most important tool) and Enable Profile Corrections. We'll attempt to use the former tool first to try and remove the color fringing automatically.
A Closer Look

Zooming in on the photo, we can see color fringing running around the edges of the leaves and branches on the foliage.
Zooming in to 100%, we can see that the chromatic aberration occurs around the branches, the smaller twigs, and the leaves that dangle in front of the bright sky. Where the same foliage meets the greener backdrop, we have less of this problem. There are blues, purples, and reds glowing around the edges of high contrast.
Remove Chromatic Aberration Does Nothing

Normally, the Remove Chromatic Aberration button works well to remove the color fringing, but here, it does nothing.
Compare this image to the one before, and it's obvious that the Remove Chromatic Aberration tick box does nothing to remove the color fringing from the problem areas. The same colors are still there. So, what's our next move?
No Lens on List

When the Enable Profile Corrections button doesn't automatically sync up with the metadata, you can search for it manually from the drop-down list, but occasionally, the lens isn't listed.
Sometimes, it helps to turn on Enable Profile Corrections to remind Lightroom of the metadata and thereby correct any optical issues that may be associated with the lens you're shooting on. However, the corrections didn't automatically synchronize with any lens from Lightroom's list. So naturally, the next move would be to go in manually to select the correct lens, but again, my lens wasn't listed. This happens occasionally, depending on how uncommon the lens is.
Fringe Color Selector

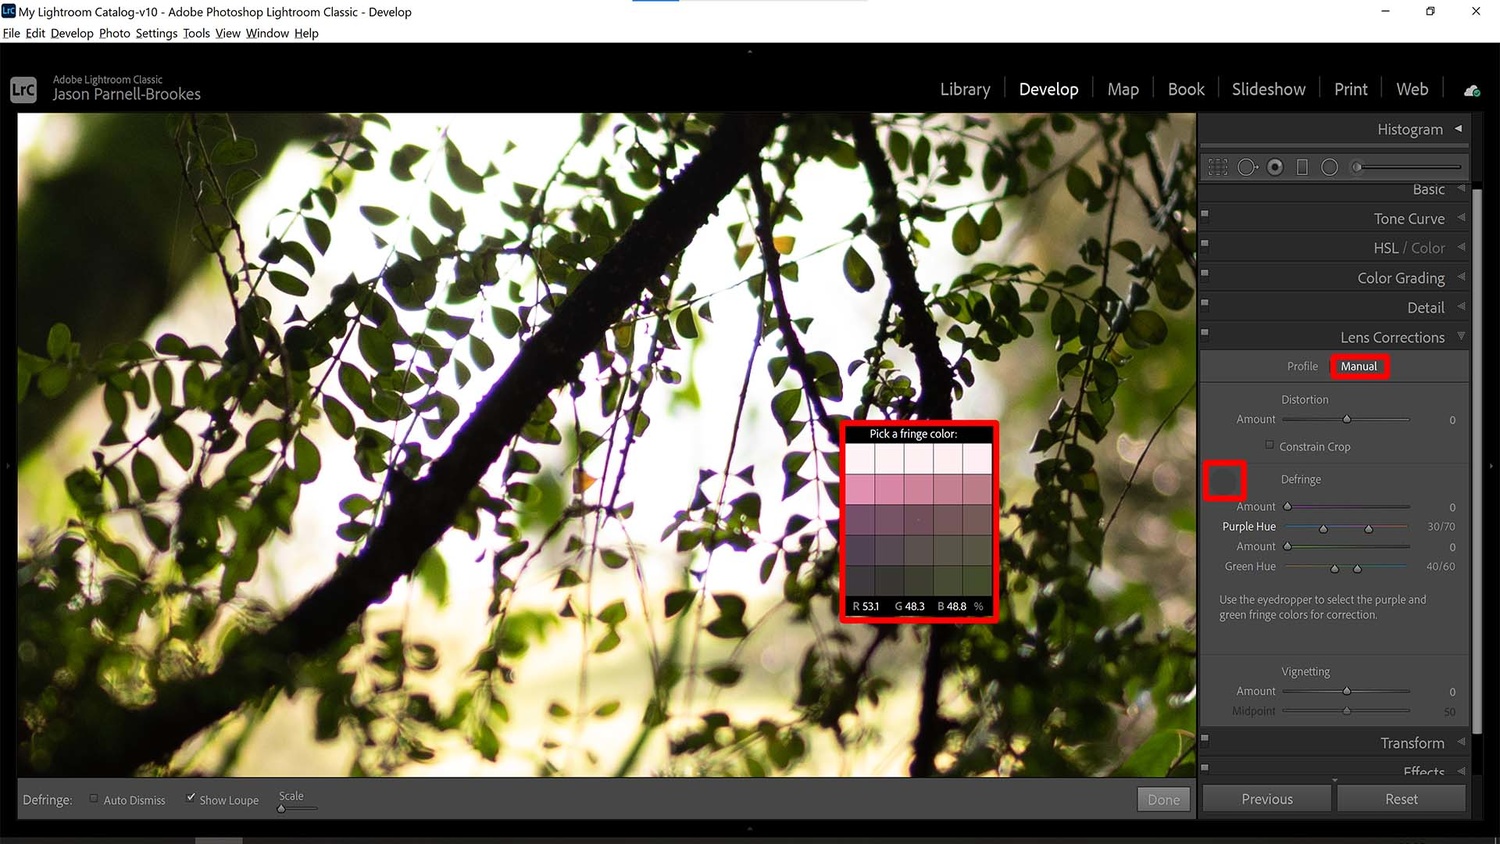
The Fringe Color Selector acts like an eyedropper tool, which allows the user to select the color they intend to remove from the photo.
While still in the Lens Corrections panel, switch over to the Manual tab, and you'll be greeted with plenty of colorful sliders. Ignore them for now, and instead, use the Fringe Color Selector tool (which looks like an eyedropper) and move it over the image. Lightroom will flash up a box that shows the pixel-level zoom of the Fringe Color Selector. From here, it's much easier to navigate to the correct color fringe. Click on the color you want to remove, and Lightroom Classic will then subtract this from your photo.
Fringe Color Selector Result

The removal of the color fringing is good at first glance, but a closer look shows that there are still strokes of color yet to be removed.
The Fringe Color Selector does a pretty good job at removing the selected color fringing, and most of the branches and leaves are now clear of aberrations. However, as you can see on the larger branch to the left and some of the thicker sections, there's still some blue and purple fringing that remains.
Amount and Hue Change

Make adjustments to the sliders to increase the amount intensity, and widen the color range for more accurate results
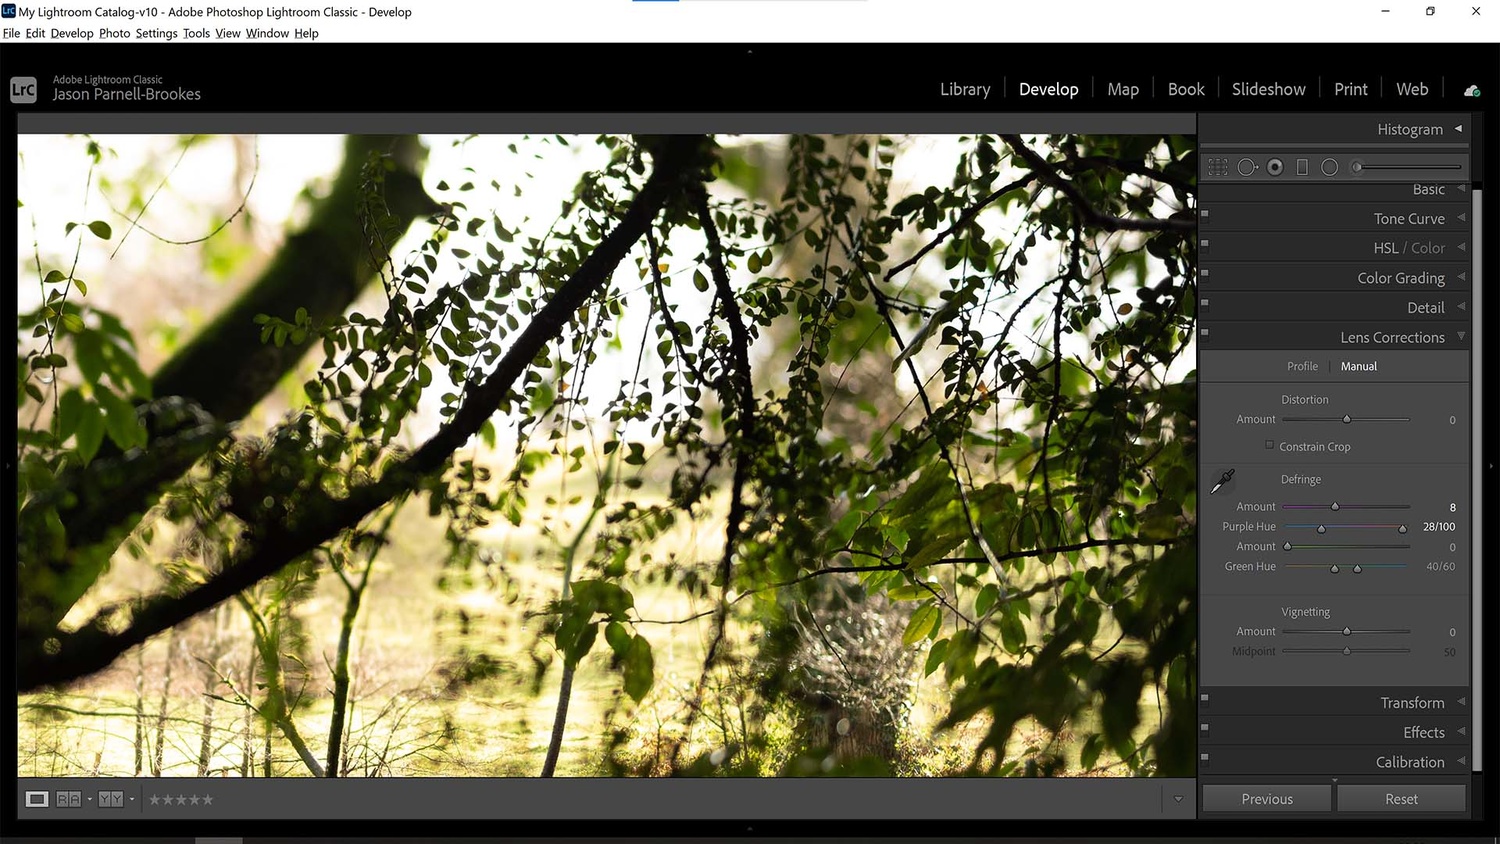
Now, it's time to make some adjustments to the sliders. Under the Defringe section, I increased the Amount slider up to +8 in order to remove more of the color from the photo. I then also expanded the Purple Hue range to capture more of the blue and magenta tones in the aberrations. This has improved things significantly, and now, there is almost no chromatic aberration in the photo whatsoever.
A Wider View

With a wide view, we can see that the photo is now devoid of color fringing and looks much cleaner in the high-contrast areas.
At this point, I like to zoom back out to take a wider look at the photo. I do this to make sure that the process hasn't disrupted the colors in the rest of the photo as well. From here, the other colors look great and haven't made a noticeable impact. If you find there are issues at this point, then make adjustments to the Amount and Hue sliders.
Before and After
Use the slider in the image above to view the difference before and after the manual corrections. As you can see, although the automatic chromatic aberration tool didn't work, the manual approach created a fantastic result.
Close-Up Look
An even closer look at the before and after shots demonstrates that manual chromatic aberration removal isn't about making do, but rather a much more selective and precise way to remove color fringing. Sure, it might take a little longer than simply ticking one box, but in a matter of seconds, the manual adjustments can be an advantageous tool to enhance clarity in your photos.


