
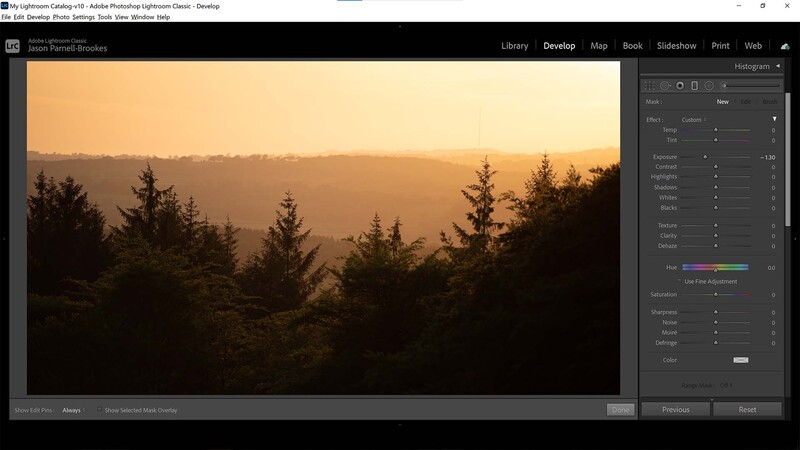
Lightroom's graduated filter is like magic, offering incredible editing options from the comfort of your own home, but it's not perfect. Take a whisk through these top six ways to improve the graduated filter for better image editing success.
Using physical filters in the real world is great for getting photographs looking good in-camera and I'm all for doing things right at the source. However, Lightroom Classic's graduated filter is so powerful that I sort of don't want to use real filters anymore. With the advent of artificial intelligence now creeping into Adobe suite software, we might even see these kinds of filters replacing real-world filters.
There is still a little tweaking to do in order to get things looking right though, so I'm going to take you through six of the best ways to tweak Lightroom's graduated filter to make your photos look great and encourage you to leave the real filters in the camera bag.
Don't Overlap
Location, Location, Location
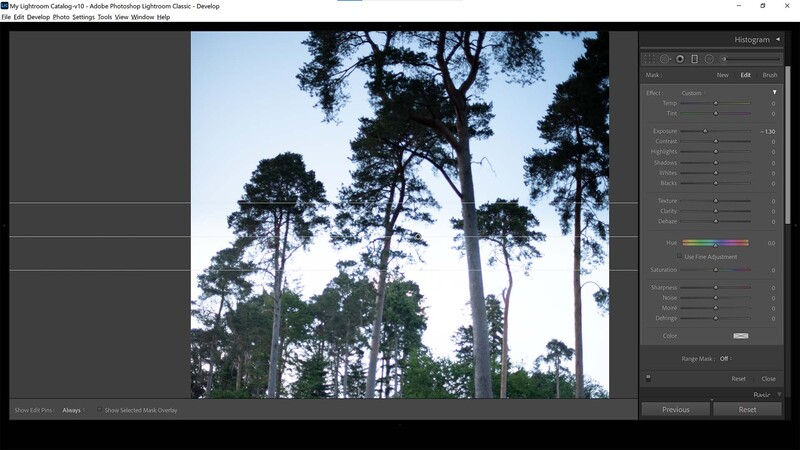
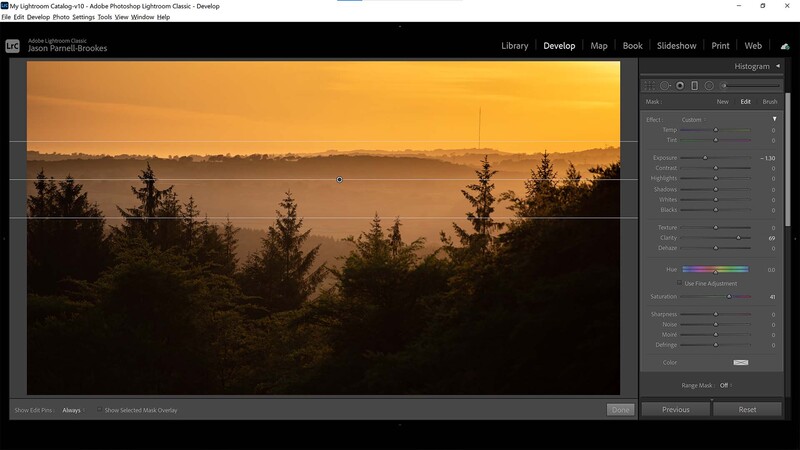
Now, if you just place a hard filter right above the horizon line you might find that the results are a little unrealistic. That's because the small part of the sky on the horizon that isn't affected will be incredibly different from the rest of the sky, which wouldn't normally happen in real life. So I like to place the filter down ever so slightly into the first area where the sky meets the land. For example, in the photo above you can see I've placed it to just gently kiss across the tops of the trees. Since the trees are silhouetted anyway I won't have an issue with the filter altering the look of the land.
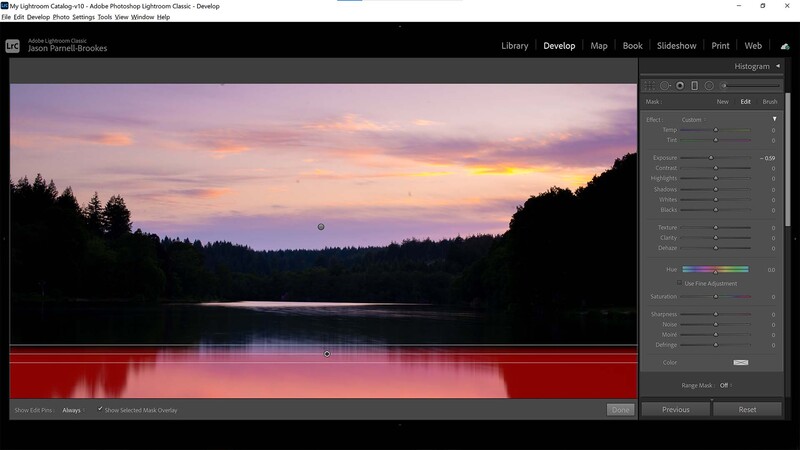
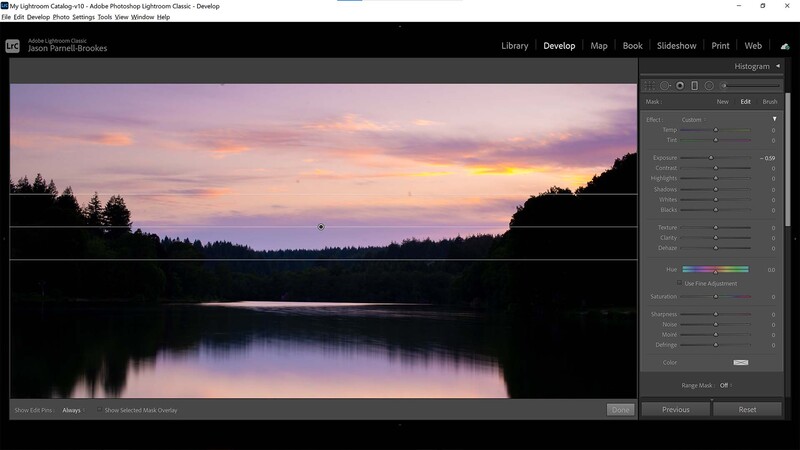
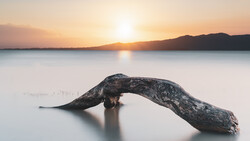
Remember that the graduated filter isn't just about correcting overexposed skies, it can be placed anywhere in the frame. Occasionally I like to pop one off to the side if I'm getting a lot of flare from a light source. Other times I do what I've done above where I place one on the bottom of the frame. Here, the lake is reflecting the sky perfectly but the original sky was overexposed and so too was the reflection.
Drag It Down
How long you make your graduated filter transition is up to you. Generally speaking, a hard filter (i.e. almost no transition at all) should be placed on seascapes or where the part of the frame you want to change is almost a straight line. Softer filters with larger transitions are better suited to scenes where you want to make a change but the scene is complex and as such you need to make the filter as inconspicuous as possible without removing it altogether. Just click and drag to change the size of the transition, and if you want it level just hold Shift while you drag. Don't forget you can edit this any time thanks to Lightroom's non-destructive qualities.
Don't Overdo It
It's easy to get carried away working on a photograph, especially when you're first starting out or when you've spent a long time on a photo. The graduated filter in Lightroom is so powerful compared with traditional filters that sit in front of your lens because there are so many types of adjustments you can make using the filter and with an incredible intensity. As you can see from the examples above, when you can start to spot the filter just by glancing at the photo, you've probably gone too far. In my opinion, it's the filter that does the job but isn't noticeable to the general viewer that's the most effective.
Introduce Some Color
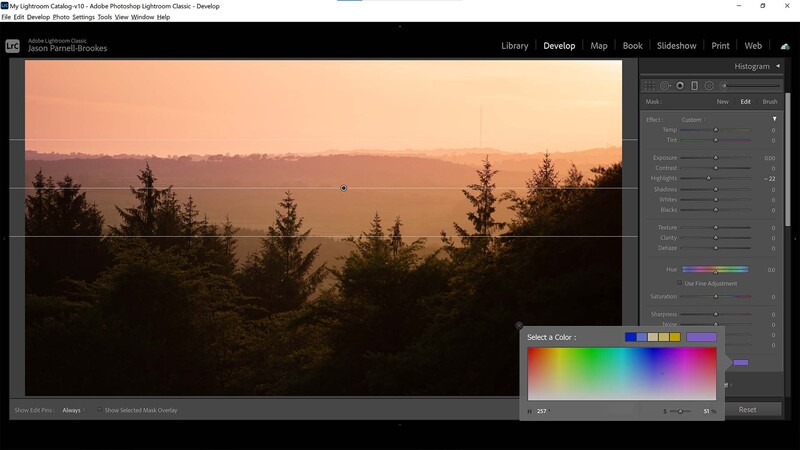
With so many variables to control in Lightroom, it's easy to let certain features slip through the net. The color tool in the graduated filter is one of those features. Essentially, there's a small swatch box from which you can pick any color on the spectrum, and when selected, Lightroom will apply that color over the working area of the filter. Above I've chosen to add a purple color to the top of the sunset which works really well set against the more orange center of the frame. However, when I first put this in I noticed that it was far too saturated. Fortunately, in the swatch box, there's a slider titled "S". This slider determines how saturated your overlaid color will be. I knocked mine back a bit to 51% for a more subtle look.
Use a Range Mask
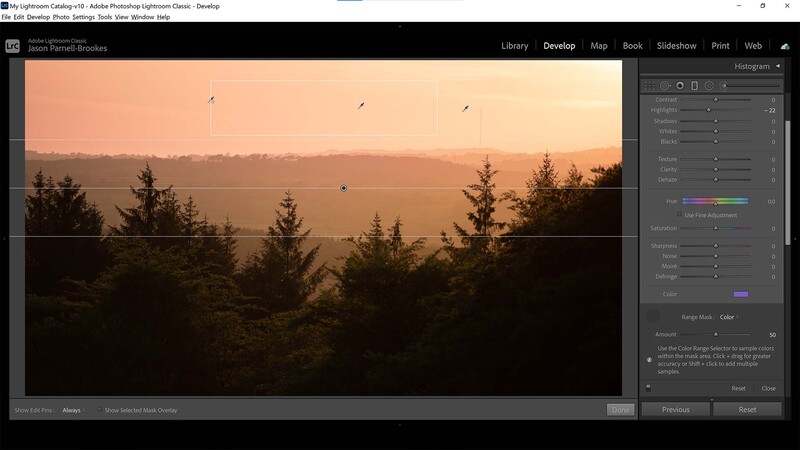
Although kicking around Lightroom since 2018, not many people have heard of the Range Mask. In the graduated filter scroll down the right-hand panel to reveal the Range Mask option. With a graduated filter applied you can click on the drop-down to choose between color, luminance, and depth. Once selected you'll be offered an eyedropper tool with which you can click to define a color on the frame to affect.
Now, clicking in one spot wouldn't be much good if you're dealing with a complex scene with multiple colors, so you can also click and drag to select a few different areas inside the rectangle of your choice. Or if you want to be more specific you can Shift + Click to define multiple points for Lightroom to mask.
What happens now is that, depending on the option you have selected, Lightroom will apply the graduated filter to only the predetermined areas you've defined with your eyedropper tool and not to anything else. This is a great way to get around the first problem we encountered at the beginning of this piece when dealing with complex skylines.

Join the Fstoppers community for free
-
Post comments and join in the discussions
-
Browse the site ad-free
-
Share your work and get featured in the community
-
Compete in the photo contests for fun and prizes
No comments yet