How many times have you seen a video or photo where a subject or even the artist themselves appear in it multiple times and wondered how they did that? Having a background in graphic design, I always guessed you just merge the footage or photos together and mask sections out to reveal the subject in each area. Well, it is as simple as it sounds but if you are not sure how to get started or how to do that, Peter McKinnon shows how he cloned himself in both photo and video using Photoshop and Premiere, respectively.
First, I would recommend using a tripod or setting your camera on something and making sure it is sturdy and doesn’t move. It makes it much easier to merge the photos or video as you don’t have to align them in post. If the camera does happen to move between photos, you can use the Auto-Align feature in Photoshop with good success most of the time. After the camera is in position, take your multiple shots or video clips and then it’s off to the computer to merge them together.
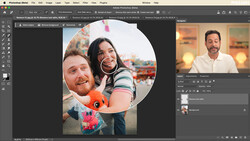
To start off, McKinnon shows how he blends the two video clips of himself talking using a feathered mask since the lighting is a bit different. You could tweak the exposures and other settings to try to get them to match or simply do as he did. As he states, this works as long as there is enough space between the subject, in this case McKinnon himself. If you have moving body parts going into each others frame it will be a bit harder and require more time to animate the mask, but it can be done with time. McKinnon just shows us the basics to get start and keeps it real simple in the video. Jumping into Photoshop, McKinnon quickly shows us how to get the job done, but like he said it is better to use layer mask and have a better selection depending on how serious the project is.
Have you done a project where you make multiple clones of yourself or another subject? Shows us your examples or share any tips you may have.



1 Comment
Peter makes things look easy