

Professional-quality photo printers and paper are expensive. It can be difficult to justify the steep price of the machine and upkeep for most photographers who shoot as a hobbyist or even a starting professional. Outsourcing your printing needs to a pro photo lab alleviates the cost, but there are some inherent complications in not being able to print from home. These four helpful steps will minimize the disconnect when sending out your images to the lab.
1. Calibrate Your Display
You hear others say this one all the time, and hopefully you haven’t been sloughing it off: While a quality photo printer may be out of your budget, you should seriously consider investing in a monitor calibration device. In order to achieve matching tonality from screen to print with your printing vendor, not to mention with the rest of photo professionals viewing your work online, this tool will make the entire process much more pleasant.

Calibrating your display is a process that simply cannot be replicated without using the proper instrument. You may be tempted to skip the expense and just compare a print to your screen and try to fiddle with your monitor until things look the same. Do not do this. Beside the fact that some degree of color blindness affects 1 out of 12 males and 1 out of 255 females, the inconsistencies through a whole range of variables using this method are going to hurt you more than help you. Here is an interesting online color test by X-Rite that challenges you to place a palette of colors in the correct hue order. Don’t feel bad if you aren’t getting back a perfect score; just realize that you should let a calibration device do the job for you.
2. Soft Proof Using Your Lab’s Printing Profiles
Once you have your display properly calibrated, the next step you should take is to find and download your chosen lab’s ICC printing profile for soft proofing. Most professional labs, such as BayPhoto or WHCC, supply their customers with these files through their website. If you are printing locally, check with an employee to see about obtaining their printing profile. With the output profile loaded in to your post processing program, you can now check your image through soft proofing.
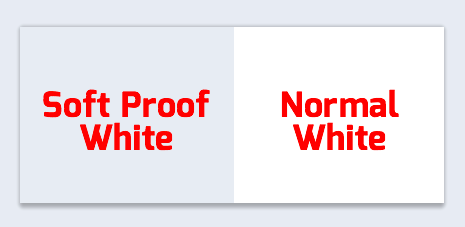
A soft proof will attempt to predict what your image will look like as a physical print. One of the ways it accomplishes this is by mapping the white point of the display’s image to the paper’s “white”, and the black point to the printer ink’s “black”. With soft proofing enabled, you can adjust the image’s brightness, contrast, and colors to best match the digital photograph.
While adjusting the print file in soft proofing, I suggest taking a look at any possible gamut warnings. Colors that are outside of the output’s color gamut will print inaccurately. That’s because the colors are slamming against the wall of color capabilities for the printer, and so it can only print the closest possible color. To toggle the warning on/off in Photoshop, use the menu option under View>Gamut Warning.
One optional tip I offer to Photoshop users is to set the workspace background color to your printer profile’s paper white color. This will enhance the emulation of your soft proof, because your image looks to be surrounded by the actual paper you will print on (which usually has a slight blue tint due to optical brightening agents). To do this, open a third party color picker (on a Mac you can use the built-in application DigitalColor Meter). Create a new blank white document of any size, then turn soft proofing on for your photo lab's profile. Use your color picker to select the “white” that your Photoshop document is displaying. Then input the color values into the workspace background custom color option. Viola!
3. Adjust The ‘Print Size’ Zoom In Photoshop
By default, when you choose the View>Print Size option in Photoshop you will see that your document isn’t actually resized to what the outputted print will be sized at. What’s happening here then? Photoshop is set to assume that your screen resolution is 72 PPI. But in reality, screen resolutions soar above 72 PPI these days with a diverse selection of display sizes and resolutions. The math is being computed wrongly and you end up with an incorrect zoom when choosing Print Size. Let’s fix that.
In the menu under Photoshop>Preferences>Units & Rulers… you will find an input asking for your screen resolution with 72 PPI already filled in. To find the correct number to enter, you can either use Google to search for your monitor’s PPI or use a website such as dpilove that will help you calculate it.
With the right number now in place, the Print Size zoom just became useful. When you outsource your printing, you don’t have the luxury of test printing your image at its intended size. This virtualization enables you to take a step back from your screen and look at the image from the proper viewing distance and gauge the impact of the correctly sized presentation.
4. Battle the Standard Crops By Adding A White Margin
With printing vendors, you are usually going to be locked in to the print sizes that they offer. This means that your custom crop job to get a composition perfect would have to be thrown out the window. But it doesn’t have to be this way.
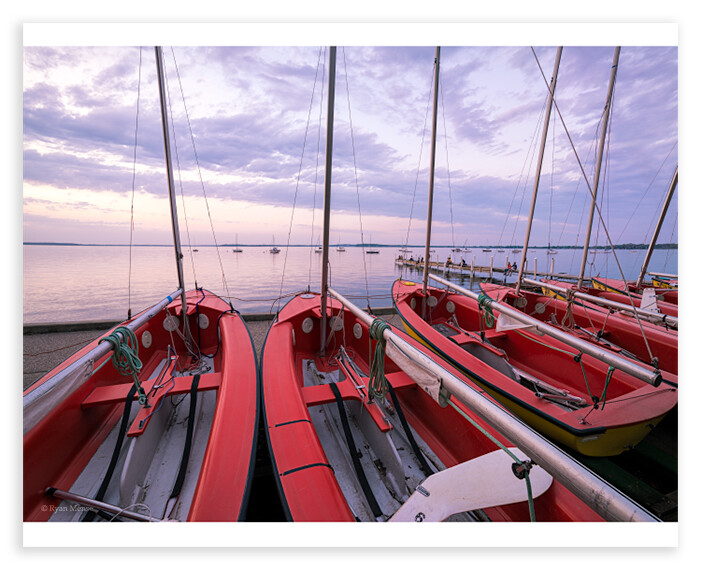
For me, if a crop is close enough to a ratio standard of 4:3, 2:3, or 1:1 I tend to compromise to these sizes. However, when working with a fairly unusual crop I recommend adding white margins to the side of your photo in order to maintain the composition in the printed product. If you plan to mat your prints, the white margins will be hidden anyways. If you so choose, using a metal ruler and a sharp Xacto blade you can lop off the white when you receive them.
Adding the white space is simple. In Photoshop, enter the Image Size dialog (Image>Image Size). With the “Resample” box unticked, change the long side of the image to the intended output measurement of the long side. Hit OK, and then open up the Canvas Size dialog (Image>Canvas Size). With “Relative” unticked and the canvas extension color set to White, change the short side measurement to the print’s short side measurement. Now, the width and height should show the same width and height that the outer dimensions of the final print will have. Click OK and your image file is ready to print with your custom crop in place.
If you have your own tip you would like to share with other readers, leave a comment below!


11 Comments
I've never understood standard print sizes. In this day and age, it's a simple mouse click to print at 8x12 instead of 8x10. What benefit does printing at the standards sizes give (other than the fact that those sizes are much more common) that printing at the native aspect ratio doesn't?
I think most labs these days have caught up to doing 2:3 along with 3:4 prints. And BayPhoto does a ton more: http://www.bayphoto.com/bayweb/pro_standardsizes.htm ... For a while, retail stores didn't sell frames that fit 8x12s and such, and if you were a photographer that catered the audience that cares about that sort of thing you were strongly advised to crop everything 3:4. That's mostly changed now. An issue comes in to play however when one fine tunes a crop based on the content of the photo, not based on a crop ratio template. Then you end up with an image that doesn't fit neatly in to any print size option.
After all that, hold a print next to the monitor with your soft-proof image on it just to see where the contrast differences are.
I have a hard time judging how much detail I'll actually be able to make out in the shadows (the backlighting of the monitor tricks my eye), so if I am preparing a print, I will adjust down the brightness on my monitor to a level I've figured out through trial and error.
Great little post man. Not having a printer in house but rather having one at my day job for some test prints here and there. I have a relationship with a local printer I used to work at right out of college. They give me a discount and I head in and print myself after hours for my own projects and larger print pieces. Always important to use resources around you like this and these tips are great!
By the way is there an white border feature in Lightroom ??
There is inside the Print module. If you want borders on all four sides you can use Stroke Border under the Image Settings panel on the right side. If you want to add margins as I'm showing in this article, it's a little more complicated. Also realize I've never done this in Lightroom before now, and searched around to find an answer for you. So I can't attest that it is the best answer.
First, select what photo you want and then go in to the Print module.
Then go under File > Page Setup. Next to Paper Settings choose Manage Custom Sizes
Click the "+" then fill in what size print you will want to make from the image. Then zero out all the margins under Non-Printable Area.
Now that you are done with Page Setup and back in the Print module, zero out all Margins under Layout on the right side. Then under Cell Size, move the sliders all the way to the right so that it matches the print size you just chose in Page Setup.
Under Print Job on the right side, change Print To to JPEG File. You'll have to make the judgment calls for the rest of the options, and when you are ready click Print to File... on the bottom of the menu and you can save your image with the white margins to your hard drive.
Thanks !! never used the print module because the export tab is my way to go .. will look into it. Stupid that there is no border in the export as such ;)
So if i end up with a perfect colour score on the test do I still need to calibrate my laptop display? I am teasing. I do believe in calibrating displays but I don't take the time to do my laptop and just do all my work from my calibrated screen at home. I had no trouble doing colour test though and getting perfect.
Great article! Just the info I needed. When rests now us to find more information about different printing material. Does anyone know a good place to learn about the ups and downs, the physical differences and cost vs quality of different printing paper/material?
took the test.. Doesn't mean much still. Don't ever want to strain my eyes like I just did to get that score.
Very useful - thanks. I've never really taken much notice or properly understood soft proofing - going to do some research!