Headshots live or die on small posture cues and what you do with hands. If you shoot people for business or branding, avoiding a few common posing traps saves you time and retouching headaches.
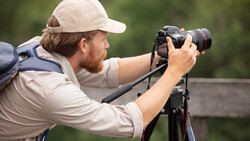
Coming to you from Gary Hughes with Adorama, this pragmatic video cuts through three mistakes that sneak into headshot sessions and shows fast fixes that don’t derail your flow. Hughes works on a tripod so you can keep eye contact and use your hands to direct without fumbling. He starts straight on, adjusts what’s already there, and only tweaks what’s needed. That approach keeps a nervous subject from unraveling while you dial in a confident look.
The first trap is the “groomsman” stance: hands clasped, shoulders rolled, jacket bunched. It flattens presence and wrinkles everything you want clean. Hughes breaks it by freeing the hands or parking them in pockets so the coat drapes, then stacking posture up-and-back before bringing the face slightly toward camera. He uses a simple cue (act like you’re leaning in to hear someone quietly) to get chin projection without the dreaded turtle or chicken analogies. You’ll see his before-and-after pop strictly from tiny posture changes, not wholesale reposing.
Mistake two is the arm-cross “claw.” When a full hand splays toward camera, it competes with the face and steals light. Hughes keeps the pose but hides one hand “down the rabbit hole” while showing relaxed fingers of the other. That small adjustment lets a ring or watch tell a story without hijacking the frame, and it drops the shoulders so the stance reads open rather than bouncer-stiff. He also turns the body slightly so the line supports the face instead of crowding it.
You also get a clear look at Hughes’s simple, controllable setup. He’s on the Fujifilm GFX100S II with the GF 45-100mm f/4 R LM OIS WR, a sweet spot range for clean perspective. Main light is a Flashpoint XPLOR 600 Pro with a small softbox, and edge light is a Glow EZ Lock strip box powered by the Flashpoint eVOLV 200 Pro II TTL. He likes the updated menu and channel indicators on the eVOLV so you can confirm A/B groups from camera position without walking to the light, which speeds testing and keeps the subject engaged. On a medium format body, small posture shifts are magnified, so the controlled rim light carving cheekbones does a lot of heavy lifting.
Pay attention to his directing cadence. He mirrors posture, uses specific micro-commands like “tilt a millimeter,” “chin forward, then down a centimeter,” and asks for a breath right before the shutter to release tension in the brow and mouth. That cadence builds expressions that feel earned rather than staged. It also gives you a repeatable script you can run with executives who only give you five minutes.
There’s more nuance in how he times expression cues, aligns jacket seams after pocketing hands, and when he chooses a straight-on frame versus a slight turn. Check out the video above for the full rundown from Hughes.
If you would like to continue learning about the art of portraiture, be sure to check out our range of tutorials on the subject in the Fstoppers store.


Join the Fstoppers community for free
-
Post comments and join in the discussions
-
Browse the site ad-free
-
Share your work and get featured in the community
-
Compete in the photo contests for fun and prizes
1 Comment
Great tutorial Gary. Slightly off subject, I like the colors you are getting right out of the camera. I have Flashpoint equipment. Was wondering what settings you had on the camera and the flashes? My colors tend to be more muted. Wondering if I need to output more light from the flash vs, ambient in the room. Thanks.