Michal Stepien's picture
This member has no rating 0
  • 0Comments
  • 0Photos Rated
  • 0/0Up/Down Votes
  • 13Following
  • 0Followers
Michal Stepien

Bookmarked Articles

Creating a Product Photography Shot Almost Entirely in Camera

Product photography is all about the details, where every ray of light, every angle, and every placement can make or break a shot. This great video will walk you through setting up and shooting a watch image while working to minimize the amount of time spent in post-processing.

Instagram Image Sizes for 2018: Download These Free Templates

Thanks to Instagram's incessant commitment to regularly changing various features on the photo-sharing app, it's more than understandable that you may not know the current image specifications for the platform. After a quick Google search brought up a host of conflicting answers, I decided to do some tests of my own and create several free Photoshop templates to make all our lives much easier.

How to Make Instagram Story Vlogs

I don't know about you, but I often find myself in this weird limbo state with Instagram. Sometimes I feel like I'm doing really well with how I interact with those that I follow and those that follow me. Yet there are still plenty of other times when I stop and just wonder how the hell am I supposed to put this app to any use? Social media is changing the way that content is created, the way it is shared, and even the way it is understood by those who view it. I am continually learning about how to best put it to use the way that it is designed to function.

A Quick Tutorial on How to Use the Pen Tool in Photoshop

Of all the tools and features in Photoshop, perhaps none strike more fear into the heart of the unsuspecting photographer than the Pen Tool. If you're one of those people, this great tutorial will show you both how the Pen Tool behaves and how to put those rules to use in practice.

How to Use CTO and CTB Gels to Change the Color of Your Background

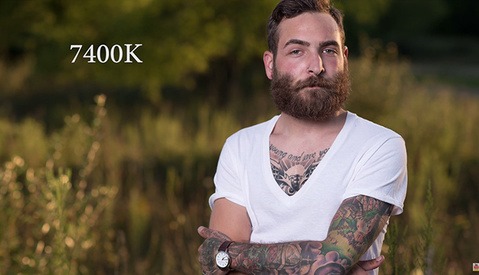
One way to spice up your photography is to add gels to your lights so you can produce colorful and edgy looking imagery. Adding wild colors to your photos can offer a lot of creativity but gels can also be used in a much more subtle fashion to slightly alter the color of your background and sky. In today's video I want to share two simple techniques I use to help make my backgrounds on location look more interesting.

How to Create Steam From Scratch in Photoshop

As a commercial photographer and digital artist, I spend a lot of time in Adobe Photoshop. One thing that I love to do is find creative solutions to solve visual problems using Photoshop. I know we all get stuck in our ways from time to time, but If you do any retouching or compositing work for living, I can’t emphasize enough how important it is to experiment and find new ways of doing things. Photoshop is always evolving and it’s important that we use these new digital imaging technologies to our advantage. In this article, I go over a technique I discovered to add steam from scratch in Photoshop.

Distinguish Luminosity Levels in Photoshop Better Than Ever With This Visual Help Layer

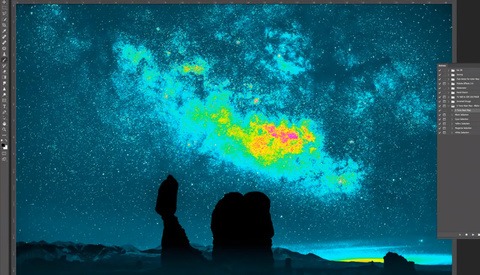
Seeing colors and luminosity correctly is not always easy. You could calibrate your screen and be stuck working at the same place every day, but some people just can’t have a fixed office or studio. And even with a calibrated monitor, adjusting luminosity to your creative vision can get tricky. This is where visual help layers come in, especially one called the five-tone heat map. Blake Rudis from f64 Academy shows you how to use and why it’s so useful.

Stop Ignoring Sound and Learn How to Create Amazing Audio for Your Video

UK-based filmmaker, and DSLRguide creator, Simon Cade, walks us through the importance of good audio in our videos. Cade also shows us the gear he uses, how he gets his samples, and how he puts it all together in post. But the biggest take away for me was seeing the amount of creativity, and exploration that actually goes into sound creation.

Color Grading With Aqua And Brown Made Easy In Photoshop

When it comes to things like quickly learning new Photoshop techniques, I am a straight to the point type of guy. I don't necessarily want to (though I certainly do on occasion, depending on the topic) watch an hour long videos explaining the minutiae of every click of the mouse. While I appreciate production values and the personality that can be on display in a video, sometimes all you need to know can be learned from text overlay and elevator music. That's what we have on deck today, enjoy.

How to Color Grade Your Footage With Adobe Premiere's Lumetri Tools

Most tutorials available for free on YouTube explaining how to color grade your footage are just ways to sell LUTs, presets, or to show you how to add teal and orange to your clips. Nate from Tutvid decided to make a more comprehensive video to help you get started with Adobe Premiere Lumetri tool so you can grade any of your videos the way you want.

Using Apply Image on Layer Masks in Photoshop

Layer masks are one of the most useful tools in Photoshop, allowing the user to apply adjustments to an image selectively. Masking, however, can be one of the most frustrating aspects of post-production, sometimes requiring lots of intricate work. One tool in Photoshop that can make your masking life easier is also one of the most overlooked: Apply Image.

Editing a Time-Lapse With Only Adobe Applications

Michael Shainblum, Fstoppers' Photographer of the Month for August, has been creating epic time-lapses for years now and he’s just released a new YouTube video tutorial. In this new video, Shainblum goes through his editing process detailing an Adobe-centric workflow for time-lapses.

Differences Between Luminosity and Color Blend Modes in Photoshop

Blend modes in Photoshop are still confusing lots of us even after years of using the software. This article is about two of them: Luminosity and Color. You may start using them more frequently after you understand their strengths and cases when you should use them.

How To Use Colored Gels to Create Electric Photography

We’ve all been there; the studio is set, the model is awkwardly waiting, but the light isn’t quite right and the stress begins to build. With every test shot, the light quality increases and the anxiety level decreases. Finally, like a blast of cool breeze on a hot day, everything clicks into place. The light is perfect.

Blend Your Mask in Photoshop Better Than Ever With the Feather Slider

Masking plays a crucial role in the quality of your retouching. There are so many tools available to create and refine masks, that’s often times we forget the most basics and useful ones. One of them is a bit hidden and it seems like many don’t even know it exists! However, it’s probably amongst the most useful options to refine a mask and make your adjustment shine through in a more natural and convincing way. It’s the feather option and I’m going to show you how you can use it with a real-world example.

CTB Gels Might Be What's Missing From Your Outdoor Portraits

I’m a huge advocate of gelling your flash. It’s one of those things that a lot of photographers just discovering off-camera lighting will often fly right past without much thought (I know I did). Even after you get that first stack or plastic bag of gels, knowing how to apply them can be a little intimidating. Enter Michigan-based Photographer Rob Hall’s expert instructions on how you should or could be using your color temperature blue (CTB) gels.

Dramatic Beauty Tutorial Part 5: High Contrast Black & White Conversion

In the final part of the Dramatic Beauty Portrait Tutorial, we will look at how I do my Black and White conversion. This image is a dramatic image so it calls for a punchy and high-contrast black and white conversion. In this tutorial, I will show you how I stack blending modes and adjustment layers to get my image exactly where I want it. You can follow these steps in your own images or use the techniques and customize them for your own use. In the video you will also see how to use layer masks to create targeted adjustments for your high-contrast black and white portraits.

Achieving Perfect Skin Tones and Color Using Capture One

You have probably heard it a few times: photographers raving about how Capture One is awesome for developing portraits from raw files. However, just like when I first installed it, you might not see any advantage over the current raw processor you are using. Then I found a few functionalities that made my workflow that much quicker and my images look a tad better before even retouching them in Photoshop.

No Sun, No Problem: How to Create Natural Looking Sun Flare

Warm smiles and serene sun flares seem to be landing on the shoulders of portraits all over the internet nowadays. Complimented with beautiful bokeh from a shallow depth of field, the allure of a sun-kissed image image is easy to see. What happens when mother nature doesn't seem to be on your side? In this article, I am going to show you how to master "faking" sun flare.

Gradient Map For Perfect Skin Color

When retouching, it is not rare to come across color problems on a model’s skin. Whether it is from a sun tan, dodge & burn, spots or skin discoloration issues, it can be really painful to treat it in post. Despite being all about having it right in camera and doing as little as possible in post, there is an easy way to correct this in Photoshop -- a method that is going to make your makeup artist want to stop correcting redness, yellowness or under-eye bags. It is so easy to use you are going to wonder why you did not think of it earlier!

Bookmarked Media

Michal Stepien has not created any lists.