
A lot has changed from the previous version of ACDSee. It has new tools and powerful AI features. If you are looking for Digital Asset Management, developing, and editing tool, the ACDSee Photo Studio Ultimate 2023 may meet your needs. Here's a workflow introducing you to and guiding you through the main features of this dynamic software.
Of course, any piece of software that's as staggeringly huge as this will be able to do much more than I can show in this article. Nevertheless, I hope it gives you a good starting point and shows you how to use the main features of this powerful and diverse software.
Importing Your Photos Into ACDSee Photo Studio Ultimate 2023
You'll find the import button at the top left of the screen, but there's a shortcut: Alt + G.
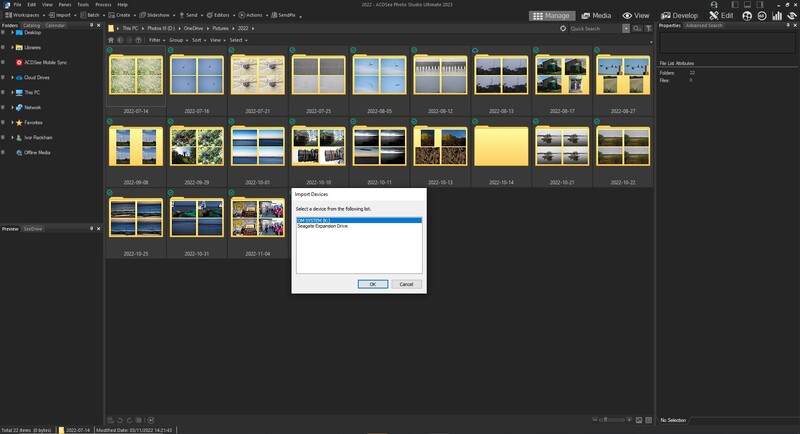
After choosing the images' source, the import pop-up window opens. You can import either just the new or all photos and select the location(s) you want to import them to. You can also choose to import just individual dates or different file types. Therefore, if you have numerous photo shoots on one card, you can easily differentiate them and import them separately.
Next, you choose the import destination(s). You can, for example, choose subfolders by file dates, e.g., the year as the top-level folder and the individual dates below, or choose the nested folders. There is no right or wrong way.
You can also decide whether you want to rotate the images automatically and whether to delete the photos from the source once they have been imported. Clicking the advanced box allows you to edit the EXIF date and organize the different file types using subfolders.
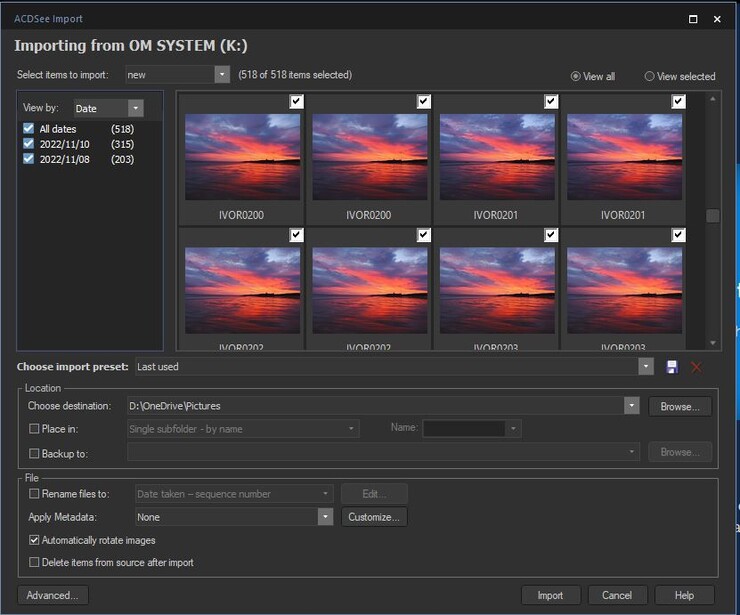
There's the option of renaming the photos as you import them. The Customize button here is worth mentioning because there is the option of adding keywords, which will save you a lot of time later. Keywords help search for images later. If, like me, your catalog runs into tens of thousands of photos shot over many years, this is invaluable. Once you have set up your import parameters, before importing, it is worth saving your import settings for future use. A small Save icon is at the end of the Choose Import row. Click that and choose a preset name.
Now, you are ready to click the Import button. That import process is lightning fast, and you'll soon have a grid of your imported images on the screen.
Sorting Photos Using Manage, Media, and View Modes
The Manage module is a super-fast browser that helps you to find and sort your photos. The folder panel on the left allows you to select individual folders for editing. Below that, you can see the camera settings and the histogram.
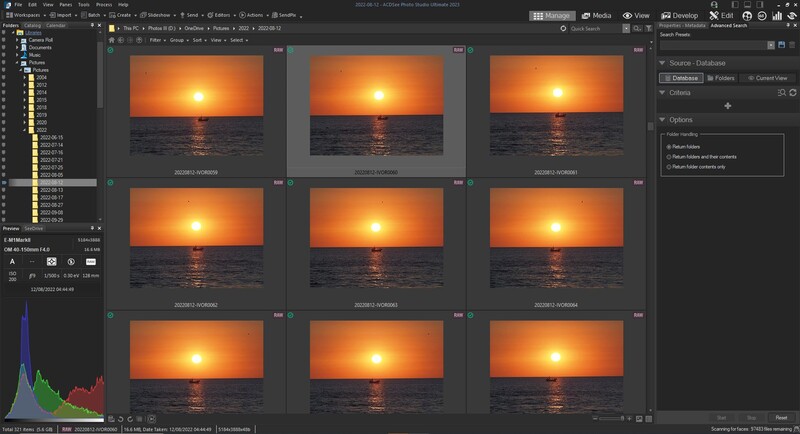
This is an excellent point to sort the photos into those to keep and the ones being consigned to the bin. I do this by applying a number rating to pictures.
First, go to Tools and then Options. Opening the General sub-menu (the top item) allows you to enable Auto Advance. Now, when you rate a picture with a number rating or a color code, the program will automatically move on to the next photo without pressing another key.
To sort your photographs, double-click on the first photo in the sequence. That opens the image in the View module, making the image larger and thus easier to see and decide whether it's worth keeping.
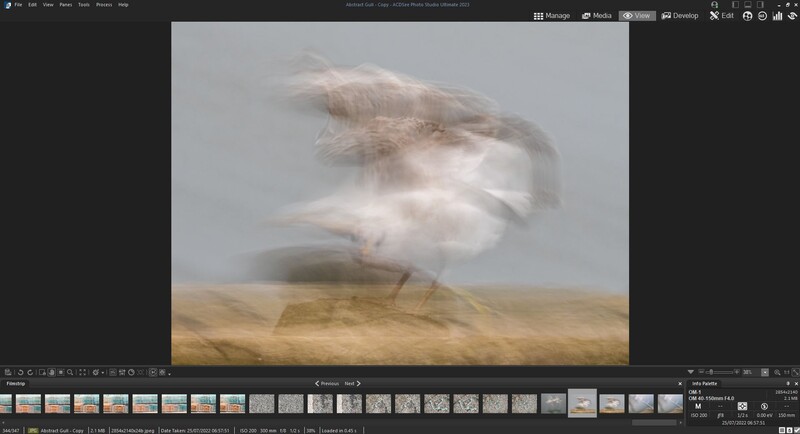
You can assign the corresponding rating for each picture using the numbers one to five on your keyboard. Six to zero add color tags to the photos.
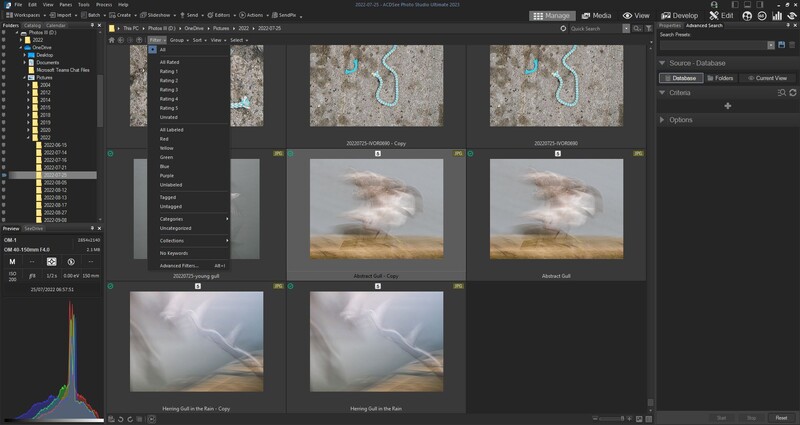
Once the photos are all rated, click back on Manage (Ctrl/Command + F1). There is a Filter drop-down menu in small text to the left and above the photos grid. Here, you can select Rating 1. Those images appear instantly, and then, you press Ctrl/Command + A to select all the photos and then press delete on your keyboard.
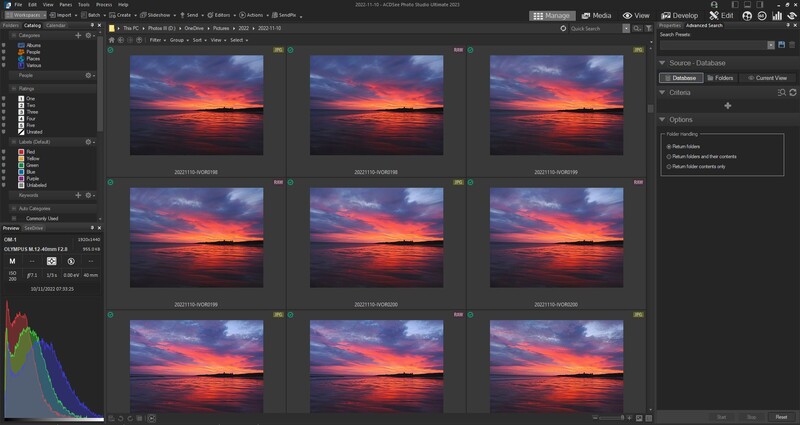
Manage Mode is full of more features than I have space to explore here. However, worth mentioning is the Catalog tab next to the folders tab.
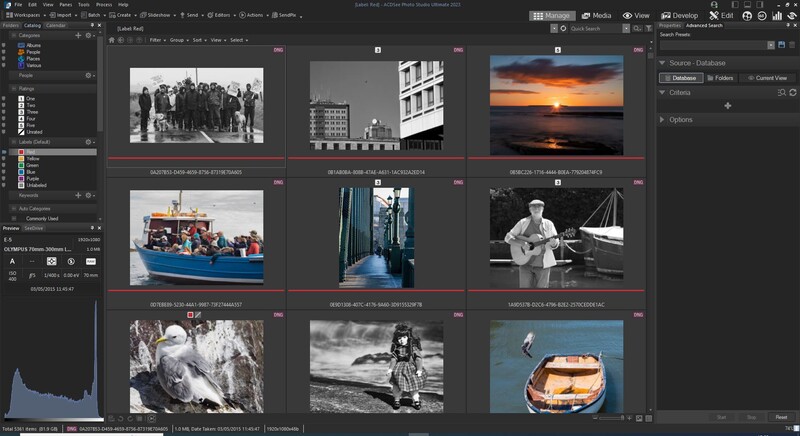
Here, you can filter all your images using number ratings, color code, and, most importantly, there's Advanced Search. Clicking the + button under Criteria brings up a range of search criteria on the right-hand panel. The following video goes more into depth about this.
A Quick Word About the Media Mode
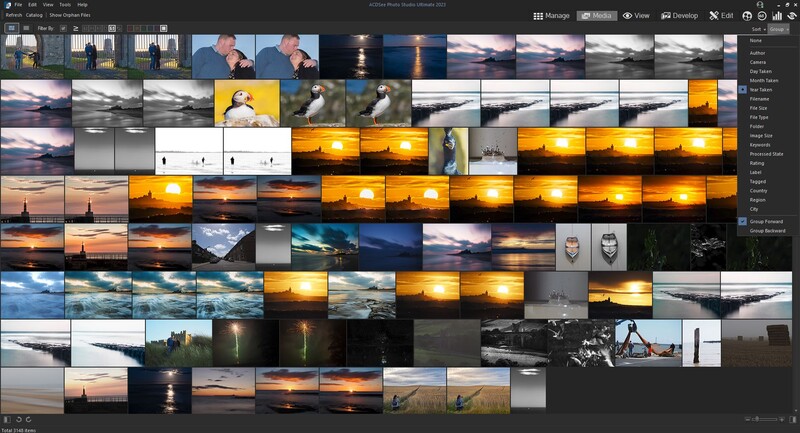
Folders browsed in Manage mode and cataloged by the program's database can then be viewed in the Media Mode. That mode allows for easy sorting of your images. Initially, all your photos are displayed unsorted in a grid. However, you can then sort, group, and filter them in many ways, such as by file type, date taken, and keyword and mix those filters with ratings and color tags.
It's a fast method of finding particular photos from your entire catalog.
How to Develop and Edit Your Photos in ACDSee Photo Studio Ultimate 2023
The Develop and Edit Modes go hand in hand. There is a difference between developing and editing a photo. It's worth thinking of developing as applying global adjustments to the entire image that can be changed or reset at any time. In other words, they are non-destructive. This is what we do to raw files. Editing is where we change individual pixels in an image, such as removing red eyes from a flash photo, cloning out an unwanted distraction, adding vignettes, etc. The boundaries between these two areas are blurred, but it's a good way of approaching them.
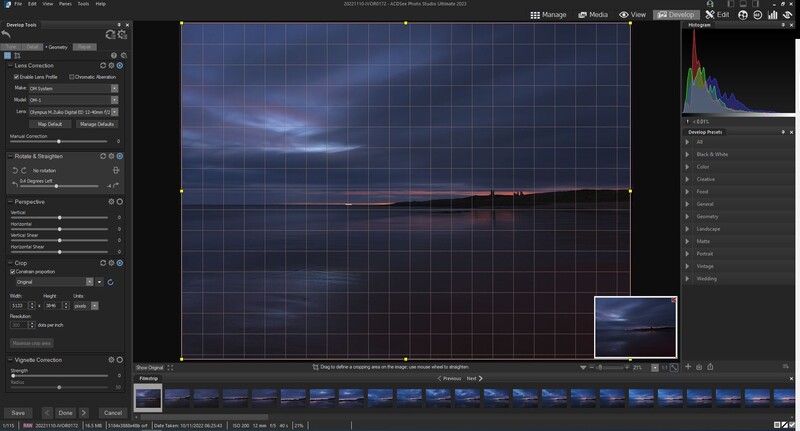
In the Develop Mode, I advise cropping and leveling a photo to perfect your composition first. On the left side panel, there is a tab called Geometry. Here, you can apply a lens and camera profile and correct any unwanted tilt when you took the photo.
Switching to the Tune tab allows you to make tonal and color adjustments to the image. Depending upon the amount of processing you want, sometimes, just using the adjustments found in the General drop-down panel is sufficient. The amount you adjust the image is down to your taste.
Exposure changes the overall brightness of an image, whereas the highlights slider reduces the luminance of the brighter areas. Meanwhile, fill light increases the brightness of the shadows, and contrast makes the dark areas darker and the lighter areas lighter.
Saturation and vibrance work similarly. Try pulling the saturation slider to the left; the color disappears. Push it all the way to the right, and the colors become too saturated. Vibrance works similarly, but only on the more muted colors.
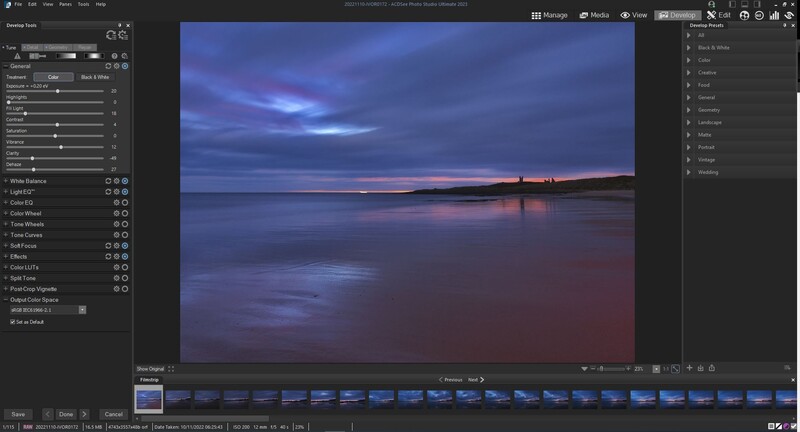
Clarity is a tool that adds mid-tone contrast, giving the image extra punch. It should be used gently. Saying that, ACDSee's adjustments are gentler and more precise than many of its competitors, so if you have used clarity in, say, Lightroom, you can push this slider further and still get acceptable results.
Dehaze does what the title says. If you have an image and you want to cut through haze or fog, then this is the tool for you. Again, it should be used gently as, like clarity, being heavy-handed can leave unpleasant artifacts on your photo.
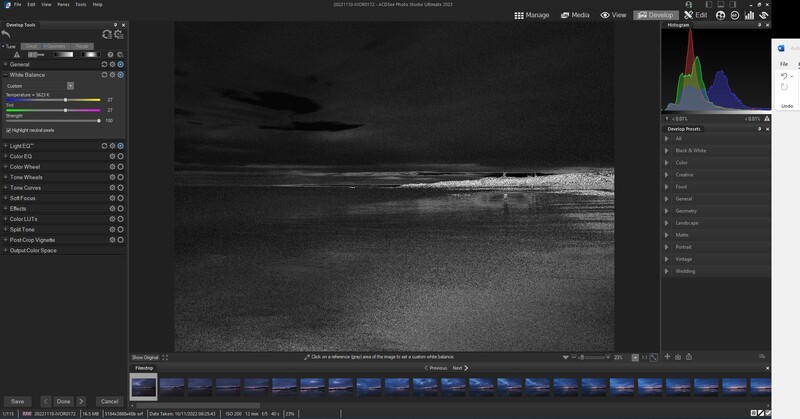
The White Balance adjustment tool works very well. If you are unsure what that is, Fstoppers has a raft of explanations and tutorials. Particularly useful is the checkbox that allows you to highlight the neutral pixels.
Next down from the White Balance controls is LightEQ. This impressive tool gives you more precise control over the brightness of the shadow and highlights.
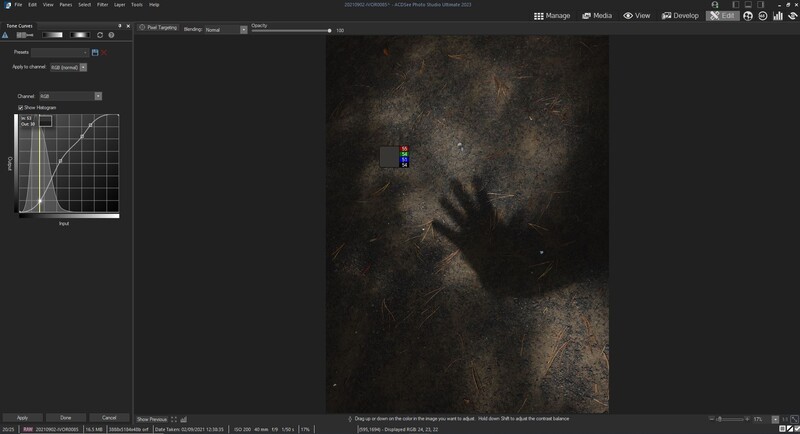
The following three adjustments, Color Wheel, Tone Wheels, and Tone Curves, give even more precise control over the colors and tones of an image. These video tutorials show you how to use those.
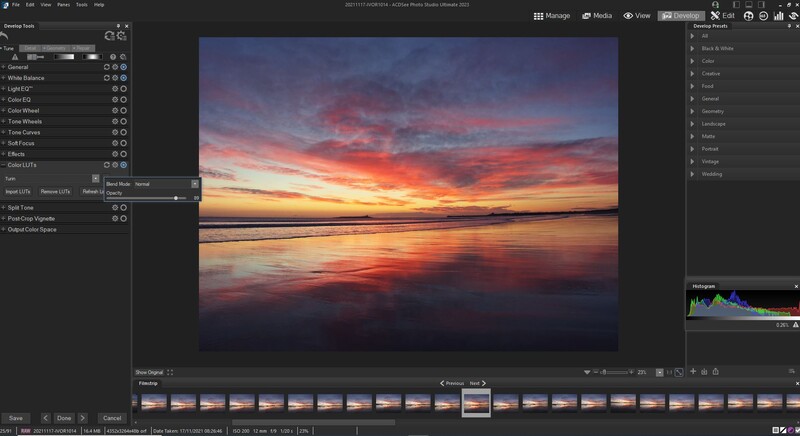
Below are a series of three adjustments that change the overall look of the image. Soft Focus is self-explanatory and, commonly, is something portrait photographers may use to soften skin. Others include adding photo effects, color overlays, a gradient map, Look Up Tables (LUTs), adding grain, and split toning. These creative effects are subjective, and you can find out more about them here.
One area worth learning about is the Detail tab and its sharpening and noise reduction. Every photo may require different settings, depending on the camera's sensor, the ISO, and the exposure length. My usual method is to remove noise first and then balance that with the sharpening. Again, being gentle with the adjustments is essential. Too much noise reduction can result in a muddy, blurred image, and too much sharpening can leave ugly artifacts on the image. Be light-handed.
There are shortcuts you can take when developing an image. On the right-hand side of the screen are various presets you can use. For beginners, they can also be used as one-click filters and a good learning tool to see how the different settings work. However, these are a great starting place for your developments. You can also save your own presets.
Getting to Grips With Edit Mode
In the Edit mode, global adjustments are available that change the pixel values of the original image. If you use these, my advice is to duplicate the background layer first (Ctrl/Command + Alt + A.) You are then preserving the original photo.
However, the big difference with editing is that the adjustments can also be added in layers. Thus, your changes are non-destructive, as earlier edits are still preserved in lower layers. Layers can be masked, too, so adjustments are only applicable to part of the image.
There are a myriad of different adjustment layers you can use on your photos: Exposure, Levels, Curves, and Light EQ change the image's tonal values in different ways. White Balance, Vibrance, Color EQ, RGB, Split Tone, Add Color, Black and White, and color LUTs all change the color values. Then, Negative, Photo Effect, Skin Tune, Sharpen, Blur, Noise Reduction, Clarity, Dehaze, Gradient Map, Vignette, Posterize, and Threshold layers all add other effects to the image. You can apply as many of these as you like.
Making Your Editing Easier With AI Actions and Face Edit
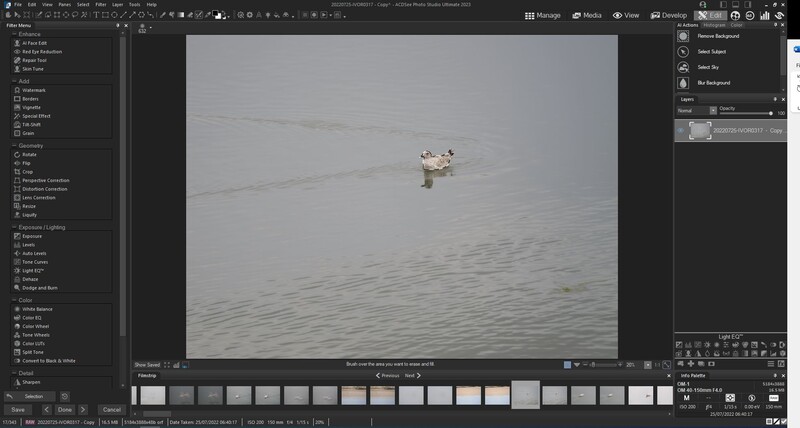
The AI Actions are powerful tools using artificial intelligence (AI) features to help you make selections. You will find these on the right-hand panel in the Edit mode, just above the Layers tab. For example, the sky selection works well, even selecting areas behind tree branches. You can then apply adjustment layers to the selected area.
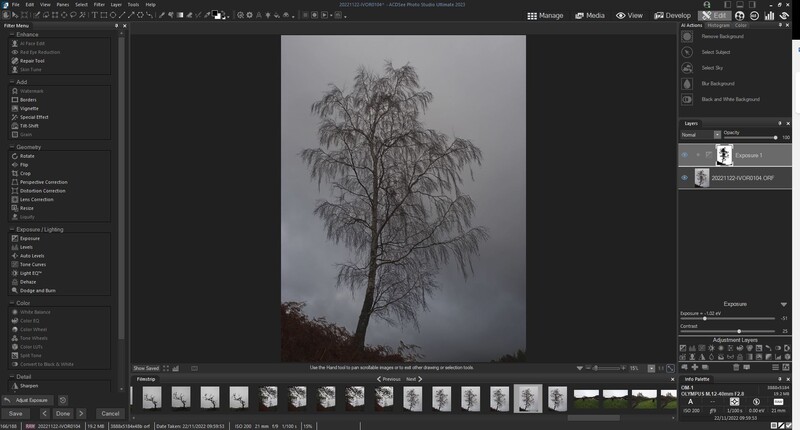
These tools also allow you to choose the subject or the sky, blur the background, and turn the background to black and white.
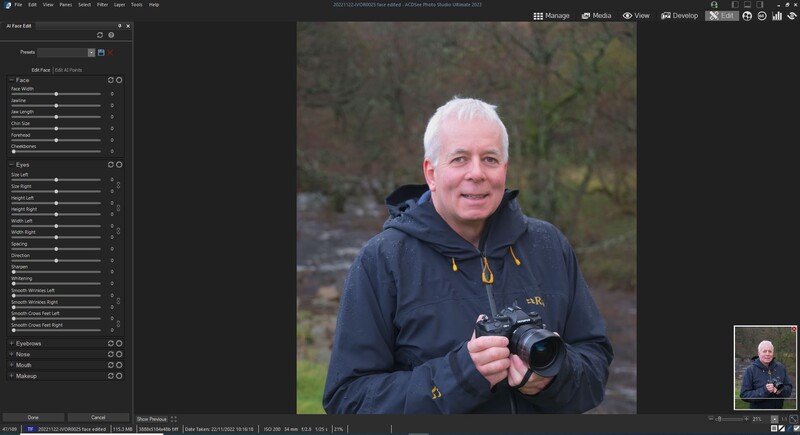
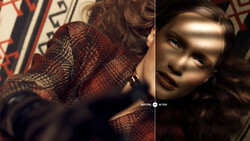
If you shoot portraits, the new Face Edit changes the subject's facial features in your photos, including their shape, eyes, nose, mouth, and much more. The first step is to check the AI adjustment points to ensure it has selected the correct parts of the face.
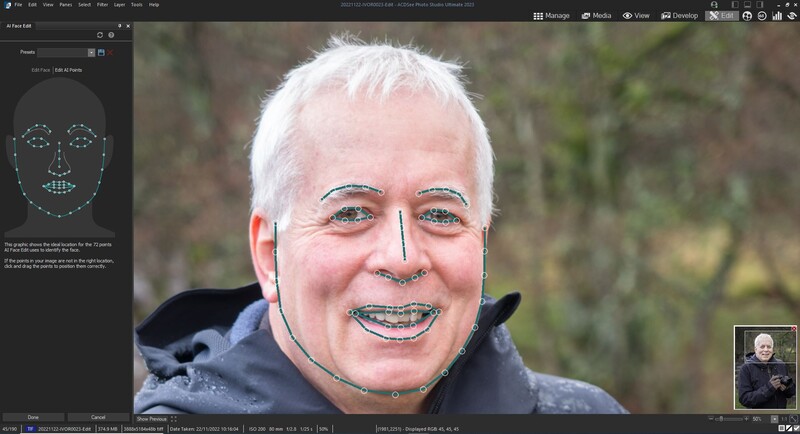
Zooming in and out of the photo gives a good idea of what adjustments are doing to the face.
Subject removal can be used for removing unwanted subjects from an image. You will find this in the Filter menu on the left-hand panel of the Edit mode.
There are a lot of other tools available, too, including Panorama Stitching, HDR processing, and Focus Stacking. The following video gives a good overview of those.
How to Export an Image
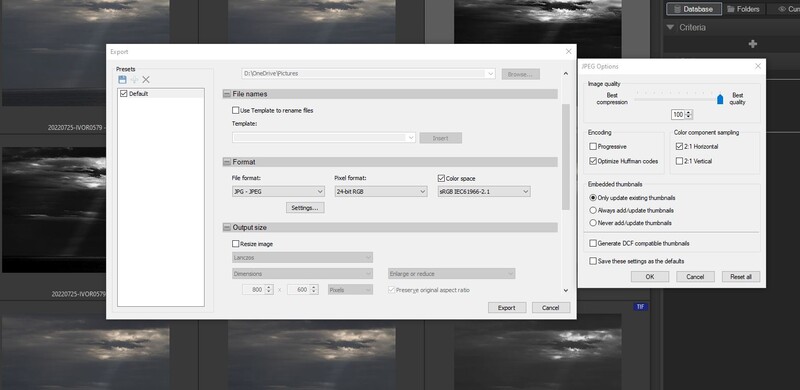
You will probably find that you are now ready to export your image to a JPEG or other file type.
Hit Ctrl/Command + Alt + E on the keyboard, and the export dialog appears. You can then decide where you want to send the exported file, rename the file, and choose the file type (for most, this will be a JPEG) and the pixel dimensions you want the exported image to be.
There are, of course, many different ways of processing your photographs. You will find other approaches you prefer as you get to grips with this powerful tool.
If you want to try the software, there's a free trial available here.


Join the Fstoppers community for free
-
Post comments and join in the discussions
-
Browse the site ad-free
-
Share your work and get featured in the community
-
Compete in the photo contests for fun and prizes
No comments yet