Late last year I wrote an article entitled “Why I Sold My RED and Downgraded to a C100.” The article, as you can imagine, was met with a bit of hostility. In short, Filmmakers and Red-users couldn’t seem to understand how I could give up the cinematic image capabilities of my RED Scarlet and settle for an entry level Canon Cinema camera. On the other hand, the article was praised by other filmmakers in similar situations that had learned that less can often mean more. Of course, no one can be right with this argument. RED cameras will continue to produce some of the most stunning footage on earth, while budget cameras will continue to be mistaken for RED footage.
In the end, it’s about choosing what is right for you, which I did.
I did a quick A/B test between the RED Scarlet and C100 before I sold the RED:
http://www.vimeo.com/81854976
This test is far from scientific, but gives a good basic comparison between the two cameras. The biggest “downgrade” I made by selling my RED was losing the smooth highlight roll off and subtle sharpness.
To put this more simply, my Canon C100 looks understandably more “digital” than my RED did.
A bit of in-camera sharpening and contrast can be expected when working with most modern cameras. I’ve found that this can be a strength for the majority of promotional videos I create. Often I am on tight deadlines and the look that comes straight out of the camera needs very little color grading before I send it off to my clients.
When possible, I prefer choose to shoot with less of a “pre-baked” contrasty look. This ultimately gives me more control over the final look of my image. Up until recently, I would achieve this by shooting with a flat picture profile. DSLR users will most likely know of this as "Neutral" or "Cinestyle."
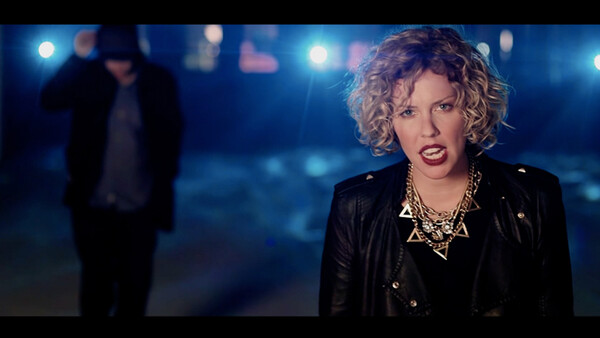
When working on my latest music video for the artist Transit, I knew that I wanted my C100 too look less “digital” while still retaining what I loved about the camera. I have a bit of love/hate relationship with the performance of the flat picture profiles and decided to try something new. Here are a couple of tools I used to make my C100 look less “digital”:
Lens Diffusion
After reading Shane Hurlbut’s blog on Tiffen Filters I decided to buy the Black Pro Mist ¼. The version I bought was a 77mm filter that screwed directly onto my existing Canon lenses. The Black Pro Mist provided me with less contrast and smoother roll-off for my highlights.
It also subtly softened my image without reducing the inherent sharpness.
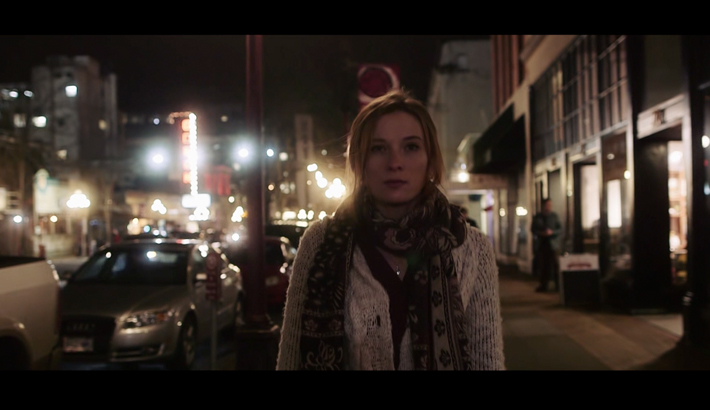
Unfortunately, we received the filter a couple of days late (after shooting our performance footage). It's easy to see the difference between the scenes.

(No Filter)
(With the Tiffen Black Pro Mist 1/4)
The most noticeable characteristic of the Black Pro Mist is the soft bloom of the highlights. Check out Shane’s full post on lens diffusion to see what is possible with similar filters.
FilmConvert
I’ve been using FilmConvert for the better part of a year now and recently upgraded to the much-improved FilmConvert 2. This third party plug-in works within your video editing program and replicates classic film stock. The most impressive part of this plug-in is that it takes into account what camera you shot the footage with and produces a custom look based on that camera. The results can be tweaked with a built in colour correction section featuring more traditional tools like curves, levels and hue etc.
Final Thought
It’s important to point out that these tools are only the beginning to creating a truly “cinematic” image. Beautiful cinematic videos aren’t solely created with filters and plug-ins alone. Rather, these visuals are the culmination of casting, lighting, set design, camera movement and so much more.
Best of luck with your filmmaking guys. As always, feel free to ask any questions in the comments below or via Twitter.


Join the Fstoppers community for free
-
Post comments and join in the discussions
-
Browse the site ad-free
-
Share your work and get featured in the community
-
Compete in the photo contests for fun and prizes
23 Comments
Shooting anamorphic also helps a lot.
Or in this case adding fake anamorphic letter boxing ;)
Haha always a good option. Have you seen the Letus Anamorphx? It looks pretty cool.
I have. The flares look a little funny to me, and the bokeh isn't quite the same as shooting true anamorphic. Hopefully I'm wrong!
Hey Dave!
Love it! Totally love the look you got out of the filters! :)
One thing that really sold me was how it was a story and it all made sense. Took me a while to get the last shot but i got it as the screen went black! :) So you succeeded! :)
I love the transitions as well :)
Did you do the VFX work yourself? :)
What lighting did you use for the house scenes, dance studio and the main performance footage? (not the stuff in the background, the foreground? :)
thanks!
Thanks! I did all the VFX as well.
Lighting was a mix of Arri 650w + 2k fresnels. Often shot through a scrimjim
I wish people would get over "film look" and start embracing modern digital technology. You know, if you have a good script, equally good actors to deliver it, and a good production crew, it might wind up "looking cinematic" without the need for parlor tricks.
well any work put into rap songs is wasted.
rap it for the dumb, uneducated, drug addicted social retards.
women are just sex objects, it´s all about guns, fast money and drugs.
gloryifing criminals.. who listens to such crap. except teenager who don´t know better.... or s*it about life.
Well, not all rap is about that, but there certainly is a lot of that. For me anyway there's something about white rappers that just seems comical.
Yet people watched Breaking Bad
Normally I'm not one to start dumb internet beef, but EXCUSE ME????
You're showing ignorance through stereotyping, do you do this in other aspects of your life too??? Rap and hip hop are giant genres in the world of music and though, yes, some is horrible and offensive, if you had the sense you would listen to the rap and hip hop that musicians put energy into making poetic in both the language and musical elements. IMO, hip hop is the only thing in today's world that is salvaging poetry, as I surely do not see such magnificent writing in modern poetry, film, television, or narrative literature. What some hip hop artists and rappers are able to do with language is incredible, beautiful, and emotional. Broaden your horizons or don't make such assumptions about things in your life.
As far as making a differentiation between "white" rap or other rap is just prejudicial. Shame on you for saying someone can't express themselves in a certain way because of the color of their skin.
Do yourself a favor and listen to any album by Dessa.
You must not have listened to JayZ
Did you even watch the clip? Where did you see:
1: Guns
2: Fast Money
3: Drugs
4: Glorification of criminals
And what research are you referring to when you claim rap is for dumb, uneducated, drug addicted retards? Citation needed.
nice!
Not on the same level as many posters (I just do dslr video for fun), but I swear by tiffen low contrast filters. Although some other sources claim ultra contrast filters are the one to go for, the tiffen website recomends the low contrast for digital video: http://www.tiffen.com/contrast_filters.htm
By lifting the blacks with a low contrast filter, you dont get any additional detail, but you do remove the posibility of macro blocking (especially if you are using avchd) and you don't lose the low colors, something that I find very useful, as color correcting the low colors often gives a more natural looking correction. I write about my experience with a tiffen low contrast 3 filter and hacked gh2 here: http://howgreenisyourgarden.wordpress.com/2013/12/18/dslr-video-lens-fi…
In case having a higher framerate and great lowlight is huge for you. You should check out the BlackMagic 4k results are stunning for $3000. My team is likely buying that instead of a C100
Definitely looks like a great camera. Good luck!
The BlackMagic cameras definitely deliver nice images but the two cameras are so different, be prepared for a lot of data management with the BM.
Looking to pick up some of the black promist filters but not sure what strength to go with. Was thinking a 1/4 and a 1/2. Would love to also think of getting a 1/8 but it might be to subtle and for the money I could save it for something else.
Personally I went for the 1/4. 1/2 looked like too much for my taste.
Yes 1/2 does seem like a little much but It would be saved for only longer focal lengths, because from my understanding you use a stronger filter on longer focal lengths to help fight back some of those sharp face details. Still might try to rent some before I actually buy.
BPM's are great, but widely used. I recently found a set of Harrison & Harrison Double Fog filters and a set of Regular Fog filters which aren't made anymore. The Double Fogs are a mix of low-contrast and fog filters which give a crazy look!
You can see them being used in varying strengths on this little teaser - https://vimeo.com/75628634
Hi Dave, thanks for nice article and sharing your knowledge with fellow filmmakers. I am an amateur filmmaker, i have a canon 70D dslr, i don't want to use ML. Though i will use Cinestyle picture profile and then color grade. I want to have cinematic images for my next short film, so i am trying to learn as much as possible in every aspect of creating a cinematic image. whether it is 24fps, 1/50 shutter speed, lighting, filters etc. Please suggest me which black pro mist filter i should use? Also i don't mind to go for cheaper ones, is there any other brand beside Tiffen?