
It's been several years since I first had the chance to visit Yellowstone National Park, but I can honestly say that it was an incredible experience throughout and I can't wait to go back. The trip to the national park was honestly a game-changing experience for me and how I approach my own landscape photography. I learned so much on that trip, not necessarily about my gear, but about what to shoot and how to capture it in a way that would help me really remember what it was like to see things in person.
Some of the lessons learned, that I'll share with you here, aren't going to be news to some of our more experienced nature photographers, but I did learn some cool stuff so I figured I'd share it with you! In most outdoor settings, chances are you'll come across a wide range of possible subjects and compositional opportunities. The weather and naturally occurring light will also play a big part in how you end up capturing what you're there to see. I've tried to break down some of the elements of what I learned from my trip to Yellowstone into some basic categories. Realistically, with any trip to a large location like the national park, there is probably an endless list of topics that could be covered, so I'll just be discussing the top six lessons that I learned from visiting this incredibly beautiful park.
1. Working With Water
Yellowstone is full of all sorts of incredible shot opportunities that involve water. With a huge collection of large rivers, insane amounts of smaller streams, a massive amount of lakes and ponds, and a plethora of geysers to choose from, the number of opportunities to set up shots with water is pretty high. The biggest lesson I learned from Yellowstone when it comes to capturing scenes involving water is how important the shutter speed is!
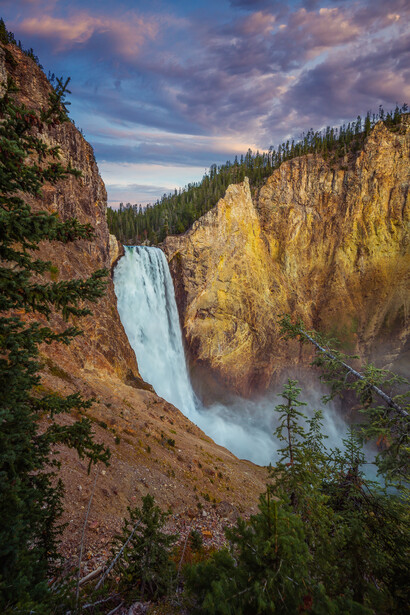
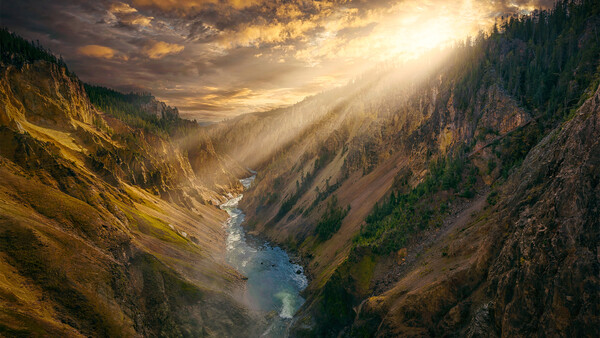
Like anyone, I suppose, when I really started playing with my tripod and pushing for longer and longer shutter speeds, I ultimately realized that a longer shutter isn't always the answer. Just because I could do it, doesn't mean I should. In the shot above, I had tried several other longer shutter speeds, ranging from 5 to 30 seconds in duration, but I just didn't like how they turned out. I was honestly surprised that the shots I liked the most were the ones that were a bit quicker, ones that kept a bit more texture in the waterfall.
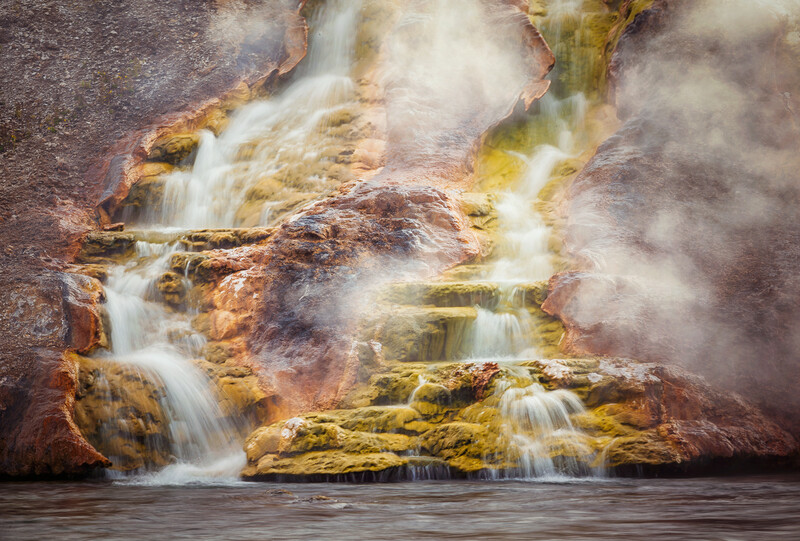
With this shot of the heated stream dumping into a colder river, I opted for a much slower shutter speed. I just loved all the textures and colors that were at play in this spot, I wanted to have that show through a bit with my shot. I chose a slow shutter speed to smooth that water out so it would contrast against the brightly colored, highly textured rocks.
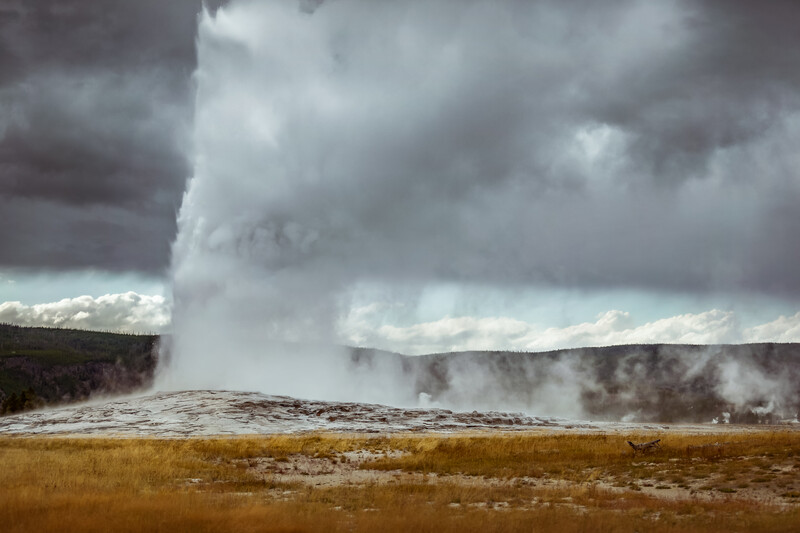
With this shot of Old Faithful, I really wanted to capture the character of the geyser, so I went specifically for a higher shutter speed. Even then, I probably could have gone with an even faster shutter to potentially capture more crisp detail in the fountains of water. That thing really shoots up quick! Even though this is a shot of steam, I think it still counts as capturing water. Looking back, I wish that I had opened up my ISO so as to close down my aperture in order to avoid some of the out-of-focus parts in the image. That would also have allowed me to shoot with an even faster shutter speed. Oh well!
Basically, this trip taught me about the importance of choosing specific shutter speeds for a concise effect in the image. Just because I had a tripod, and could blur that water into silky ribbons of oblivion... didn't mean that I should. It's when I really started to read my scenes, to pick a shutter speed that told the story I wanted to tell, instead of arbitrarily picking a shutter speed because it was showier in technical terms.
2. Capturing The Wildlife
The amount of wild animals that roam throughout the park is impressive enough. Once you start to realize how many different species there are, just in Yellowstone, it's kind of like driving through an American mid-western, free range, zoo! It really is incredible to see many of these animals in their natural environment, it's that much more fun to capture a picture of one, here and there.
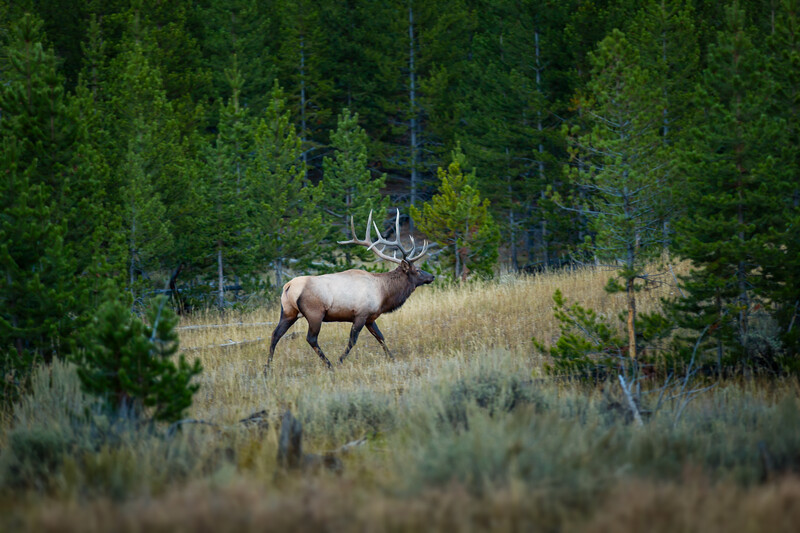
If you can find the animals, capturing them is relatively easy. From what I experienced, the longer focal length you have, in the way of lenses, the easier it will be for you. For this trip, the longest lens I had was my 70-200mm. However, I can tell you right now, I wish I had rented something in the range of 400mm, maybe even 600mm. I barely even left the car for this shot. In fact, I was kneeling near the edge of the road to get this one. The thing to remember is that you're not alone, there are other people there to enjoy the same views as you. So be courteous and try not to walk in front of other peoples' cameras, pull your car completely off the road (if permissible, otherwise keep moving), and pay attention to your surroundings.
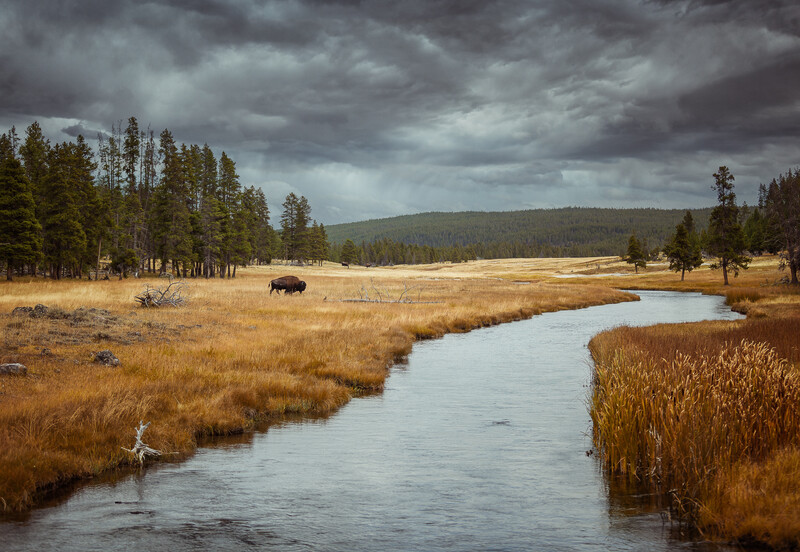
For this picture above, we had found a good parking space several hundred feet away from this spot and I simply walked down to the bridge and just shot from there. I had a good vantage point with no obstructions. All I had to do was be patient and wait for the buffalo to make his way out of the trees and into the grass. Being willing to be patient will allow you to grab some of those shots that most people will never capture. When it comes to capturing pictures of wild animals, a lot of the lessons that I learned from Yellowstone really weren't lessons that I had to experience for myself. I watched a lot of people make some really stupid decisions and get pretty close to getting themselves hurt. There are signs all over the place warning visitors to keep their distance from the animals, especially the larger animals. You don't have to get right up in an animal's face just to get a decent picture.

That being said, sometimes the animals themselves will choose to come right up in your face! If that's the case, just use your head. For this shot, I was kneeling down to get this low angle, but I was about 18 inches away from our car and I kept the car door open. The buffalo wasn't interested in me, but I didn't want to take any chances; there are plenty scary videos on YouTube of people getting charged by getting too close to these majestic animals. I grabbed my shot, and hopped back in the car. Not even a full minute after that, this guy literally walked right behind our car and meandered across the road.
In a nutshell, what I learned about shooting wildlife in Yellowstone is pretty simple. Firstly, don't be an idiot. Instead, be safe and smart. Also, don't worry about getting every single shot down to perfection! It's okay if the f-stop isn't perfect, or if the shutter speed is a little too slow, you still captured something super cool! I think that's probably the biggest lesson I learned while trying to capture wildlife. Even if I never even took a shot, I still got to see and appreciate some incredible views out there and I think it's important to remember that. Getting to take any pictures home at all is a plus, but just enjoying the views for what they are is also pretty important. It makes the trip more fun!


20 Comments
Nice work! Yellowstone is magical for sure and I'm inspired to return one day soon!
Thanks, Adam! I loved my visit there and I cannot wait to go back!!
Nice work and good waterfall shutter speed tips. With today's higher megapixel sensors, at least one has the ability to crop quite a bit closer if for some reason the lens does not reach
Thank you! You'll have to let me know if you end up shooting something where any of those tips came in handy! :)
Rex! This is incredible man. I love the shots with wildlife. Something you do't get to shoot all too often because they typically stay out of the way from humanity. Such a coincidence that you wrote this article. I am traveling to Yellowstone next Tues to shoot a short doc with some friends. I'll be arriving a few days early to do my own exploring as most of our business is video, not photography. Do you have any suggestions as to where I should go?? I have literally been so swamped with work I've had no time to do my homework. Yet. Is it possible to see Yellowstone and the Tetons in 2 1/2 days? Where did you camp/lodge at? Any suggestions would be highly appreciated my friend. Feel free to email me direct at markbowers84@gmail.com if you'd like to keep this off your comment stream. Really beautiful shots man, can't wait to get my own!
Thanks, Mark!! I have so many suggestions for you! I'll make sure to shoot some info over to you this weekend! I look forward to seeing what you capture while you're there!! :D
I just sent you an email! Let me know if you got it, or if I should re-send.
Your picture epic!! That first landscape, you have to be so proud of that one!
Thank you so much! I felt incredibly lucky to capture pretty much all the shots I managed to get while I was there. The weather couldn't have cooperated any better than it did!
Beautiful shots and great tips, look forward to your next two parts... For what it's worth, would love to see a before and after of the processing of your first image, and what you did to capture that much range.
Thank you, Andrew! I'm glad you enjoyed the read! I am so stoked to release the next two parts!! I'm also working on a bunch of back-end stuff about these shots from Yellowstone, stay tuned!!
Holy shit, that first image! Is that shot at artist point? Sunset I guess?
Thank you!! That's actually looking downstream at the brink of the Lower Falls, early morning. :)
Awesome, thanks! :)
Great article! The cover photo is absolutely mind blowing! Would be super proud of that photo! All the other photos are nice too (except the Old Faithful), made me remember the good old times when I was on the road trip across the national parks. The Old Faithful is better in person than on any photo I've seen. I guess it's impossible to shoot a good photo of that. I had white clouds as the background so there was no contrast and my photos came out looking like crap.
Thank you, Stas! I totally agree, Old Faithful is so hard to capture, definitely much better in person!
When I lived in Cody in film days, I was usually impressed at how much bad, plain light was about, so that for most of the day, taking photos was more or less useless. The elevation contributed to the problem. I need to go back through the Kodachromes from that era. I also need to set up a program of revisiting places like Yellowstone and adding some more to the list.
Light can really be tricky, we got pretty lucky on our trip with a solid variety in weather and lighting conditions.
If you have any of those Kodachromes scanned, I'd love to see how they turned out!!
I need to undertake a scanning campaign. My long-time camera was a Minolta XE-7 with lenses from 28-200 mm. It had an impressive Leitz-Copal shutter.
Rex. Nice article and great shots. I am going to Yellowstone NP in September. I want to try some of your techniques. Also, I like your comment concerning the texture of the waterfall since it gives texture to the flowing water.