
Editing pictures of the Milky Way is difficult to get right. Which white balance do you use? How bright should the scene be? How do you remove excessive noise without stars disappearing? Well, follow these eight steps for image editing success on the galactic scale with Lightroom Classic.
There are plenty of reasons why it's difficult to edit photographs of the Milky Way. For starters, the photo is taken at night when it's dark and the rod cells in our eyes aren't very good at picking up color in low light. This is compounded by the fact that our cameras can take long exposures and reveal detail in scenes that we can't see with the naked eye. Detail that we have to process when editing the images later. As more people move to the cities to live, more of us are losing the ability to look up at the night sky and see the Milky Way, so even if we manage to get a snap of it, how are we supposed to know what looks normal?
In this tutorial I'll walk you through eight steps you can take in Lightroom Classic to improve your Milky Way image editing. I'll address color, exposure, contrast, and other detail adjustments such as sharpening and noise reduction. I'll be giving suggestions of my favorite editing styles, but also pointing out some helpful hints to keep things looking accurate and realistic. So take a few minutes to follow along and watch your Milky Way shots come to life right on your screen. Oh, and make sure you're shooting your astro shots in raw format because this gives you the widest flexibility when it comes to processing your images.
1. Choose Your Color Profile


After import the first step is to set the right color profile. This is often the most overlooked step for most Lightroom editors but it transforms the rest of your editing workflow so dramatically that you should really spend a little time choosing the best profile for you. Personally, I like the default Color, or Landscape profiles because they have rich tones with plenty of depth in the shadow areas. But there are also some other good preset options if you click Browse which give a more stylized effect. In the image above you can see the difference between the Neutral and Landscape profiles.
2. Balance the Color


Which color temperature you choose is based entirely on whether you want to stay realistic with tones, are aiming for a specific style, or perhaps want to remove some orange light pollution from nearby cities. It's good to start with a reference point and I choose the Flash white balance preset because it's pretty flat and natural at around 5500K with no tint in either direction. From here, I like to experiment with Tungsten or Fluorescent white balance if there's heavy light pollution. This calms down the warm tones and introduces more blues and purples.
3. Get the Exposure Right

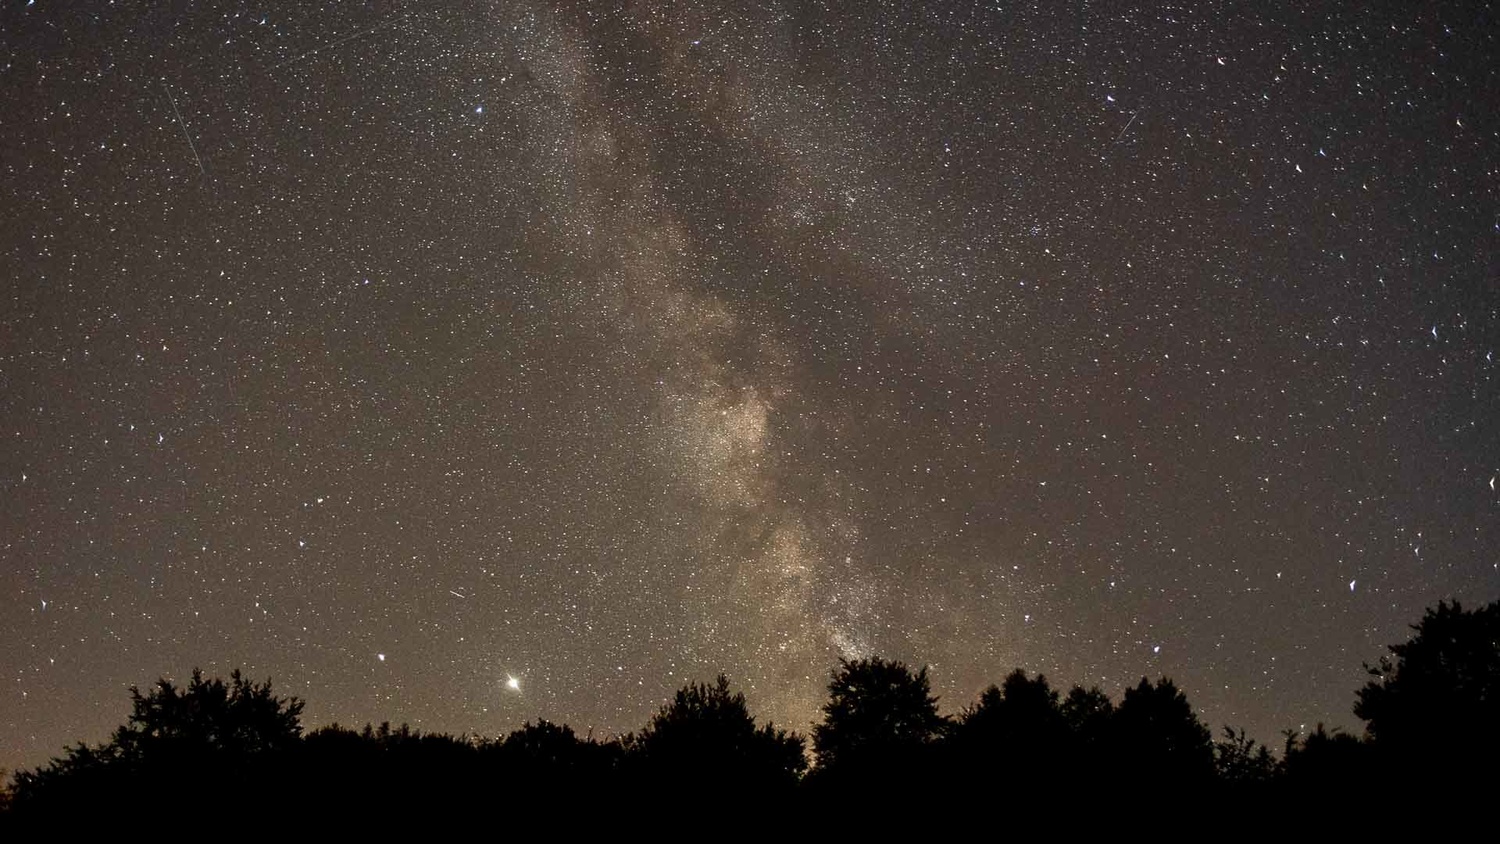
A simple increase on the Exposure slider to 0.35 lifts the slightly underexposed shot
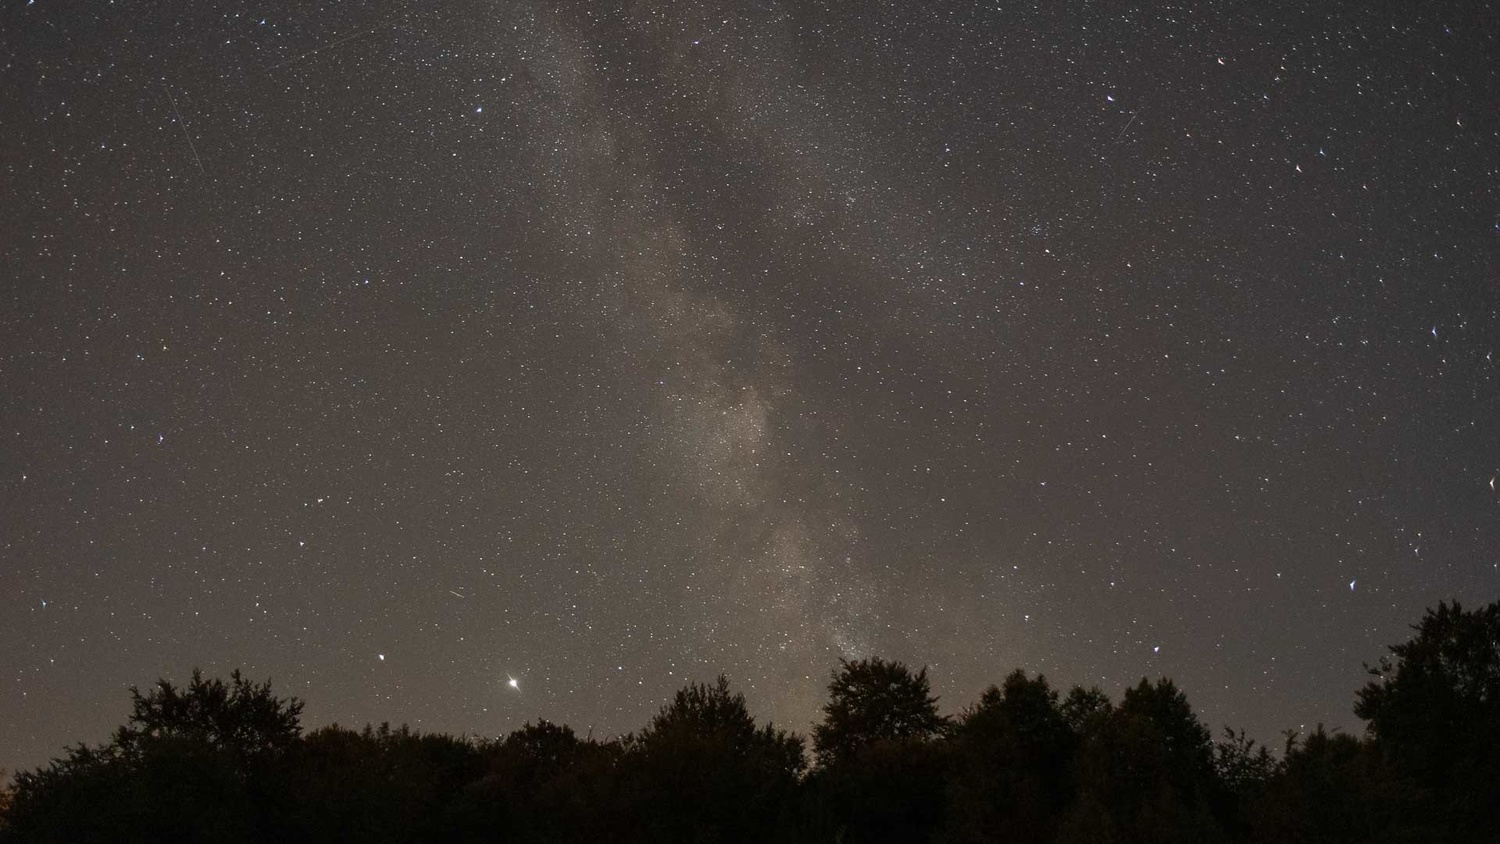
Nailing the right exposure is tricky on any astro photo, but the Milky Way actually guides you because it provides a large, bright portion of the sky from which to reference. Now, you should be getting the exposure right in-camera and not relying on Lightroom to boost your shot. If you find yourself always boosting exposure because your shots are too dark then you'll need to set a longer shutter speed during capture. However, a little selective exposure boost with the Adjustment Brush set to a high feather can help lift the Milky Way in amongst the darker night sky.
4. Boost Star Contrast

Astrophotographs are by their very nature, dark. So I like to boost the Whites slider up high to make the brightest parts of the image (the stars) stand out. I don't recommend boosting the slider all the way to 100 because you'll get highlight clipping and there'll be loss of detail around the stars, but a little lift of anywhere between 10-50 will give them some shine.
5. Keep Shadows Deep

In addition to boosting the Whites slider you may also want to deepen the Blacks slider slightly just to enhance the contrast in the scene. The reason for avoiding the Contrast slider is so that I can be specific with bandwidths of tones, so by altering the Whites and Blacks sliders I'm editing the two ends of the tonal spectrum. Milky Way shots are already dark enough though, so be sparing with the Blacks slider or you'll introduce shadow clipping.
6. Enhance Texture


Using the Texture or Clarity slider is a point of contention for many photographers, with some overdoing it and others avoiding it altogether. However, if used in the right way, a little increase of the Texture slider helps to improve localized texture around contrasted edges. With bright stars in the Milky Way set against the dark black sky, sometimes a little Texture boost to about 10-15 highlights every pin of light up in the sky. Overdo it though, and you'll see what looks like noise in the Milky Way. Because the Milky Way is so dense with stars, nebulae, and other heavenly bodies, we perceive it as more of a wash of color and light than the individual stars that make it up, so don't turn it up too high. In the image above, you can see the difference between 0 on Texture and Clarity sliders, and +33 and +10 respectively in the after image.
7. Reduce Noise


Reducing noise in astrophotographs is a balancing act. Avoid using it and you may risk admiring a star cluster for hours before realizing it's just noise induced by the sensor, but add too much and you might remove the very stars you're trying to capture. That's why it's a good idea at this point to zoom in to at least 100% (1:1) to see how much the noise reduction affects the image as you apply it. I've found a good balance is to apply some Luminance to a level where 99% of the stars are still visible but you're removing a lot of noise, and then fine-tune using the Detail slider by boosting a little to keep things a little sharper on the smaller spots.
8. Make It Sharp

I wouldn't advocate any sharpening while editing astro shots, but a small amount of output sharpening in Lightroom Classic is a good idea when you're finished
Generally, I'd avoid adding any sharpening when editing Milky Way shots. If you're going to display them high resolution on a website, or perhaps print them out, then it's a good idea to include some export sharpening for whichever medium you're outputting to, whether for screen or print.
Summary


So there's eight basic steps you can use right now to improve your Milky Way photographs. In my shot above I took the flat raw image and transformed it into a Milky Way shot that I think is out of this world. The steps above will work best on raw images because this gives you more image data and greater flexibility when it comes to editing.
In fact, I recommend shooting on raw for all your work. JPEG or TIFF is okay if you're doing high volume work such as motorsports and need to upload shots immediately without editing, but for the rest of us who have some time to edit then raw is the way forward. If you've found any of this helpful, or have a useful tip of your own, leave a comment down below and share it with the community.
If you love travel and photography, consider checking out our Photographing the World Series with Elia Locardi where we go to some of the most beautiful locations in the world and teach the process of creating world class landscape images. Save 15% by using "ARTICLE" at checkout.


Very useful tips -- thanks for the article!
Although I don't have LightRoom these tips look generic enough that I should be able to largely apply them in other RAW converters as well.
New Moon coming up next week. Might be the perfect time for me to give MilkyWay a shot. this article will help, Thanks!
Thank you for making this an article I could read, instead of a video that makes me invest 25 minutes to mine the "8 tips" (or five or three or whatever) from the chaff of self-regard!
Just a comment, if I set longer shutter times, how do I avoid star trails?
The best way, in my opinion, is to use the PhotoPills app to let it calculate that for you based on the NPF rule.
You can read more about it here: https://petapixel.com/2017/04/07/npf-rule-formula-sharp-star-photos-ever...
There's an old rule-of-thumb called the "500 rule" but it's inaccurate, basically outdated by cameras with higher megapixel count and by APS-C cameras, and also doesn't take into account the effect of aperture.
The NPF rule does take all this into account. PhotoPills simplifies it because it already fills in your camera-specific parameters, and you only have to fill in your lens focal length and aperture. (There are other apps that can calculate the NPF rule, and spreadsheets available online, but then you still have to fill in all camera-sensor specific details).
If you don't want to purchase the PhotoPills app, tell me your lens focal length, aperture, and type of camera and I'll give you some guide-numbers.