
A few months ago, I shared how to take stunning night photos. There, I touched on the technical aspects of taking and editing such images. In today's article, I expand on the topic, focusing on creating perfectly noise-free night images.
A lot has happened in the software industry over the past year. AI is everywhere, including in photo-editing software. Most of those new tools still have limitations. Some introduce artifacts in an image, and others limit the resolution of the photos they can handle. One tool that stands out for me is Lightroom's AI noise reduction. I'm surprised at how well it works, especially on night photos.
But to create technically perfect night images, some additional steps are still required. First, you should start by using the best camera settings for astrophotography. With those, you will get pinpoint stars without any trailing. But those settings will also yield a lot of noise in the photos. And there are three steps involved in dealing with it.
AI Noise Reduction
As I mentioned above, AI noise reduction in Lightroom is the tool of choice for cleaning up night photos. But if you take a photo at ISO 3,200 or ISO 6,400, something often required to show enough features in the sky, noise reduction alone will not be sufficient to create a perfect result.
I usually set the strength to 50 when applying AI noise reduction to night photos in Lightroom. Going beyond that introduces artifacts. From my experience, those are not very noticeable and much better controlled than with tools like Topaz DeNoise. But in a large print, you'll see them.
In the image below, I show a 100% comparison between an out-of-camera raw file, shot at ISO 6,400 with the Canon EOS R5, an image with basic Lightroom settings applied, and then the same photo with AI noise reduction.
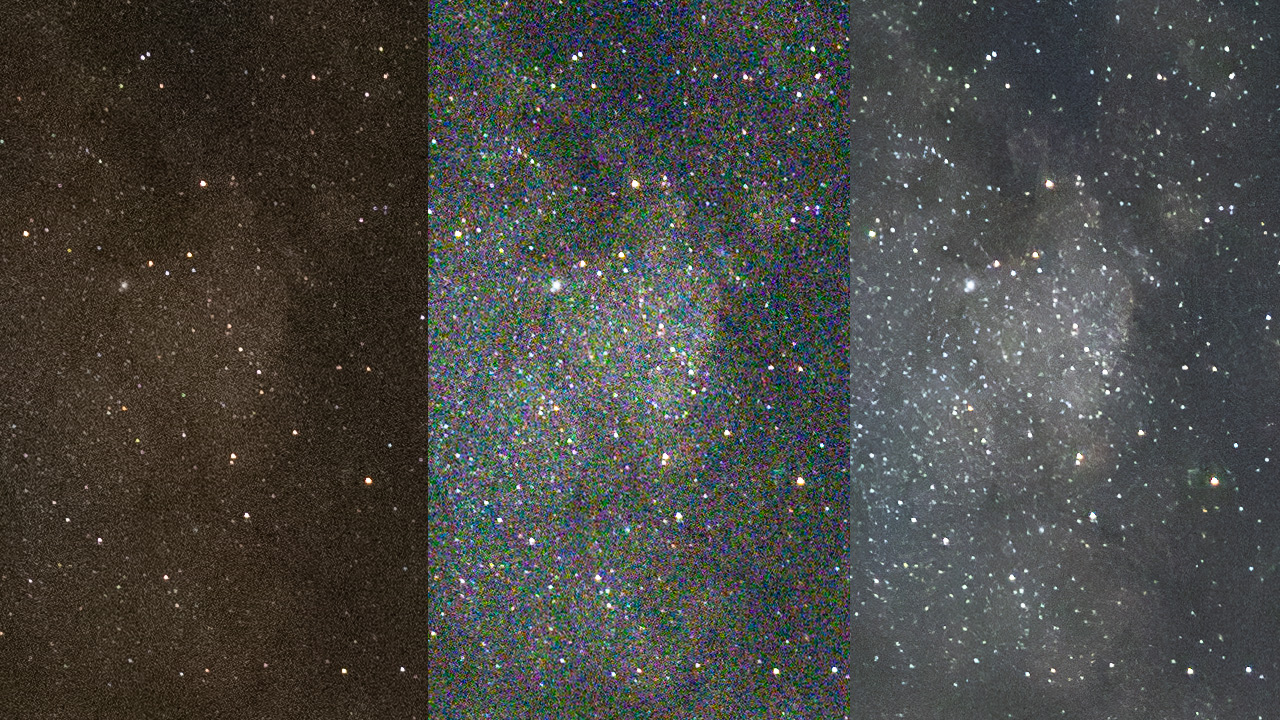
From left to right, you first see a drastic increase in visible noise. It is due to the contrast and brightness I added to the raw photo using basic adjustments in Lightroom. The noise is nearly eliminated in the rightmost image as noise reduction is applied. Also, with a strength setting of 50, no artifacts are visible, even in a 100% view.
Image Averaging
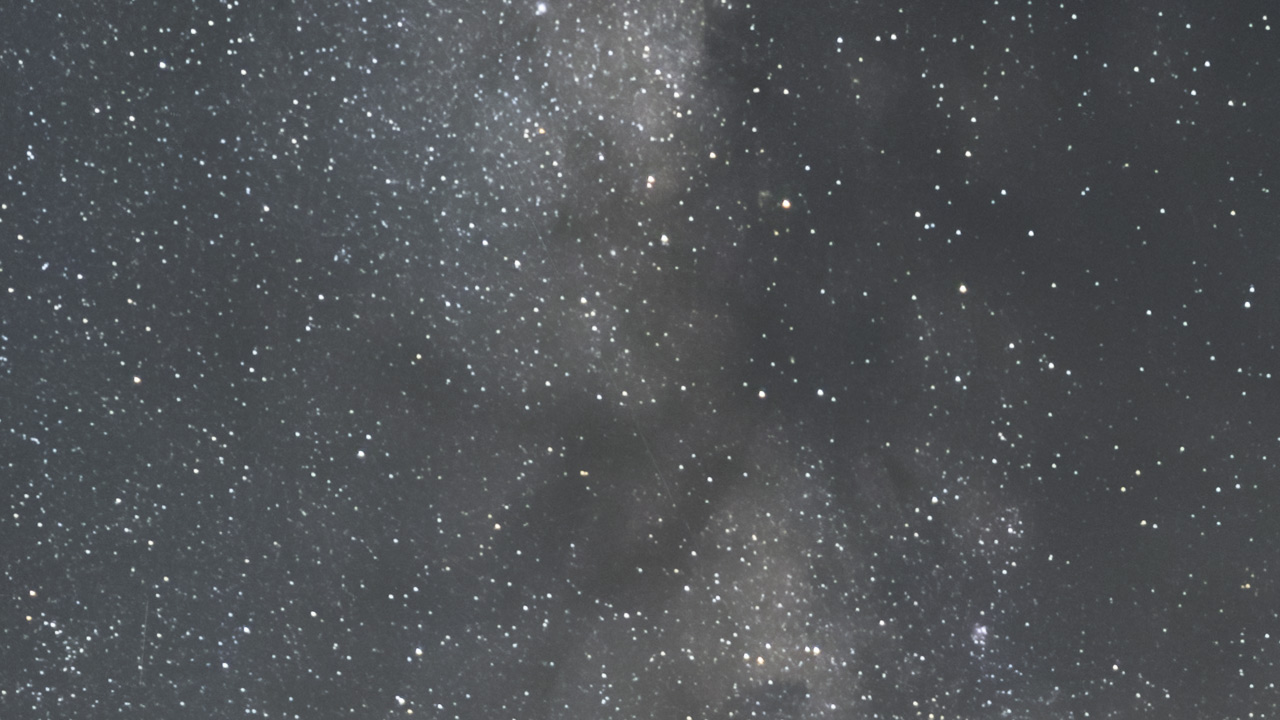
How do we now get from an image that was taken at ISO 6,400 and looks as if taken at ISO 800 after reducing noise to a photo that looks like an ISO 100 image? The solution is image averaging. In the past, I typically took between 20 and 40 photos of the night sky to average out the noise using a software called Sequator. Thanks to AI, between five and ten images are now enough.
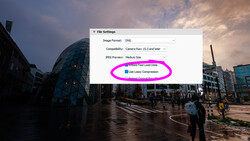
As I show in the feature video, you must first apply noise reduction to all photos of the sequence before exporting them as 16-bit TIFF files with Adobe RGB color space. After you load those files into Sequator, apply the following settings:
- Composition: Use "Align stars" with the mode "Accumulation"
- Sky region: Use "Boundary line," "Gradient," or "Irregular mask" depending on the shape of the horizon
- High dynamic range: You must set this to "On" to keep the overall brightness of the image intact
- Remove dynamic noises: Set it to "On" as well
- Reduce distor. effects: Setting it to "On" creates better results
- Color space: Use "Adobe RGB" color space
You can leave all other settings switched "Off" and start the averaging. The resulting TIFF file will look as clean as a photo taken at ISO 100. If you're still not satisfied, use more photos for the averaging. It will also blur the horizon line more, and the blending with the foreground might get harder, though.
Time Blending
The final step is to bring in a clean foreground. If there is any ambient light in the sky (for example, from the moon), you can capture the landscape using very long exposures just before or after taking the image averaging sequence. Alternatively, you can use the image averaging technique for the foreground too. The same principle applies, but instead of using Sequator, you should use Photoshop for the averaging. Load all layers into Photoshop, put them in a "Smart Object" and select "Layer - Smart Objects - Stack Mode - Mean".
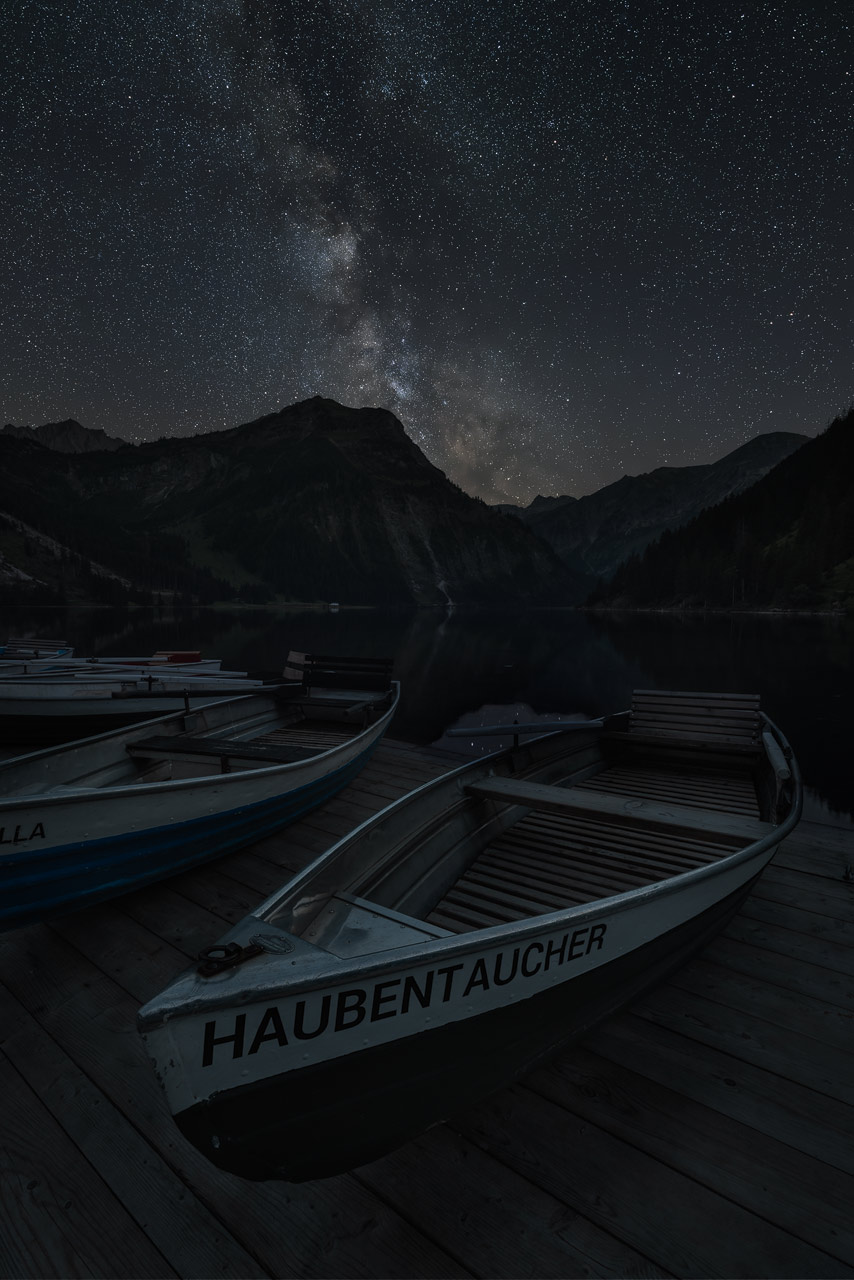
But often, it's too dark at night, and even an exposure of several minutes will not show any detail in the foreground. That's why I prefer to capture photos of the landscape during the blue hour. With the right preparation, those will blend well with the images of the night sky. The whole procedure requires patience. To take the photo of the boats at Lake Vilsalpsee, I spent more than two hours taking all the images.
To get a convincing blend, you must first create a precise mask for the sky. Use it to combine the image for the foreground with the averaged photo of the sky. At first, this will look horrible and completely unnatural. The key now is to use curves to drastically darken the complete foreground. Make it nearly black, so it looks similar to the landscape in the night photo. Start gradually masking out some of the effect of the curves layer with a black brush and low opacity. Think of it as reverse dodge and burn. In my in-depth tutorials, I share this process in all its detail. It takes some practice to achieve a convincing result, but you also have control over which parts of the foreground you want to reveal and which you want to keep hidden in the shadows.
Conclusion
With every advancement in camera technology and software, night photography has become more accessible. Gone are the times when you needed a f/1.4 or f/1.8 lens to capture the night sky. Now, you can get away with using ISO 6,400 and an f/2.8 lens. And I'm sure the requirements will further shift in the future.
For me, this is a perfect example where AI helps photographers achieve their creative vision by removing technical limitations. And I'm excited about what the future will bring in this area.


Join the Fstoppers community for free
-
Post comments and join in the discussions
-
Browse the site ad-free
-
Share your work and get featured in the community
-
Compete in the photo contests for fun and prizes
3 Comments
No Noise Reduction is AI. Period!
I do not want to be little your process, so please this is not a bad reply! What you are doing is so long ago in camera time! I commented in you last post and commented on the modern ways. But first and foremost please use camera NR, with today's cameras and images come out really clean. Sensor today are backlit and require less ISO's. Also dual ISO points here the low 640 is better than a lower ISO. Again another improvement is ISO Invariance meaning even using a dark image ISO just increasing the exposure will brighten as well as have the less noise of the lower ISO.
Single images with good SS will eliminate all that extra work!
The high ISO cameras like the a7s/ii/iii are mainly for those doing video in very dark places, stills rarely get above 6400 in the darkest of places but there is the second level ISO od 12800 to start the lowering of noise in sensor hardware. A7iii was the start of ISO Invariance.
Camera NR? And Shooting JPEG, right? Are you serious? I stick to my old ways ;-)