Astrophotography and nighttime photography generally come with their own respective challenges. The biggest problem tends to be increased noise especially in the shadow areas of an image. But what if there was some incredibly smart software that could magically get rid of the noise and improve your images, would you use it?
For the last few years, I have been using software from a company called Topaz Labs. The software that I have been using the most from this company are Sharpen AI, Gigapixel AI, and DeNoise AI. Each of these offers features that can improve specific areas of an image.
For example, Gigapixel AI, which is one of my favorites, can intelligently increase the resolution of an image file. It's quite remarkable how even the smallest and most compressed of files can be converted into huge dense images that you can print.
The second of the three is Sharpen AI. As the name would suggest, this software will sharpen images even if you miss focus slightly. The software analyzes the image and then sharpens areas of the image that are in focus and reduces noise in out-of-focus areas. This is all done in just a few moments and does not require any manual masking. Sharpen AI is the software that I use the most.
Finally, we have DeNoise AI. This is probably one of the most useful software for astrophotography and nighttime photography.
All three pieces of software are on sale right now for Black Friday for just $99.99. You can buy your copy using this link.
Remove Noise From Milky Way Images
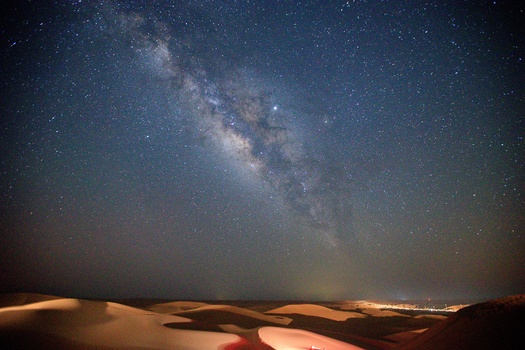
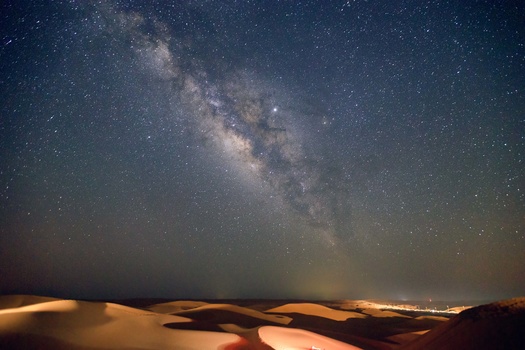
Image by Imran Mirza
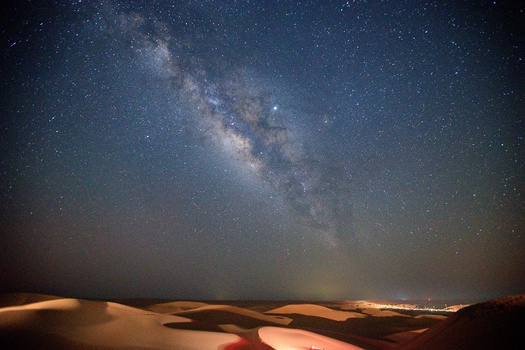
The straight-out-of-camera milky way image above is what we're going to be working on. If you look at the cropped version of the file you'll notice a significant amount of noise. The photo was taken with the Canon EOS 1DX II, the EF 16-35mm f/2.8 II, and was shot at ISO 6400. The Canon 1DX II is now almost a 6-year-old camera, so this kind of noise is to be expected when shooting in difficult scenarios. Fortunately, software DeNoise can make a huge difference.
Using Adobe Lightroom, we can perform some initial edits on the file, such as managing the exposure, white balance, and so on. Once satisfied, we have the option of either using Topaz Labs software from Lightroom or we can take the image into Photoshop and applying the software effects there.
Integration with Lightroom has been done pretty well. With a simple right-click you can select which of the three software you'd like to use on an image.

In Photoshop, you can use both Sharpen AI and DeNoise AI, however, Gigapixel AI only appears as an option in Lightroom. This however does fit in quite well with my workflow so the lack of Gigapixel in Photoshop is not at all a problem.
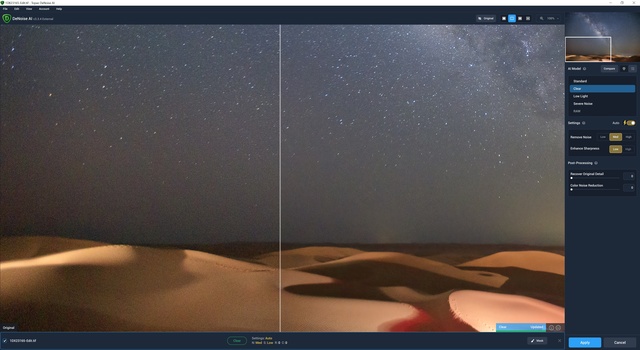
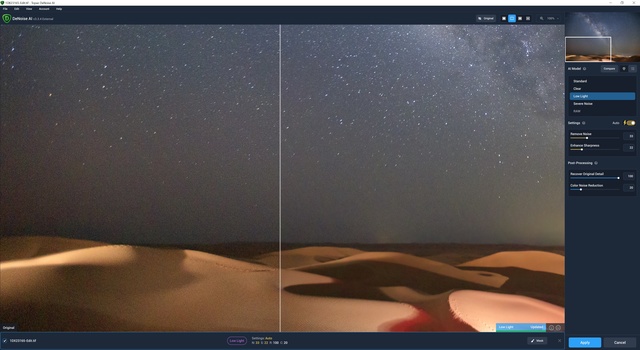
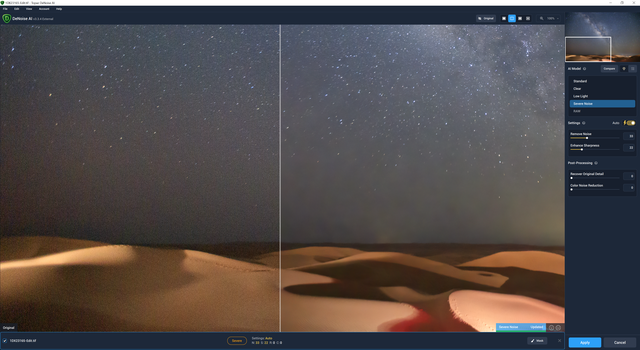
Once you open the software from Lightroom, you have a number of preset options on the right-hand side panel. You can of course tweak the settings, however, I find that in almost every situation, the preset options are fine. The available options are Standard, Clear, Low Light, and Severe Noise.
As you can see in the examples above, each of the preset options removes noise in a slightly different way. The Severe Noise and Standard options are far too aggressive for this particular image so I decided on using the Low Light option. This setting seems to do the best in my view when it comes to removing noise but also retaining detail.

For this particular image, I did end up tweaking the settings. The result is that DeNoise can remove unwanted noise from an image without removing crucial details. This is especially the case when it comes to the stars that are barely visible in the image. These add to the final file and if the software removed it, the results would be quite poor. Fortunately, DeNoise is smart enough to avoid doing this.
Sharpen Milky Way Images in Photoshop
Once I've applied the DeNoise software to the image in Lightroom, it's ready to be taken into Photoshop for a more extensive edit. Unfortunately, a lot of the time when photographing the milky way, results can end up looking a little soft. Motion blur is generally an issue, however, sometimes it can also be due to missing focus. In this particular case, the image does demonstrate a noticeable amount of motion blur.

After creating a second layer, you can open Sharpen AI by clicking on the filter drop-down option and going down to Topaz Labs. The software will open up in a smaller window and similar to DeNoise, it will offer a range of options.
For this image, I found the automatic settings a little too aggressive, and for that reason, I opted to control the software manually. The Motion Blur - Very Blurry option on the right-hand side panel was the best fit. I increased the amount of noise reduction to prevent the sharpening from reintroducing noise back into the image.

The result was an image that had far more defined details and the overall noise in the file has been reduced quite significantly. In most cases, I prefer to use Topaz Labs software in Photoshop and this is because you have the option to create a layer mask. Although the software itself does allow you to mask out certain areas, I personally prefer to use the masking features of Photoshop.

Finally, after a little color grading and a few minor edits, we can save the image and return back to Lightroom. Once in Lightroom, we can take the file into Gigapixel to increase the overall resolution of the image.
Improve Your Astrophotography With Gigapixel AI
Gigapixel AI is probably my favorite software because honestly, I enjoy more resolution. The Canon 1DX II is a 20-megapixel camera. For many types of photography, this is probably enough. However, I generally prefer images that are at least double that and this is why I shoot with higher resolution cameras myself.

As mentioned above, Gigapixel AI can be launched through Lightroom and it's the same as launching DeNoise AI. Simply right-click on the image and select the software via the Edit In option.
Once the software opens, you'll be met with a range of different options. The top section on the right-hand side is to do with the size you want. The software does have an upper limit on how much you can increase the resolution of a file, however, I've never reached anywhere near the upper limits. For this image, I decided on increasing the resolution by 1.5x the original. This resulted in a file that was just over 44-megapixels.
Below the resolution options, you have the AI options. Here you can audition and select the best fit for your image. I decided on using the Standard option with the auto settings and this produced the best results. Some of the other settings were over-enhancing the feint details in the file, which could work for other types of photography, however, it didn't work for this image.

Final Results

The final result we have is a 44-megapixel image that is not only sharper and more defined but has significantly less noise. Noise in Astro images can be tricky to get rid of. The main reason is that a lot of noise-reducing software can get confused between starry details and noise. This isn't the case with Topaz Labs software because it manages to effectively differentiate between detail and noise.
The software suite from Topaz Labs is something I continue to use almost daily because, in my view, it is utterly brilliant. With Black Friday here, Topaz Labs has an awesome deal running right now. You can purchase the whole software suite for just $99.99. You can buy your copy using this link here.





Also been using all and was the best things when they came out and still are the best but Dxo PureRAW can be sharper and less noise. I just PP an image of a 2019-01-20 lunar eclipse using Dxo first then to LR exporting to Topaz Sharpen and Denoise with some LR sliders between and using LR masking subject (selected moon) and inverting subject to do sky basically to desaturate to get white stars and a darker sky. Using Sony A7Rm2 and Sigma 150-600mm @ 600mm f/6.3, 6s, ISO 800 no tracker. Topaz Sharpen has 9 different selections the blur got rid of the movement rings. Dxo does a lens profile but importing to Lr you can select the lens Profile and camera profile like "portrait". If you have many noise reducing a raw image run all to find the best output to use! I would advise not to use Lr noise reduction if using Topaz Denoise it seems to work best by itself.