
Product photography is a great way to experiment with lighting and editing techniques. For me, it’s a chance to shoot in a relaxed environment where I have complete control over the subject, lighting, and camera. I can set up something small in the living room and find solutions that can be applied to my portrait work or professional product photography. It also requires a lot of creativity. Homemade items or DIY solutions are abundant on sets. From light-shaping tools to methods of creating parts of a composite, a lot can be created simply and at a low cost. You may be surprised to see how minimal of a setup can create some stunning photos.
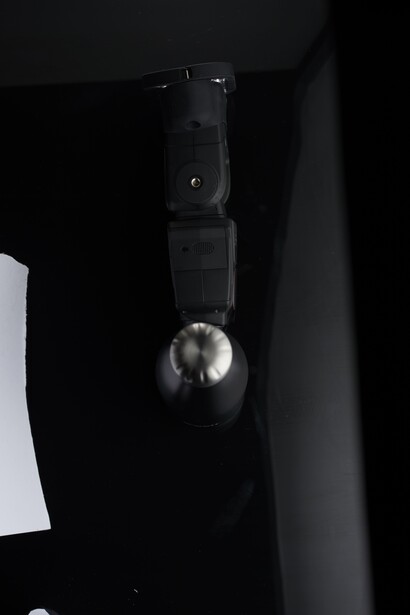
For this setup, I used two Lumopro LP180R flashes (for some insight on these brilliant units, I have a full review here), with one through a 48” Octabox directly to the right of the subject as my main light and one behind the bottle to light the backdrop. The reason for this is that a light source that large creates a super soft light that wraps around a subject as small as this water bottle. This helps to avoid harsh and defined specular highlights. This large light will also help us with the use of bounce cards to fill in the side of the bottle opposite the Octabox. The backlight will light up the background (a large piece of matte board), so it will be easy to remove the bottle from the background in Photoshop.
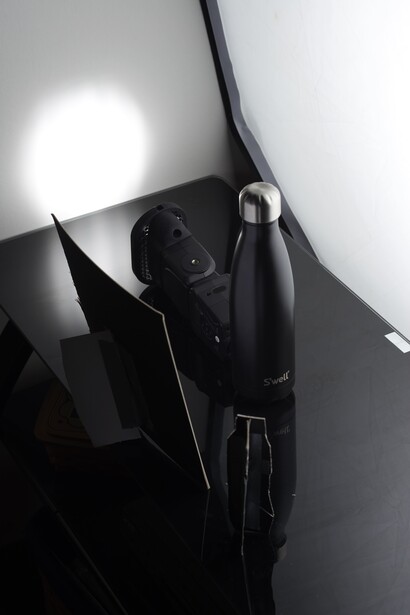
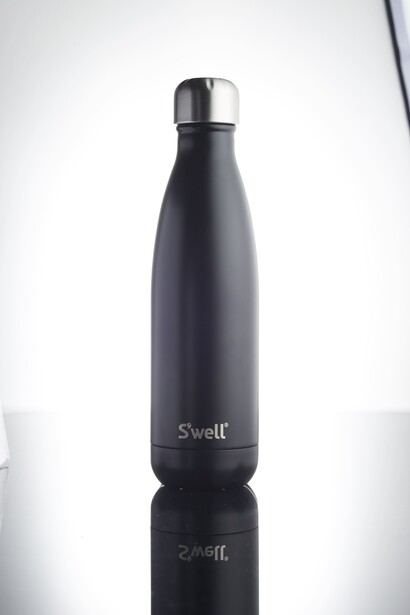
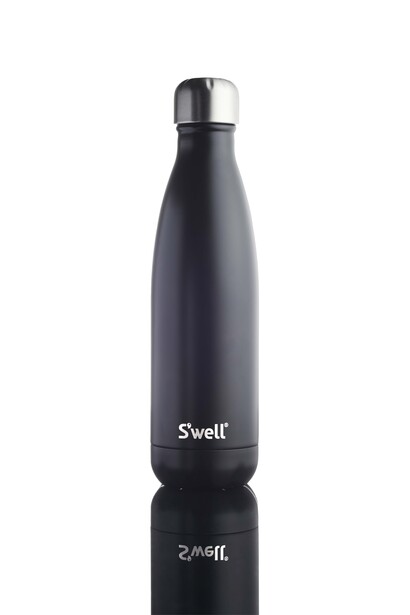
The bounce cards and background are pieces of matte board that I purchased from an art supply store for about $10. I used one large bounce card that is roughly the same height and width of the bottle. Again, this creates an even light that covers the side of the bottle with no hard edges. I also used a third, smaller card to add a small highlight on the front left of the bottle to give the image some dimension. This is the light that created the base image. Some dodging and burning was done to add to the contrast later. The reflection in the image is not added in with Photoshop. The surface on which the bottle is sitting is a glossy, black TV stand in my living room. I haven’t tracked down black plexiglass or Lexan locally, so I opted for this instead.
The background light was set at a higher power than the key light in order to blow out the background. The matte board has a little texture to it that I wanted to eliminate. The last thing that I added was water from a spray bottle to create droplets on the surface of the bottle. All of these elements come together to give us a good starting point for our Photoshop work.
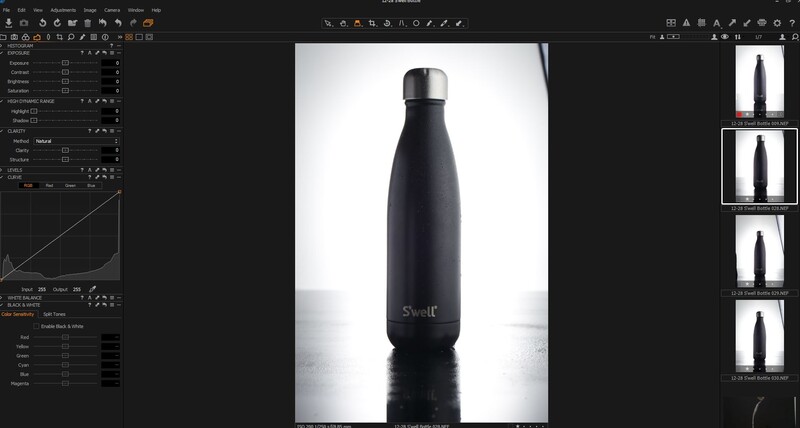
I open all of the photos in a Capture One session. Here, I choose which images I want to use and perform the initial tweaks. While in Capture One, I adjust color temperature and global exposure rather than in Photoshop due to the flexibility of the D800 raws over the TIFF format.
Once I have chosen all of the images that I will use, I open them in Photoshop use the “edit with” feature. To begin, I always duplicate my background layer so I can easily revert back or clone from the original if necessary. On this initial duplicate, I perform cleanup. This includes clone-stamping, healing, and patch-tooling away the scratches and dust that showed up in the TV stand despite my best efforts to clean it beforehand. From here, I can start removing the bottle from the background. There are several ways to do this: I used a combination of the quick selection tool and the refine mask tool to create the mask. In his article, Nick Pecori shows another quick and extremely effective of creating a pure white backdrop for product images. Once I had the mask created, I right clicked with the quick selection tool and hit “new layer via copy”. This creates a new layer above the background copy that is just the bottle.
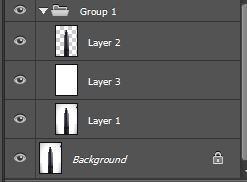
The next step is to make a new layer below our bottle cutout. This layer will be filled with pure white. Press "D" to revert your colors to pure black and pure white, and then, press "X" to switch to white. On the new empty layer, use the paint bucket tool (G) to fill the layer with white. Now, you should see the bottle and the reflection on a pure white backdrop.
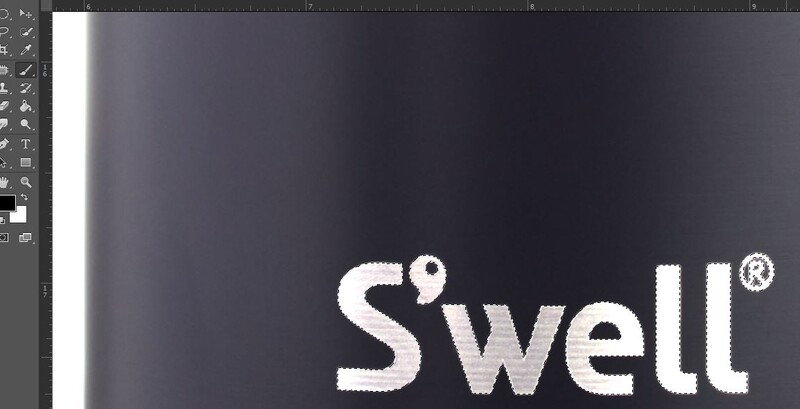
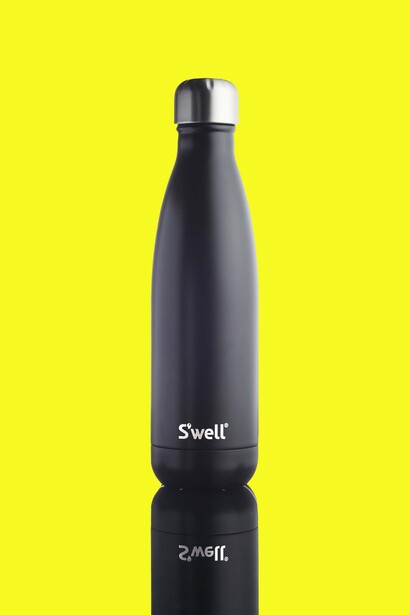
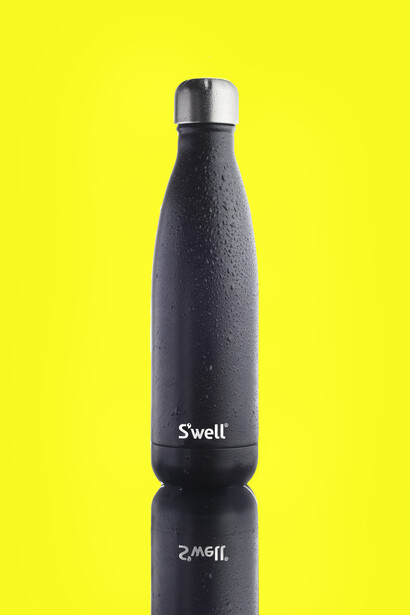
At this point, our image looks pretty good. One thing that stood out to me on this particular image was the brightness of the label. The bottle is a matte black that makes it look very sleek, and the label and cap are a shiny silver that stand out against the matte black. I wanted to enhance this effect. To do this, I again used the quick selection tool to create a selection of the label. Then I created an exposure adjustment layer with a mask. I applied the mask to the selection and painted in the effect. This ensures that the mask only affects the label and that it doesn't bleed onto the black part of the bottle.
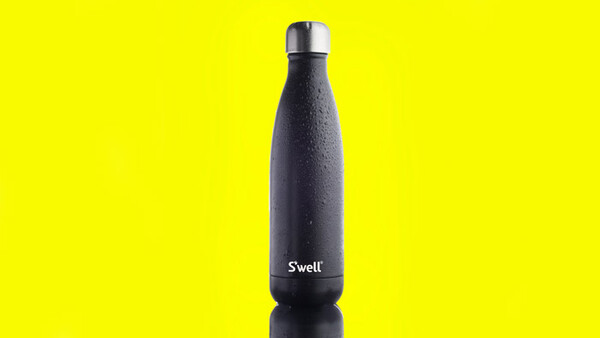
From here, I decided to change the background to yellow. To do this, I simply changed the white layer to yellow by selecting the shade I wanted and using the paint bucket tool. This creates even more contrast with the sleek and minimalistic bottle.
I wanted to add more dimension to the image with some water droplets. Because of the better composition and lighting of the current image, I decided to mask in the droplets from one of the other images. I opened this image in Photoshop and cut the bottle out. This time it was easier because we already have the mask created. I dragged this image into the current document and lowered the opacity to line it up. Then, I control-clicked on the original bottle cutout layer while I had the image with the droplets selected. I then masked out the background.
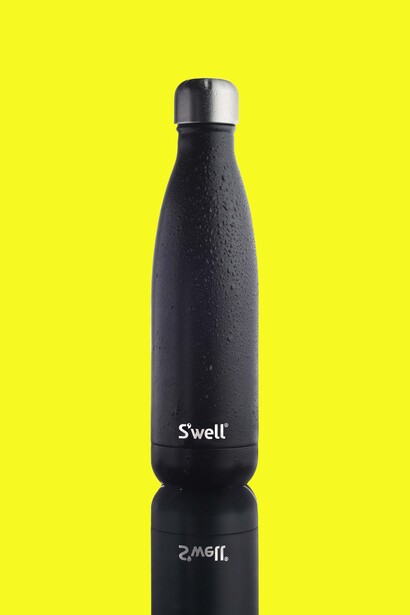
Next, I unmasked the label and the cap using the previous selection that we used to brighten it. I did this similarly on the reflection to ensure it matched the actual object. At this point, the image is just about finished. I decided that I wanted the sides to appear brighter, so I created a levels adjustment layer, brought the highlights up, and alt-clicked the create mask button. This creates a black mask on the layer, covering up the effect. To bring in the highlights, I used a large, soft, white brush at roughly 50% opacity to create an even look.
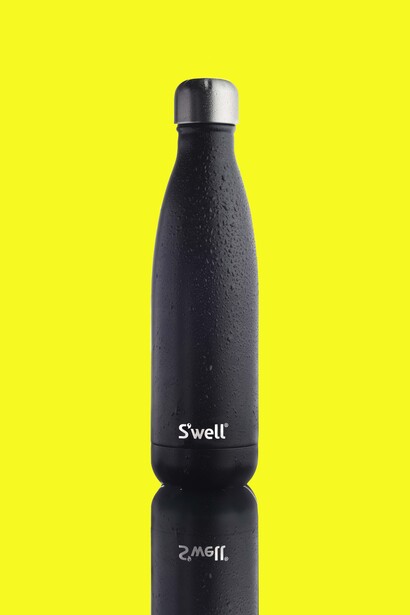
Below is the final image:
Product photography is a fantastic way to learn lighting. Sometimes, it can be difficult to book portrait sessions purely to play with lighting. With products, you can shoot for hours and try many variations of lighting setups. All you have to do is scale it up from there. For craftsmen or jewelers, knowing how to create beautiful product images can make or break an Etsy or eBay shop or website. It doesn’t have to be expensive, just done thoughtfully and deliberately. All of the images were shot with a Nikon D800 and the Nikon 85mm f/1.8 lens. These images could be shot with just about anything, but this is just my preferred tool due to resolution, dynamic range, and ease of use.
For those of you that have tried product photography or actively shoot it, what are some of your favorite DIY tools or methods that you use?
7 Comments
Nice final image!
May I ask, would the procedure be the same if the bottle would be transparent?
I use a 2 light (soft box) 3 minute BASIC setup I use for most bottle shots. (No touchups)
Why not do some light painting instead? It may just be me, but I have fun playing around with my lighting only using a phone to get some decent shots (in my opinion).
Here's an example of what I mean (sorry that it's unedited and not cleaned up):
Why yellow? That's not appealing if you're trying to sell the idea of a warm or cold beverage. And the mist of droplets on a double-walled bottle makes no sense. You should approach exercises like this as though it was a real shoot.
Cool! Thanks for sharing :)
This is excellent work, Spencer.
Very informative. Thanks!