
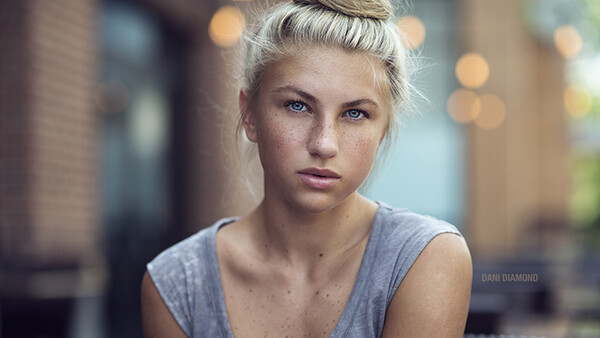
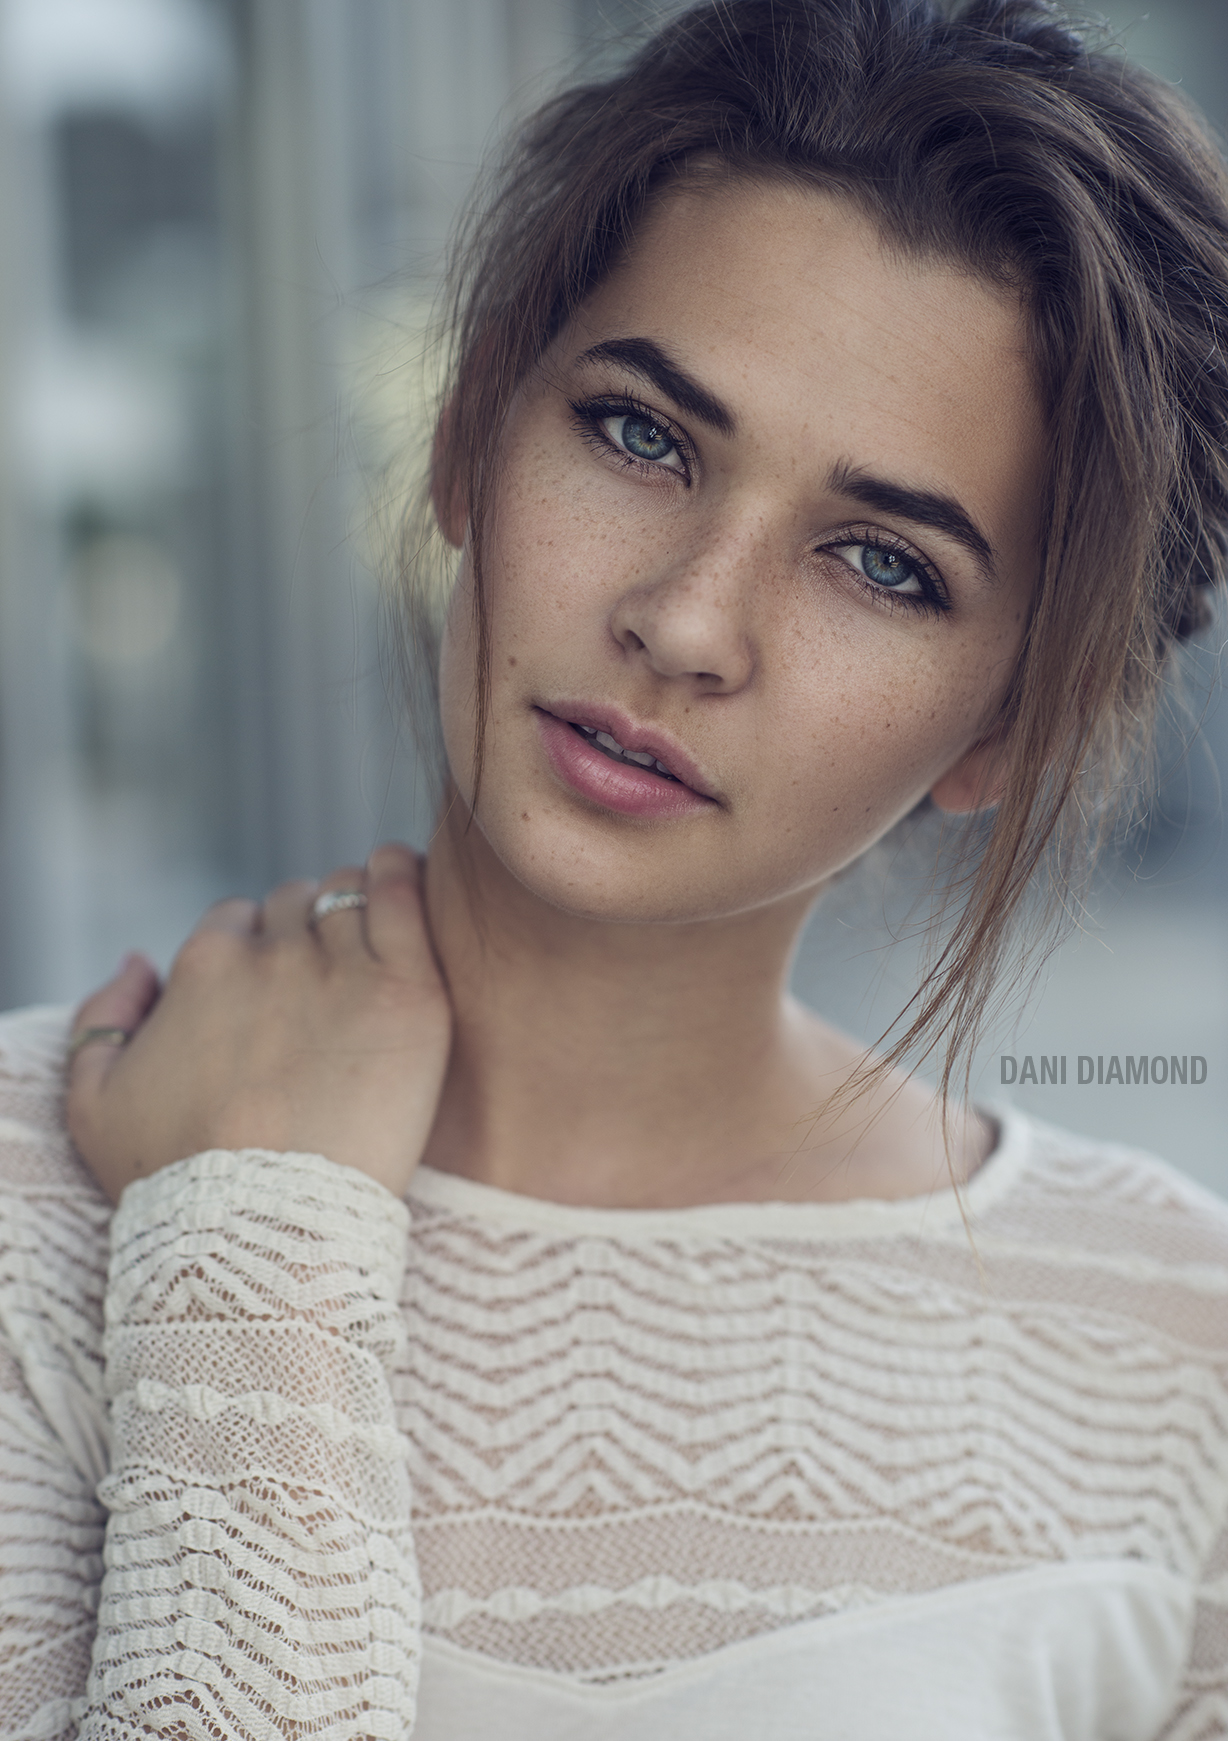
In my recent Natural Light Tutorial with RGGEDU, I went through every aspect of natural light photography and retouching... Or so I thought. During a shoot this week, I realized I missed one thing: enhancing freckles with Photoshop. In this article I will show a simple method to making those freckles pop. The first time the idea of retouching freckles crossed my mind, I figured there must be a really quick adjustment I can do to darken freckles to make them stand out. Eventually, I came to realize that there is no easy curves or levels layer that will pop those freckles instantly. Ultimately, a new layer with some manual labor is needed. Below is a more detailed explanation of how to do this along with a handful of examples.
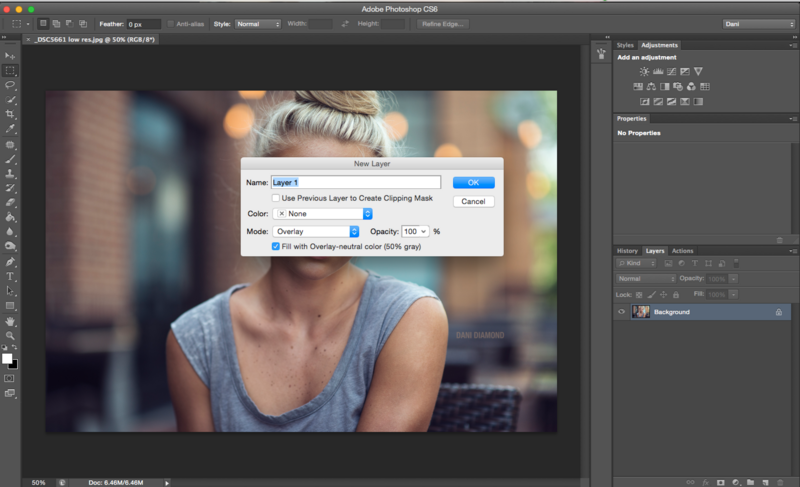
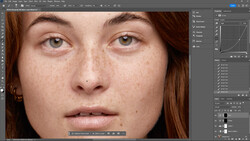
Step 1: Add new Layer (Command+Shift+N), Set Mode to Overlay and turn on 50% Grey
Step 2: Chose Photoshops Burn tool (O), Set to Midtones 20%

Step 3: Zoom all the way into photo and start manually burning each freckle
Step 4: Lower opacity on the layer if you feel you went too far or duplicate the layer if you want to darken the freckles even more.
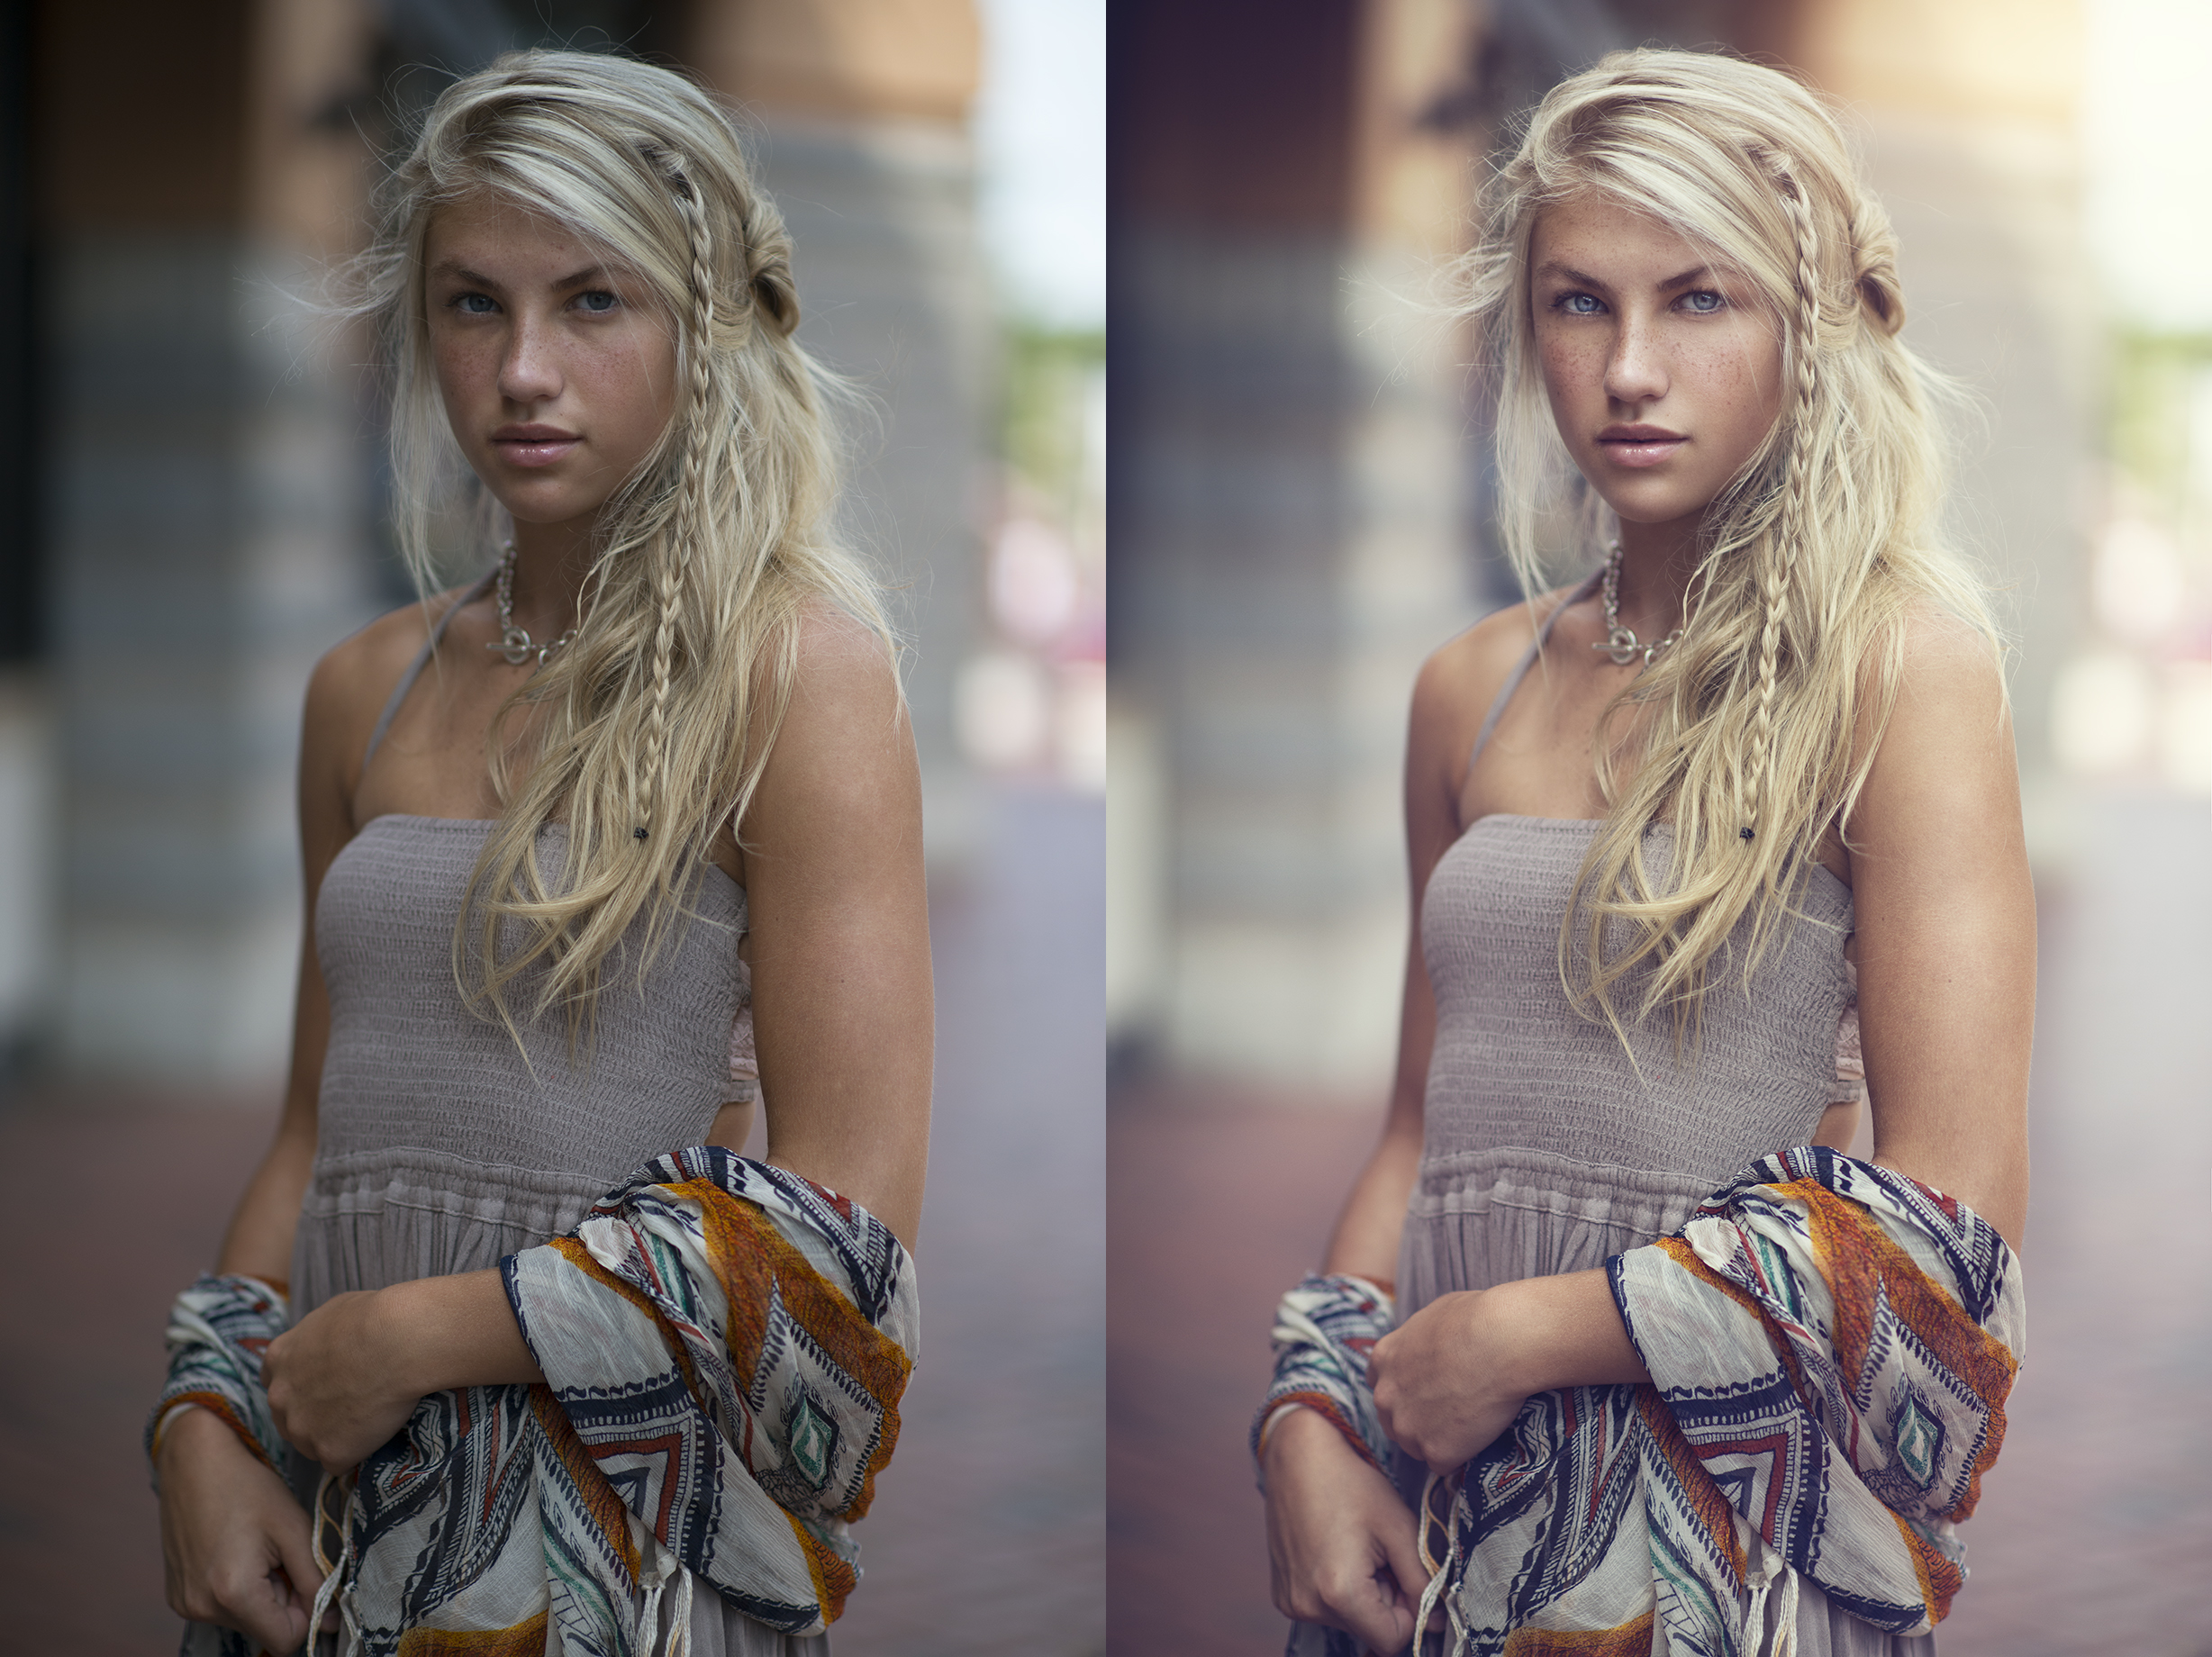
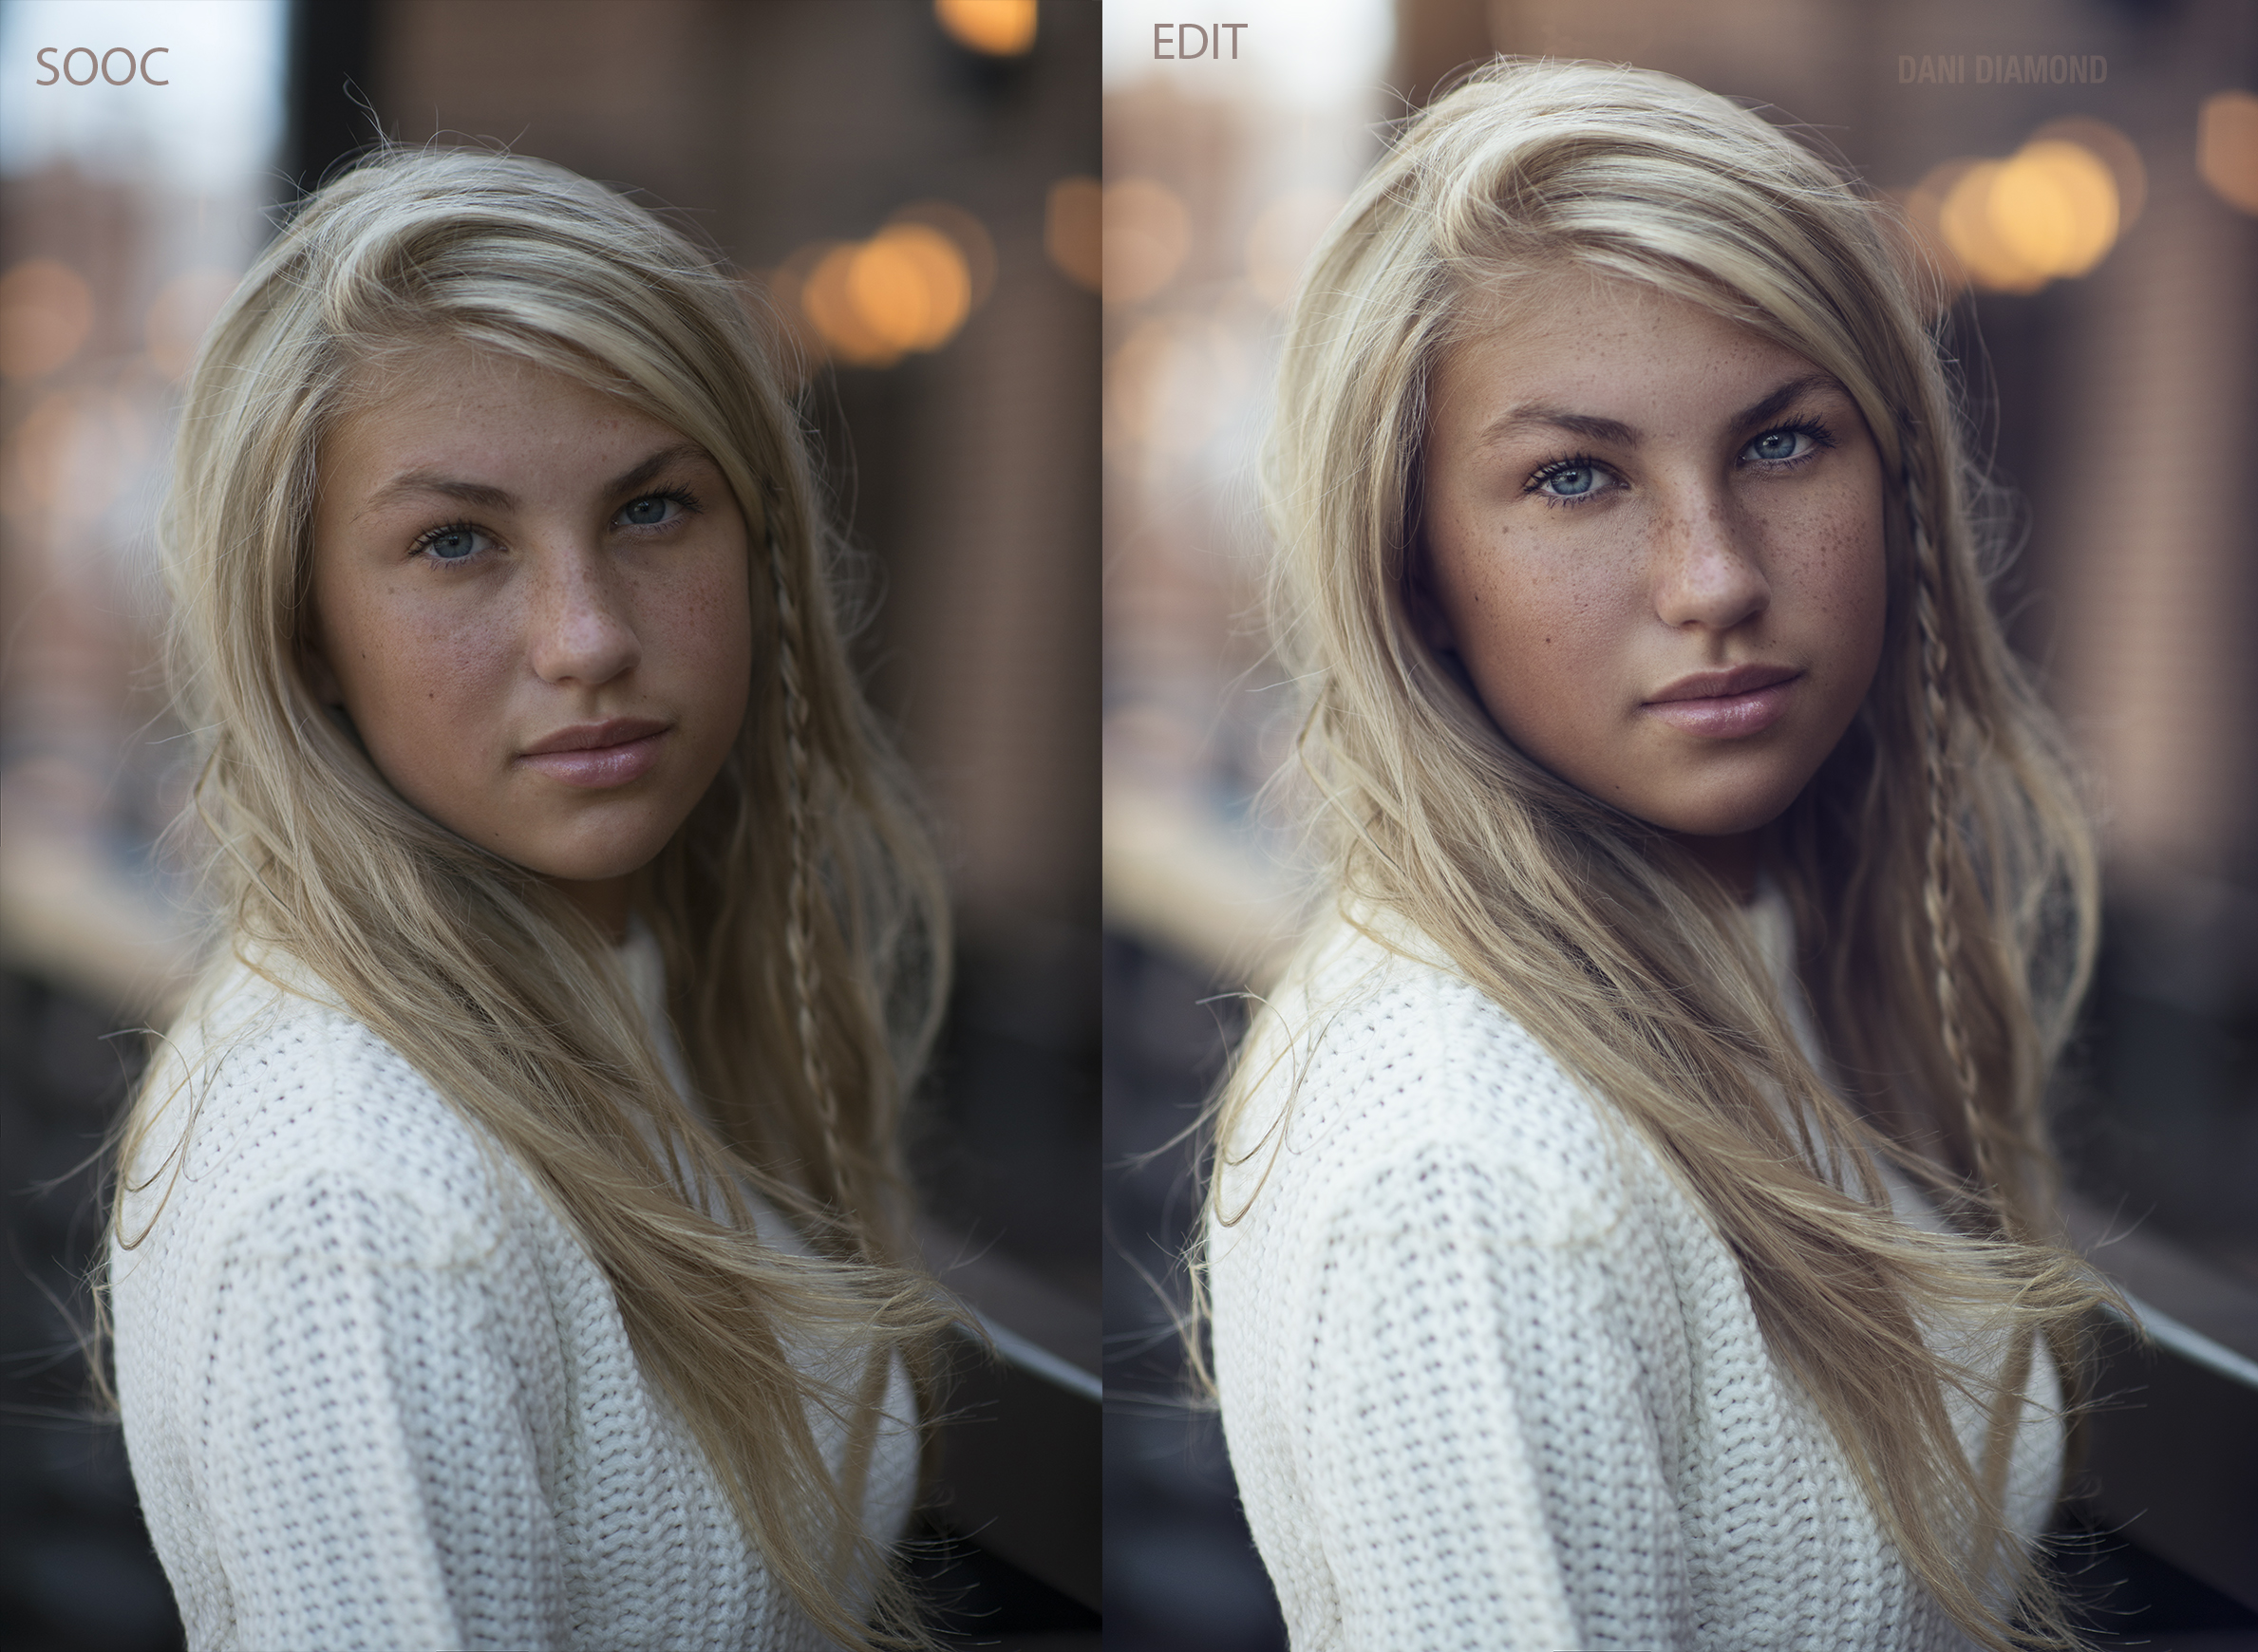
This may seem like a very long and tedious method but I can assure you that you will walk away with the most clean results. Using my tablet, I can enhance freckles in less than 2 minutes per photo.
If you're interested, you can find more info on my natural light and retouching tutorial in the video below:
Have you found a more efficient method? Please post in the comments.


Join the Fstoppers community for free
-
Post comments and join in the discussions
-
Browse the site ad-free
-
Share your work and get featured in the community
-
Compete in the photo contests for fun and prizes
15 Comments
without being able to test it at the moment. I would create a new layer, set to overlay or softlight. Select a dark brown color not black. Paint messily over the desired freckle area. Double click on the layer to bring up the options and use the blend if options to target the freckles. From there just lower the opacity until you're happy.
Actually Bryan's method is the right one if time is of the essence and you want to better control saturation.
Time is always of the essence ;)
LOL. I want to punch myself in the face now. Great stuff thank you for sharing lol.
"Step 3: Zoom all the way into photo and start manually burning each freckle...This may seem like a very long and tedious method...'
:-)
Calculations and levels/curves are your friends. In an RGB file, a difference calculation between the red and blue channels will give you the base alpha (cyan and yellow in a CMYK file), then modify the contrast ratio with levels/curves. You might need an alpha for different shading areas on the skin.
Create an adjustment layer (I use levels, but it can be anything) and set it to (in your case) multiply. Invert the adjustment layer mask so it's opaque, make a selection from the alpha you created, and paint all the freckles in an area in a few brushstrokes. Much quicker to do than to read. :-)
I just used this technique yesterday on a corporate portrait in reverse, where I was asked to reduce the freckles on the subject's face and arms (adjustment layer set to screen). Takes just a few moments. ;-)
Aside from the insightful technical detail... such compellingly natural models. I never, ever tire of freckles.
Here's a peek at a recent model of my own.
http://lifeascinema.blogspot.com/2014/12/here-comes-sun.html
More complicated but a very accurate way is to use channels to select and create a channel mask, then on a copy of the the blue or green channel darken the selection using luminosity blend mode
Dodging and Burning always saves the day...
Now here is a question, while doing the Frequency Separation to make the image a bit cleaner and softer skin, some of the freckles go away. does anyone have a method of keeping them or bringing back just the freckles, when trying to softening the skin.
I suppose this answer came late but I'm reading the article now so I'm going to answer you.
The thing that came to my mind is:
-Hide your FS layers and make a stamp from the layers below.
-With the lasso tool, select the area containing the freckles you want to stand out.
-Ctrol/Command J to copy that selection to another layer.
-You can get rid of the stamp now, don't needed anymore.
-Show the FS layers and bring the new layer with the freckles over them.
-Use "blend if" to hide the rest of the skin and show only the freckles in the freckles layer. Feather the transition splitting up the little handle so there are no hard edges.
-At this point, the freckles layer only show the freckles, You can do everything on this layer, blending modes, adjustments like curves, hue/sat, etc, filters like C.Raw and perhaps a little of clarity... Opacity... Everything necessary.
I'm just thankful no one is suggesting to remove freckles.
this is what i've been looking for the whole time ^^ thanks a lot !!!
Cool article, love the different options in the comments as well!
This seems like a very tedious way of doing it with results that may be uneven across all freckles. I agree with some of the other commenters that using channels is a better/quicker/more accurate method. Plus the fact that you can reverse it to actually tone down or remove freckles ;)
BTW I came here from your other tutorial about correctly retouching eyes, great read.
Or just shoot in UV! (https://www.youtube.com/watch?v=o9BqrSAHbTc)