
Before getting into the thick of this article, there is an important distinction that needs to be addressed when discussing the coloring of images (and video, for that matter), and that’s between color correction and color grading.
While both are post-production processes, color correction is the process of making the image look more neutral, unprocessed, and natural overall. Color grading, on the other hand, is the process of using color to stylize that image.
Typically, this is done after color correction and creates or emphasizes a desired ambiance and color palette. Want to make your freshly shot digital image look like it was shot on Eastman Color Negative film stock in the ’60s, or maybe you’d rather pull the color palette from Blade Runner 2049? Color grading is essential in getting you there.
How is this achieved? By manipulating a number of image parameters from exposure, contrast, hue, and saturation, and using various tools to do it. This is an arena Capture One is professionally associated with, and the great part is that not only is Capture One renowned for it, it makes it extremely easy to achieve subtle or dramatic results.
Color grading on a whole can be as simple or as complex as you want, and you can spend a great deal of time waxing poetic about color theory and Dyad versus complementary harmony, but here, we’ll go over a few ways and tools to color grade in Capture One with ease and include a selection of recommended videos to further demonstrate.
If you don't have Capture One, this is the perfect time to try it, and you can click here for a 30-day full trial of Capture One Pro so you can follow along.
The Color Balance Tool
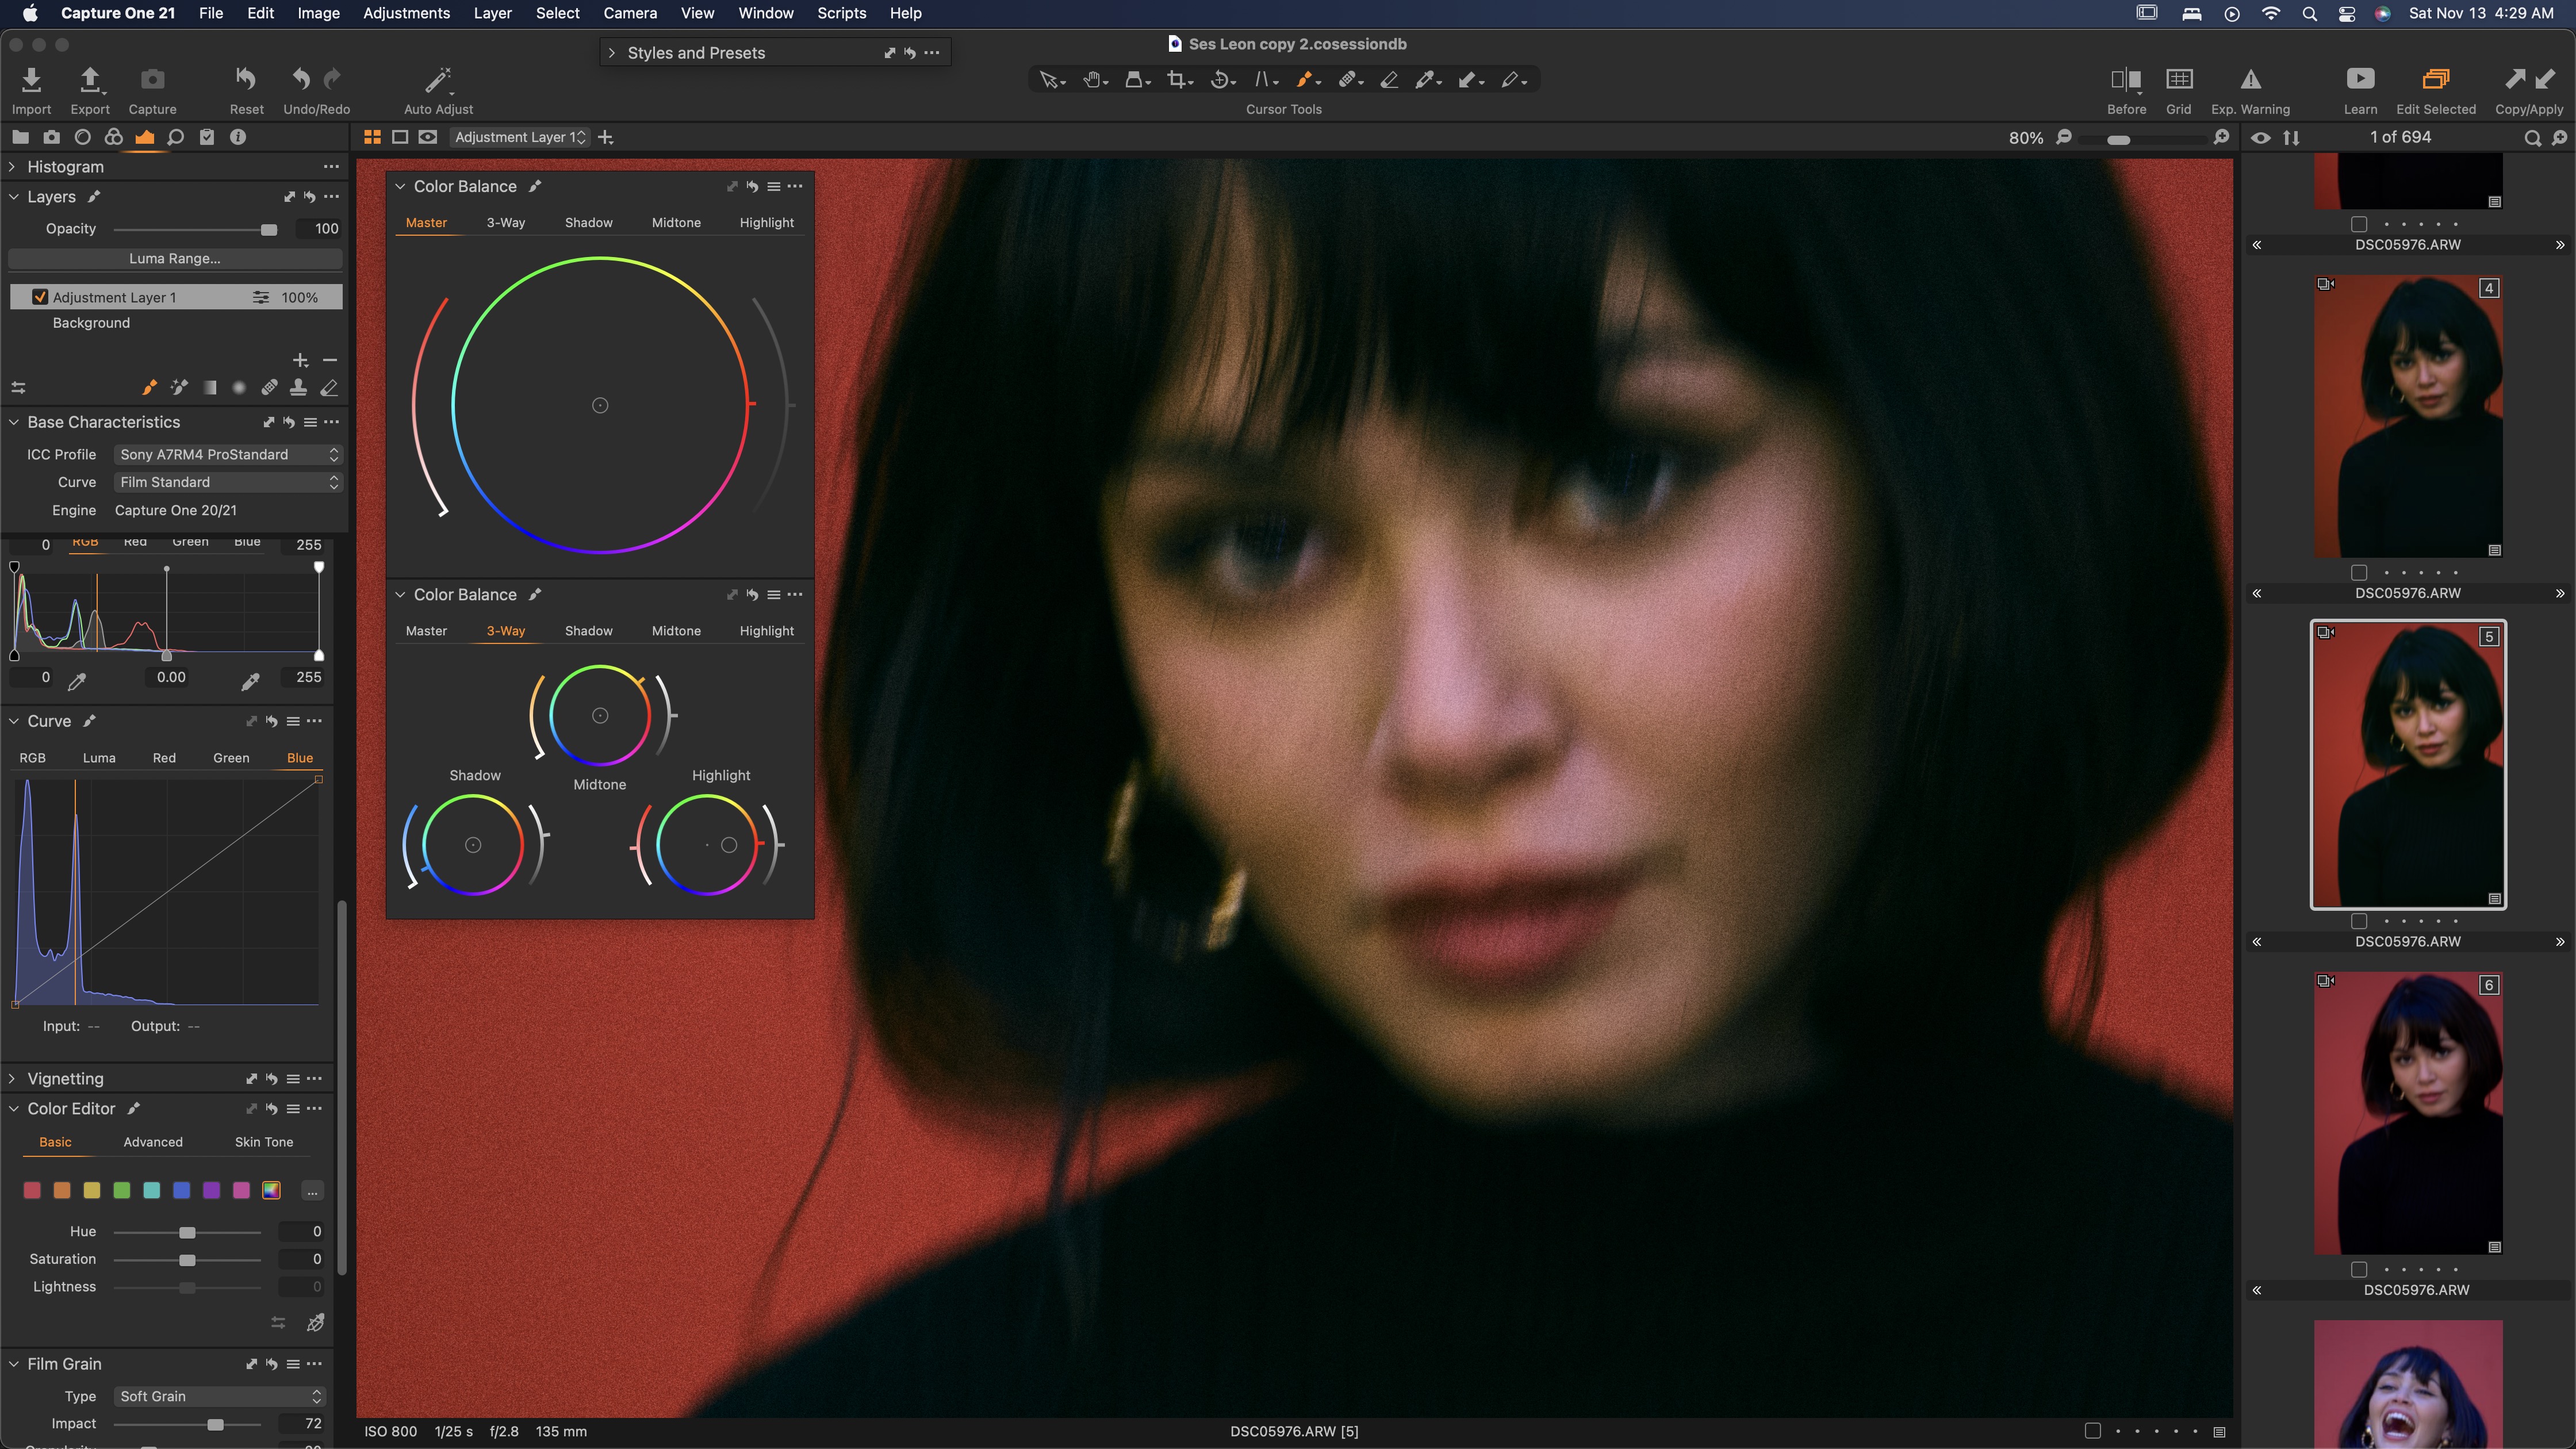
While you can use Levels, Curves, and the Color Editor tools to color grade, without doubt, the most favored and most powerful is the Color Balance tool. It is comprised of a Master color wheel (great for removing color casts and global color correction) and the option to use separate color wheels, one each for Shadows, Mid-tones, and Highlights, allowing you to adjust hue and tone in those areas. Those familiar with grading for video will be right at home here, as this setup is a standard for video.
Each wheel has a slider for saturation and one for lightness, but you can also drag the center spot around to your liking, so although the slider duplicates one of the functions of the wheel, you have the control to adjust independently.
As you can probably imagine at this point, this tool lets you quickly change the hue and tones in every part of your image in no time, but what’s particularly great about it is it doesn’t just work globally on the whole image, but you can use this tool to affect local adjustments when working with layers.
Layers
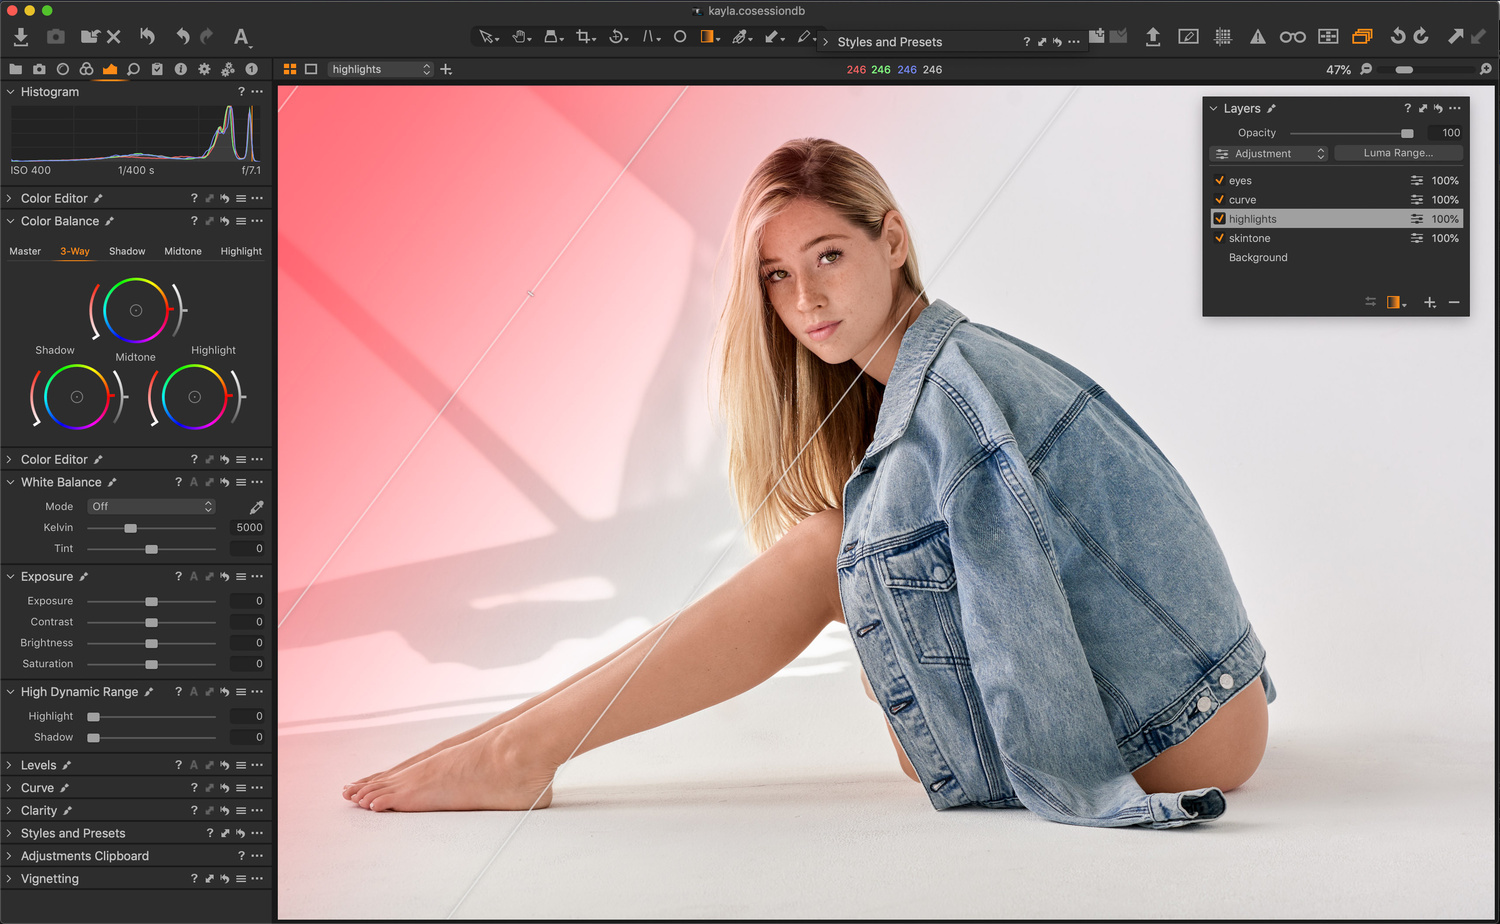
Layers in Capture One are incredibly powerful and add tremendous flexibility to everything you do, as they change the game in terms of power and flexibility. From high-quality healing and cloning to fine-masking, layer stacking, and layer opacity control, Capture One’s layers and layer-masking tools allow you to maximize the flexibility of your raw files. This is a major way Capture One differs from Lightroom, and even though Photoshop has more robust layer functionality, keep in mind that in Photoshop, you’re not working with raw files once you’re out of ACR.
This has great implications for color grading, as not only can you use multiple layers of color adjustments but can use the Color Balance tool mentioned above on local adjustment layers. Another huge benefit is the Opacity control over your layers, and combining that with the ability to use the Color Balance tool with Luminosity masks provides you with the real finesse of your color grade.
The Color Editor, Curves, and Levels

Color grading in Capture One is not simply relegated to the Color Balance tool, even if it is the go-to. With Curves and Levels, you can choose specific color channels to adjust, and with the Color Editor tool, you can choose to change specific color ranges versus the colors within shadows, highlights, or mid-tones. This means you can keep an overall cast but change the hue, saturation, and lightness of one specific color.
Of course, using one tool doesn’t preclude using the others; you can use them in conjunction.
The videos below are highly recommended to see all of this in use, and as Capture One's own David Grover says, remember the key takeaways: “work on a layer if you can; it certainly helps to use opacity to lessen the impact if you’ve gone a bit crazy. Don’t be afraid to incorporate other tools like the color editor, saturation, contrast, or whatever into an overall color grade.”
Conclusion
There's far more on color in Capture One than can be encompassed here, but if you want to jump-start and learn immediately, there is already a bevy of tutorials on Capture One’s YouTube channel, and you can download Capture One here with a 30-day free trial.
If you're looking for a fast and effective way to learn Capture One, check out The Complete Capture One Editing Guide, a five-hour video tutorial taught by Fstoppers' own Quentin Decaillet.


Join the Fstoppers community for free
-
Post comments and join in the discussions
-
Browse the site ad-free
-
Share your work and get featured in the community
-
Compete in the photo contests for fun and prizes
No comments yet