As raw processing software for wedding editing or batch editing in general, Capture One has nothing to envy from Lightroom. Quite the opposite, it’s perfectly tailored to help wedding photographers get a fast and efficient workflow.
When processing raw files from a wedding or a large shoot, matching color and exposure can be very time consuming and require a good eye. Since Capture One 11.1, we have a new tool at our disposal making the whole process not only faster but also a lot easier. All the guesswork has been removed to left us with just a simple task to match all images.
While shooting all manual can help with any color and luminosity difference on a batch of images, it’s still possible to notice a visible change from shot to shot. With the Normalize tool, all you have to do is pick the sample area on the source image, select the same area on the target image and Capture One does the rest for you.
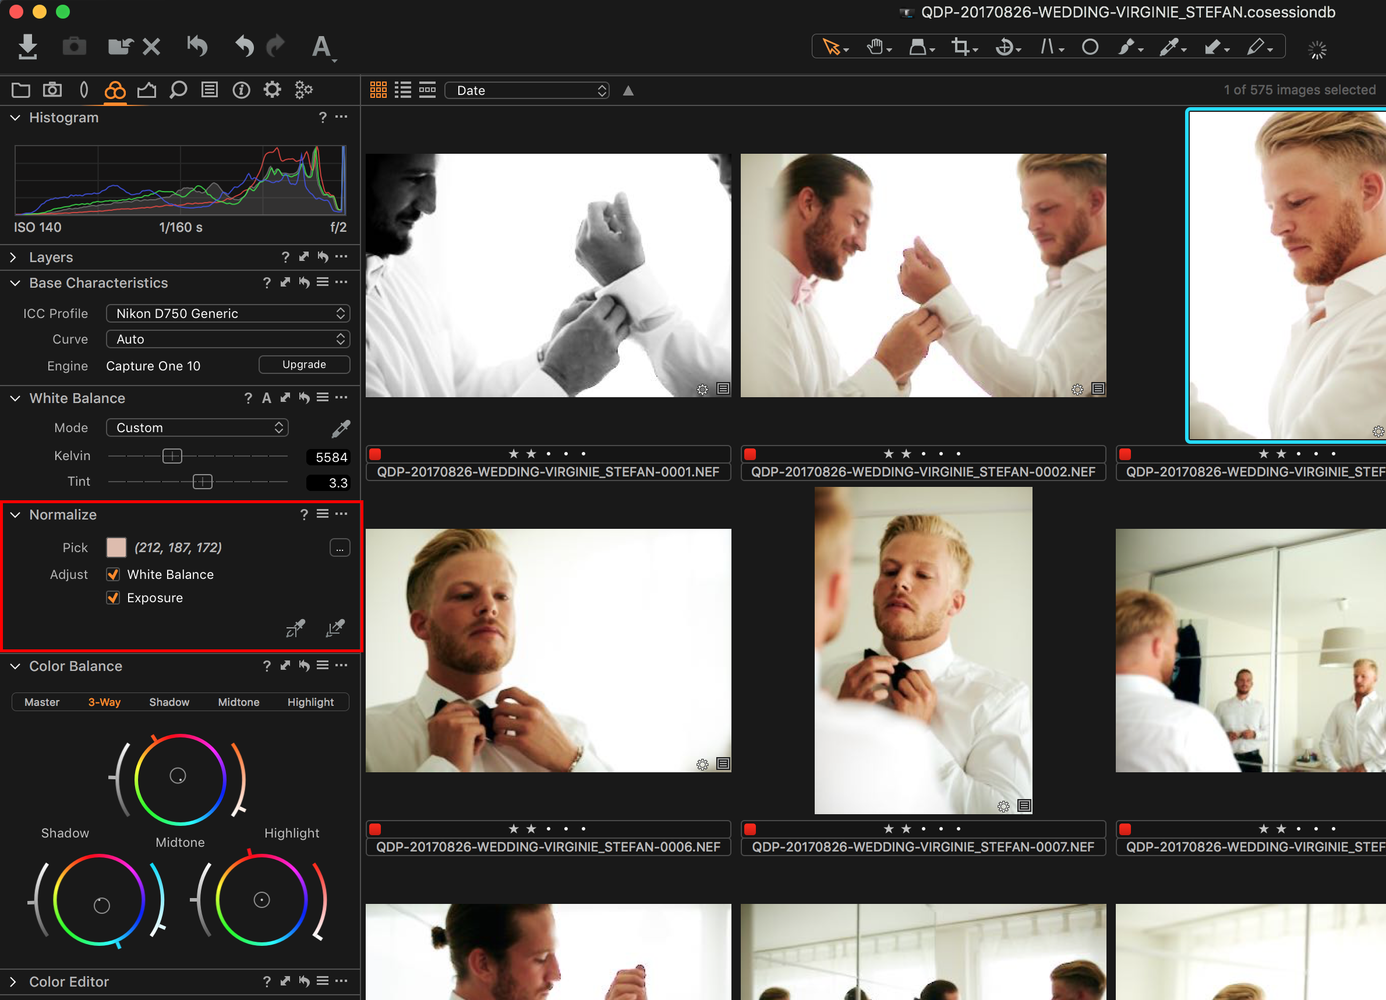
To access the Normalize tool, first make sure you’ve installed Capture One 11.1, then go to the Color tab, and there you should find the Normalize tool. If you don’t, right click on the Color tab, select Add Tool, and click the Normalize tool line.

The interface is straightforward. First, the Pick option shows the current sample color, and then below the Adjust options give you the choice to alter the White Balance (color), the Exposure (luminosity), or both. If you have a defined color provided by a customer or set by yourself, the three dots button next to the Pick color square and set the desired value.


Below all these options are the two pickers. The first one on the left is designed to capture the white balance and exposure from the sample area on the source image. While the second one is here to apply to correction to the target image and match the source.

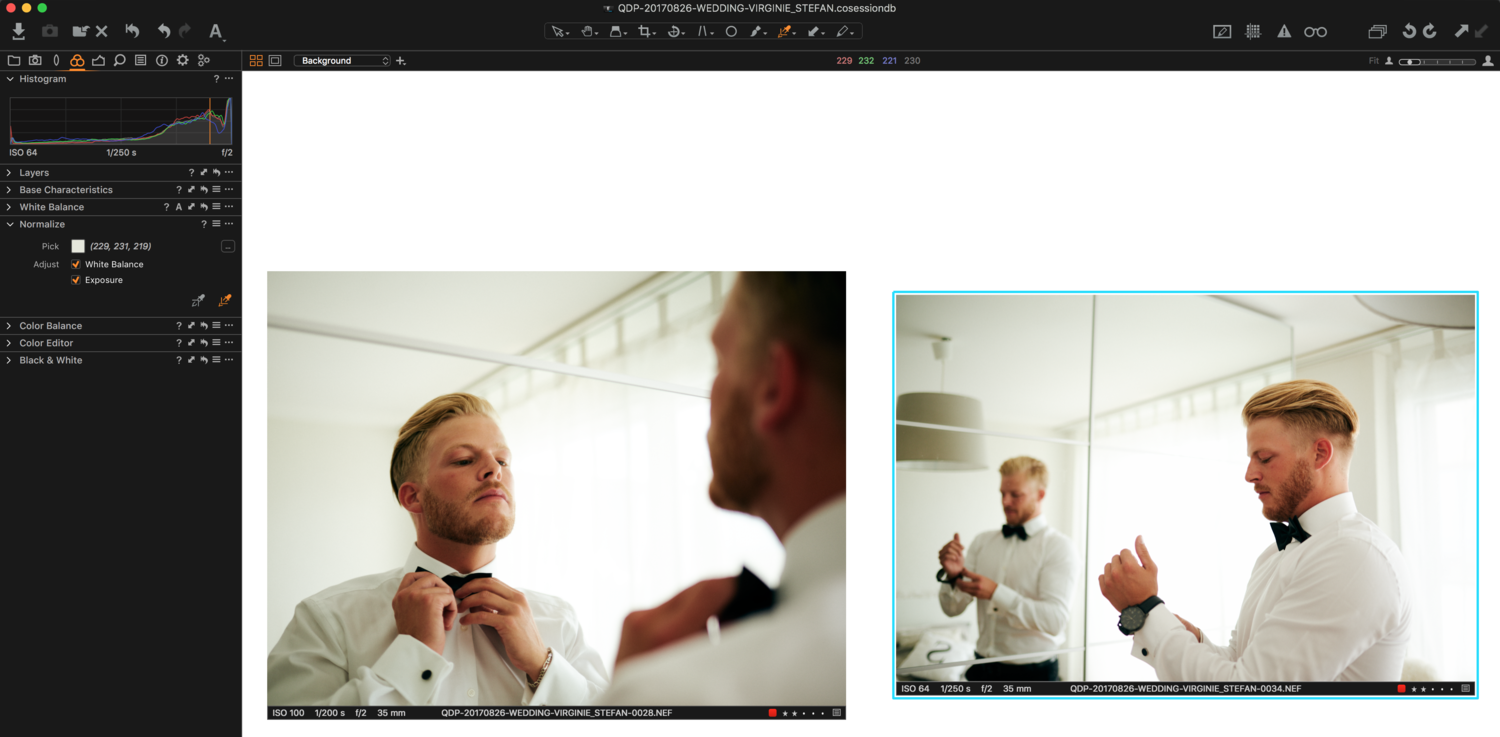
Using the first picker found in the Normalize tool, I make a selection on the ceiling
If you understand all of the above, then using the tool shouldn’t be an issue. Use the first picker, select an area that is found on both images and that should have the same luminosity level and color. Once you’ve clicked, select the second picker, and click on the same area on the target image. That’s it; you’re done!

Using the second picker I apply the adjustment selecting the same area
The sample you created remains set until you create a new one. So when batch editing a wedding, if you establish a sample matching the bride skin tone or dress, you can apply it on all images in which she appears – unless lighting alters her skin tone or dress color. You can go one step further by creating User Preset for each important person found at the wedding so you can quickly match all images even when the bride and groom aren’t on the shots. User presets are created by clicking the three lines at the right top corner of the tool


So how's that side by side tool? Create a version then compare? Yeah.
It's still very clunky
Amazing tool :D
Other question, what styles are used?
For this wedding, it was one I created myself :)
Sérieusement vu les ""exemples" quant aux raw, un photographe qui expose si mal et incapable de faire une compensation flash correcte devrait changer de métier car ce n'est pas un photographe professionnel digne de ce nom
Ce n'est pas un Capture One (que je maitrise depuis sa création) qui va "récupérer" les mauvaise prise de vue
In case I run between three, four places where each place has a different light level and
even the "color" in the room is different, I will not before every two, three pictures (or even more, I do not know how much I will do) to convert the camera (WB, exposure in M, ISO, etc.) .. I see no reason why I do it with digital camera and in RAW. Sparse moments (in the case of running over and reset it can be even minutes) I would rather be ready for "unexpected" moments 🙂 .. Manual and WB firmly set to the ceremony, the feast where I have a certainty that the place will remain a moment ..
It is a good function in CO ...
This is a nice addition to C1. I've used that function a lot, I think I saw it first on your Youtube channel Quentin. Merci !
I tried this on a series of retail interiors and it works really well.
It saved me a bit of PS work in getting all brand colors uniformly. Thanks for sharing this, Quentin!
Glad it helped! I used a wedding to showcase the technique because it's where I find it most useful for my work, but it's extremely powerful for any picture really :)
Thank you, Quentin! Just did a few experiments with a class room shoot and see that it actually improved a few images I had already processed, in terms of white balance. Literally picked a consistent spot on a kid's face and really liked the results. I can also see how it's not an all-in solution for all images but I'll be trying to apply this fairly aggressively over the next week or two and see where things land. Seems like it would be really useful for architecture and interiors.
Oh cool I hadn't seen Normalize tool yet and been using C1 since version 8.0 :D