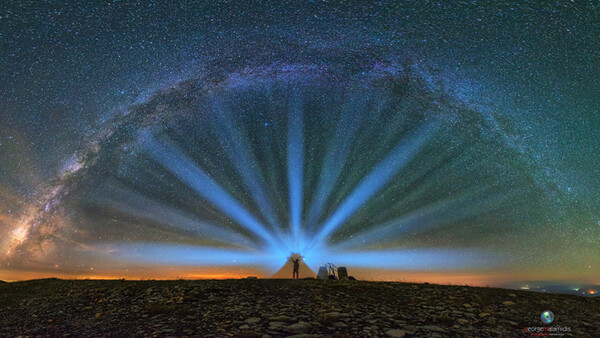
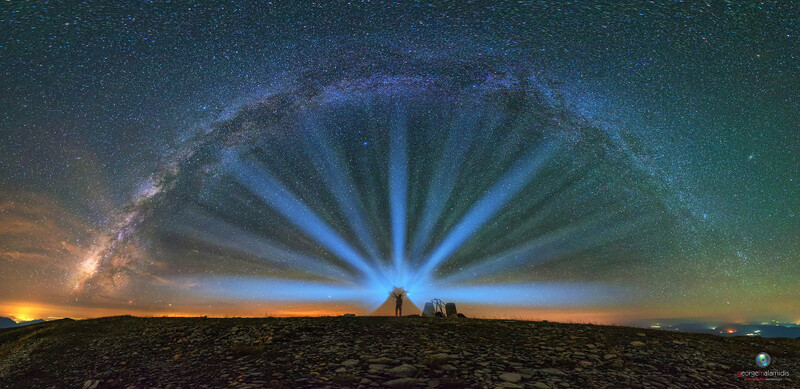
It's always impressive to see a subject that's shot so often used in a new and creative way. This conceptual shoot of the Milky Way by George Malamidis was beautifully conceived and executed. George picked two possible names for the image, both of which perfectly describe the outcome, "The Iris of God" or "The Peacock Milkyway." Want to know how he got the shot?
The Planning
George and his friend had to start off their trip early in the afternoon as the location they chose was about two hours by car and another one hour hike. They chose their shooting location both because it was highest point in their region (Thesprotia - Greece), and because it was also the darkest. They hoped to this combination would give them the highest possible detail of the milky way, and they were right! They reached the peak 10 minutes before last light of the day disappeared. According to George, the scene was magical. They had prepared for a long night with plenty of water, food, and warm clothing.
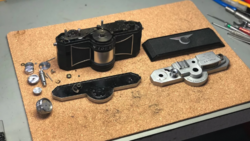
The Gear
To get the shot, George brought the following gear:
Benro Tripod with panoramic head (to eliminate parallax in the panorama)
Shooting
George took eight portrait images for the panorama. Four shots were taken at 0 degrees from horizon with a camera rotation of 60 degrees. Another four images were taken in a similar manner at +45 degrees from horizon. These shots where enough to capture the entire scene. All shots were at f2.8, ISO 4000 and 25 second exposure. The final shot intended for light painting was taken with a landscape orientation.
To create the light trails in a way that resembled an iris, George had to create some areas with a higher concentration of light and some with a lower concentration. George had his assistant use a very strong flashlight. The flashlight was held in one spot for five seconds, then was slowly rotated clockwise from 0-90 degrees pausing briefly at 45 degrees. This same movement was then done again on the opposite side with a counterclockwise motion. The whole process was then repeated, pausing at different angles until George got satisfying results.
Post Production
The first eight images were lightly edited in Lightroom and extracted as tiff files. The tiff files were then imported into a stitching program that made the final panorama image without the light trails. The panorama was opened in Photoshop and the shots of with the light trails were placed as layers over the base image. The light trails were then masked together by George's assistant over the panorama along with slight dodging and burning to accentuate and minimize certain light beams. Finally, minor levels and contrast adjustments were applied to the Milky Way.
The final image that George came up with is definitely inspiring. If you want to check out a full 360 view of his location that night, check out his website.


5 Comments
I feel as though the flashlight ruined it.
I agree with Prefers Film, maybe the traditional one light would be better.
On the flip side its refreshing to see someone be creative and try to break the mould, so full marks for that.
Yea. I agree w/ Prefers Film.
If you guys like it without the flashlight, just find one of the million pictures without the flashlight on Google. Awesome picture, thnx for the work flow description.
Props for taking the time to put a rad twist on a fairly common subject. Love it great work and show of creativity.