
When first learning Photoshop, most of us are introduced to the pen tool, brush tool, or maybe even the eraser tool to remove sections of a layer. However, these methods can be both time consuming and mediocre in creating a clean final image. In this tutorial I'll be walking you through the steps that I use to isolate subjects shot in studio (against plain backgrounds) for the creation of a composite image.
I want to preface this by saying that every editing method I know has at some point been inspired by another online tutorial I've come across, and adapted to fit my needs. There may be one or many other similar tutorials like this online, I in no way claim complete originality in any of my methods. This tutorial is intended for those with intermediate experience with Photoshop, as I will assume that you know which tools and adjustments I'm selecting by their names.
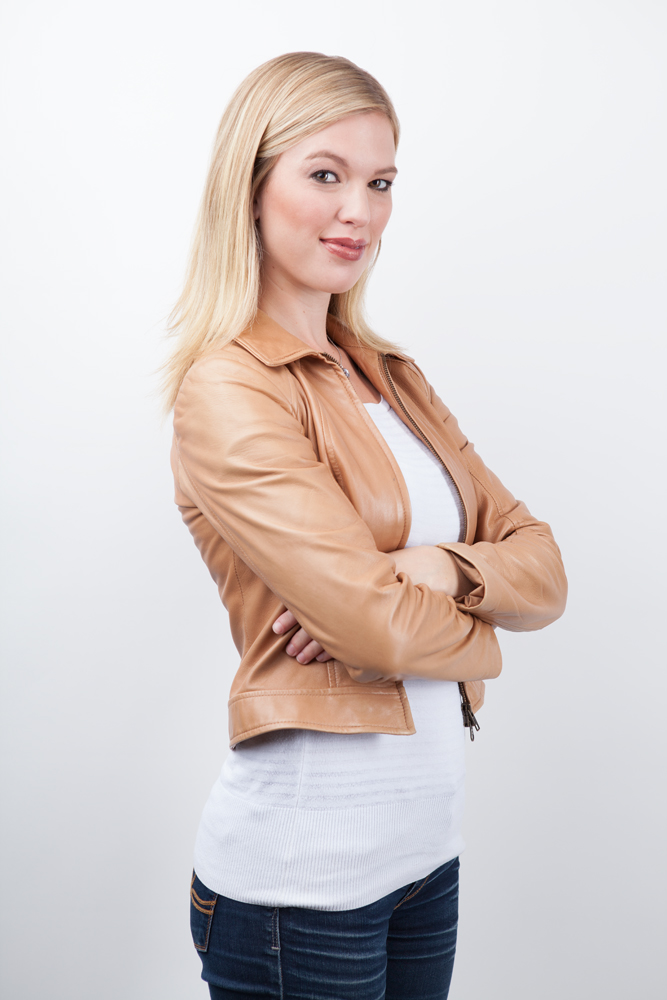
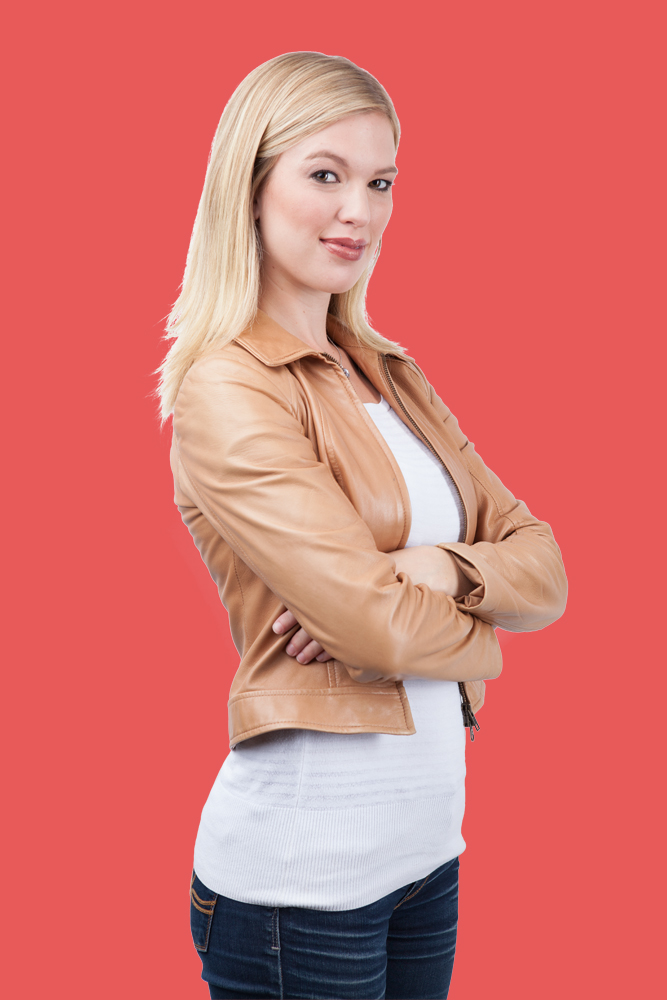
Step 1: Begin with an image shot against a contrasting background - for the intended purpose of a composite image I advise you shoot everything against a plain, contrasting background, like a white or black backdrop in-studio in order to gain full control of your lighting, and easily differentiate your subject from the photo. In this case, we'll be using a portrait. Once your photo is open in Photoshop, duplicate the layer before starting any work (Cmd/Ctrl+J)
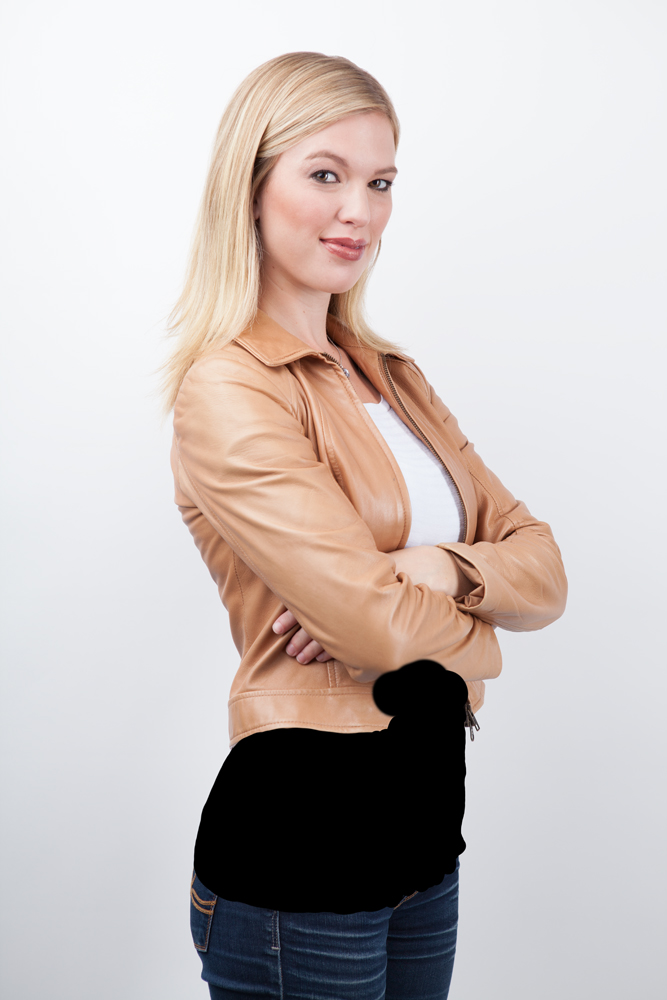
Step 1a: (Optional) You'll notice that her shirt has similar tones to the background, and almost blends in. It's always best when the background has complete contrast from the image, but this isn't always possible. In this case, we'll simply brush black (carefully) over the white area in the duplicated layer. If the edges are not completely in focus, I recommend feathering your brush to match it (you can change your brush size and feather amount by right clicking anywhere in the workspace). Don't worry about overlapping other parts of the subject, as long as the edges are precise.
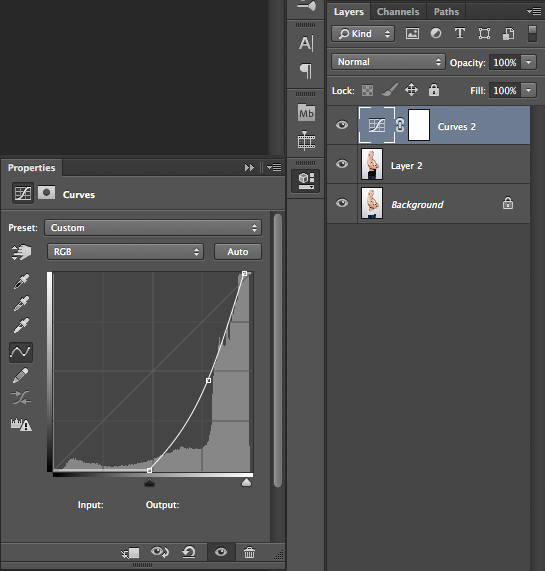
Step 2: Create a curves layer above the duplicated photo, and adjust the RGB tones so that the subject is the most contrasted from the background, you should have something like this.
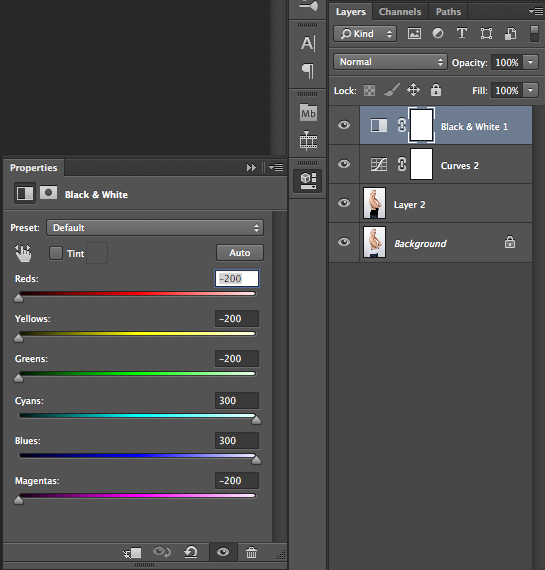
Step 3: Create a black and white adjustment layer above curves, and adjust the sliders so that your subject is as black as possible, and your background as white as possible (or vice-versa). Merge the Layers.

Step 4: Use the burn (or dodge) tool to completely darken or lighten your subject to contrast the background further. For best results, with the burn tool use the settings: Range: Shadows, Exposure: 100%, Protect Tones: Unchecked), or the same with dodge but with highlights instead of shadows. I also prefer to feather the brush between 10% and 50%. ![]()
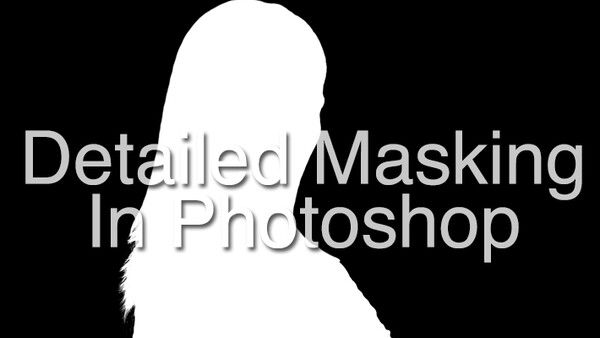
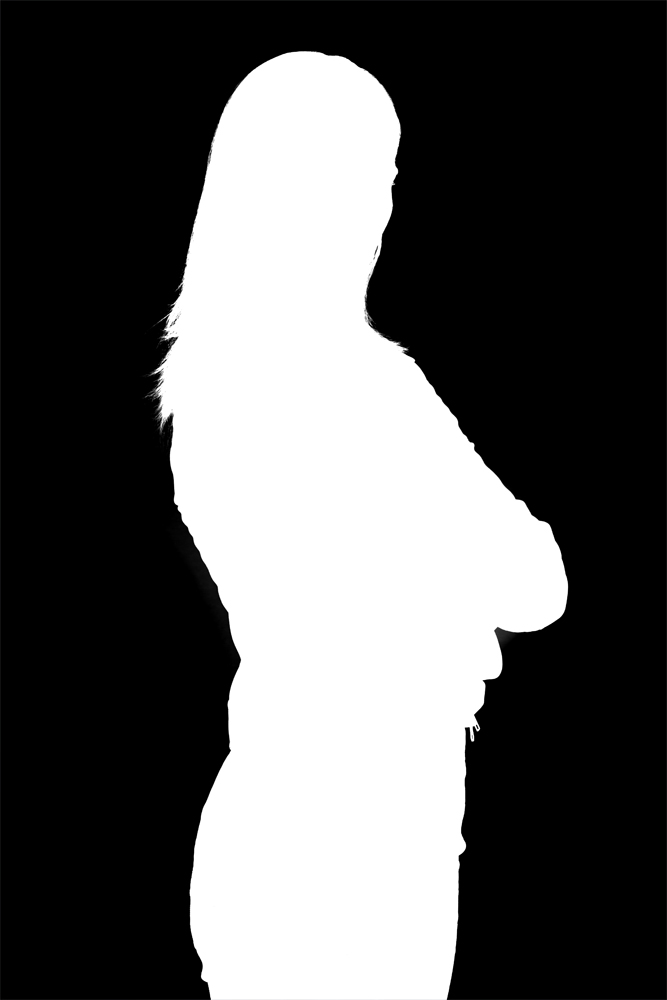
Brush in any remaining light/dark areas, then invert the layer (Cmd/Ctrl+I) and do the same to the background. You should now have an image with a completely white subject, and completely black background (invert it if you see the opposite) note how in the image, you can still see detail from the tips of her hair, something that you can't do well with other masking methods.
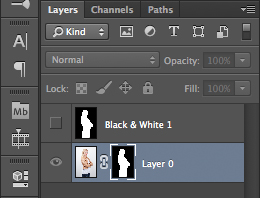
Step 5: Select all (Cmd/Ctrl+A), copy the layer (Cmd/Ctrl+C), then deselect (Cmd/Ctrl+D) (It's super easy to remember by holding Cmd, then pressing A, C, D). Create a mask on he original, untouched layer, hold Alt, and left click the mask; this will display what's within the mask (should see plain white).Press Cmd/Ctrl+V to paste your completed mask, then left click the photo in the layer to view it again. Finally, turn off visibility for your top layer by clicking the eye next to it.
Step 6: Create a contrasting, colored solid layer under the masked photo layer to view any imperfections and visible edges in your mask. Use the brush tool to make adjustments to the mask until you're happy with the result.

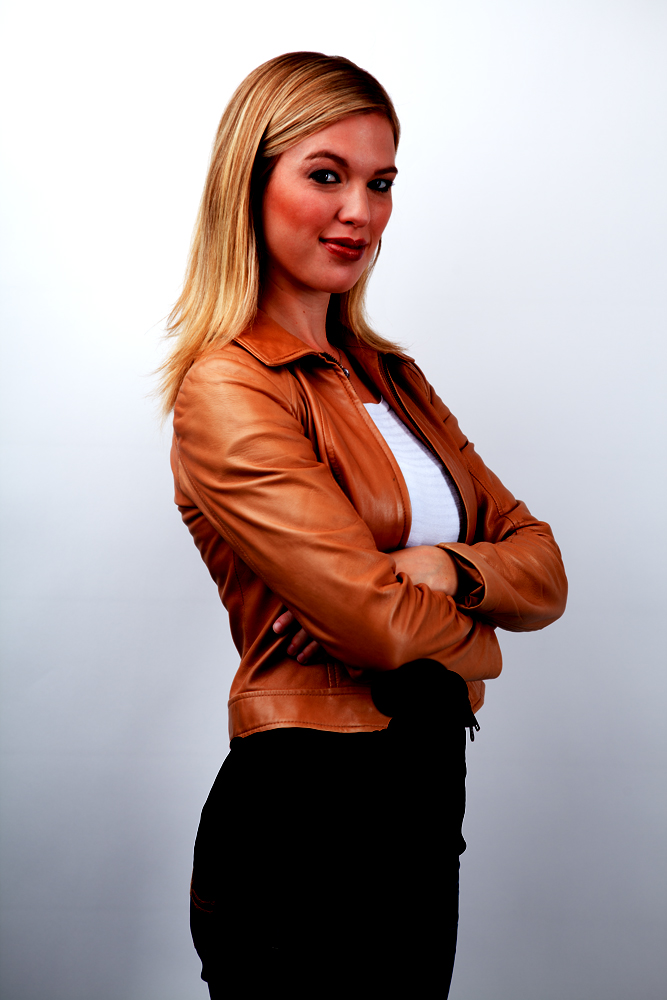
^Final, Cut out.
And you're done! Place the image on whichever background you wish! I recommend this process for anything with a lot of detail and fine edges, and if you're having to do this a lot it's useful to know how to create actions to automate steps like the black and white layer, merges, etc. If you don't know how to do that, I touched on it in this article (Under "Editing"). Please let me know if you found this tutorial helpful, and if you find any ways to improve the process for your own uses.

Join the Fstoppers community for free
-
Post comments and join in the discussions
-
Browse the site ad-free
-
Share your work and get featured in the community
-
Compete in the photo contests for fun and prizes
30 Comments
This is just awesome. Will save me at least 30 min or work!
This would work well if the new background has a similar color to the contrasting (studio) background, which usually isn't the case. Calvin Hollywood has demostrated a technique with which you can fix some of the issues that occur especially with strands of hair. Your example with the red background shows this drawback well at the bottom of her hair. You can right-click on your mask and choose "Refine mask". The following dialog box let's you adjust some settings, but what most don't know, you can actually paint in the image to tell the algorithm: "look here are some spots, where the mask isn't perfect, please try again.". Works really well with hair! If your original contrasting background had a strong color "decontaminate mask" will help to get rid of the color bleeding through. Never used that one though.
Just in case some of you speak German, here is his original video about this technique: http://www.youtube.com/watch?v=pAZDVaWQdaE
Scott Kelby also mentioned this during FAB thought the new CC has much better control of refine edge and refine mask.. also split toning helps to get the most out of the hair with blending modes screen and overlay
And I guarantee you will love this technique because it's so fast... watch the video i posted above .. the new CC has more feature of refining and decontamination of the selection
Thanks! I was going to say this. I have done a lot of masking (either form grey or white backgrounds) and I always get remnants of the background color and end up spending way too much time doing the rest of the masking by hand. I'll try this method and see if I get better results.
If you have another source that isn't german, that would be greatly appreciated! :)
Thanks!
Thats Nice and Easy , Thanks :)
Contrast mask is wonderful if you have enough contrast to make it work on a solid background. There are better ways to mask for real backgrounds. Which is more likely the case when you would want to save a subject from an otherwise boring background.
Check this video from Nappaton
. time 14:00 or around
http://www.youtube.com/watch?feature=player_detailpage&v=gI0VyqXZfsU
The glow trick is incredible! I have been painting that in by hand for 13 years.
I know right.. RC is amazing!! he knows PS in and out.. things I would never imagine.. haha
And if you are from Greece, here is a similar technique!
http://filephotography.gr/photoshop-mask-out/
good tip but nothing new. learned this with cs2
*gives cookie*
You can always get the same result but use channels instead of the annoying dodging and burning or converting to black and white...
That's the technique I started with, but I find this works better for me. If you don't like dodging and burning, by no means am I forcing you to.
How to do this with a crowded backdrop?
Is there a video in English anywhere on this method
I've come to the conclusion that in order to get it done properly the subject has to be shot in front of a similar background as the one that will be put in later. Additionally it's all sorts of light spill on the edges of the subject that blemishes the final result.
That said, to get it done accurately the photo has to be planned meticulously in advance with the final result in mind.
well on white there is not a big problem at all to cut out....
Thank you.
Well actually, this is the traditional method. Very similar to the channel selection method. The "Refine Edge" tools since CS5 do this much quicker and you even have more controls for removing the background color contamination.
Quick Selection and refine edge is way more faster.
from "also white" to white you can use also Magic Wand Tool..
difficulties in the cut out operation start when you have to pass from white to red or blu.. or viceversa..
in any case, if you use brush tool in normal mode, your selection cannot be good.
i think on fstopper there is always good articles, but in this case i think the headline is not sincere:
these instructions can be good for newbyes, but this isn't a detailed masking technique
:(
I love options, this is another good one. Thank you!
hi
may I cut my Profile picture ?
Sure. Go ahead :)
I have never ever left a comment on a blog especially you have to sign up for it. But I've been trying this tutorial out and it's just AMAZING! So I JUST HAVE TO SIGN UP AND APPRECIATE to this genius! I have to clean tons of bicycle background and the wheel parts are just crazy and never been 100% precise or I will need to use so much time in one image!! I'm so HAPPY and glad that I FOUND this page!! MILLIONS OF THX to JAMES!!!
Step 3. "Merge the layers". Which layers? The B&W and Curves?
This is nice technique, some idea goes around my mind, will this technique fit with usual channel masking technique?