

Remember that first time you've looked at those dream portfolios? How did they happen? You've probably compared your portfolio against those and thought, "How would clients put their trust in me for something as big as that?" The hard truth is, those dream-portfolio photographers had a great website issued by the hospital they were given birth at. Face it, if you don't have your portfolio website printed on your birth certificate, you won't ever have one. Of course that's not true.
But how did it happen? There are many ways a photographer reaches to a level their work is attractive to potential clients. Some are blessed with friends, or business connections in the right places. Others are blessed with parents with friends, or business connections in the right places. However, the majority of us are those who have a "nobody" background. That's me. I started from zero like many of you.
Client's Perspective
So, you want to do commercial work, huh? From clients' point of view your work has to have the vibe that makes them hire you. You may want to shoot for a big fashion brand but all you have is car photography. Clients won't conclude you can shoot fashion just because you've shot cars quite well. In general, you will get the same type of photography you have in your portfolio. If you have cheap looking projects, you will get more cheap projects. If you have dream projects, you will get dream projects.
Differentiating Between Paid and Personal Work
I do not make a difference between paid and personal projects in my portfolio. Why should I? Do the clients care about my bank account, or they care about my abilities? I haven't seen any photographer publishing their account balance on their website. Clients care about your work. They don't care if it has been commissioned or it's something you paid yourself. They care if your work has value to them.
How to Have Dream Projects?
Dream projects. Read that correctly. That's not dream budgets. That's not dream numbers on your invoices. Sometimes that's not even dream clients. It's dream projects. You can have high budget dream projects. You can have low budget dream projects. Having paid dream projects is great but let's face it, no client will pay big money to a "Nobody Photographer" with no portfolio. That's right. You have to start with a portfolio. Not any portfolio, but a dream portfolio. You will be your own client of your first dream projects. If you want to have a high end looking project, be a client with high demands. Challenge yourself. Think as a client. Push the envelope. Demand more for the same price. Set limits to your budget. Set timeframe limits.
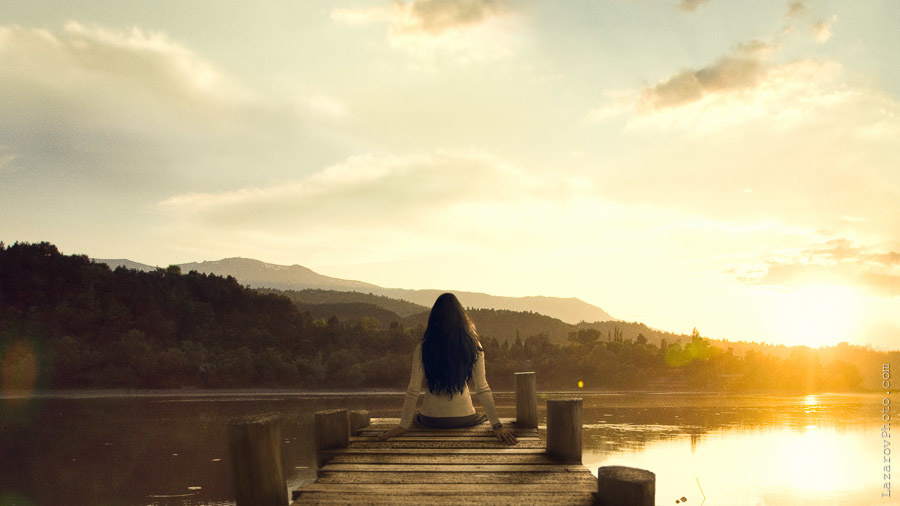
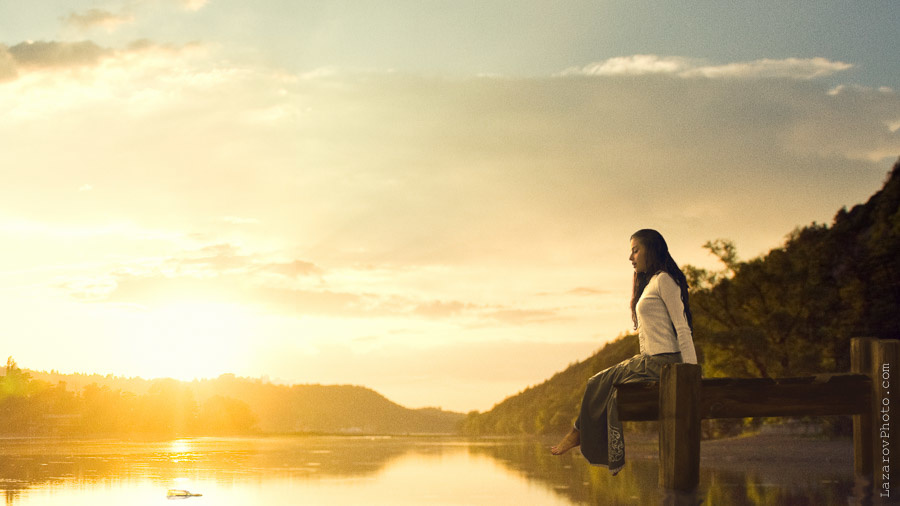
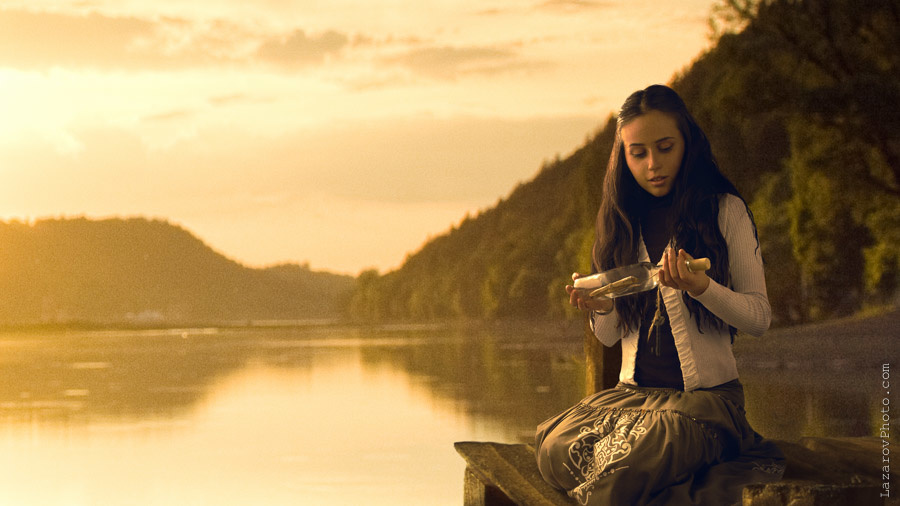
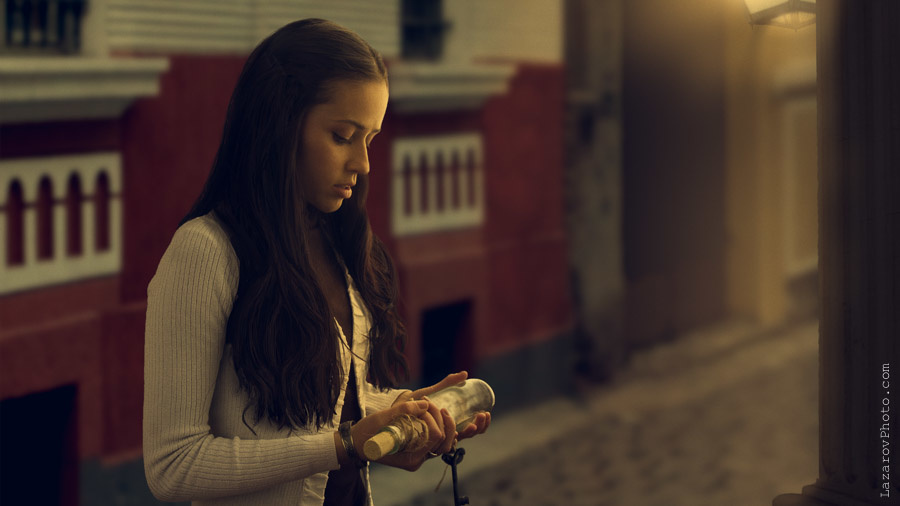
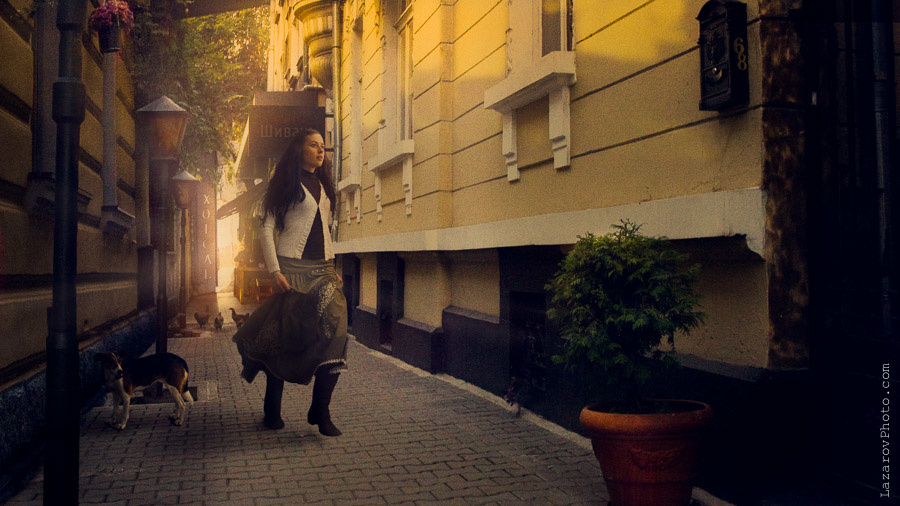
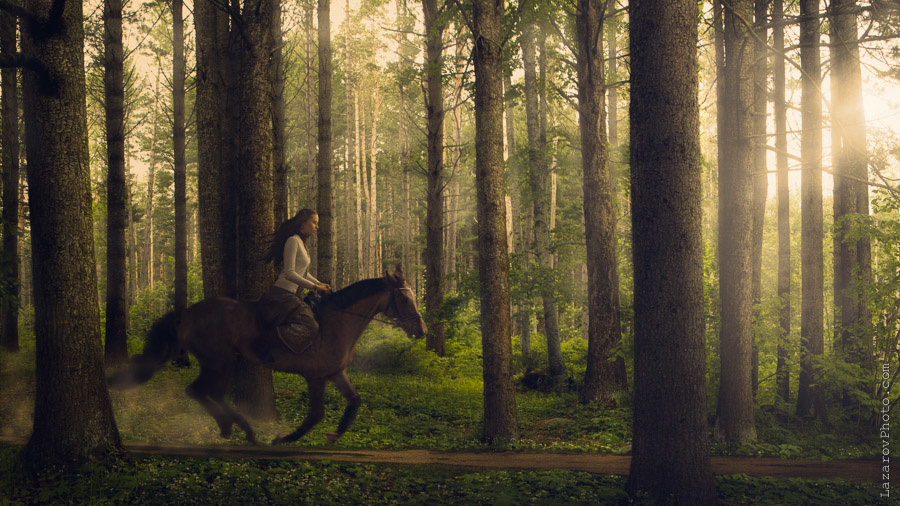
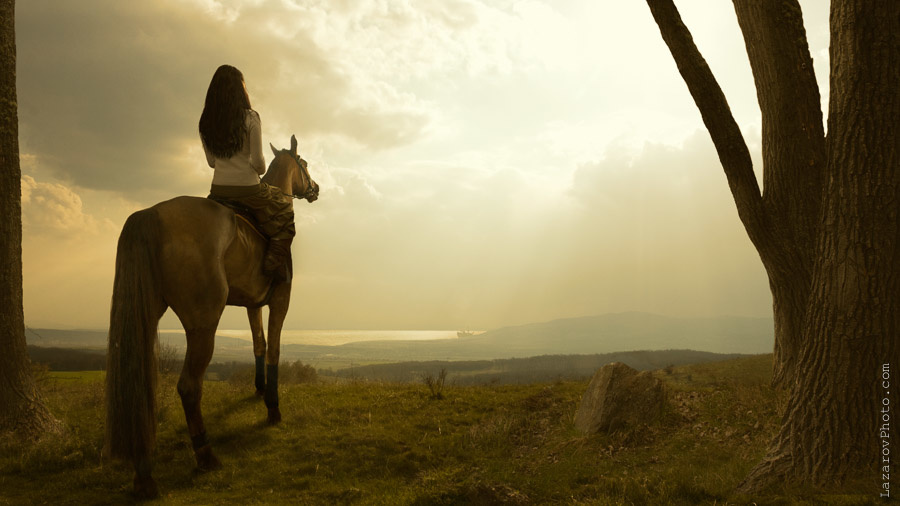
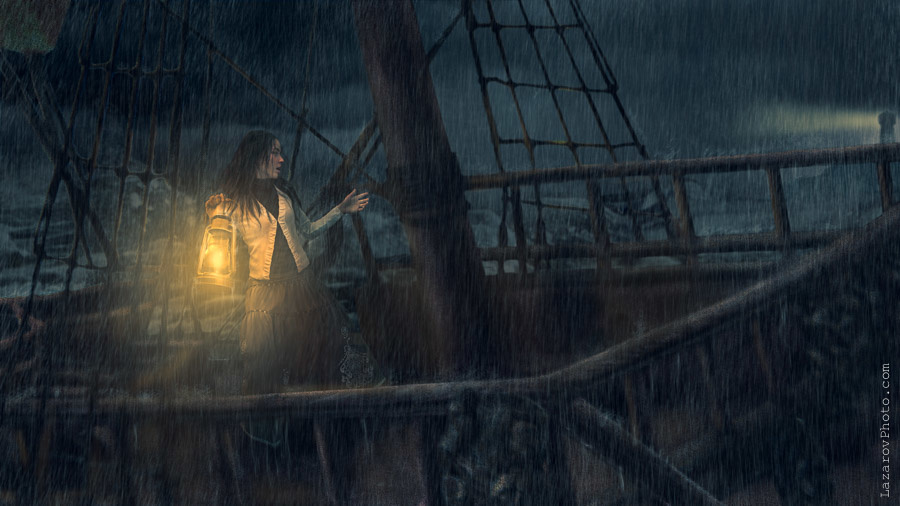
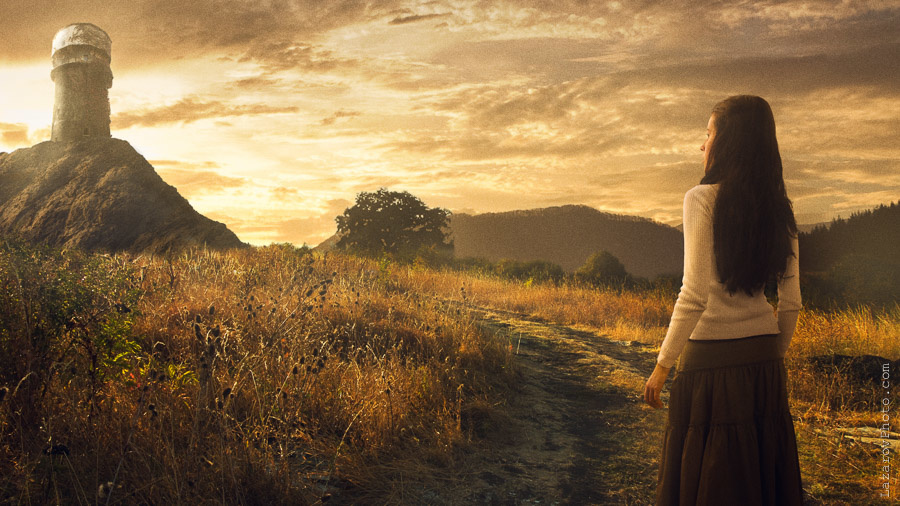
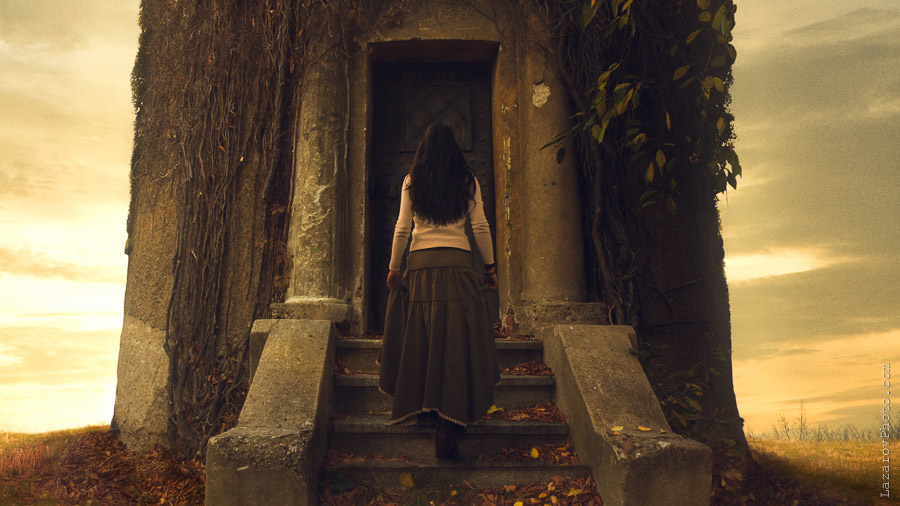
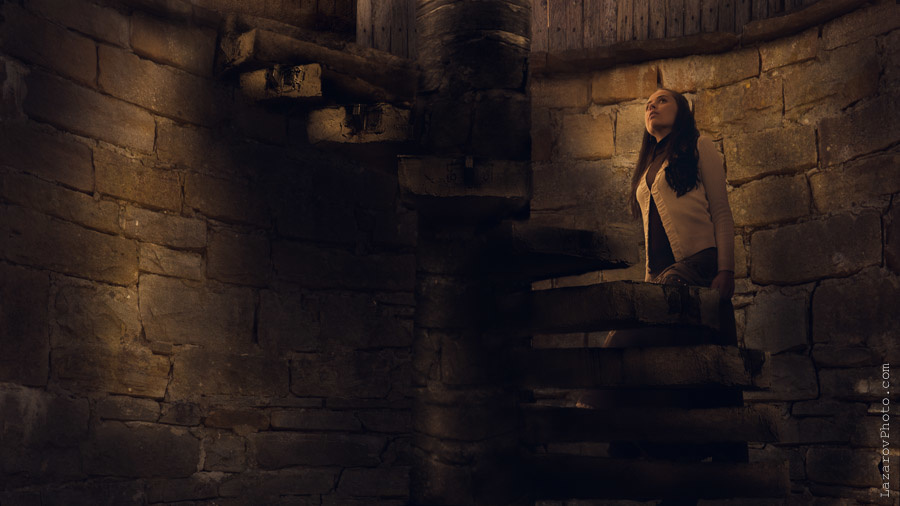
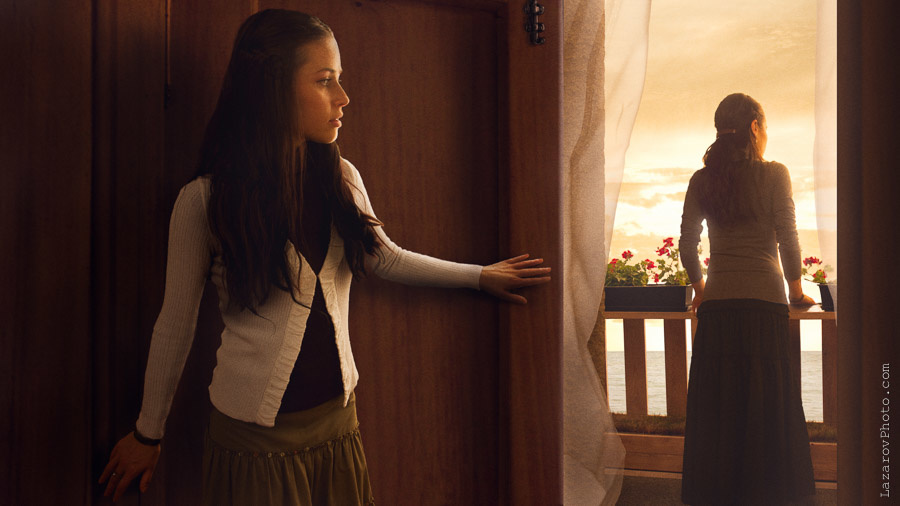
"Letter In a Bottle"
It was one of those periods in every photographer's life when commercial work was not coming to me. The phone was not ringing. All I had was emails about winning lots of cash transferred from banks in Africa.
I decided to work on my next best-in-my-portfolio project. In order to have a superior project, I had to have superior skills, or superior ideas. Skills are to be learned. Skills do not come with your birth certificate. Ideas usually come when you start looking for them.
I sat down as a client thinking of a story. I did not care about budget or means to photograph it. It had to be a nice visual story. I was not asking myself, "How would I accomplish this shot?" At that stage I was the client who only had the idea (and the money). I expected to "hire a photographer" who might bring that idea to life.
How to Approach a Dream Project?
Ask Questions
Everything you can think of has to be clear between you and the client. Questions are not something you have to be ashamed of. It's a business. No questions are stupid.
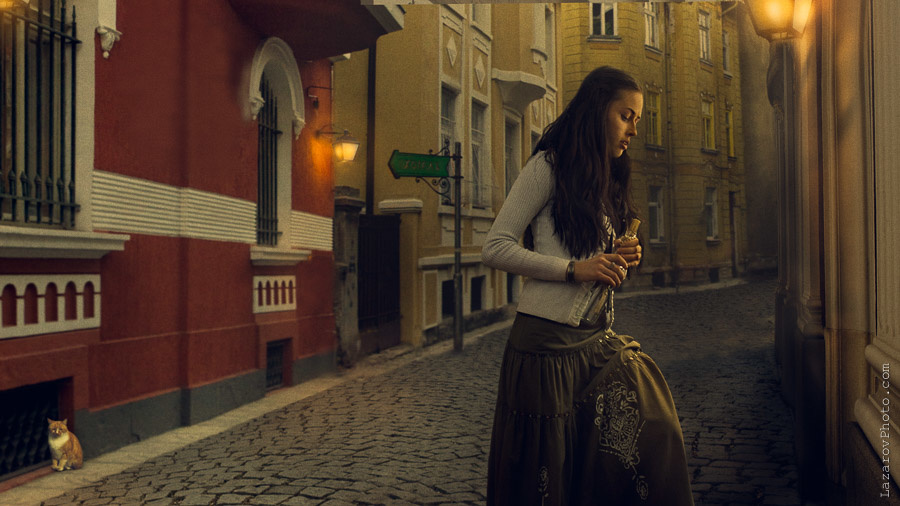
Question 1: "Why 29 images and not 30?" The client answered: "30 is too many." The answer was quite satisfactory.
Question 2: "Why so complex? Why not a series of portraits of a girl on a blurred background?" The client answered: "I want it complex. I already have the one you've proposed."
Project was clear.
Planning
Planning doesn't mean you should not ask questions anymore. Questions are asked all the way through unless you are making a project as a surprise.
All in Camera or Compositing?
This project started in a late autumn, so I had to either wait for warmer days, or make every image as a composite. I needed new clients. Waiting was not an option. I had to get straight to the job as soon as possible. I am not good at compositing. I want everything to look real but it's not easy with compositing. Too cold outside. Too warm on the sketched storyboard. Okay, going with compositing...
I do compositing only if there are constraints making it all in camera. Constraints may be budget, weather, or whatever. I'm not against heavy image manipulation. However, most of the time I'd prefer it's all one shot.

Lighting Setups
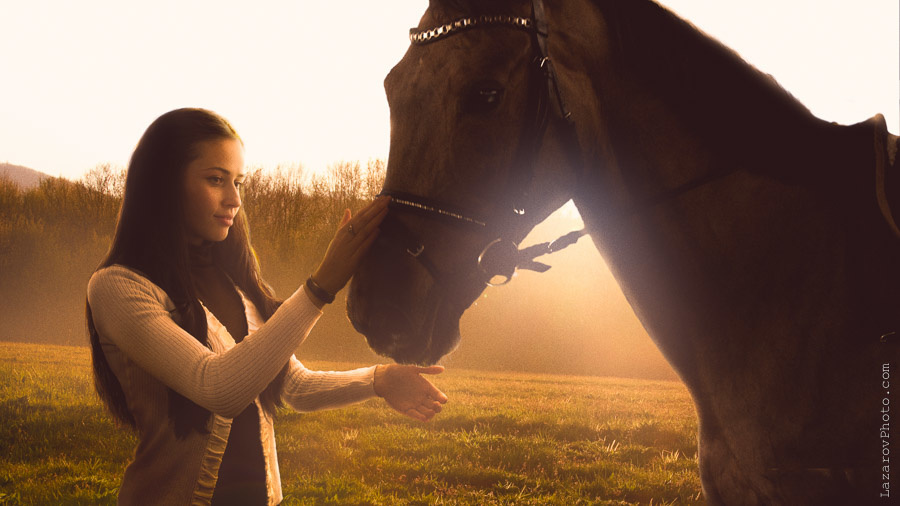
I found an appropriate female model. She only had two-three hours for that project. How to shoot all that for such a short time?
I had to plan the different lighting setups. There were scenes she had to have her hair and clothes wet. Obviously I couldn't do these in the beginning of the photoshoot.
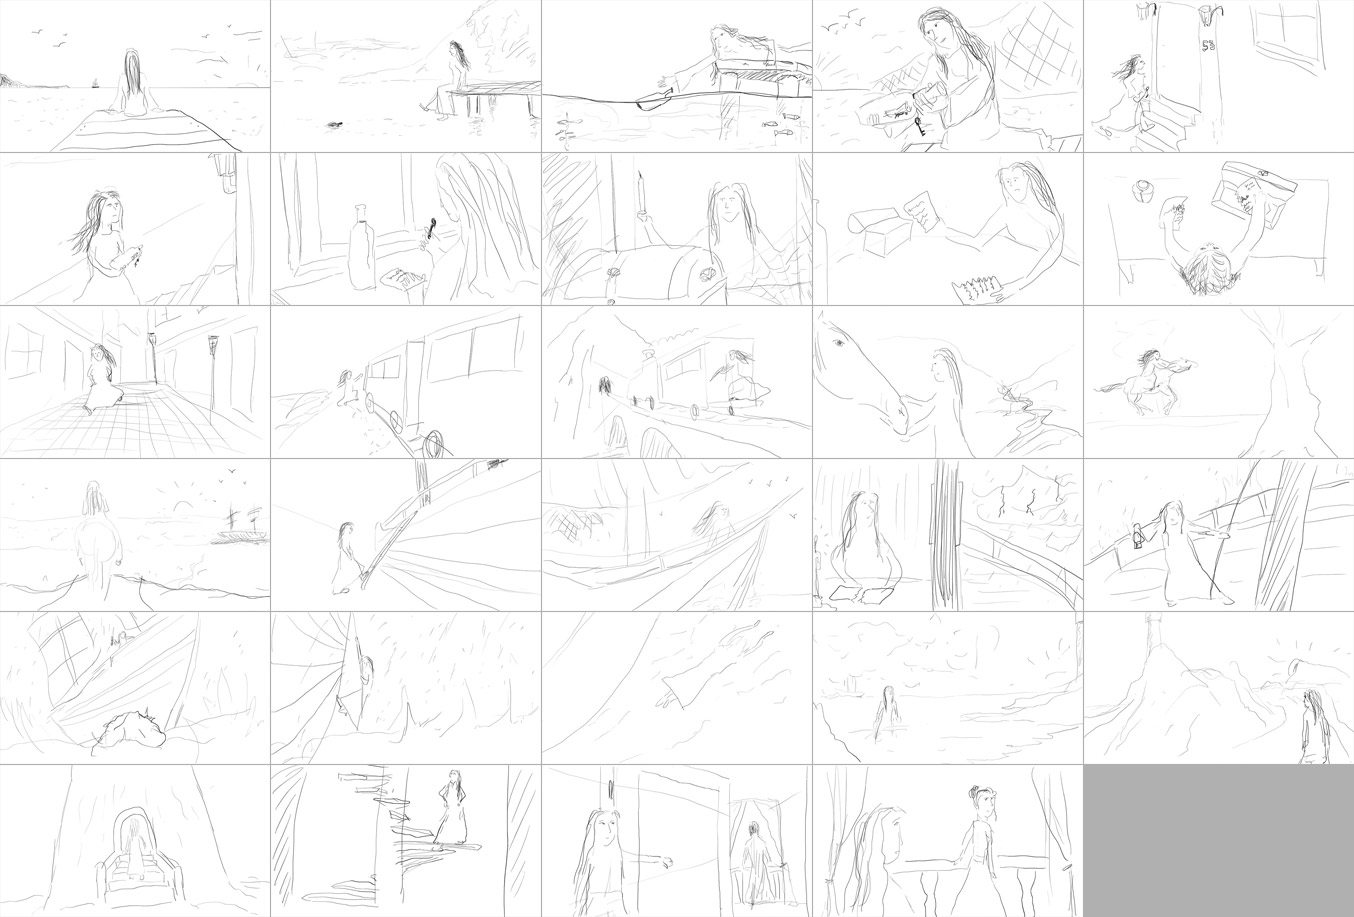
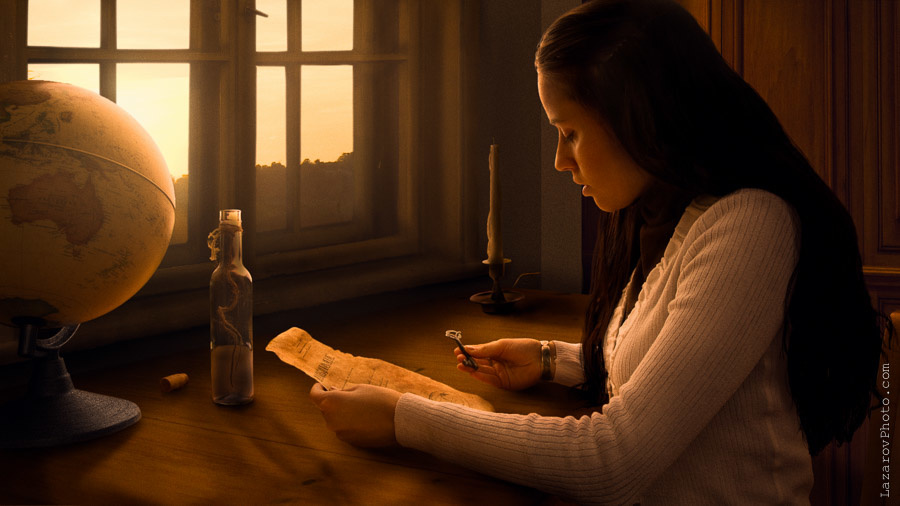
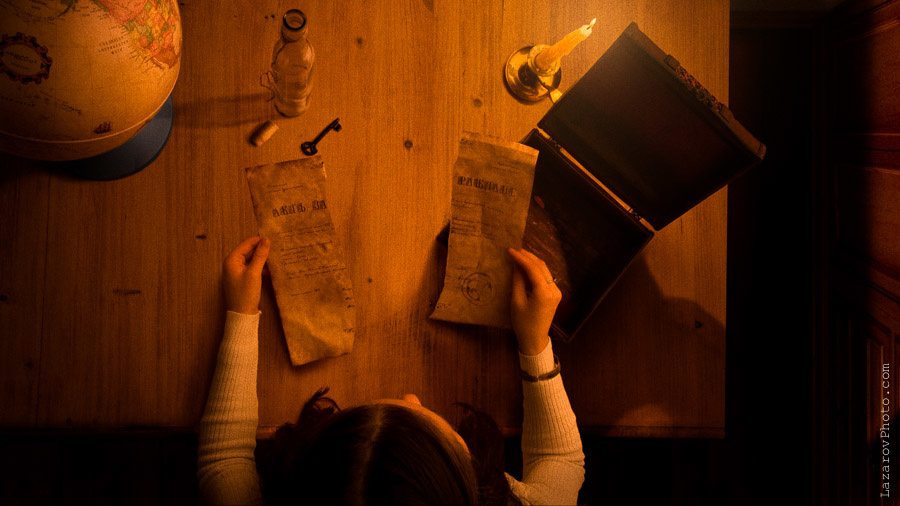
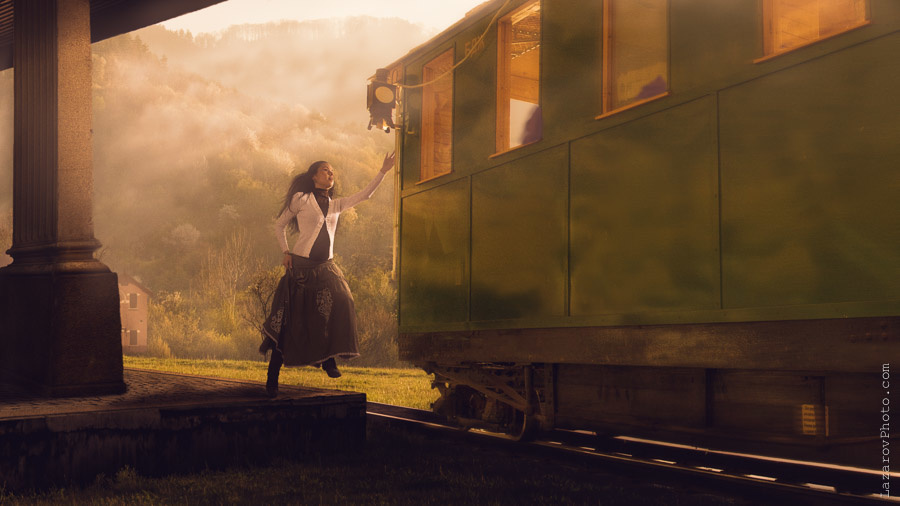
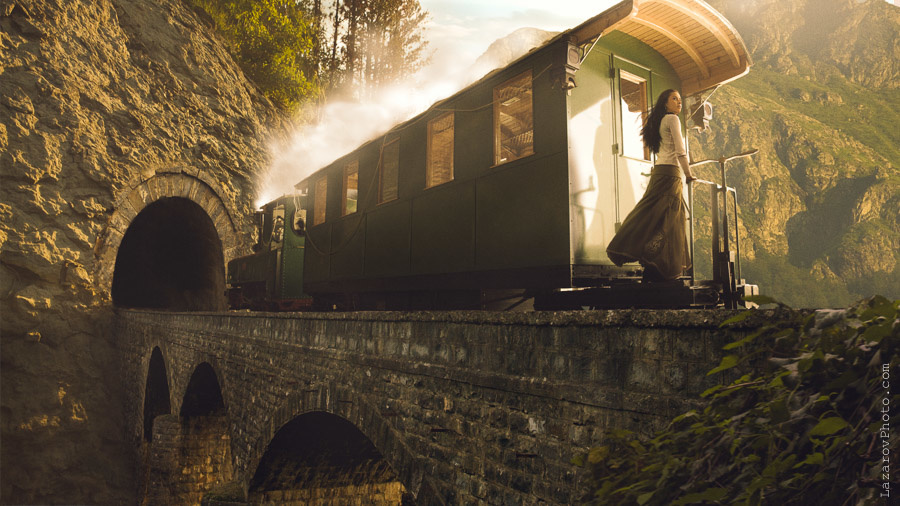
If I had 29 setups, five minutes to position the lights, meter them, then five minutes to shoot, that is 290 minutes, or about five hours. I had only three. So, I grouped the lighting setups by similarity. I had a total of 11 groups. The scenes which required wet hair and clothes were put at the end. I also prepared all the props needed for the shoot, such as a bottle, old letter, chest, key, candle, rope, etc.
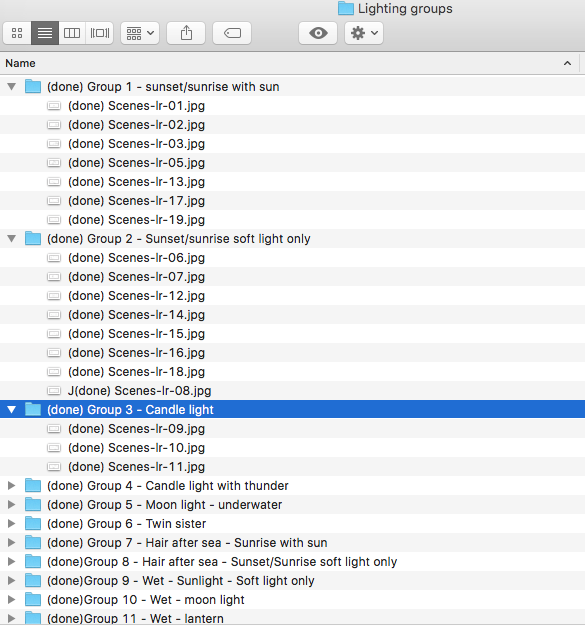
Let's do the rough math — three hours (the model is available) is 180 minutes. 11 setups means about 15 minutes a setup. This includes both shooting and setting up the lights. Looks good. The actual time it took was between three and four hours.
Most of the time I was using one or two lights and a white reflector on the opposite side. This can be seen in the setup below. There are two lights on the left and a white reflector on the right. The white fabric also works as a reflector.
The Backgrounds
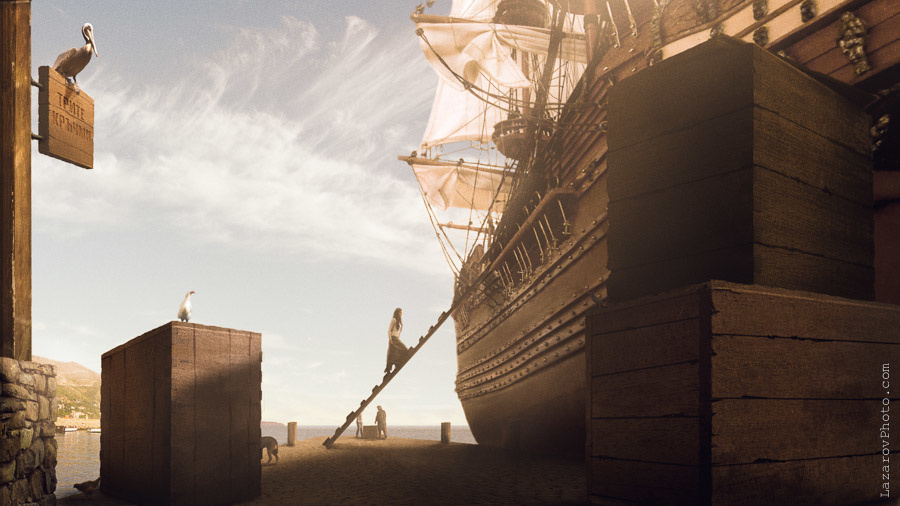
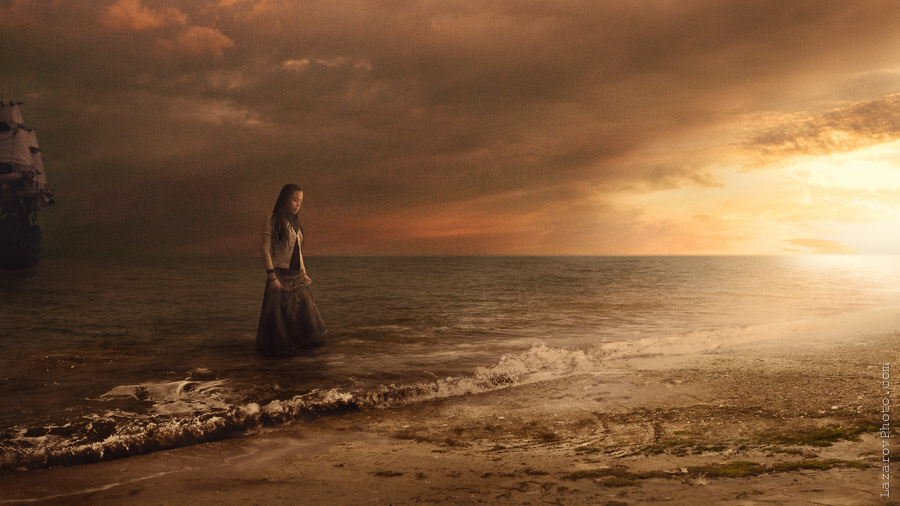
The main subject had been photographed. Now what to do with the backgrounds? How would I photograph a train on a bridge? How would I photograph a half-submerged bottle. Where do I find a pier? How to find a medieval ship?
Each picture from the story was its own separate project. I had to deal with 29 small projects (I'm glad they weren't 30). Compositing was an excuse to travel a lot. It's a good practice to get used to photograph backgrounds and elements you may need for compositing in the future. That's what I do for years. Fortunately I had most of the warm looking backgrounds already shot. I needed the missing elements. That's what I traveled for.
How I Did Some of the Images
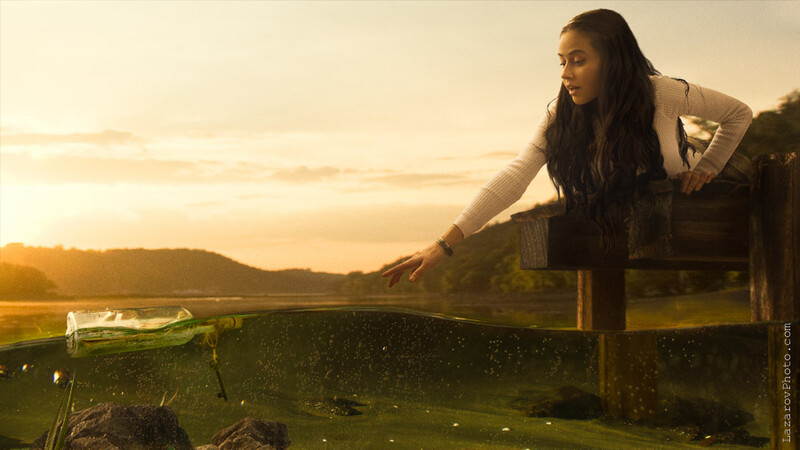
For the bottle I rented a fish tank from the local pet shop and photographed the bottle in it:
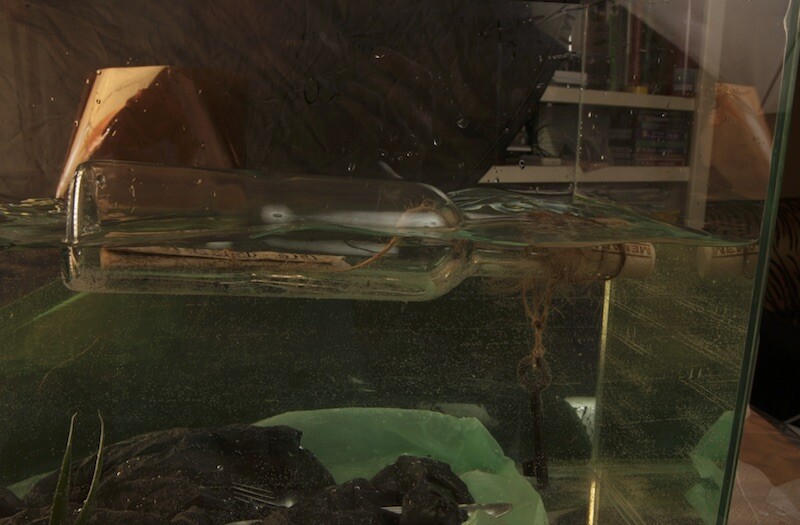
At the bottom that is a trash bag. It was used to hide the reflections from the table below. Yep, and a fork to hold it down.
The pier was part of the same setup. It was a miniature I did from wood. As piers are big pieces of wood they are usually rough. This means no special skills are required to build a rough looking miniature.
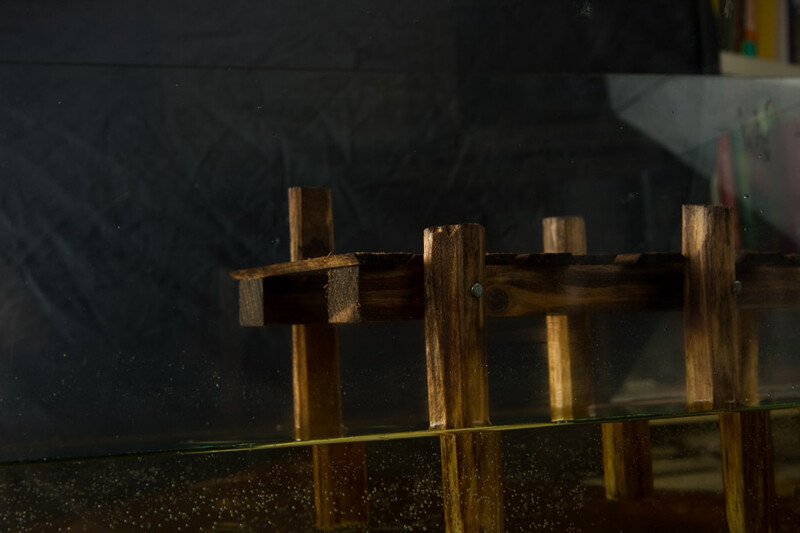
The important thing about photographing miniatures is, in most cases you want them to be completely in focus. Shallow depth of field has to be avoided. Shooting at f13 or higher is common for that type of images. All elements in the image have been lit the way I lit the beautiful model.
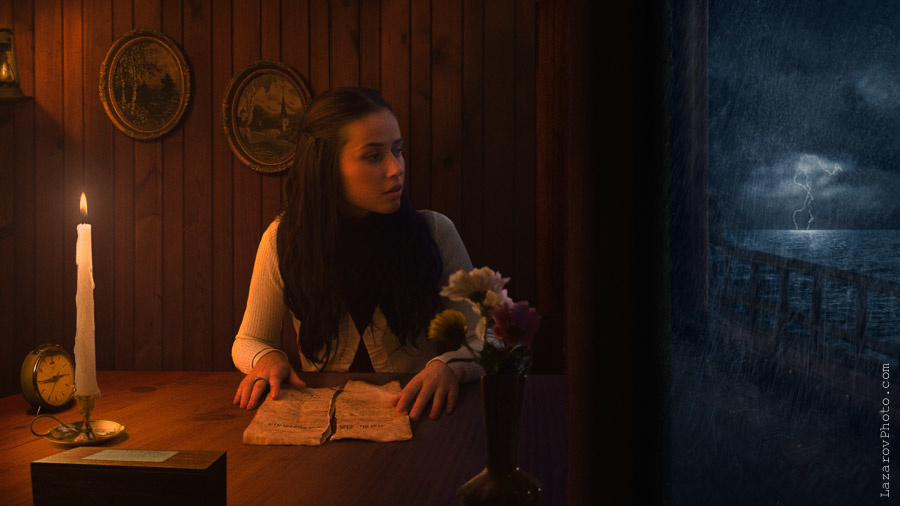
Three days after that I was ready with the final image. That was the first scene I had completed. 28 more to go...
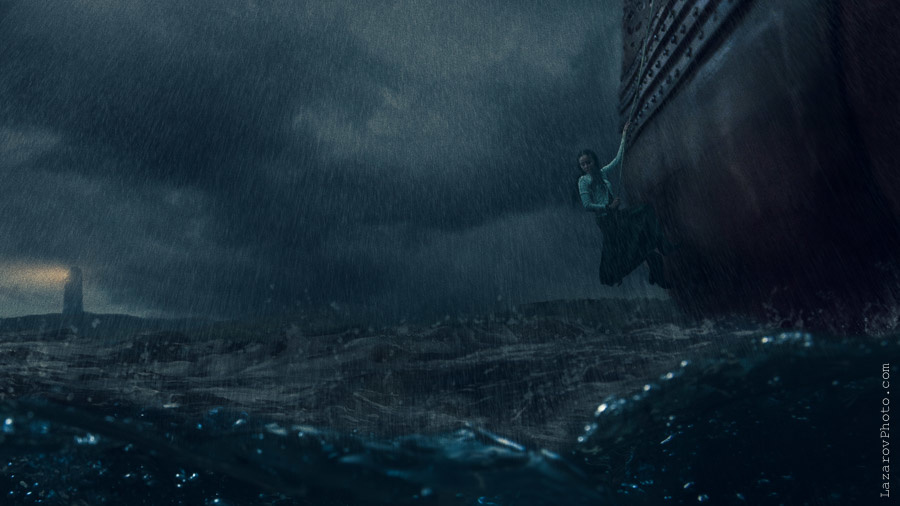
Let's look at the following "About to jump into the sea" scene:
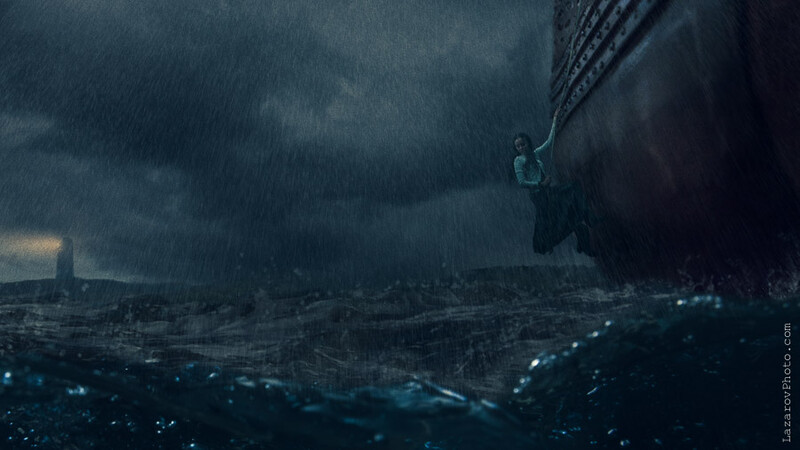
The model was sitting on a black Peli case.
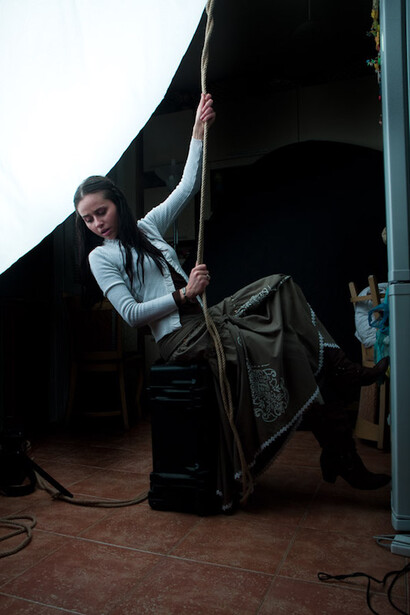
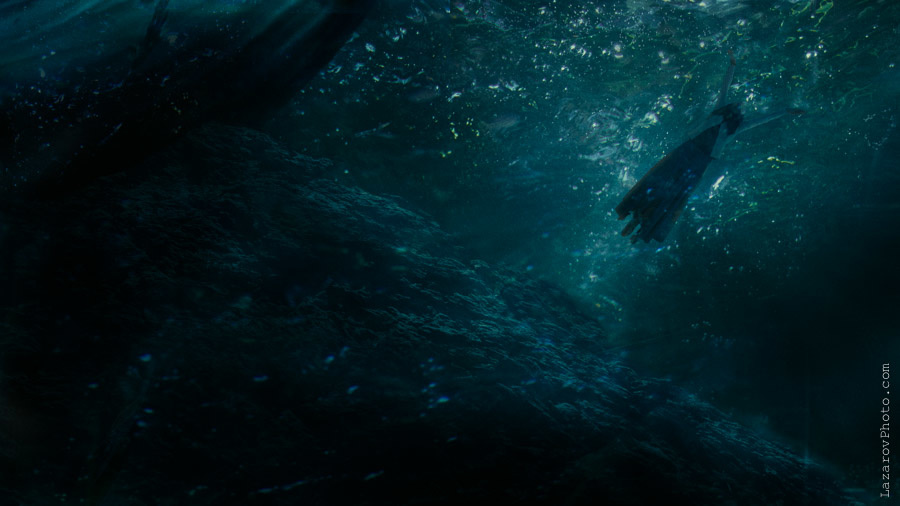
That on the right is a fridge turned white reflector. So, for lighting I had a big softbox on the left and a white reflector on the right. For the waves, I used the fish tank once again:
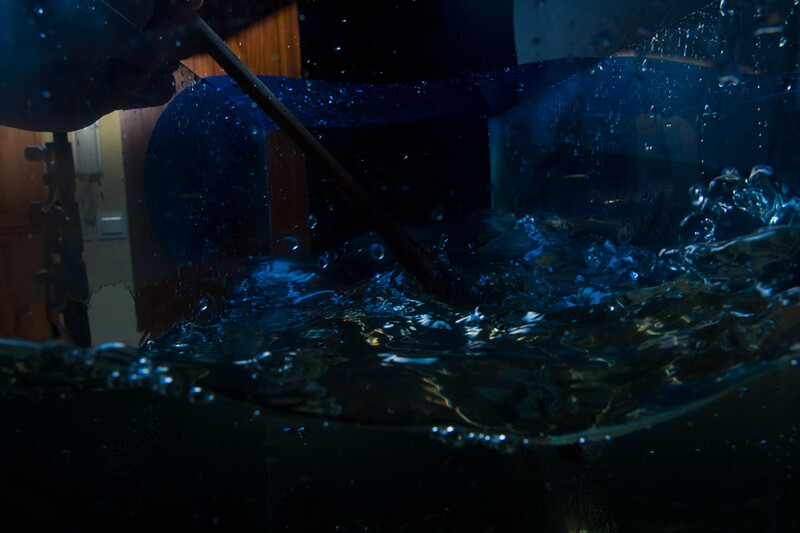
Yep, this is a professional wooden spoon. You can't achieve such waves with a common household one (joking). There is a blue filter at the top and a single umbrella for the lighting (on the top left, just out of frame).
I found a luxury shop where they were selling a three feet long miniature of a medieval ship. I asked if they would allow me to photograph it for a project for my portfolio. The people were kind enough and let me take some pictures. I used those frames for the scenes with the watercraft.
Lesson learned: You should not be afraid to ask. Even if you are a nobody photographer in a luxury shop.
After three days in Photoshop I had the image completed.
Eight months later I had all images done. On a budget. The expenses came out to be about $500, most of which for gas.
The Gear?
Oh, yes, the gear... Why am I writing about gear on the last place. Isn't it important? Not so much.
I used an old discontinued Canon 40D at the time of this project. It has all the things most photographers don't like — noise even at ISO 400, max ISO 1600, old crop sensor, 10 megapixels... But it worked for the job. Any camera brand that can be connected with an external flash would work here.
For lighting I used available light for some elements (like the ship that I photographed in the shop). The model was lit with an Elinchrom Quadra.
The best tool of all remains your brain. It can't be bought but it can be taught.
Conclusion
Content is king. It is not about having the best gear. It is not about waiting for the dream high budget client to have a dream project for your portfolio. Do not be limited by gear, or prejudices that you should never use compositing. Yes, shooting it all in camera is always better but at the end of the day it's the final image that matters. If the result looks good, nobody cares how you did it... well maybe a few photographers out there do care.
You May Ask
That's article is entitled Part 2. What About Part 1?
You are always in Part 1. It is where you learn and perfect your craft. You should always practice Part 2 as well. Clients will flow but with a little help from some marketing and patience. Maybe I can write more about that in Part 3. Let me know if you are interested.


Join the Fstoppers community for free
-
Post comments and join in the discussions
-
Browse the site ad-free
-
Share your work and get featured in the community
-
Compete in the photo contests for fun and prizes
33 Comments
Great article man. Well done!
Nice set of 29! But why not 30? (jokingly)
Wow great post. Love your images and your thought process. You have reminded me and inspired me to create the the type of images that are in my head.
Go ahead, Ben!
Jeez! I need to reevaluate my efforts. You're taking it to a whole new level! Well done!
As I said, anyone could do it. It just takes a bit of patience.
Inspiring...well said!
very cool! travel without leaving home.
Thanks. I actually traveled a lot, especially trying to find the right stone bridge.
Very inspiring post! I myself am doing a "dream project" at the moment-luckily nothing as post-intensive as this must've been!
Fabulous series! Great post work! Very well done!
Thanks! I'm glad we are all on the same path :) Good luck!
Good article, and I really like the photographs. Thanks for this.
Have Fun,
Jeff
Hey Jeff, thanks! I appreciate your feedback.
Great work and inspiring article, Thanks!
I'm glad it's inspiring to you Bob.
Great! thanks for this!
Your article has seriously inspired me and helped answer some doubts I had so thank you, and great job on this project!
Amazing work and an amazing article! Well done! Looking forward to Part 3
Thanks. Will do a Part 3.
This is a great article, not only for all the insight and knowledge it shares but it's structure and the thought process behind it is unique and enlightening. Just the concept of the part 1 & 2 alone is a really interesting way of approaching things. Very cool.
Whoa, thanks Grant! Thanks for the feedback, I appreciate it!
Super article Tihomir, please write the 3th part jejeje. I have a technical question, I've taken pictures with a white cyclorama background to make later a photomontage, I see that you use a BLACK background. Is the black background better to cut the subject and make photomontages?
Background doesn't matter to me as long as it doesn't blend with the subject. I've shot these in a small room and cut them out manually with a mask and a brush (without special selection tools).
Cutting out subjects is the easiest part from a composite. The hardest part is lighting it properly and matching it to the background. As I said, for me composites are the way to go only if budget doesn't allow it or it's something impossible in real life. In this project it was both.
Thanks for all your advices!!
Good Stuff....inspiring
great article!
Duuuude just got around to reading this, really incredible and inspiring for me at a low point this week! How do you go about coloring the warm and bluish tones in these shots???
Thanks Mark. I use Curves and Color fill adjustment layers. For Curves I use the Blue and Red channels (just the mid point towards Red + Yellow which equals Orange). For Color Fill I use some orange tone and set the blending mode to Color with opacity to taste (usually 5-10%). It's similar for the Blue tones.
People who are good at Photoshop know other ways to do that like Gadient Maps and Photo Filter adjustment layers (and probably others). I know only this one :)
Great advice and makes sense to me. I'm gonna try my hand at it. Thx for sharing, really good work seriously
truly great article, thanks for sharing your process and the gear part is also fun :) brain is the only limit ;)
Thanks a lot!
Great article, thank you. Consider me inspired!
Haha, thanks Chloe.