
Sometimes you just want to shoot midday with a speedlite, in the middle of the forest, on a balmy 80-plus degree day in Florida. OK, those last few statements are purely hypothetical, but as a traveling photographer, I work with what I’ve got.
As my wife and I entered Florida on the last leg of our eastern seaboard trip, we encountered the Osceola National Forest just outside of Jacksonville. Driving through, we noticed an insane number of fronds, aka spiky green plants, huddled amongst long, slender pine trees that were so perfectly aligned it was hard to believe the forces of nature were responsible. Desperately in need of some photographic inspiration, I suggested we stop and host an impromptu photo session. My idea was to shoot a fantasy/horror-like scene middle of the day using a single speedlite.
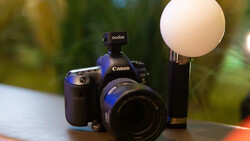
How would shooting midday achieve any sort of effect other than harsh shadows and blown highlights? Let me preface this by saying that traveling with a photographer full-time is no easy task, and I applaud my wife for her assistance in moments such as this. In this case, it was hot, the mosquitos were out in full force, and I was asking her to wear a long, black rain jacket for me. Not the best idea for brownie points. The trick to this effect is setting your white balance to something cooler, such as tungsten or fluorescent and using a flash gelled with a CTO. In this experiment, I used a Yongnuo YN560 IV speedlite which came with a series of color gels for all kinds of creative effects. Here is what mine look like:
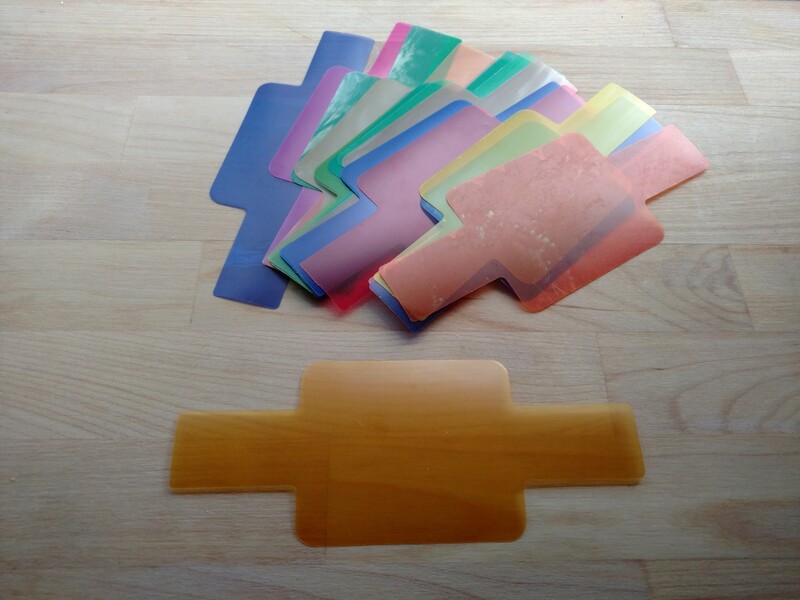
They are really cheap, incredibly useful, as well as fun in a variety of situations. By using a cooler white balance setting on your camera, you are effectively turning everything to a dark bluish color in your scene before introducing flash. A CTO gel (or Color Temperature Orange gel) is then added in front of your flash to add an orange tone to the light being emitted. Seeing as this light will only affect your subject, it gives the impression they are being lit in a nighttime setting as the ambient light in your scene will remain bluish. It's pretty cool, and even better, once you understand the technique, it will open a world of other possibilities using different colored gels.
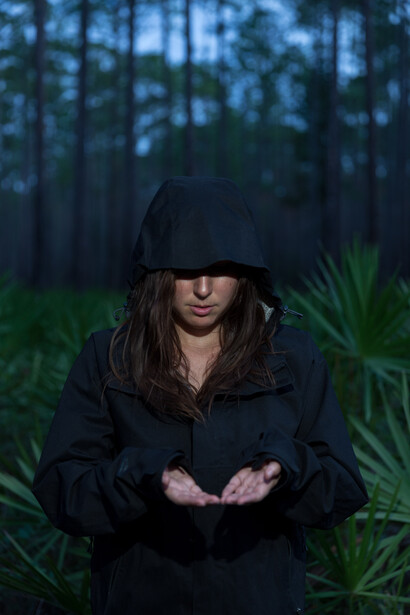
For my shot, I asked my wife to stand in front of a series of long, symmetrical pines with fronds around her waist. In my opinion, the long pines slightly out of focus gave the impression of an ominous forest and the spiky fronds added an element of danger and texture to the background. I positioned her in an area of shade and looked for a background that wasn’t being entirely lit by the sun in order to achieve the dark look I was going for. Shooting with a small speedlite midday is difficult enough, as it will struggle to overpower the sun; therefore, shooting in the shade seemed easier. In addition, I decided not to use a modifier as I wanted the light on her to have more contrast and increased range, whereas the modifier would reduce both. Finally, I used an ND16 filter, which allowed me to shoot with a shallower depth of field. My Canon 6D has a sync speed of 1/180 of a second, the fastest shutter speed at which it will function with a flash. It is near impossible to reduce the ambient light in a scene without using a small aperture, which was undesirable in my case. More expensive flashes will have high speed sync built in, which allows for a faster shutter speed and consequently a larger aperture, but if yours does not, using an inexpensive ND filter is an alternative. The downside is that it requires the flash to operate at a higher power, which reduces the recycle rate, battery life, etc.
Here is a behind-the-scenes look at my setup:
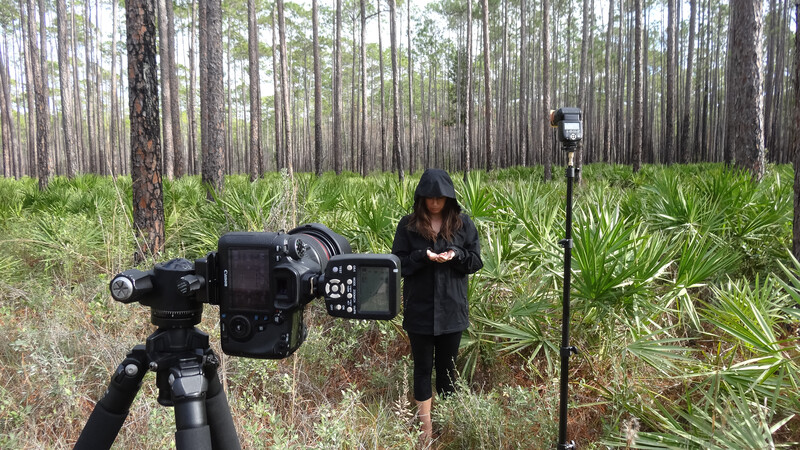
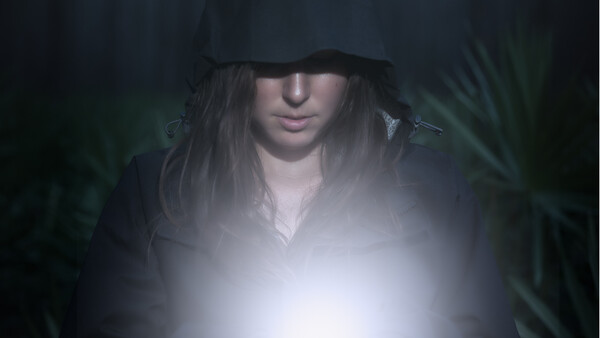
The setup was a small, portable light stand with a single flash gelled camera right at about a 30-degree angle from my model. A few test shots later, and I decided on f/2.8, 1/180 s, and ISO 160 using a tungsten white balance setting. Here is my favorite shot, including the before and after:
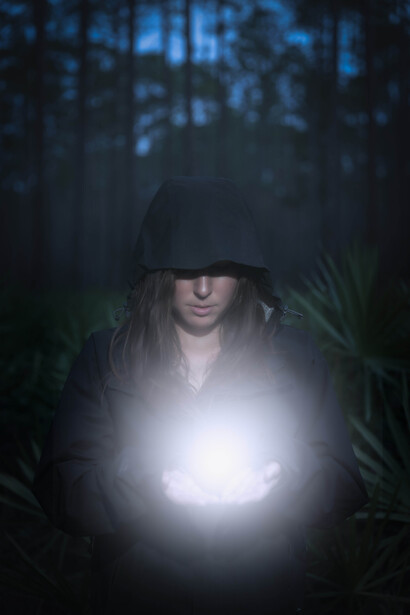
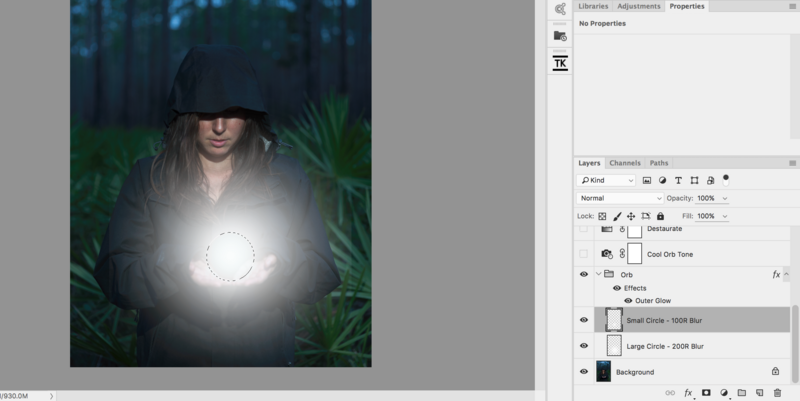
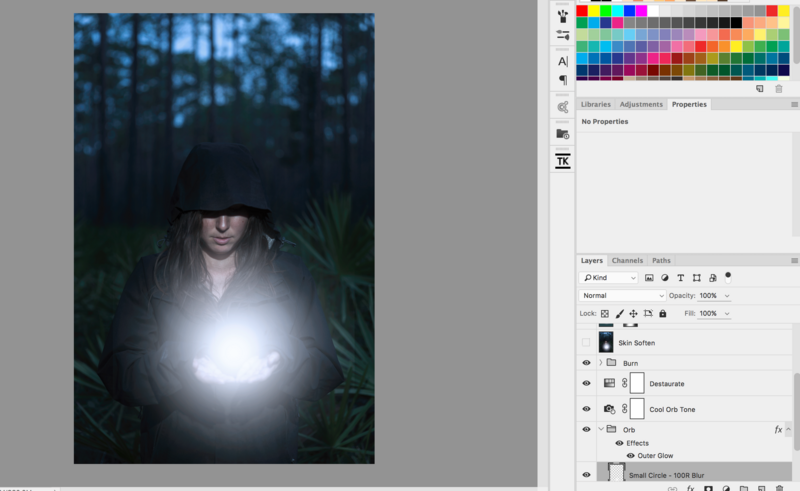
In post, I needed to composite a glowing orb as it wasn’t something we had readily available nor would it have had much effect in the harsh light. To do this, I added a blank layer and used the elliptical marquee tool to create a large circle filled with white. Then, I applied a Gaussian blur set to a radius around 200 to diffuse the harsh effect and give it that glowing look. Then, I did the same, except I used a smaller circle and smaller blur radius, as I wanted the inner portion of the orb to appear brighter.
I hope this tutorial was helpful for anyone unfamiliar with gels and their many uses. All of this can be done with a relatively inexpensive flash, an ND filter, and gels. Feel free to ask questions or add other ways you have found them useful!

Join the Fstoppers community for free
-
Post comments and join in the discussions
-
Browse the site ad-free
-
Share your work and get featured in the community
-
Compete in the photo contests for fun and prizes
9 Comments
The concept and explanation was good till the glow was introduced. The hard shadow from the speedlight doesn't make sense if such a prominent "light source" is coming from below. There should be more fill to make it believable.
Shintaro, you are absolutely correct. But hey! This was taken on the side of the road in high heat with my wife as an impromptu model so I shot very quickly. Photos, edit and article written in less than 3 hours.
I wouldn't have noticed or thought about it had Shintaro not pointed it out. Since then, I've been trying to think of a way to accomplish it but I'm not nearly as creative as you or, it would appear, detail oriented as Shintaro. :-)
Haha I notice it more than I did before since it's now the first comment on my post but I knew it was not the greatest lighting to begin with. The article was more about the WB and gel technique vs lighting but I respect any and all feedback!
Sorry! Haha. I do think the article was great about the WB technique. I just noticed it more since this is the same kind of issue I've been trying to deal with since I do cosplay shoots often.
I just happened to be trying the exact thing you were describing in your article on shooting during the day time and making it seem like night.
https://fstoppers.com/photo/142530
No worries man! I appreciate you having a view and suggesting a method to fix the issue. At the heart of all of this is a desire to help others learn and that includes myself. Great shot BTW, where did you get a costume like that ??!
So you're saying it's ok because you half assed it? lol
Not at all what I meant