
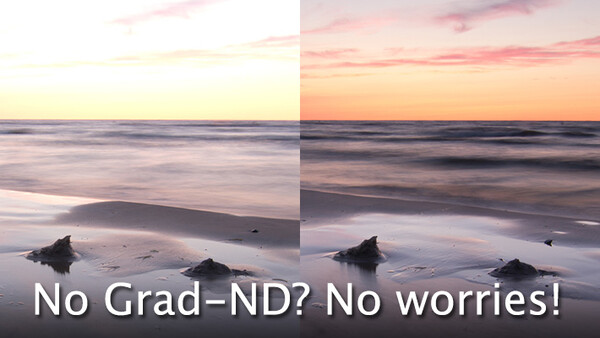
While on a kayaking trip in the Great Lakes, I stopped just after sunset to shoot some images on the beach. The sky was still bright and very saturated, while the sandy ground was losing light and getting dark in my exposures. My kit was small, and I had no graduated ND filter, but I came up with something that worked well in a pinch.
I’ll start this with a disclaimer: this trick isn’t meant for pros out on a high paying gig– if that’s you, simply pack your grad-ND. People who can do HDR in camera might not find this useful either. If that's you– move along, nothing to see here. For vacation photogs and others wanting to have some fun with experimenting, please read on.
Light winds, rolling waves, and a colorful sunset bookmarked the end of a great weekend while I hung out at a State Park in Michigan’s thumb. I found it funny that the crowds all left once the sun went below the horizon, and the only people still on the beach were my friend Scott and I, both armed with DSLRs and tripods. We had spent the previous few days kayking 20+ miles of shoreline, only taking what we could pack into a 13-foot kayak, so our kits were pretty limited. That, and the fact that this trip wasn’t for a video or photo gig (more about solitude and beer) so I was definitely in more of a “vacation photo” mindset.
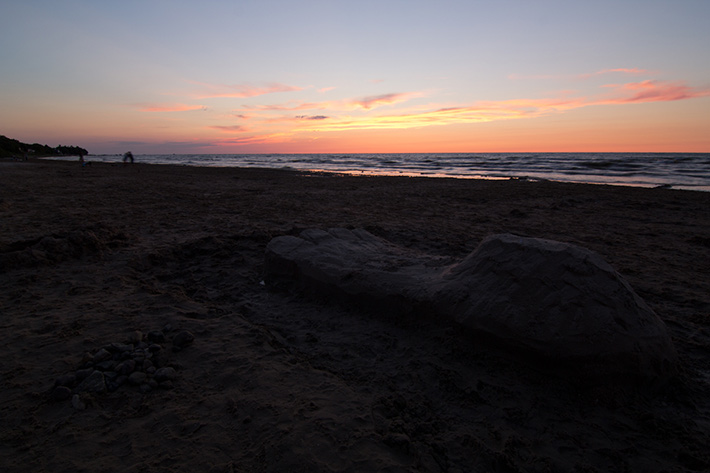
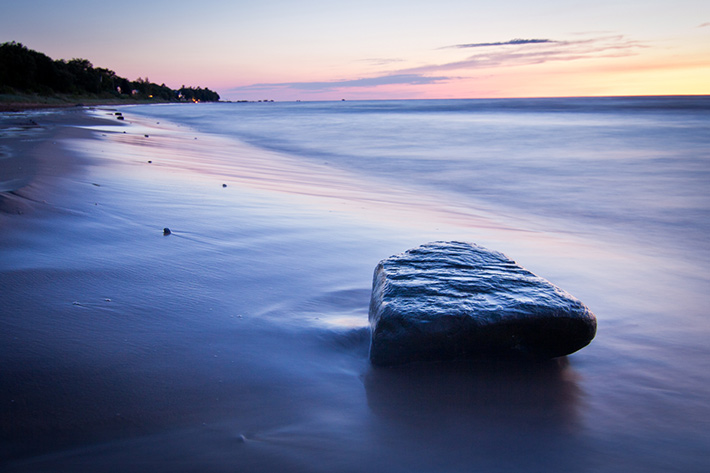
I enjoy the saturated colors and versatile light that comes just after the sun has set, so I set off along the beach to make some images in the later part of magic hour. I came across some sandcastles, and then a giant foot made out of sand. I started here taking a few shots to just see how things looked, and messed with settings and color balance. I metered on the sky first, recomposed, and this was my result:
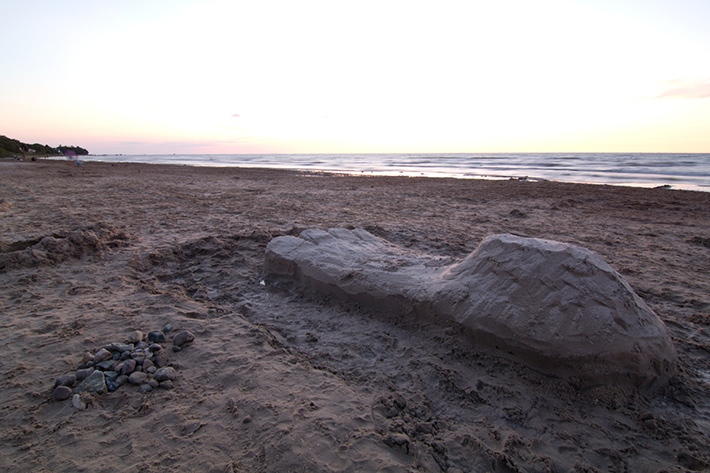
I then metered on the ground, so my second photo came out with the sky over exposed.
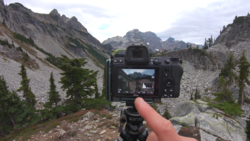
Not very satisfied with this, I knew the range was too great. I yearned for the grad-ND that I didn’t have with me. Why not try to fake it I thought? So by engaging liveview, I held my hand over the lens, and lined it up with the horizon. I shot an exposure of about 4 seconds, and about 2 ½ seconds into it, I pulled my hand up and out of the frame.

It took a few shots to nail the timing, but immediately I could tell this would help me get more range out of a single exposure. One issue that I could tell from looking at the images on the LCD was that the area I was covering with my hand wasn’t quite perfect. (You can see in the image above that there some dark spots along the left part of the frame from where I wasn't precisely on the horizon) The curves along my hand and finger didn’t line up as well as I wanted them to. So, I reached into my pocket for my phone, which happens to have a flat edge without any buttons. I suppose you could use anything, as long as it is flat-sided. A lens cloth perhaps? Credit card from your wallet?
I tried to capture a few more images with my phone as a makeshift graduated ND filter, and just have some fun on the beach looking for interesting lines and colors.
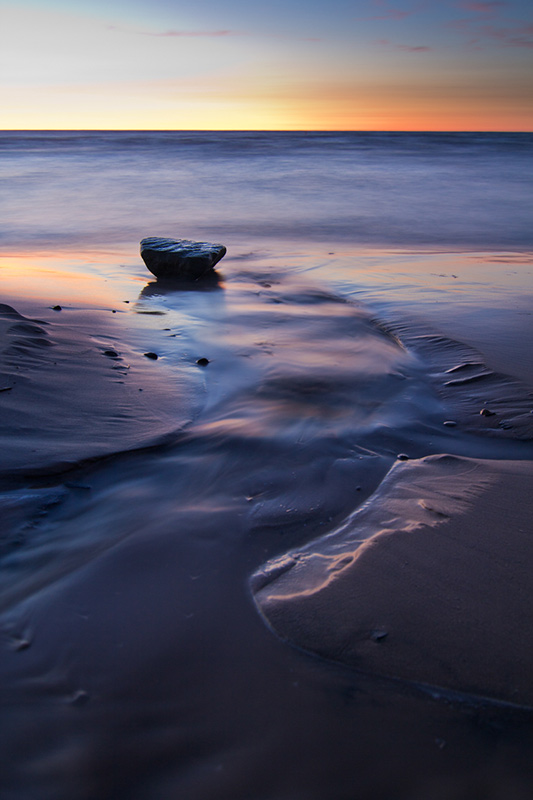
Here’s another before shot, with no processing except for some cropping:
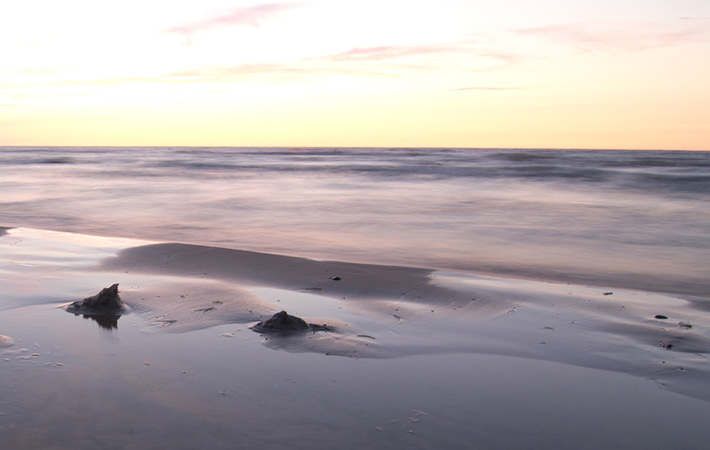
Here’s the same shot with using my iPhone to cover the lens for part of the exposure. This shot has the exact same camera settings (ISO100, F13, 4.0 Second exposure) as the previous image:

There have been plenty of times I’ve been on vacation or on a backpacking trip and didn't have a graduated ND filter. I know it doesn’t take up much space, but I try to pack light and fast when on long hiking trips. I’m hoping this trick will work for me again, and maybe some of you will give it a shot and make it work for you as well. It’s far from perfect, but I for one enjoy the creative experimenting from this kind of thing– it’s part of what I enjoy about photography.
There are a few things that I should note too, if not obvious.
• This will only work if you’re doing an exposure longer than about 2 seconds. If you need to freeze something in your image that is moving, this trick can’t help.
• If the sky is about 3.5 stops brighter or more, the results are rather poor. I tried to re-create this hack when the sky was still very bright, and it looks very unnatural, not to mention it’s hard to keep the shaded area perfect.
• It helps to have a mostly linear horizon, like shooting at a beach or lakeshore. Objects in the distance like trees or rocks above the horizon line might lose any detail by using this method, but every photo is different, so experiment with what works for you.
• Why not take 2 exposures and composite them in Photoshop? Sure, you could do that. But I’m not the kind of person who likes to fix things in post if I can help it. I do 90% of my post-processing in Lightroom, and it’s a breeze. If I can nail the exposure and range in camera, and then do tonal adjustments and some minor spot exposure work in LR, I’m a happy camper. There’s something about getting an image in camera that just feels more genuine than compositing multiple images in Photoshop. I might be the only one that would ever know, but it’s important to me.
• HDR from multiple exposures is also a solution, so if that’s your thing, rock out. I still meet plenty of people who aren’t familiar with good HDR techniques, but would try this trick instead, so it might help them get into it.
• If you slowly remove your hand/phone/whatever up and out of your shot, you can really get a gradient that looks nice. Move it out quickly, and it might be a bit more uniform, except for the normal vignetting that a lens would show.
• Other things you could use include a microfiber cloth, grey card, notepads, iPads, t-shirts, pretty much anything that is flat. If you need some curve to it, a baseball cap might do the trick.
• Experiment! This method could also be used for sunrise, and in other applications where you can get away with a longer exposure and using straight angles.
All images by Mike Wilkinson.


Join the Fstoppers community for free
-
Post comments and join in the discussions
-
Browse the site ad-free
-
Share your work and get featured in the community
-
Compete in the photo contests for fun and prizes
30 Comments
This is pretty cool. It's all about the little things :D
Dang, this is incredible. Really nice walk through on something so simple and easy to use. Using your phone is genius to keep that straight line across the horizon too. Nice work and great post!
Thanks Andrew. It was definitely a light bulb moment. It's funny how I often learn the most when I'm relaxed and just having fun experimenting– not when I'm out on a shoot.
Yea for sure! You always seem to be more relaxed when you are on your own time and dime really.
This is so true. As we focus on "productivity," we often kill our artistic and creative side by limiting the time we have just to play. So much comes out of playtime.
Awesome tip! This is a great tip that showcases one of the fundamental aspect of photography - exposure time.
Some pros use sharp ND and "feather" the edge to their liking - which is basically the same thing you're doing here.
old school burning. Me like :)
word!
Whoa, in-camera burning and dodging. You should do this with a bit of gaffer's tape on a coat hanger, at Tunnel View in Yosemite at sunset. I bet that'd turn heads!
That is sweet! Great post!
i keep a leader flag from a polaroid 600 film pack in my bag for this exactly ( I'm not sure if the impossible project stuff has the black flag...im sure it does ), it's black and has a hard edge and wont really get that damaged because its plastic.
Interesting idea, experimenting with opacity. If a solid object is in the frame for 2 seconds of a 4-second exposure, the object will be 50% opaque. (1 second out of a 4 second exposure = 25% opaque, etc).
Just to play devil's advocate, though, I'd say you can get results close (if not identical) to this ND grad effect using only 1. a DSLR with good dynamic range; 2. a single RAW exposure; and 3. Lightroom's area adjustment brushes.
I do it all the time. :)
Great point. It would be an easy test to see if using the graduated filter tool (if that's what it's called) in LR would give me similar results. The difference would be I think though, is that with the phone trick, you would get another couple stops of usable exposure adjustment before things started to look too wonky. My experience with raw is that you can only push it so far before it starts to look bad.
Agreed. (Gotta be careful push/pulling RAW files in LR4).
Also, a fun way to experiment with your idea is to line up a row of similar or identical objects, then photograph them @ a 10-sec exposure (or whatever).
Remove one object at 2 seconds, one object at 4 secs, another object at 6, etc. Then, it's easy to see how the amount of time exposed affects an object's opacity, which could help further refine the makeshift ND grad technique.
I've already got a few ideas for exploring this.
You've done a solid community service here by reminding people that there are fun, cheap, and resourceful ways to improve their images without relying on the old 1's and 0's.
I had forgotten about this trick. Thank you for the reminder =)
Ok, wait, you are blowing my mind right now. You really just hold up something to block part of the lens for a portion of the shot? My phone? Seriously, this is so simple, I am gobsmacked and NEVER would have thought of it. I gotta try this! :)
Haha, a few years back I did this with my wallet when doing long exposure sunset shots using live view. its amazing how well it worked in a pinch!
Simple -- yet I would've never thought of it. Nice !
This hack sounds very familiar to the technique we used to print Test B/W prints from 120mm negatives in darkroom .It is always handy to carry one solid card with u it helps alot .
If almost anyone can do it, I don't wanna.
you hipster you...
Awesome tip, having done all sorts of dodging and burning in the darkroom.
Now I actually have a purpose for live view. Thanks!
If you happen to have a pair of polarizing filters, you can cross them to loose a few stops too. It will take down you specular highlights, but it can still achieve an interesting effect.
Although totally bizarre it's pretty amazing what you can achieve with this quirky procedure.
Thanks for the tip.
An effective technique, though not all that new... we used to do this back in the '70's, I don't remember if it was Michael Newler or Bill Campbell, my instructors at Nikon School of Photography back in 1974. We used to use polycontrast filters, CC filters, nose oil on a skylight filter to replace a diffusion or spot filter, but also used our hands both in front of the lens and also use our fingers in front of the flash. By opening cracks in our fingers, we could control the amount of flash that came out of a manual flash on the fly. Excellent tool Mike, the more of these ON THE FLY tools photographers have, the more variables they can control without the need to do everything in post. KUDOS! (One thing having lived 59.6 years on the planet, spending 36 years of that time as a photographer has done is allowed me to see things go around, then come around again. Now if we can just rub the palm of our hands really fast against the back LCD panel, maybe we can get the sensor to render the image faster? Sorry! Old darkroom development trick.)
This is called "black card photography" and you got some nice shots from it by the looks of it.
Port Crescent or Sleeper State Park? I'm heading to Sleeper next weekend. Thanks for the tips.
Thanks for bringing to light (pun intended) and modernizing the classic
burning and dodging techniques in the field. Great tips, especially
since I need a new ND filter. This will help till then!
In Taiwan, many people use "black card photography".
You can buy black card or black gloves on bookstore.
About Teaching, you can refer on
http://www.youtube.com/watch?v=kMGgCuTqloo
or http://www.youtube.com/watch?v=SfRQ6mqzAeA
Thanks for the great post. Will give this a try.