
Freckles are in. As more and more brands and publications start opting to hire models with realistic “imperfections,” we’re bound to see more and more ads with speckled skin. Score one for realistic expectations! However, lighting freckles isn't easy, as most broad light sources will flatten the tone in the skin. Here’s a quick tutorial on how to bring back and enhance freckles in Adobe Lightroom.
When you’re trying to enhance freckles in Adobe Lightroom or Photoshop, you’ll want to focus on freckles as a distinct color, not a distinct feature. Your goal is to isolate the color of the freckle and enhance that specific color. In the tutorial above, I use the black and white color mixer to isolate the freckles from the rest of the skin and then bring up the underlying skin in order to darken the tone of the freckles. How dark you want them will be dependent on what they look like in person or your artistic taste.
If you'd like a couple of free Lightroom presets to get your started off on the right foot, look no further: Freckles Presets.
We can then use the black and white image to overlay our “flat” color image in Photoshop. By changing the blending mode to luminosity, we can then use that layer to enhance specific tones in the skin, namely the freckles, and mask any unwanted changes out of our image. It’s a simple, crude, and effective way to enhance freckles in Post Production.
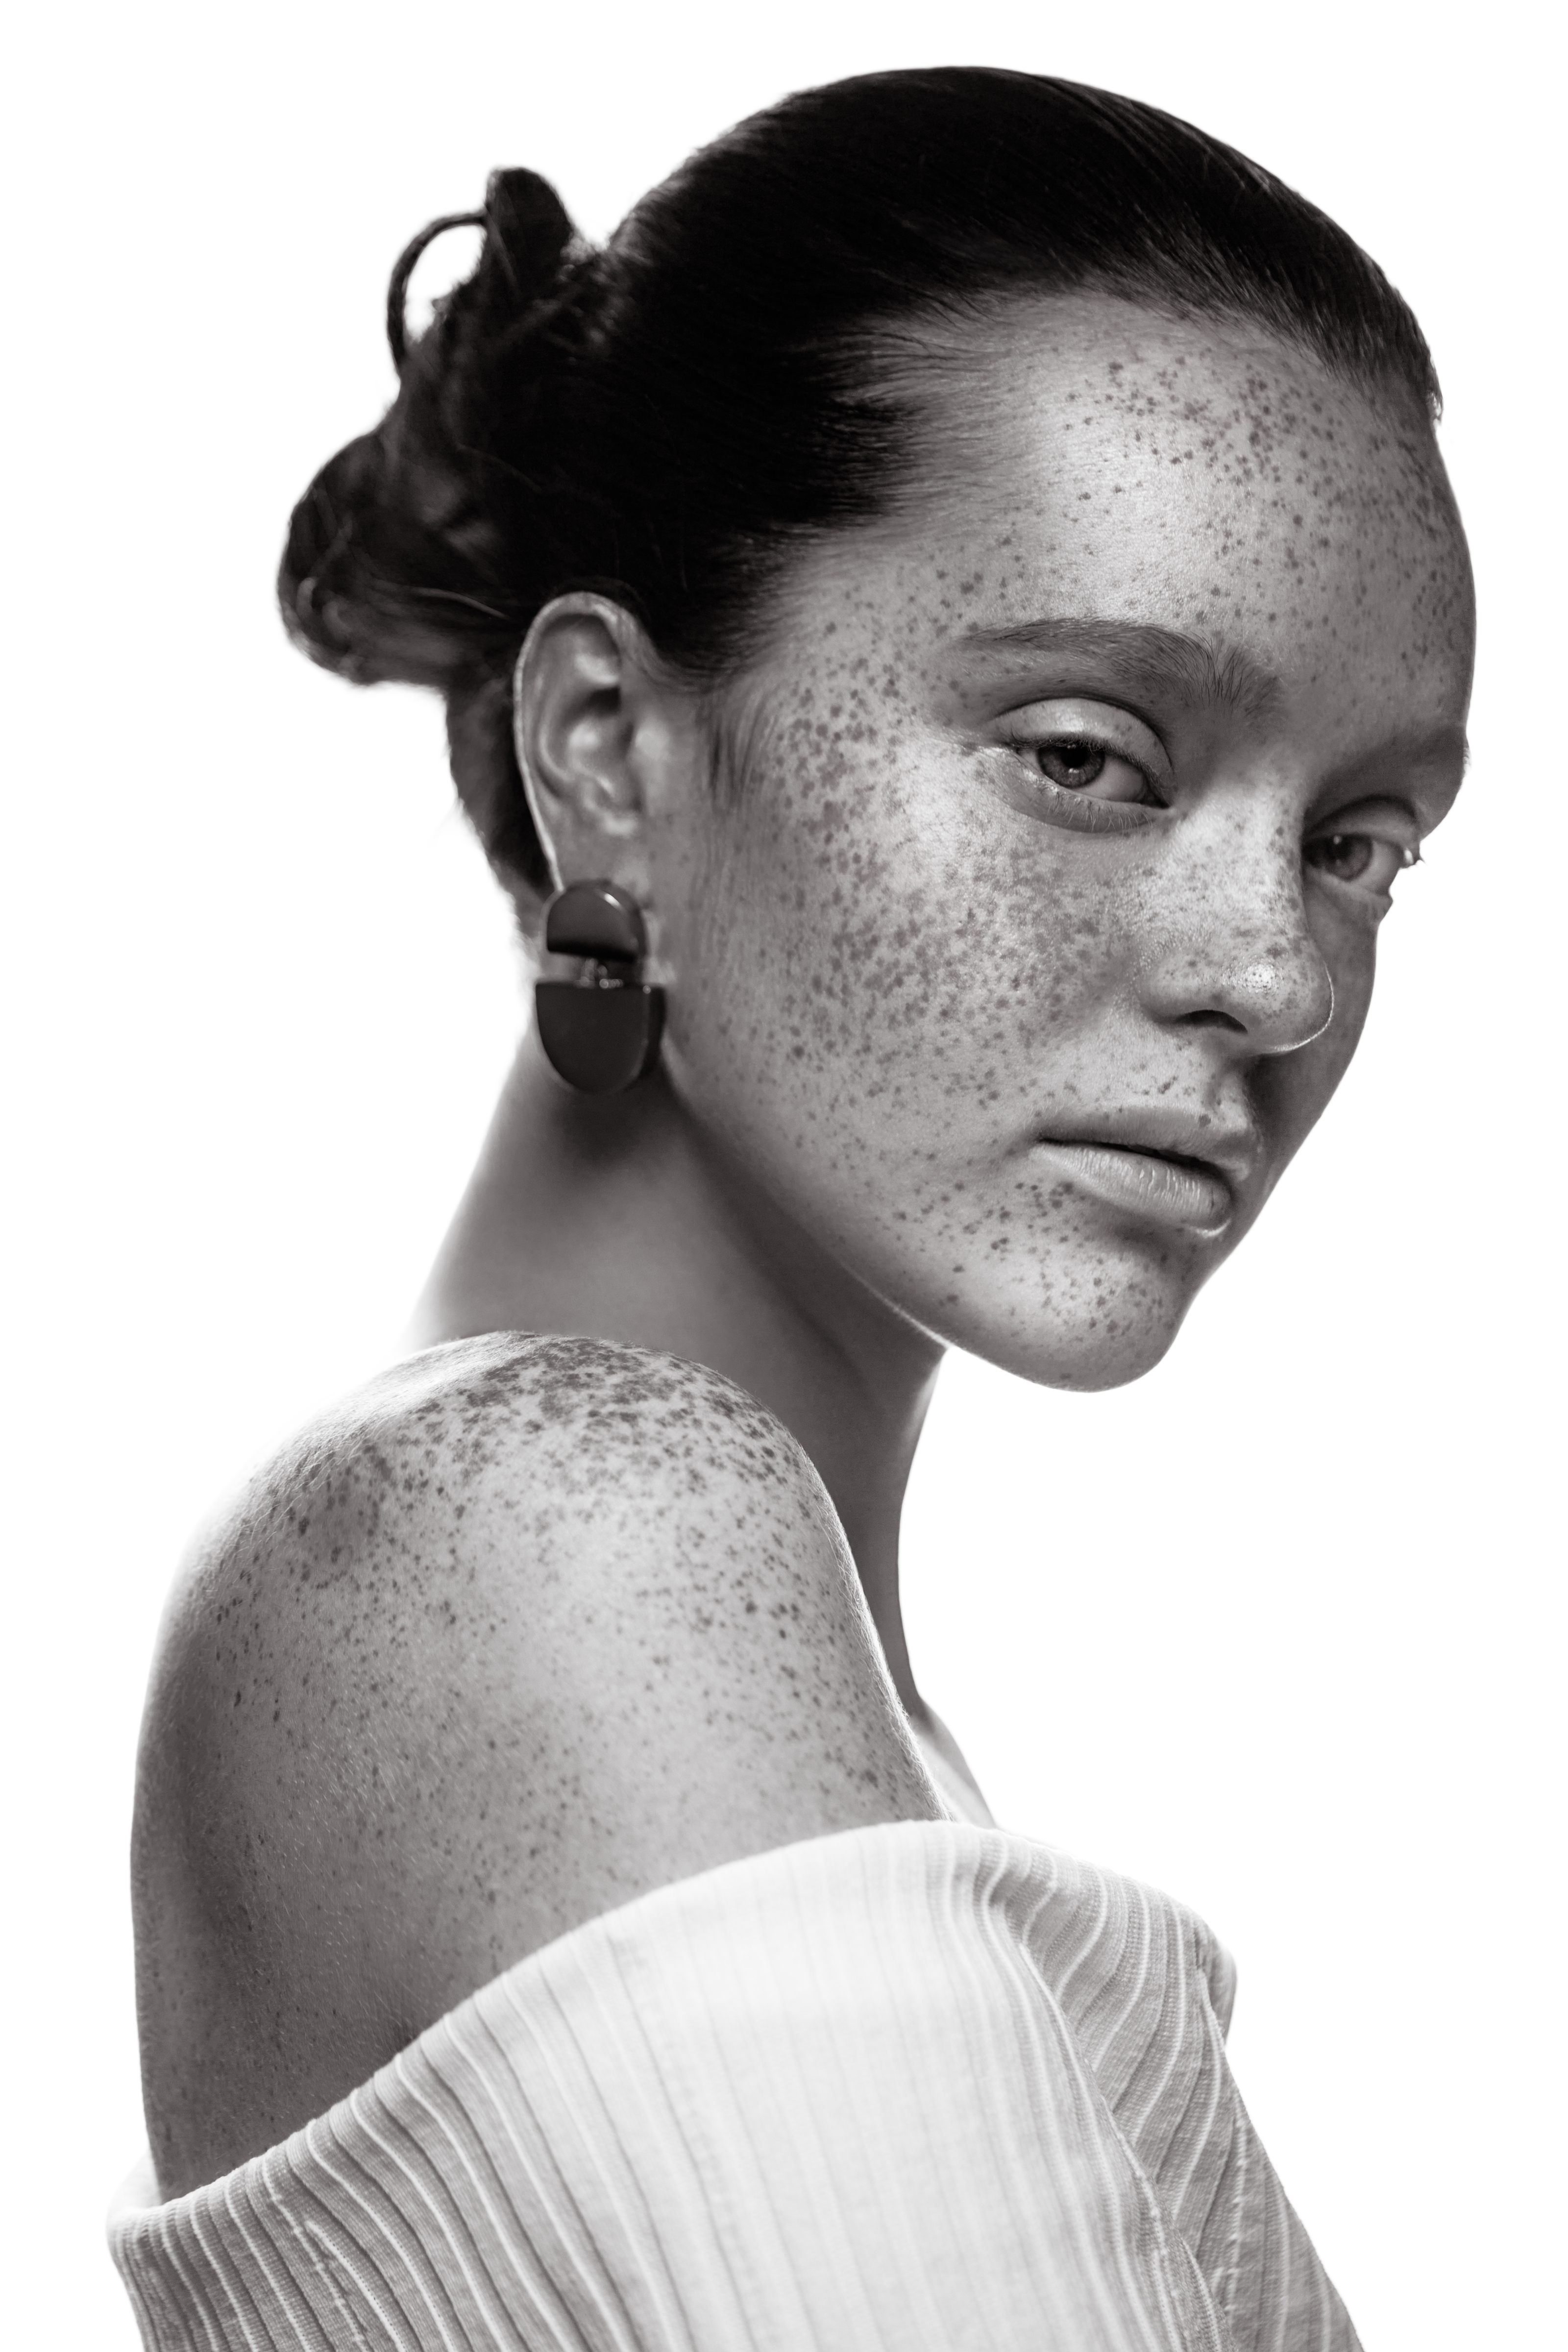
Shot with the Canon 5D Mark III and Tamron 90mm f/2.8 Macro: 1/160, f/2.8, ISO 100

Shot with the Canon 5D Mark III and Tamron 90mm f/2.8 Macro: 1/160, f/2.8, ISO 100


3 Comments
Thanks for the small tutorial. How can I enhance the freckles the same way in Photoshop starting from scratch? Not using lightroom. Thank You!
Use Adobe Camera RAW, it has the same tools just wrapped up in a different UI. You can access ACR through Ps or Bridge. Alternatively you can use Hue/Saturation adjustment layer in Ps with an additional small curves adjustment to enhance contrast between skin/freckles do a similar look which is how I used to do it before I did it in ACR which was mostly to reduce them for clients who didn't like them.
It's all about understanding the underlying colours and how to separate them using tonality.
Thank You Daris! I know about ACR but I've heard you can work on freckles by playing with the channels in photoshop, I just don't know how they do it, thought maybe someone knew.