One of the most important aspects of virtually any image is contrast. However, contrast is not just a single, global property of an image; it has many different forms and usages. This helpful video will show you how to master each of them to create compelling images.
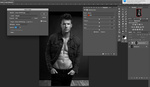
Coming to you from Sean Tucker, this great video talks about the idea of contrast and how best to add it to an image to really make a subject pop. As Tucker demonstrates, there are many types and levels of contrast, and using them in tandem in a nuanced and precise way is the proper route to a polished image in which the subject is really accented. As he mentions, when you're using the high-pass filter, consider masking out the skin, as you don't want to over-sharpen that. Also consider masking out the background, particularly broad swaths of similar colors and textures, as sharpening can introduce artifacts in these areas, and there's no need to sharpen them anyway. A lot of the trick lies in being selective about where you add sharpness. Give the video above a watch for the full rundown and be sure to check out Tucker's photography book as well.


Funny to choose a backlight photograph to speak about the loss of contrast... Like, I love my pictorialist portrait lense but I have to sharpen everything in post...
I'm just kidding :)
Very cool way to control contrast. Thanks for sharing
Dunno about this, I think its way too much work when he could've just loaded this up in a camera raw filter and tweaked all the tones/sharpness there in a few seconds