
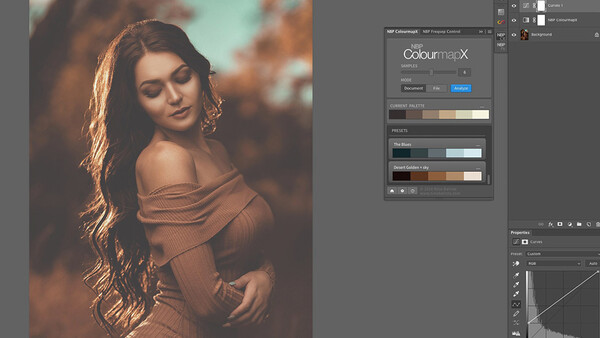
I have been using The ColourMapX panel extensively and a caveat of it led me to further dig into something I rarely used before, clipping adjustment layers to other adjustment layers. Doing so greatly enhances my experience with this panel, but honestly with any type of adjustment.
Example Usage
If I was re-grading one of my old pics and I apply a gradient map, you can quickly see the luminosity is greatly affected because of the blending mode, which is the appropriate one for the color grade.

So the first thing that comes to mind is to use a curves layer to fix the luminosity by lifting the shadow point since the effect is too dark, but that creates its own issue by washing out the image.

By clipping the curves layer to the gradient map layer, we are able to have the curve only affect what the gradient map is doing. We can do this with the flyout menu of the curves layer, or by holding your cursor in between the two layers and pressing the option key (macOS) or alt key (Windows) and clicking to clip the layer.

When you have clipped the layer, you will notice right away that your luminosity changes from the curves layer are now behaving as expected and only applying the change to your previous adjustment layer. Therefore allowing you to modify the luminosity to bring it back into spec, but keep the color grading from the previous layer.
Grouping the two new layers allows you to easier toggle a before and after.

The result is much better this way, and I find myself now clipping many other types of adjustments off different layers, such as channel mixer and others.
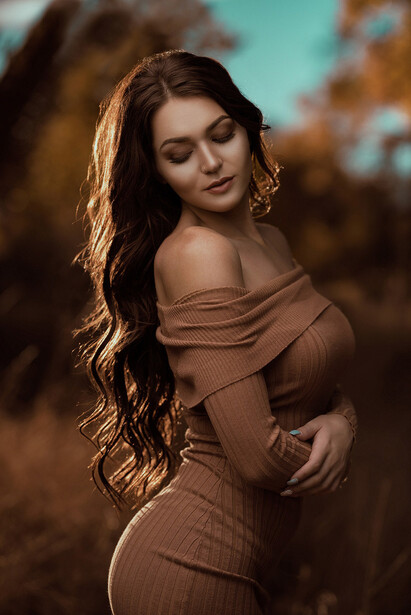
Below is the original image before and after using this technique with a gradient map layer and a clipped curves adjustment.
Summary
I feel it's always good to experiment with new ways of accomplishing things, and usually a better or faster way is found. I had also tried putting the curves layer under the gradient map, but I didn't prefer that as I felt the gradient map was affecting the image differently in what to color with which hues of the gradient map although it did produce a similar result.
By using the clipping layer above, I feel like the gradient map stays more intact and then adjust the luminosity after the fact.


Join the Fstoppers community for free
-
Post comments and join in the discussions
-
Browse the site ad-free
-
Share your work and get featured in the community
-
Compete in the photo contests for fun and prizes
6 Comments
Bill. I think you forgot to include the final image :) Great tip by the way. Thank you.
No problem, the correction was shown in the before/after slider, right before the Summary.
I can’t see it. Just see a picture of your layers panel followed by the summary
Joe, I had the same problem in Chrome. I refreshed the webpage and the final picture, with slider, appeared. So, try refreshing your web browser.
Thank you ! Sorted ! Bill sorry for the trouble :)