
A lot of people associated HDR with over-processed, surreal images. This is not always the case. Shooting HDR can be very useful in different circumstances. It is often seen in real estate and landscape photography and can be very useful to balance a wide range of light levels. There are many programs out there for merging images together to create an HDR photo, but one of the simplest ways to create these dramatic photographs is using Photoshop's built-in HDR Pro.
Most DSLRs beyond entry level can process HDR images in-camera, but this doesn’t always do the trick. Shooting HDR in-camera usually produces a single JPEG file and does’t always create the results that we are looking for. By combining separate exposures in Photoshop, you will have much more freedom and control over the final image.
Bracketing Exposures for HDR
Using a tripod for this technique is essential in order to maintain consistency. Depending on what kind of camera you are using, the controls for exposure bracketing will be different. I recommend consulting the instruction manual for your specific camera to properly understand how to use this function. If you're not familiar with bracketing, it is basically a technique that allows you to shoot several varying exposures. Similar to shooting long exposures, you are going to want to use the self-timer or a remote. This helps to maintain consistency and makes sure you do not move the camera at all. When using the self-timer, I will set the camera to shoot three, five, or seven photos continuously so that I have raw files for each exposure.
Working with the Raw Files
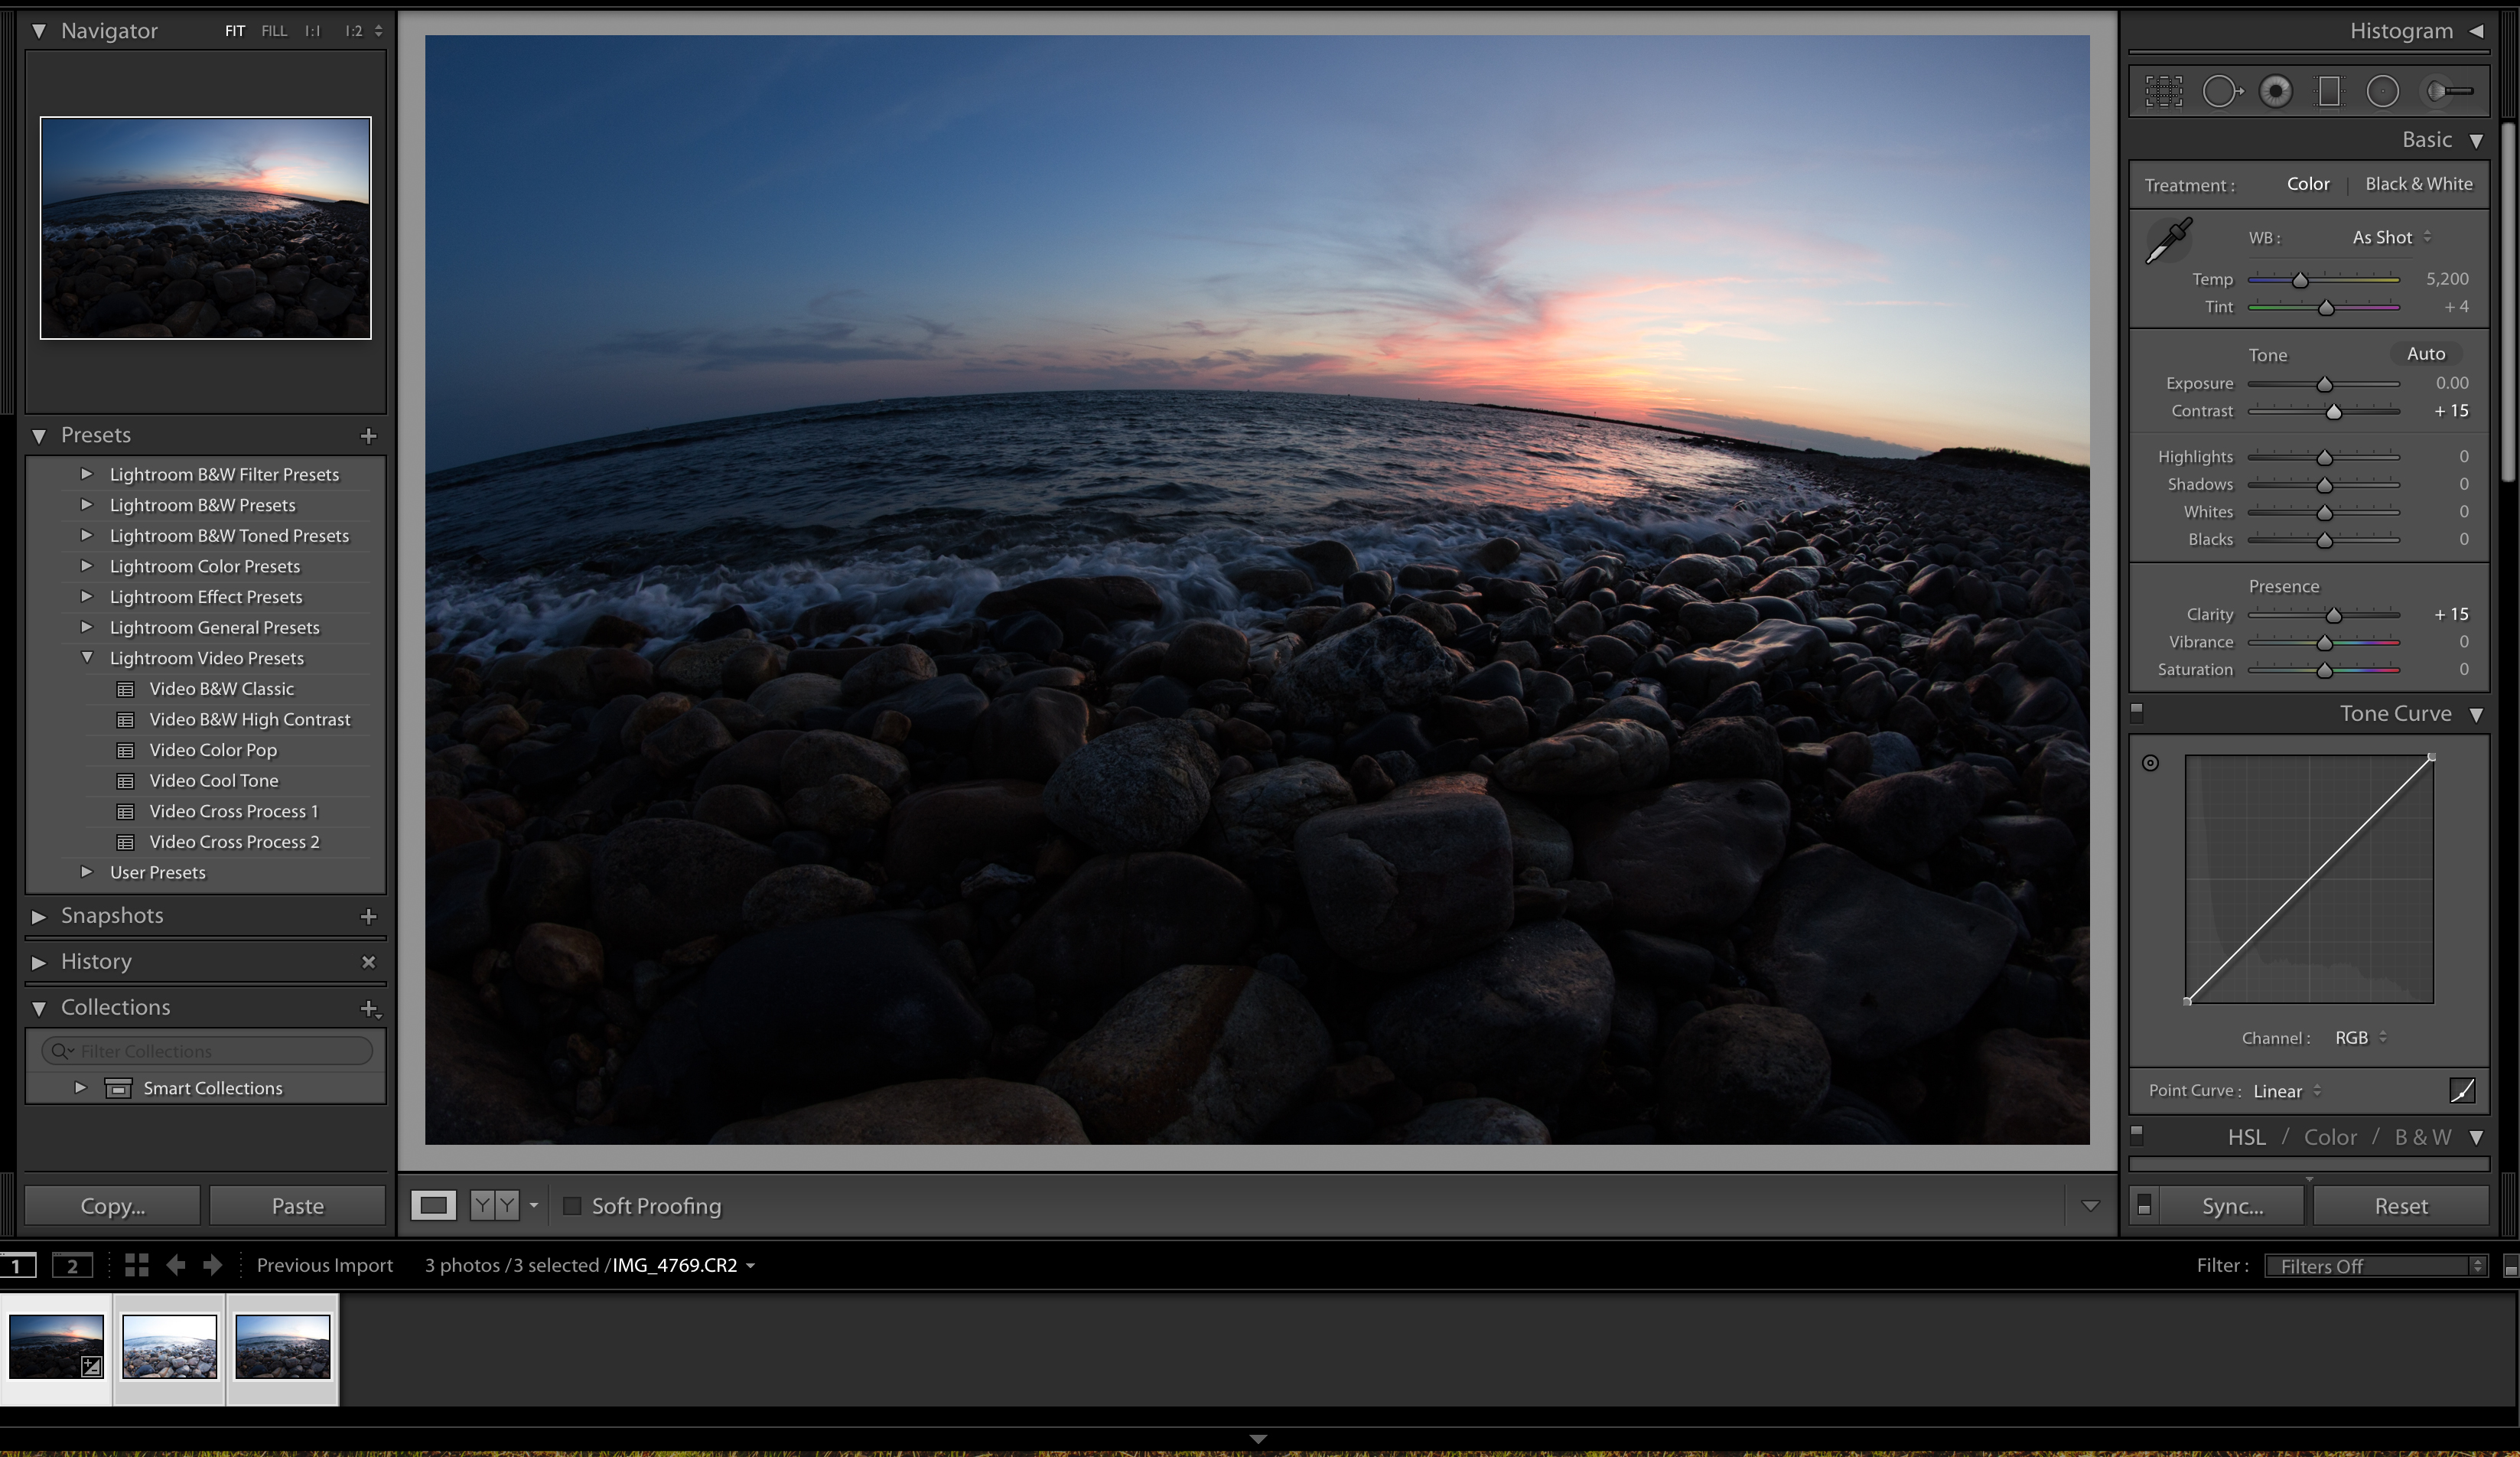
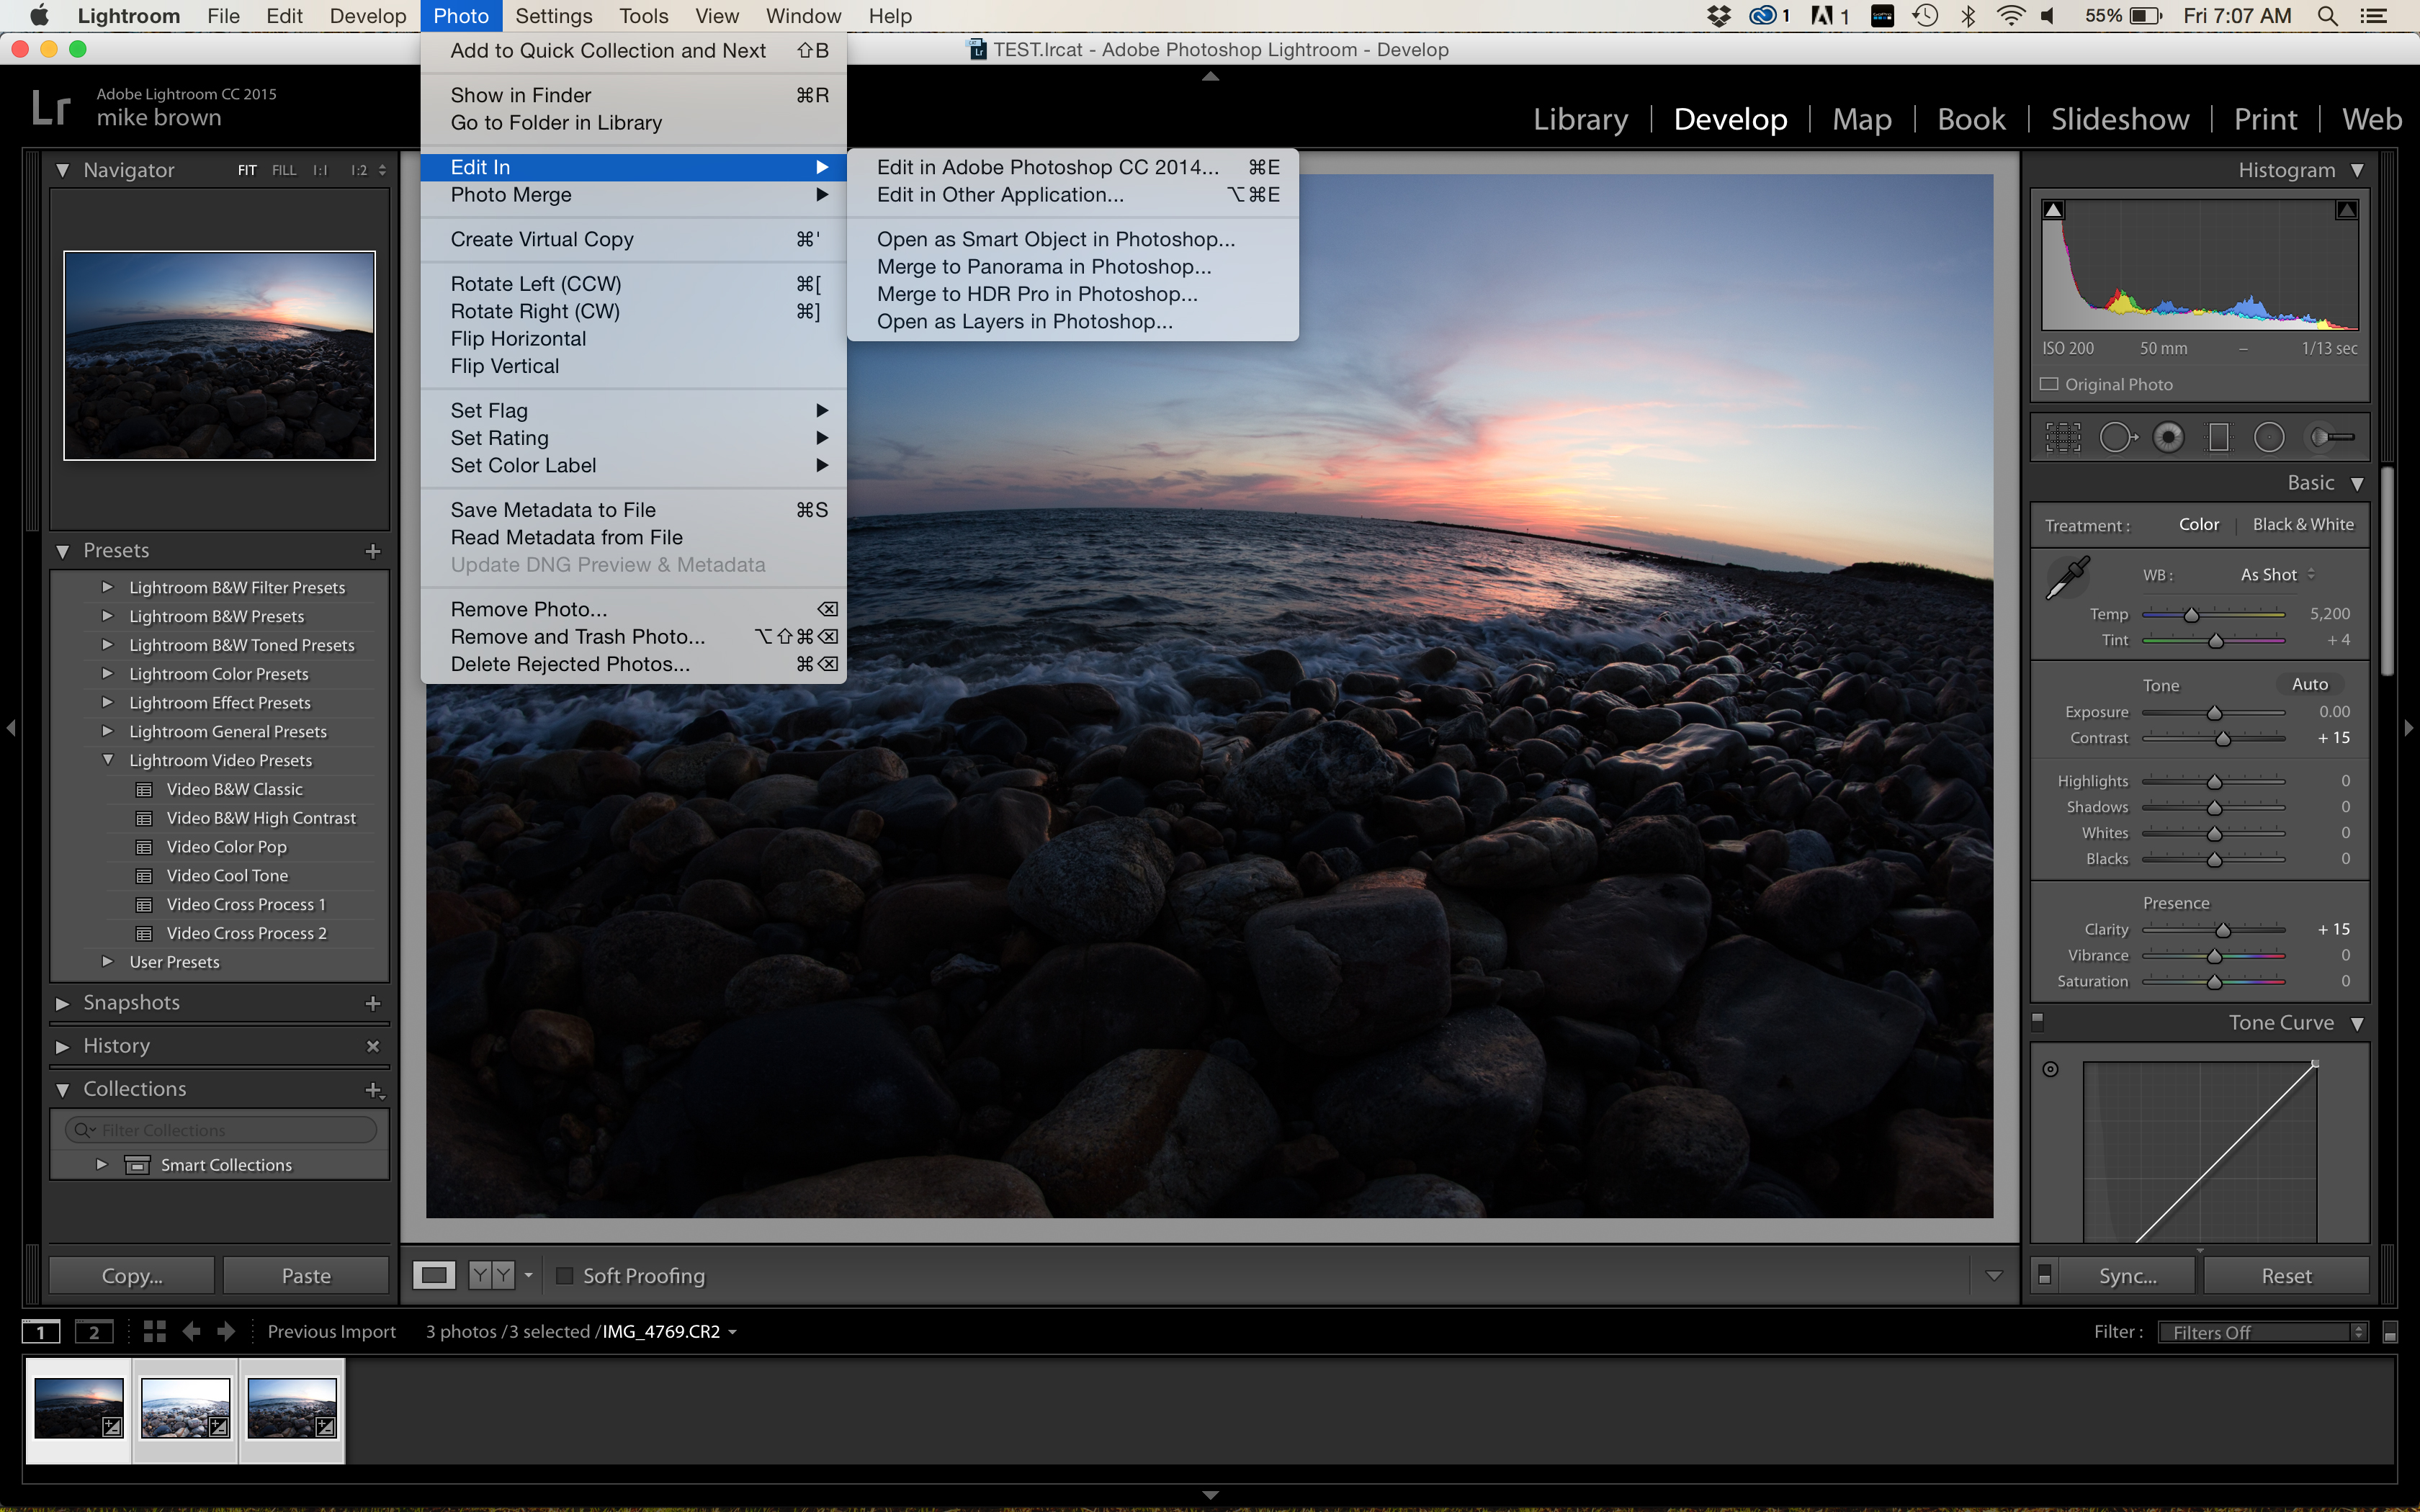
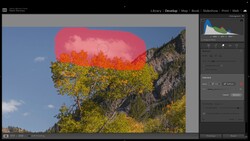
Once I am happy with my shots, I will import them into Lightroom and make a few minor adjustments. Usually I will increase the clarity and contrast by a few points, depending on the image and the look I am going for. I will batch edit the photos so the same changes are made to each photo whether I use three, five, or seven exposures. Once you are happy with your adjustments, go to the Photo tab in Lightroom. In the drop down menu, you will find Edit In > Merge to HDR Pro as seen below. This will merge the photos together and open up a new window in Photoshop.
If you are not using Lightroom, you can open the photos in Photoshop and I will explain how to merge them in HDR Pro directly in the next step.
Bringing It All Together with Photoshop
I usually edit the photos in Lightroom, but if you are not, make sure that you are not working on anything else in Photoshop when you open the images. Once the different exposures are open, the next few steps are pretty simple. First, you are going to look under the File tab. Towards the bottom of the tab, you will see Automate > Merge to HDR Pro. This will open a small window, click Add Open Files and make sure that the files that are loaded into the window are the correct exposures for your HDR image. Once you are sure you have the correct exposures, click OK.
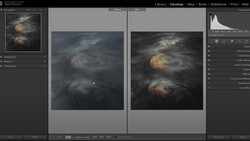
If you were using Lightroom, once you click Merge to HDR Pro it will take a few seconds. After Photoshop is done merging the exposures, a new window will open up allowing you to edit the HDR image (seen below).
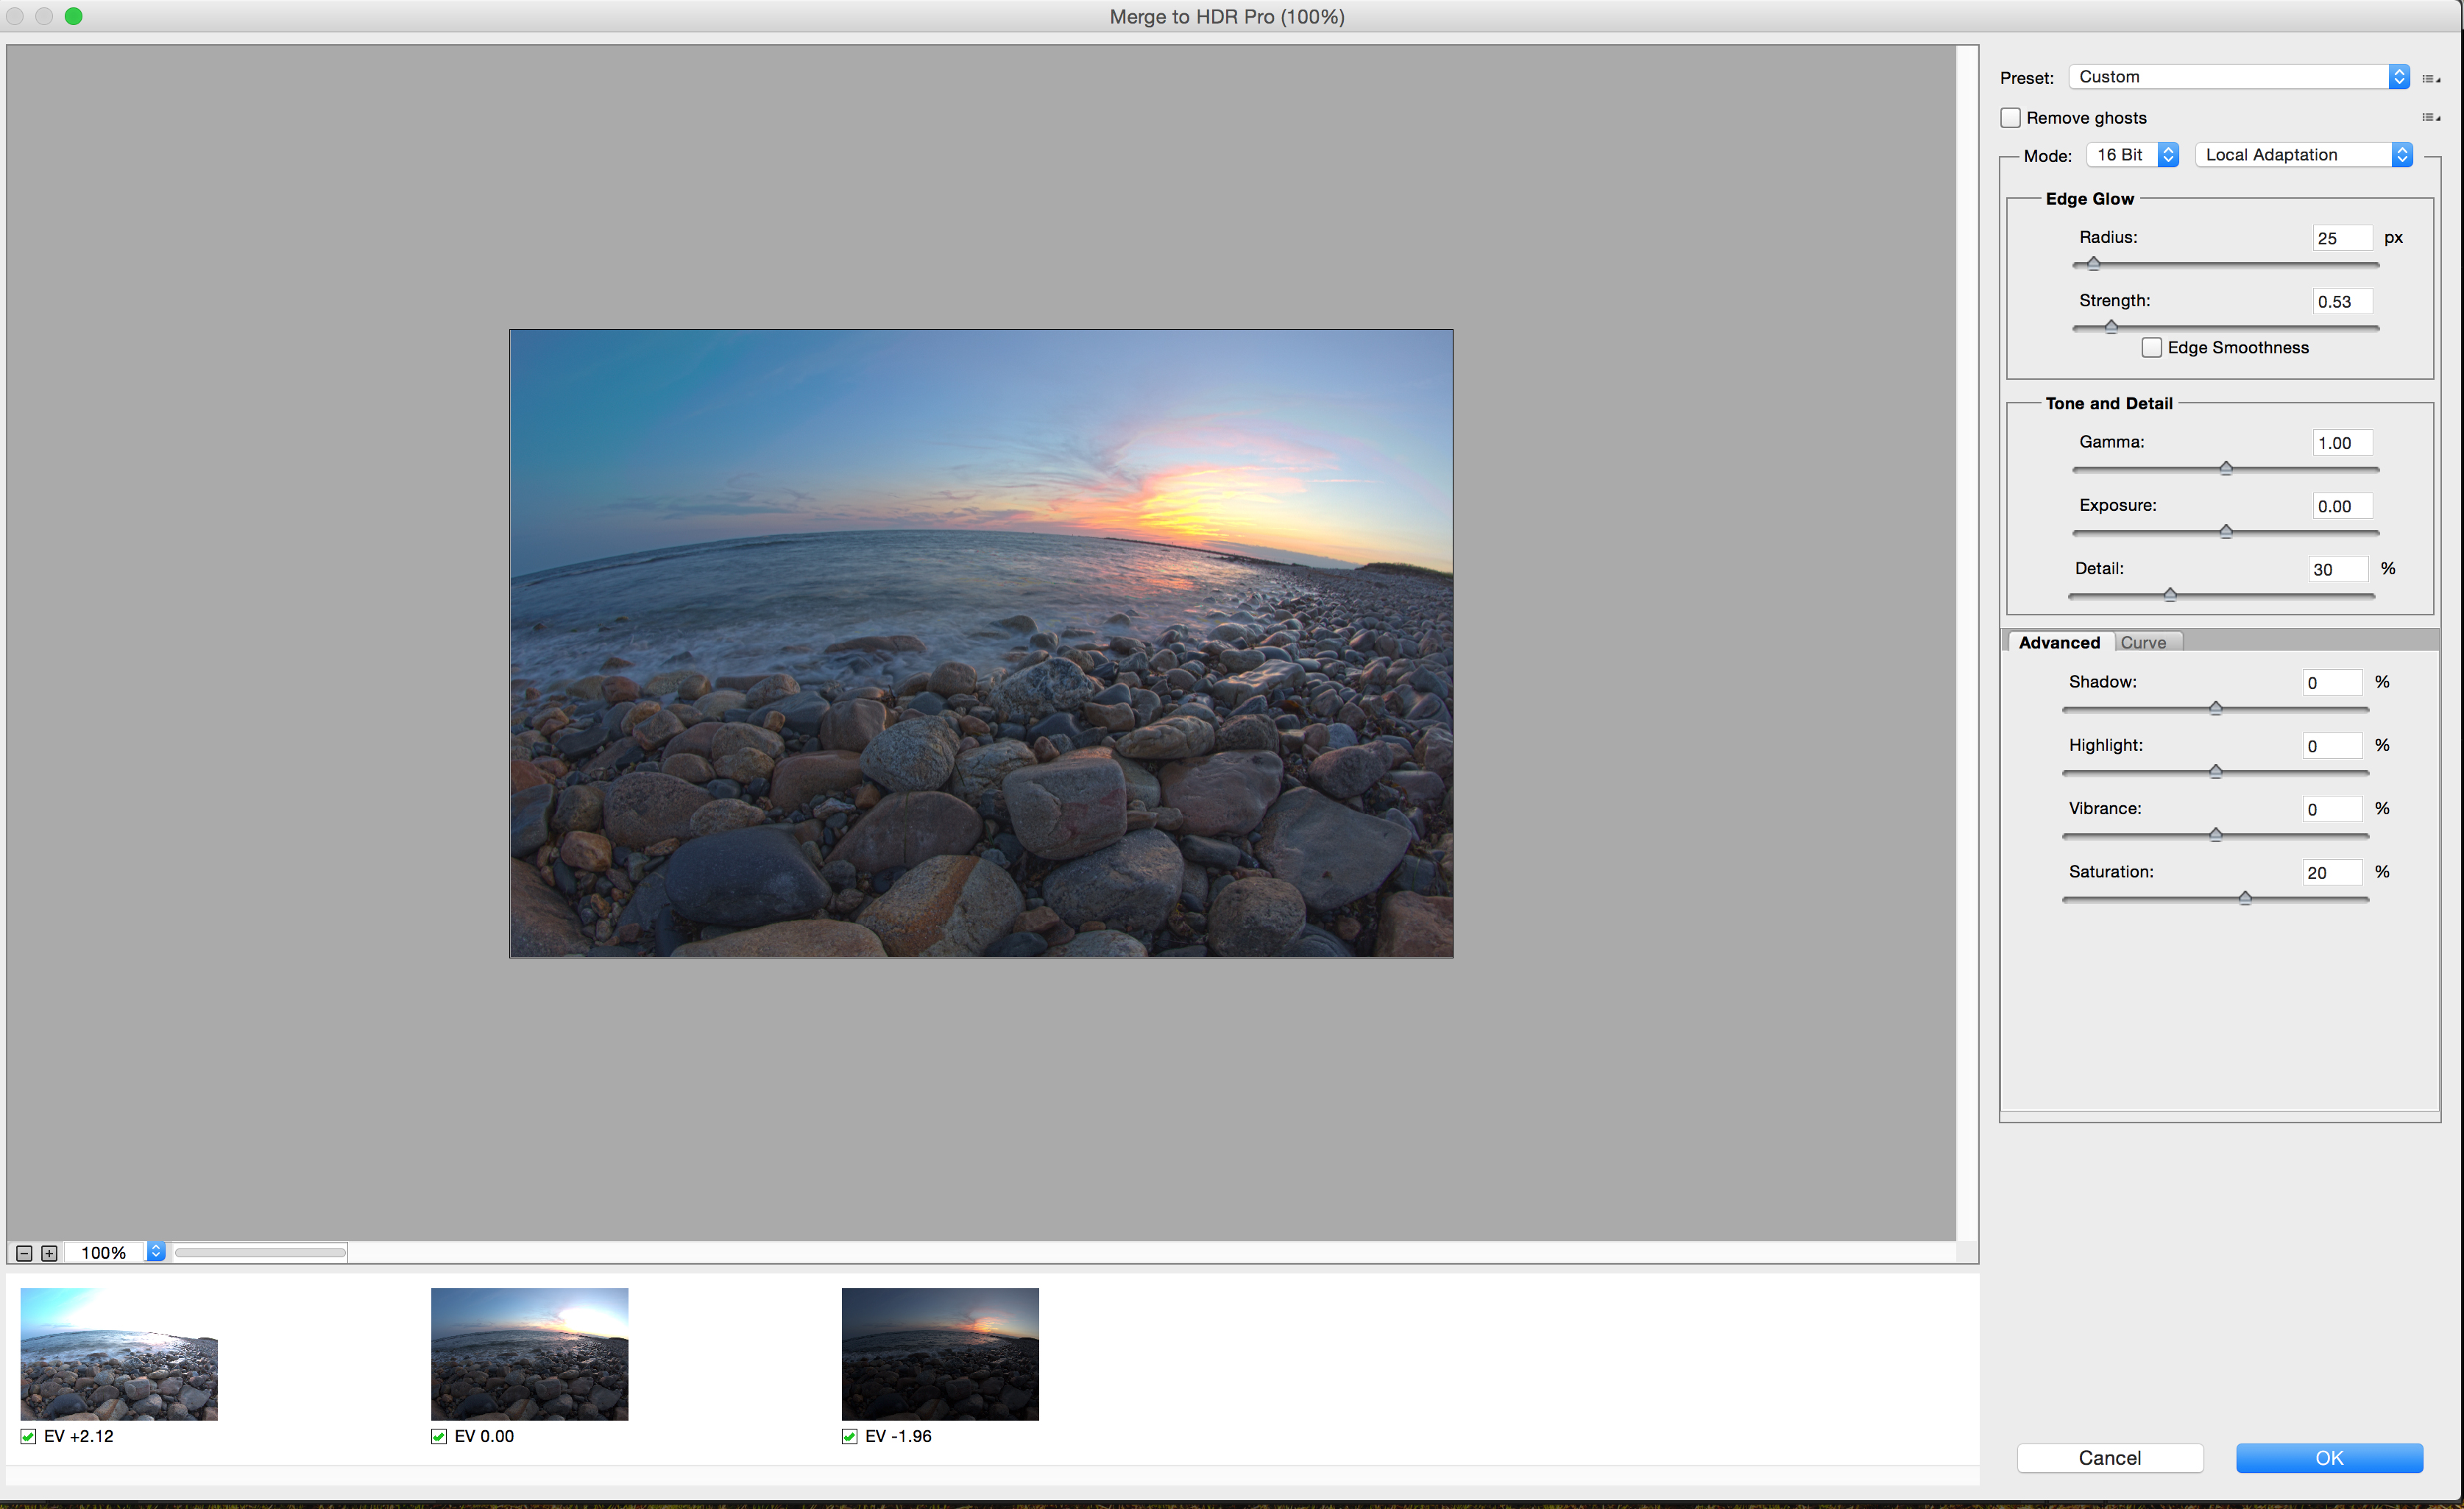
As seen above, you can adjust the sliders for the HDR image as you would like. Under the preset dropdown, there are various settings you can choose that will give you different looks. Some are very surreal looking while others are more realistic. Normally, I stay away from the presets and stick to adjusting the sliders based on the image I am working with. I recommend spending some time adjusting the different sliders and learning exactly what each one does.
Whether you have a professional-grade DSLR or are shooting with something more basic, this HDR technique can be helpful in bringing your photos to life. Yes, you do have to be careful not to overdo it. But, when done correctly it can really add some nice color and dynamic range to your photos. Shooting for HDR can be more time consuming than just going out and snapping a few photos, but it is a fun technique to learn. I love the element of surprise; it is a great feeling seeing a beautiful image come together from several different photos.
There are tons of programs for creating HDR images on the market. Do you prefer using Photoshop's solution or do you have another favorite application?


Join the Fstoppers community for free
-
Post comments and join in the discussions
-
Browse the site ad-free
-
Share your work and get featured in the community
-
Compete in the photo contests for fun and prizes
7 Comments
To answer the question in the last paragraph I'd use pretty much any HDR app in preference to the Photoshop one. It's terribly old and the tone mapping is very poor. It's OK for creating 32 bit files but, to name just one, Photomatix is vastly better. Lightroom 6 has a HDR plugin too - it's not that great but it trumps the PS version.
Question: do you NEED to bracket?
Something I've been experimenting with is taking a single, RAW exposure. Then, after loading into Lightroom, I create 2 (or more) virtual copies of it, adjust the exposures of those copies and merge them all into an HDR. The result is virtually identical to a process taken from bracketed photos. The advantage is that I only need to take a single photo (instead of three or more). I can "create" the bracketed photos in Lightroom and go from there.
This allows me to create HDR images from photos of moving objects or if i choose to use strobe. I find it much easier and just as effective as bracketing.
Anyone else?
Depends on the camera and ISO. Modern Nikon cameras with Sony sensors are the best for the dynamic range you need to extract the data. I've done the same in both Lightroom and Capture One, which has a shadow/highlight control they actually call HIGH DYNAMIC RANGE.
If your ISO is too high you're going to wind up with clipped highlights and noisy shadows. Again you can push a Nikon body a bit, but not too far. At base ISO I think you can do this with a fair amount of cameras to some degree.
Below is a shot I took right at the edge of dusk with a Nikon D600 at base ISO 100. In the "straight" shot, the highlights (including the moon) were blown out and the shadows plugged up. As you can see I was able to retrieve the highlight detail and bring back the remaining skylight of dusk and shadow detail in the buildings (you may need to view it against a dark background to see the shadow detail).
Of course, depending on the scene, you may not have enough light to get a good exposure. With proper exposure you can pull out more data from an actual multi-exposure HDR, but as you've pointed out you need still subjects.
Stephen. Any camera captures only a certain amount of tonal data with the darker areas being progressively worse quality until you reach a cut off point, nothing can reveal shadows that don't exist in the capture. Subsequent exposures, especially 'over' will allow shadows to be recorded with decent fidelity.
I did this many times with my D700, LR, and Photomatix. I simply took one exposure in LR, made 4-5 virtual copies separated by a stop exposure then imported them into Photomatix. I did lose some dynamic range and gained some noise but it was at the gain of having ZERO ghosting and an extremely sharp end result.
Raw files give you a huge advantage in this regard.
The latest Lightroom iteration has a surprisingly natural HDR algorithm. Raw in, raw out (.dng output). It takes forever to process and the resulting file is large (70+ MB from my Canon 6D original), but it's worth it when I absolutely can't manage a single exposure.
For me, the best part about the new LR HDR feature is that, unlike all other HDR software I've dealt with, it doesn't compound color cast issues. Colors stay as natural as any of the single original raw files.
I do the same thing with some of my big panoramas, but for very large ones, even if you resize down to 512 megapixels or 65,535 pixels on the longest side to fit under Lightroom and Camera RAW's limitations, you still can't fit it under the 4GB filesize limitation of TIFF as a linked layer, only a flattened image (losing the dynamic link). Sigh...