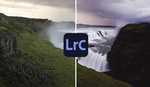
The graduated filter is one of the most versatile and powerful editing tools in Lightroom, and its usefulness goes far beyond simply making adjustments to exposure. This excellent video tutorial will show you a variety of tips and tricks for getting the most out of the graduated filter.
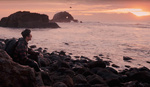
Coming to you from Anthony Morganti, this fantastic video tutorial will show you a range of tips and tricks for getting more out of the graduated filter in Lightroom. The graduated filter is tremendously useful because it allows you to build in a transition to whatever changes or adjustments you make. This makes the adjustments far more natural, as you are not left with an obvious, hard edge between the two areas. This is a great tool, for example, if you are bringing down the exposure of the sky in a landscape shot in which the horizon is a bit uneven, as it allows you to hide the edit by building in an imperceptible transition, instead of having a weird line cutting across the frame. It is a highly customizable tool that you can use to apply a wide range of different adjustments. Check out the video above for the full rundown from Morganti.


Another good lesson on FIlters! Thank You.