
When people first get into wedding photography, one of the main pieces of advice they will hear over and over is, “You can’t reshoot a wedding." This instantly leads to photographers asking, “How do I protect my images?" Image backup and cataloging is sort of like baking a cake. Every photographer is going to have a different recipe to how they do things. Over the years my process has evolved into what it is today. This process came about in part from learning by fire, and another part came from learning from others. If you don't want to use my entire process, I at least hope part of it can become a helpful addition to your workflow.
Step 1: Dual memory card slot
I know not every camera in production has dual memory card slots. When I first started shooting, my first couple cameras didn't have them and I didn't really see a need for them. Then I had one card failure after a wedding and I instantly saw the error of my ways. I didn't run out that very moment and upgrade my gear, but I did make a mental note that my next camera needed to have dual card slots.
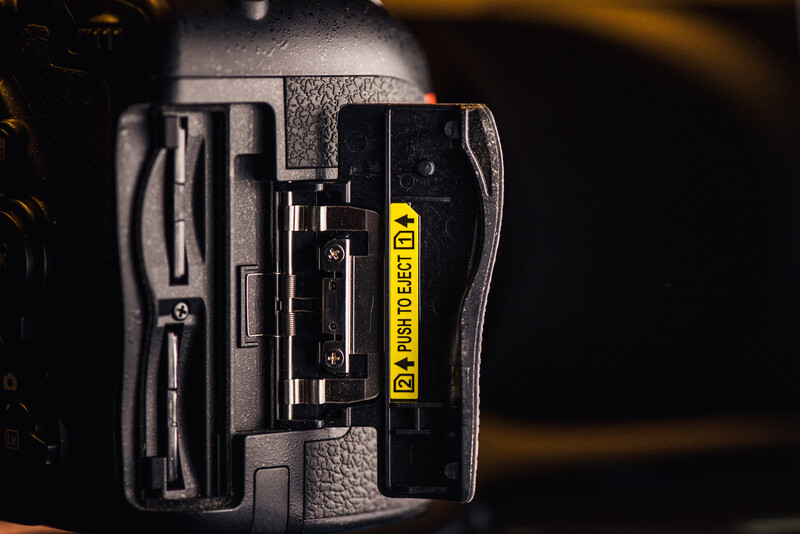
As far as settings go, I always have my camera set to shoot raw + small JPEG to both cards. I know a lot of people that will shoot raw to one card and jpeg to the second card as the backup. But for me, if I’m using a second card as a backup, then I want the raw file. I use a 64 GB SanDisk Extreme Pro card in each slot and it’s very rare that I will hit the buffer limit on my Nikon D750. The reason for the small JPEG is that we do a same day slideshow at most weddings and it’s faster to work with a small JPEG for this. I could switch to only raw files going to each card for non-wedding work, but then I would forget to switch back over on the wedding day so I just set it and forget it.
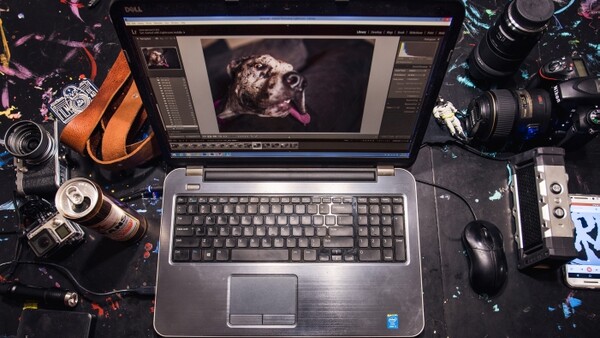
Step 2: Upload to computer
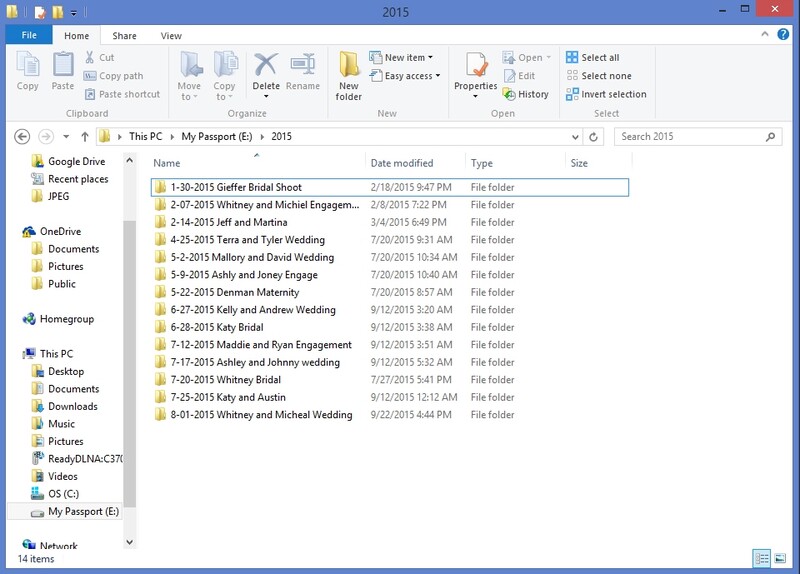
Once the wedding is over I upload all the images to the computer. I do this the instant I get home or back to my hotel room no matter how late it is. Each shoot I get goes into its own folder. This folder has the date of the shoot followed by the couple's name. Inside this folder I have a subfolder for each card that was used.
Step 3: Amazon Cloud
This is the newest addition to my workflow and I have been pretty happy with it. The key to this is that you have to be an Amazon Prime member to use it. What you get is unlimited photo storage to their cloud server. The reason I love this service so much is that it includes raw files. I’ll say that again… it includes raw files.
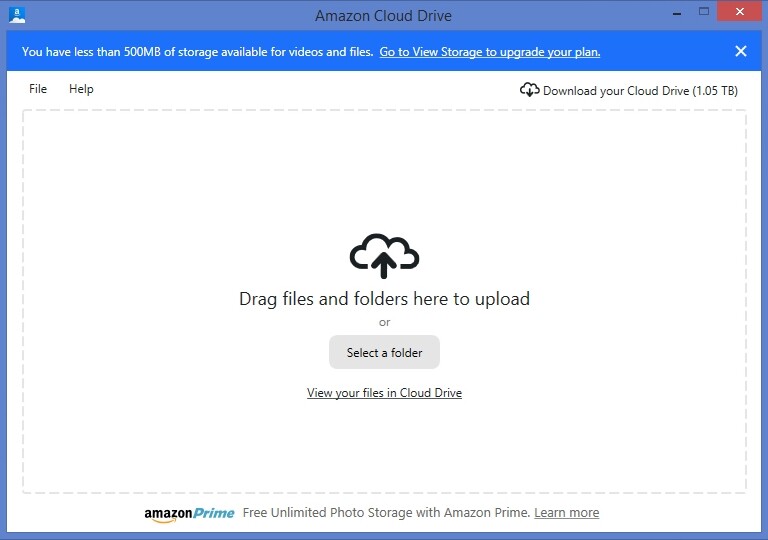
Amazon has one of those fancy interfaces like Dropbox or any other cloud service where you put an image into a folder and it automatically uploads it to the cloud. I would not suggest using this though. The first time I tried it there was a sync issue and it ended up deleting all my images from the PC. Also, once your drive is full and you remove images to make room, they will also get removed from the cloud. Instead, I use their fancy folder uploading tool. The way this works is once all the images are on your computer, you simply drag the folder into this tool and it uploads the entire folder. Since I upload all the raw files and the small JPEGs, it can take a decent amount of time. A wedding can take a couple of days depending on how many images you shoot. But having a cloud backup of your raw files for the price of Amazon Prime is completely worth the price and the time to upload.
Step 4: External Drive
At the exact same time that my files are uploading to Amazon Prime, they are also getting copied over to an external drive. This drive is simply my unedited backup drive. By the time the drive gets full, then at least a few weddings have been fully edited and delivered to the client so I can delete those older folders to make room. This drive is simply an easy and fast way to make another backup.

Step 5: Create my Catalog
At the exact same time that I’m moving images over to Amazon Cloud and my external drive, I’m also creating my new catalog in Lightroom and importing my images. I know a lot of people that live off one catalog for everything they do and it works just fine for them. For me though, I need a catalog for every shoot. The reason for this is when I archive a wedding, then I also want all my edits for that wedding to go with it. I don’t want one catalog filled with folders that no longer live on my computer. I also don't want to be looking for archived images and have to figure out where the catalog is that corresponds to those images. So instead I have one folder that holds all my raw files, JPEGS, and catalog. When I move the folder, everything stays together. I also have this processing while I'm creating my other backups because it can take a lot of time, so I rather have it going while I can do other things, like finally going to sleep.
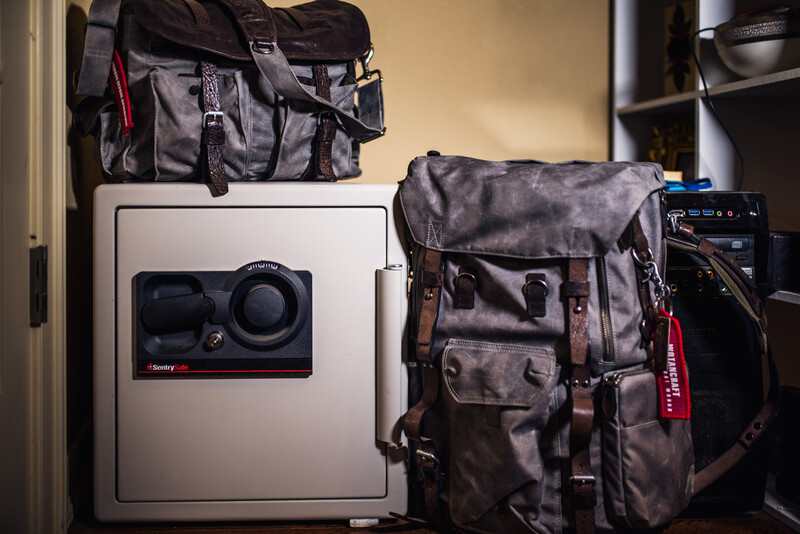
Step 6: Fireproof Safe
After I get all my images onto the computer and my other backups are processing, I’m ready for bed. Before I go to bed though, I move my memory cards into a fireproof safe. I do this because at this current time, the only real backup I have made is on my computer. If the computer blows up, then all my other backups will fail because they are not done processing. The next morning when my hard drive backup is done, that drive then gets moved to the safe and the cards are free to use on the next shoot.
Update: When looking for a fireproof safe, make sure you select one that is rated for the higher temperatures needed to keep media devices safe.
Step 7: Zenfolio
This part of the process is after I have edited all my selected images and I’m ready to deliver them to the client. The site I use is Zenfolio.com and not only is it a great service to deliver images to a client, but it’s also a great way to back up your selected images. The service comes with unlimited JPEG storage but I only upload the selected images I want to deliver. I have been using Zenfolio since I started shooting, so I currently have every single image I have delivered to a client in a single location.
Step 8: Archive Drives
After images have been edited and delivered to clients, the files live on my computer until it starts to get full. I do this just in case I need to go back and find another image I may have missed when culling or for those images that need additional retouching for a larger print. But once the hard drive on my computer starts to get full, I move a handful of the oldest folders off my computer and onto an external hard drive. These hard drives are labeled with a date range to make it easy to find images in the future. Now that I'm writing this, I think these drives should hang out in the safe, but as of now they just sit on my desk. It’s very rarely I need to access these drives though. Since all the selected images are on Zenfolio, if i need to find an image, 99% of the time it's easier to go online to get it.
What backup and archive process do you use? What, if any, part of my process can you see yourself using?


Join the Fstoppers community for free
-
Post comments and join in the discussions
-
Browse the site ad-free
-
Share your work and get featured in the community
-
Compete in the photo contests for fun and prizes
57 Comments
I say a year in my contracts, but that is just to cover my butt. Since Zenfolio is unlimited storage, I have every image I have ever delivered to a client on there still available.
I dont get the whole archiving thing. You have done your job, delivered the images. Why should you be archiving on gazilllion water-fire-nuclear protected disks??
because it's my work and I want to keep it? throwing it away would be like a painter selling a copy of a print and then throwing away the original.
I'm not suggesting throwing anything away, but i dont see why i should guaratnee archive for clients. Keeping your work is a fair point, it just seems to me a little bit over the top. Isn't say,one or two copies enough? I dont mean no disrespect, just my opinion.
no worries at all. We guarantee to keep images available for clients for 1 year. This gives them (and family) plenty of time to order prints, digital images, and albums. The hosting site is a pretty reliable backup and place to store these images, but I wouldn't want to completely rely on them because stuff can always happen. from there the other backup option are whats needed to keep the raw files for myself, as well as backup the hosting site. if a drive fails, i have the raw files in another location.
Well said. Thanks for your reasoning. Is it reflected in your pricing, or just a bonus?
Its just part of what we offer. I'm not sure what the standard is in the wedding community though.