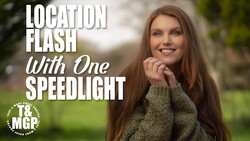
One speedlight and a diffusion setup can go a long way toward producing a clean, versatile portrait. Knowing exactly how to position, power, and modify a single flash is the kind of skill that makes the difference between a shot that works for one purpose and one that works for a dozen.
Coming to you from Jiggie Alejandrino, this practical video walks through a complete one-light portrait shoot inside a small home studio, roughly 2.5 m wide and 4 m deep. Alejandrino builds the setup around a Sony F60RM II speedlight fired through a Fotodiox 65 cm shoot-through umbrella backed with a panel to control spill, then diffused a second time through a 1 m x 2 m diffusion panel for a genuinely soft result. The goal is a clean profile image that works equally well as a headshot, a set card, a social media photo, or a brand event poster. Camera settings run at 1/400 s, f/1.4, ISO 100, with the flash at 1/4 power and white balance set to 4,800 K, eliminating ambient light mostly and relying on the speedlight as the sole source.
One detail worth paying attention to is how Alejandrino handles the reflector. Rather than placing it directly opposite the light, he positions it so it wraps around the subject, which keeps the fill looking natural instead of flat or artificial. He also controls flash power remotely through the camera using the Sony WRC-1M wireless remote commander, adjusting output on the fly while watching the effect in real time on an Atomos Ninja V monitor connected via HDMI to his Sony a7R V. The video captures the full posing session with subject Brent, showing how slight adjustments to light position shift the contrast and depth of the image considerably.
The second half of the video shifts to a post-processing technique using Luminar Neo as a Photoshop plugin. Alejandrino identifies a frame where the pose and expression are strong but the lighting feels flat, and uses Luminar Neo's Portrait Studio Light feature to add directional contrast after the fact. The approach involves duplicating the layer first for non-destructive editing, then applying the light adjustment and masking it back selectively so only the face receives the added contrast. The result visually matches the look of the in-camera frames where he had dialed in more separation. It's a straightforward fix, and seeing it applied to an actual image from the same shoot makes the technique easy to follow and replicate.
Check out the video above for the full breakdown from Alejandrino, including the complete posing session and every step of the Luminar Neo editing process.


Join the Fstoppers community for free
-
Post comments and join in the discussions
-
Browse the site ad-free
-
Share your work and get featured in the community
-
Compete in the photo contests for fun and prizes
No comments yet