
Photography has a spending problem, and it starts early. The moment you get serious enough to move past the kit lens and the auto mode, the industry opens a firehose of recommendations pointed directly at your wallet. Better bodies, faster glass, studio lighting, editing software, bags, straps, filters, presets, printers, and accessories that promise to make your work look professional before you have figured out what "professional" means for you.
Some of those purchases genuinely matter. A few of them will change how your images look, how reliably you can work, and how much you enjoy the process. The rest are marketing dressed up as necessity. The trick is knowing which is which before the credit card comes out. Here is the list I wish someone had handed me when I was starting out.
Worth the Splurge
1. A Quality Tripod
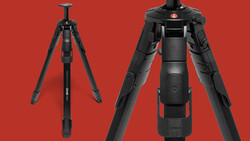
The $80 tripod from the big-box store looks like it will do the job. It will not. The legs flex under the weight of a real camera and lens combination. The head drifts after you lock it. The feet slip on anything that is not flat concrete. The locking mechanisms loosen within months. You will fight it every time you use it, and eventually you will stop using it entirely, which means you will stop shooting the kinds of images that require a tripod, which means an entire category of photography (landscapes, long exposures, macro, night work, self-portraits) will quietly disappear from your creative range.
A tripod in the $300 to $500 range from a manufacturer like Manfrotto, Benro, or Peak Design is a different experience. The legs lock and stay locked. The head holds the camera exactly where you put it. The weight is manageable because the materials are better. And it lasts. A good tripod bought in your first year of photography will still be working in your twentieth. The cheap one will be in a landfill by next spring. This is one of the rare photography purchases where spending more upfront saves money over the lifetime of the gear, because you only buy the good one once. If you want to see the kinds of landscapes, long exposures, and cityscapes that a solid tripod makes possible, Photographing the World: Landscape Photography and Post-Processing covers the techniques and the workflows that depend on having a tripod you can trust.
2. A Better Lens
If you are still shooting with the kit zoom that came bundled with your camera, the single biggest improvement you can make to your images is not a new body, not editing software, not a lighting setup. It is a better lens. A fast prime in the $200 to $400 range (a 50mm f/1.8 in almost any system, or a 35mm f/1.8 if you prefer a wider view) will transform what your camera can do. The background separation at wide apertures, the low-light performance, and the sharpness are all dramatically better than what a variable-aperture kit zoom can produce.
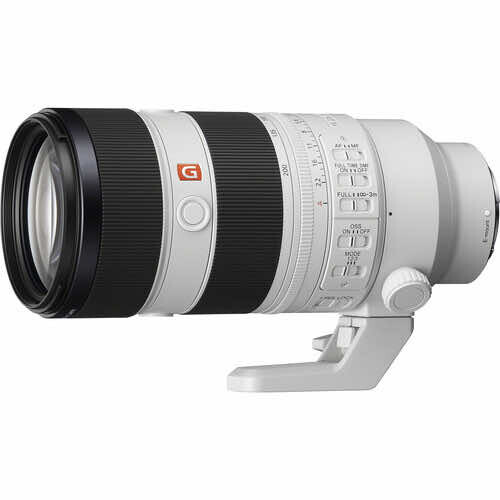
This does not mean you need the most expensive lens in the catalog. A $250 prime from Nikon, Canon, Sony, or a third-party manufacturer like Sigma, Tamron, or Viltrox will produce images that are indistinguishable from lenses costing five times as much in most real-world conditions. The point is not to buy the best lens. The point is to move beyond the kit zoom to something designed for optical quality rather than bundling economics. That single step produces a bigger visible improvement in image quality than almost any other upgrade you can make. If you want a structured guide to getting the most out of whatever glass you invest in, Photography 101 covers the camera fundamentals that determine whether the gear in your hands is the limiting factor in your work or just the tool you happen to be using.
3. A Proper Lighting Modifier
A bare flash or a bare bulb is not a lighting setup. It is a bright point source that produces harsh shadows, unflattering contrast, and the "deer in headlights" look that photographers associate with amateur work. The flash itself is only half of the equation. The modifier, the thing you put between the light and the subject, is what turns raw output into shaped, directional, flattering light.
The $40 collapsible softbox from the no-name brand on Amazon will technically attach to your light. It will also spill light everywhere, produce uneven illumination across its face, and fall apart after a few dozen uses when the velcro gives out or the internal rods bend. A well-made softbox, umbrella, or beauty dish in the $100 to $200 range from a manufacturer like Godox, Westcott, or Neewer (their mid-tier products, not their budget line) produces consistent, even light that behaves predictably. Predictability is the whole point of lighting. If you cannot predict what the modifier will do, you cannot control what the light will do, and your results will be inconsistent no matter how good the flash unit behind it is. The modifier is where the light quality actually lives, and a $150 modifier on a $100 flash will produce better portraits than a $400 flash with no modifier at all. For a walkthrough of how modifiers actually shape light on a human face, Illuminating the Face: Lighting for Headshots and Portraits covers the specific modifier placements and techniques that turn a single light source into professional-quality portrait lighting.
4. A Backup Storage System
This one is not glamorous, and it will never make your photos look better. It will, however, prevent the worst day of your photography life. Every photographer, hobbyist or professional, will eventually experience a drive failure. The drive that holds your photo library will die. It will not give you a warning. It will not wait until you have finished sorting your vacation photos. It will fail on an ordinary Tuesday, and everything on it will be gone.
An external backup drive is the minimum. A proper system is two drives in two different physical locations: one at your desk and one offsite (a second drive at a friend's house, a cloud backup service, or both). A portable SSD for local backup runs $60 to $120 depending on capacity, and a cloud backup service like Backblaze runs about $7 a month. For under $200 a year, you have a system where no single failure can destroy your entire photo library. For a working photographer, this is not optional. For a hobbyist, the photos you are taking now are the ones you will care about most in twenty years. Losing them is not a technical inconvenience. It is a genuine loss, and $200 a year is trivially cheap insurance against it.
5. A Good Editing Monitor
Every editing decision you make, every color correction, every white balance adjustment, every skin tone tweak, flows through the monitor you are looking at. If that monitor is a $200 consumer display with inaccurate color, washed-out contrast, and inconsistent brightness, every decision you make on it is a guess. You might be guessing well, but you are still guessing, and you will not know how your images actually look until someone else views them on a calibrated screen and sees something different from what you intended.
A color-accurate editing monitor with hardware calibration support in the $400 to $700 range (the BenQ SW series is a strong starting point for photographers) paired with a hardware calibrator like the Calibrite ColorChecker Display gives you a screen that shows you what your images actually look like. The difference between editing on a calibrated display and editing on a consumer panel is the difference between working with your eyes open and working with a color cast you cannot see. This is not a luxury. It is the minimum standard for trusting your own editing decisions, and it matters for hobbyists as much as professionals because the images you are editing are the ones you are going to print, share, and look at for years.
Not Worth the Splurge
6. The f/1.2 Version of Any Portrait Lens
The f/1.2 portrait prime is the "someday" lens that photography YouTube has convinced an entire generation of beginners they need. It is enormous, heavy, slow to autofocus, and costs three to five times as much as the f/1.8 version of the same focal length. The depth of field at f/1.2 is so shallow that getting both eyes sharp on a portrait at normal working distances is genuinely difficult, which means most photographers who own one end up shooting it at f/1.8 or f/2 anyway, at which point they are using it as a very expensive, very heavy version of the lens they could have bought for a fraction of the price.
An 85mm f/1.8 produces gorgeous portraits with plenty of background separation at every aperture a beginner will actually use. Save the $1,500 or more you would have spent on the f/1.2 and put it toward lighting, education, or literally any other investment that will move your photography forward more than an aperture you will rarely open.
7. An Editing Tablet Over $500
The Wacom Cintiq and its competitors are impressive pieces of hardware designed for digital illustrators, graphic designers, and retouchers who spend eight hours a day drawing directly on a screen. If that describes your workflow, the investment may be justified. If you are a photographer who uses an editing tablet for dodging and burning, masking, and local adjustments in Lightroom or Photoshop, you do not need a pen display. You need a pen tablet.
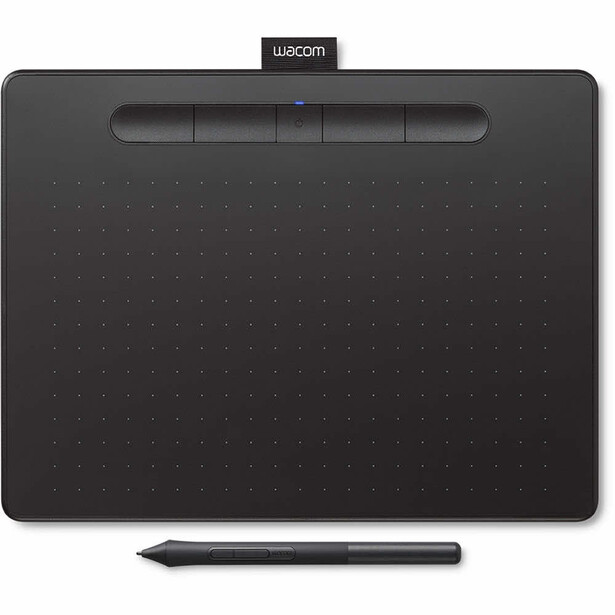
A Wacom Intuos in the $80 to $150 range does everything a photographer needs from a tablet. The learning curve is the same regardless of price (you are learning to move a pen while looking at a separate screen), and the precision is more than sufficient for photo editing work. Spending $500 or more on a pen display when your editing workflow does not require one is paying for capability you will never use.
8. Paid Lightroom Presets
The preset market is enormous, and the pitch is seductive: buy this pack, apply it to your images, and your work will look like the photographer who made it. The problem is that presets are starting points, not finishing points. A preset applied to a well-exposed, well-lit image can look great. The same preset applied to a poorly exposed image with mixed white balance will look terrible. The preset did not fix the underlying problems. It just added a color grade on top of them.
The time and money spent collecting preset packs is almost always better spent learning to edit. Understanding how exposure, white balance, tone curves, and HSL sliders actually work gives you the ability to create any look you want, including looks that match the presets you were considering buying. Learning to edit is slower than buying a preset pack, but the skill is permanent and transferable. The preset is a shortcut that teaches you nothing, and the photographer who relies on presets will always be limited by someone else's creative decisions rather than developing their own. If you want a structured path through Lightroom's actual editing tools rather than a shortcut around them, Mastering Adobe Lightroom covers the full editing workflow from import to export in a way that builds real skill rather than preset dependence.
9. A Photo Printer (Unless Printing Is Your Passion)
A quality photo printer costs $500 to $1,000. The ink costs $50 to $100 per set of cartridges, and a set does not last as long as the manufacturer's page-yield estimates suggest. The paper costs $30 to $60 per box of premium stock. The color management requires a calibrated monitor (see above) plus a printer profile for every paper type you use. The maintenance requires periodic head cleanings that consume ink even when you are not printing. If you let the printer sit unused for two weeks, the heads can clog, which requires more cleaning cycles and more wasted ink.
Professional print labs produce better results than most home printers, on better paper, with better color management, at a per-print cost that is usually lower than the home-printing math once you factor in ink, paper, and wasted test prints. Unless printing is a genuine passion for you, something you enjoy as a craft in its own right, outsource it. A lab like WHCC, Miller's, or Bay Photo will produce prints that are better than what a home setup can match, and you will never have to troubleshoot a clogged print head at midnight before a delivery deadline.
10. A Camera Bag Over $350
Camera bags are one of the photography industry's most reliable upsell opportunities. The $400 and $500 bags exist, and they are beautifully made, and they are not meaningfully better at protecting your gear than a well-designed bag in the $150 to $200 range. A Peak Design Everyday Backpack or a Lowepro ProTactic provides padding, weather resistance, organizational flexibility, and comfort that will protect your gear through years of daily use.
What you should not do is go too cheap in the other direction. The $30 bag with thin padding and plastic zippers is a real risk to your gear. A camera bouncing around inside a poorly padded bag will accumulate damage that shows up as loose lens elements, misaligned focus, and cosmetic wear that tanks resale value. Spend enough to get real padding, quality zippers, and weather resistance. That threshold sits around $100 to $200 for most photographers, not $400. The premium above that buys aesthetics and brand cachet, not protection.
The pattern across both lists is the same: spend money where the investment changes your output or protects your work, and save it everywhere else. A good tripod, a better lens, a proper modifier, a backup system, and a calibrated monitor are investments that pay off in every image you produce. An f/1.2 prime, a Cintiq, a preset collection, a home printer, and a luxury camera bag are purchases that feel like progress but do not actually move your photography forward in proportion to what they cost.
The best photography purchases are the ones you forget about because they just work. The worst ones are the ones you remember because you spent too much on something that did not change your images. The list above is designed to help you tell the difference before the money is gone.
17 Comments
Wow, I'm 10 for 10; have all 5 things I should, and 0 of the ones I shouldn't. All are very valid points.
You're smarter than me then!
9/`10, but I like making prints, which hang all over my walls.
You make an excellent point regarding the f1.2 lens upgrade. The improvement over the 1.4 and 1.8 is modest yet, in the case of konica and minolta vintage f1.2 lens are literally up to ten times more expensive. Save your money
I'll disagree with the printer. I love coming home, picking my favorite pics and printing them. Then filling my album. But if you're on a tight budget then yeah, better skip it.
I logged in because I must give a shout out to FLM tripods. I never have to think about mine when using it which is the best endorsement I can give. It just works, every time.
I'm going to disagree on one of them the camera bag if you're a landscape photographer you definitely need to put a caveat Asterix next to that. I bought the German-made Compagnon bag .... And I can guarantee you it's the best money I've invested 100% waterproof. Yes you could spray it with a garden hose and not one bit of water will get in. It also sits on your hips properly so it's not gonna cause your neck and back problems like a lot of the other backpacks also comes with a lifetime guarantee. I'll take that thanks other than that. I agree. The other thing is variable ND filters whatever you do, don't buy variable ND filters please do not buy them.
I wholeheartedly agree. I bought a Lowepro whistler 450AW, a lot of money but I enjoy it every time I go out. It has a lot of room for camera gear and room for jackets,gloves, food and drink. And most importantly, it’s comfortable
This may sound ridicules to most but for a great lens for a Sony is the $1,200 2015 FE 24-240mm F3.5-6.3 OSS yes it is old by all standards and not super fast as the new AF systems but todays price is good and maybe better used. It stays on my day camera while driving anywhere or on a walkabout in a small teardrop over the shoulder bag. What it has is 10x range but in APS-C mode in camera closeups/cropping 36-360mm, all for that moment you see what others do not.
Number two is the 2013 APS-C Sony E 10-18mm (15mm-27mm in 35mm) f/4 OSS $500 BUT can be used in Full Frame at 12mm to 18mm (18mm if you remove the light shield), it is so small and light it can even fit in a shirt pocket compared to the monster Sony 12-24mm's f/4G and f/2.8 GM or even the 14mm f/1.8 those require external filter holders + the hand full of glass filters. It has up front threads for filters and even at f/4 gets bright night captures. Also perfect for your panorama rig night or day no extra torquing on the knobs.
In your bag you have from 12mm-360mm, WOW after all the years, good stuff stays good!
The key is to keep things at low cost never ever cheap for the every day for that unplanned moment where ever you may roam!!!
5. Ben Q is a great starting point, and recently monitors for photographers but even still if you want to go all the way find one that handles HDR the HDR selection in Lrc yes shows the histogram that goes to the right more. Again though understand that even exporting in HDR that has more brightness in the image anyone without a monitor with it will not see what you are seeing or if posting to most social media also. I had to double check my BenQ and it does not have the ability. A good study if Fstoppers has some info.
The info about hardware calibrator is most most important to keep current, I use datacolor calibrator mainly because it was the one years ago also I use the Spyder Cube in hard to judge places and yes you can use the calibrated faction on your camera to get the proper white balance K, but again Fstoppers may have all the info, and when you really want to be a geek there is the illuminati device that you use with an app on your phone to get the info. Yes I like to play just info. In the end you are working the RAW all this helps to get a start. Ok when thinking even using gray card is you are point to the place but the side of the card is pointing to your back, do you get the proper light color by turning around then back ???? always ???
Disagree with the printer. If your not making prints fine. However you said you were, just sending then out. Problem is prints don't look like monitors. There are subtle and not so subtle differences. Not to mention that papers make a difference. Once you acually print a photo you tweak it for the paper and how it shows up in a print. Sure you can get great prints from a lab but not if your creating your own look entirely. Nothing like spending money on a lab print, waiting for it and going, "shoot I wish i had made that part a little darker, that part really didn't translate. " But for family prints, yes go to a print lab.
So still very much an amateur, so legitimately asking, even though you might be stopping down that f1.2 to f1.8, isn't it true that most lenses produce there arguably best photos when stopped down some? Like supposedly, according to actual tests, my f2 lens is supposed to be sharpest at f4-f6. So wouldn't the f1.2, stopped down to f1.8, give you a sharper image than a f1.8 shot wide open? Again, just asking, for a friend : )
I agree to a point. I purchased a 49 inch monitor for virtual flying. It was the worst for color and for editing photographs. Because of this, I was normally on the couch with my laptop (or was till I got rid of the monstrosity of a screen) and used a 16 inch XP-Pen tablet Artist collection that was expensive, but far less than Wacom of similar size. I bought 2 Asus 31.5" ProArt 4k monitors (Bday present to me) for editing and no longer do so on the couch. On the tripod. I purchased a Manfrotto Carbon fiber that was supposed to be able to hold 50lbs. Was trying to get a picture of a solar eclipse. The head broke off cleanly sending my camera D810 FF and Nikon 300mm 2.8 lens down to the parking lot. They refused to replace the center rod saying I was abusing it to try and use it that way. The rod was the least of my concerns. Luckily the lens fell on the hood and cracked but took the most of the impact. The camera also came through without any appreciable damage. Still have the camera (studio work), but got rid of most of my heavy glass and shoot OM micro 4/3 now. Glass is way lighter, but no less expensive. I pretty much agree on the rest except with OM lenses - not all have IS built in. For any kind of fast bird or wildlife photography having 7.5 stops of stabilization sure helps in getting sharp images.
Very good common sense tips...but a photo bag over $ 350...my twenty five year old Lowepro AW is very usable and in great shape after all these years... there are very decent photo bags for a lot less at $ 200.