
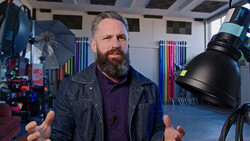
Let's answer some of the questions I get the most about my unique lighting setup.
Every photographer understands the quest for the perfect lighting setup, especially when working on location. It's a delicate balance of power, portability, and versatility. For years, I’ve refined my approach, and what I’ve landed on is a somewhat unconventional "Frankenstein" assembly of gear that, despite its piecemeal origins, consistently delivers when the need arises. This setup has been the secret behind countless of my favorite images and the source of a lot of questions, particularly after its recent appearance in a BTS video my buddy Taylor Jackson shared of me.
https://youtu.be/DSvkhcmq7mM?si=UcPC7Y-gtsYHSOr2
In this article, we'll dive deep into why this specific lighting rig has become my go-to for location work and then provide a detailed guide on how you can assemble your own.
Why This Setup Reigns Supreme
There are two primary reasons why this lighting configuration has become indispensable for my workflow. While one might be highly specific to my gear, the other offers universal benefits that any photographer can appreciate.
The Global Shutter Advantage (and Challenge)
My journey to this dual-flash system began with the adoption of the Sony a9 III, a camera featuring a global shutter. For those unfamiliar, a global shutter captures an entire image simultaneously, unlike traditional rolling shutters that scan the sensor line by line. This technology revolutionizes flash photography, especially at high shutter speeds (check out this video for more details).
In a camera with a global shutter, when you shoot at very high shutter speeds, you're essentially taking a tiny "slice" of the light from the flash curve. This means that if your flash is firing at full power, you might only be capturing a fraction of that light because the shutter is so fast it effectively "cuts off" the ends of the flash duration. You could be shooting at full power and getting the same effective light output as if you were shooting at 1/8 power, simply because the shutter isn't open long enough to capture the full flash burst.
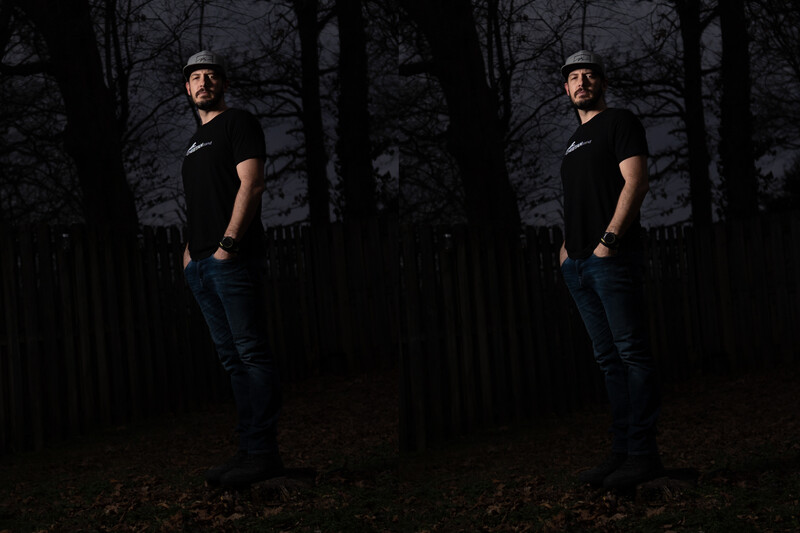
This phenomenon creates a unique challenge: if you need more light, you can't simply increase the flash power beyond a certain point because you're already effectively "maxed out" in terms of what the shutter can capture at that speed. To remedy this, my "Frankenstein" setup leverages a double flash system. By combining two Godox AD200Pro units, I gain an extra stop of flexibility. If I'm in a situation where I need more light and increasing the power of a single flash is no longer effective due to the global shutter and high sync speed, I can simply turn on the second light. This effectively doubles my light output without fighting the limitations of flash duration, flash timing, and shutter sync. It’s a workaround that provides crucial flexibility in fast-paced, high-shutter-speed environments. (For a deeper dive into flash timing intricacies with high shutter speeds, this video goes a bit deeper)
Size, Weight, and Versatility: The Location Advantage
Beyond the technicalities of global shutters, the second, and arguably more universally applicable, reason for this setup is its superior size, weight, and versatility for location work. Carrying a single 400 Ws flash on a light stand, especially with modifiers attached, can be quite heavy and cumbersome. As someone who frequently travels and shoots on location, minimizing weight and bulk is very important for me.
This setup ingeniously breaks down the traditional monobloc concept into separate components: the lightweight flash heads (Godox AD200Pro extension heads) are up on the light stand, while the heavier battery packs remain at the base. This offers several significant advantages:
-
Lighter Load on the Light Stand: By keeping the majority of the weight (the battery packs) at the base, the light stand itself doesn't need to be as heavy-duty. This allows me to use lighter, more portable stands without sacrificing stability.
-
Enhanced Stability: Counterintuitively, placing the heavier battery packs at the base of the light stand acts almost like built-in sandbags. This lower center of gravity significantly increases the stability of even lightweight stands, preventing them from toppling over in breezy conditions or crowded environments.
-
Preferred Light Stand Choices: This weight distribution allows me to consistently use my two favorite light stands, both optimized for different aspects of location photography:
-
Cheetah Stand Mini: This is my go-to for traveling. Its compact size allows it to fit comfortably within a carry-on bag or a standard roller bag, eliminating the need for a separate, oversized luggage item just for a light stand. This saves both space and hassle during air travel.
-
Cheetah Stand C8 (Auto Stand): For local location work where flying isn't a concern, the C8 is invaluable. While slightly larger than the Mini, its standout feature is the automatic leg deployment and retraction. This "auto stand" functionality is a game-changer when navigating crowded spaces like wedding receptions or cocktail hours. No more fumbling with needing to close and reopen the stand as you move around or the worry of tripping guests; the legs open and close automatically as you pick up the stand, making it easy to move from location to location.
-
This strategic distribution of weight and the ability to use compact, efficient light stands make this setup incredibly maneuverable, stable, and practical for any on-location shoot.
How to Assemble This Frankenstein Lighting Setup
Now that we understand the "why," let's break down the "how." Assembling this system involves a few key components that work together to create a powerful yet portable lighting solution.
Core Components
You'll need the following essential items:
-
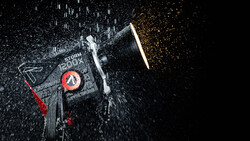
Two Godox AD200Pro (or AD200) Flashes: These are the heart of the system, providing the necessary power. The Pro versions offer slightly faster recycle times and more stable color temperature.
-
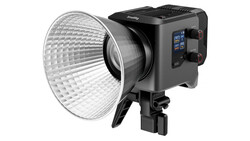
Two Godox AD200 Extension Heads: These are crucial. They allow you to separate the flash tube from the heavy battery pack, enabling the lightweight setup on the light stand. The flash head detaches from the AD200 body and connects to this cable, which then plugs into the battery unit.
-
MagMod MagRing: While traditionally designed to hold two full AD200 units, I'm simply using it for the lighter extension heads.
-
MagMod MagGrip: Instead of slotting the full AD200s into the MagRing, I attach the small, rubber magnetic piece from MagMod (the one that typically goes on a speedlight or bare bulb AD200 head) to each of the AD200 extension heads. These pieces then magnetize securely into the MagRing.
-
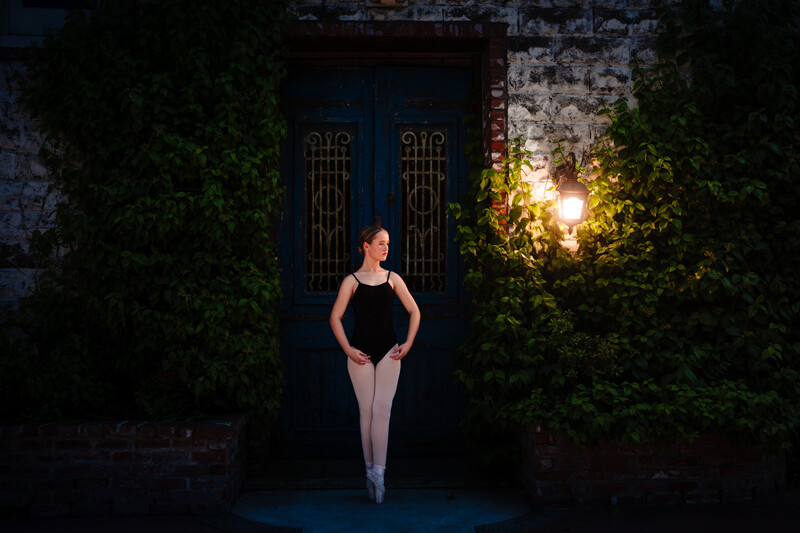
MagMod Modifiers: A significant benefit of using the MagRing is its compatibility with the entire MagMod ecosystem. You can easily attach MagMod gels, grids, spheres, and other modifiers directly to the combined flash heads. This offers incredible creative flexibility, allowing for precise light shaping and even multi-color gel effects.
-
Magmod MagShoe: This is the item that will allow you to attach the MagRing to the light stand.
-
HoldFast D-Ring: This is what I use to attach a strap so that I can hang the battery units on the stand. This is what I had on hand, but any 1/4-20 D-ring accessory would work.
-
Kondor Blue Quick Release: This little item is key for letting you mount the two battery packs to each other, while also letting you quickly and easily separate them when needed.
Important Note on Double Shadows: When using two separate light sources close together, especially for front-lighting subjects, there's a potential for visible double shadows. To mitigate this, consider pulling the light back a bit further from your subject so the two light sources can blend, or use a light modifier like a softbox, umbrella, or MagSphere to further diffuse and combine the multiple light sources.
Separating the Lights for Dual Sources
One of the setup's hidden gems is its ability to break down into two entirely separate light sources without needing to lug around extra gear. The AD200 extension heads come with their own small mounting points where I've added a MagMod MagShoe adaptor to each extension head. This allows for quick and easy attachment to another stand, or more often than not, I simply have someone else hold the light for me. Also, with the extension head being so small, I can easily fit the light into locations most other lights would never fit—all while still obtaining the power of a 200 Ws light.
Addressing Power Loss and Final Thoughts
A common concern with extension cables is power loss. While there is a minimal loss—around 0.2 to 0.3 of a stop with the AD200 extension cable (which is roughly 6 feet long)—this is a negligible trade-off for the immense benefits. Longer cables or pack-and-head systems (like the Godox AD600Pro) might experience slightly more loss (around 1 stop), but for this setup, it's easily mitigated by the ability to combine two flashes for increased output and versatility (at least in my book).
This "Frankenstein" lighting setup, born out of necessity and a bit of ingenuity, addresses the unique challenges of global shutter cameras while simultaneously providing unparalleled portability, stability, and versatility for location photographers. It allows for high-power output in a compact form factor, making it an ideal choice for anyone looking to optimize their mobile lighting kit.
Hopefully, this detailed breakdown is useful, and as always, if you have any questions about specific components or assembly, feel free to ask in the comments.


Join the Fstoppers community for free
-
Post comments and join in the discussions
-
Browse the site ad-free
-
Share your work and get featured in the community
-
Compete in the photo contests for fun and prizes
No comments yet